Drivetrain (Cooper S) MINI Cooper S (R53) intakes, exhausts, pulleys, headers, throttle bodies, and any other modifications to the Cooper S drivetrain.

Drivetrain Supercharger oil change, I did It!

Thread Tools
 
Search this Thread
 
  #1  
Old 12-11-2015, 06:05 PM
graveshaker's Avatar
graveshaker
graveshaker is offline
2nd Gear
Thread Starter
Join Date: Nov 2015
Location: Saginaw, MI
Posts: 74
Likes: 0
Received 0 Likes on 0 Posts
Supercharger oil change, I did It!

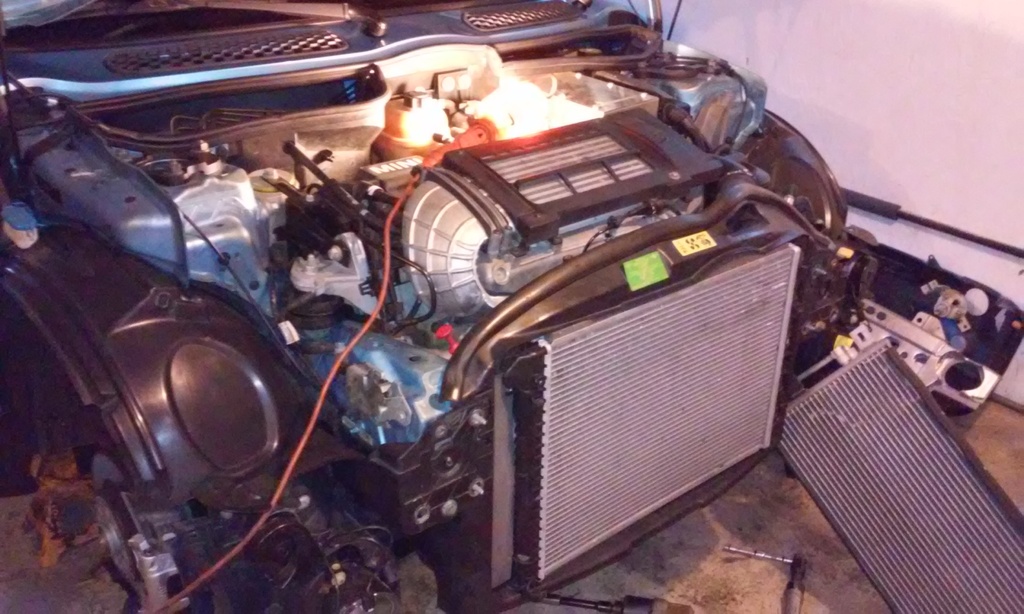
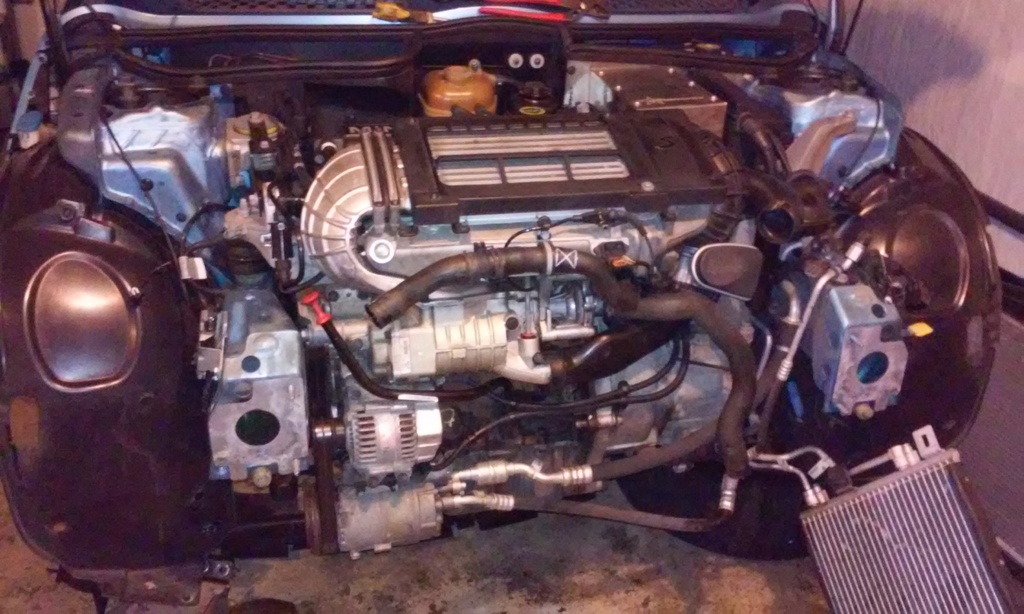
Hello all, very new to mini cooper. I've owned her for a few weeks. She was well kept and all maintenance besides the supercharger oil was done. I watched Mod mini videos on how to put the mini into front service mode and supercharger oil change as if studying for finals. I felt comfortable enough to tackle the job. His point of view videos are so well made that I feel most anyone could tackle the job. I'm seriously considering making money on the side by following his videos and doing odd repairs on mini coopers.

Name:  20151210_164037_zpsumqfwirb.jpg
Views: 3812
Size:  253.6 KB

Name:  20151210_175838_zpsgrmvq9ye.jpg
Views: 4673
Size:  251.0 KB

Name:  20151211_204137_zpsxyoooals.jpg
Views: 3414
Size:  255.4 KB


Victory!!
Name:  20151211_204154_zpstn54qo1z.jpg
Views: 3973
Size:  268.6 KB

I'm done for now. I'll crack the drain bolts to see just how much or little fluid is in the reservoirs in the morning. Once again thank you Mod mini from youtube, not sure if he's a member here.
 
  #2  
Old 12-14-2015, 09:20 PM
gary87xj6's Avatar
gary87xj6
gary87xj6 is offline
2nd Gear
iTrader: (21)
Join Date: Nov 2006
Location: Richland, WA
Posts: 96
Likes: 0
Received 0 Likes on 0 Posts
Great job! How long did it take you from start to finish?
 
  #3  
Old 12-15-2015, 04:13 AM
graveshaker's Avatar
graveshaker
graveshaker is offline
2nd Gear
Thread Starter
Join Date: Nov 2015
Location: Saginaw, MI
Posts: 74
Likes: 0
Received 0 Likes on 0 Posts
Originally Posted by gary87xj6
Great job! How long did it take you from start to finish?
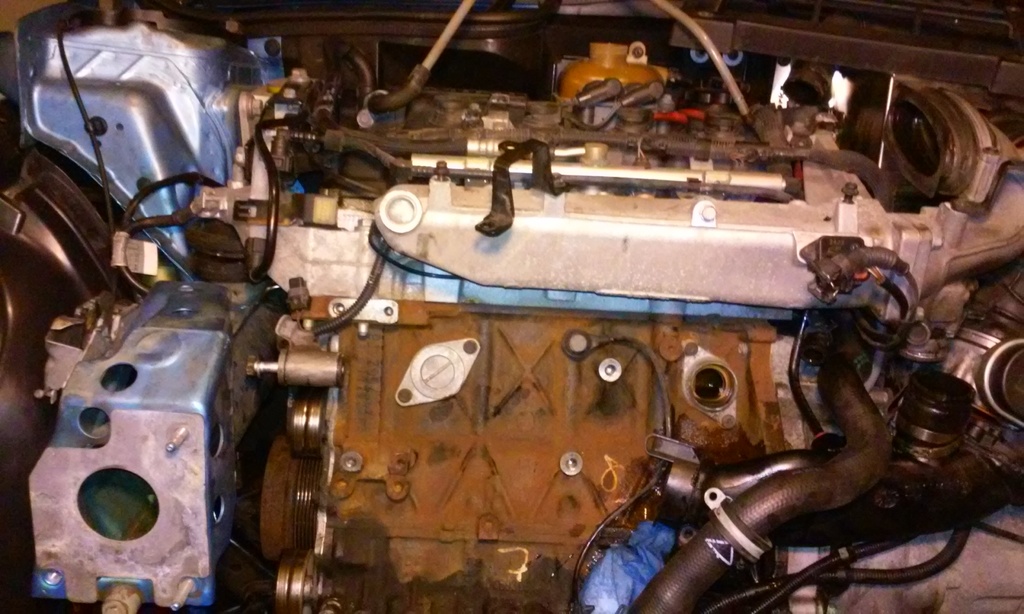
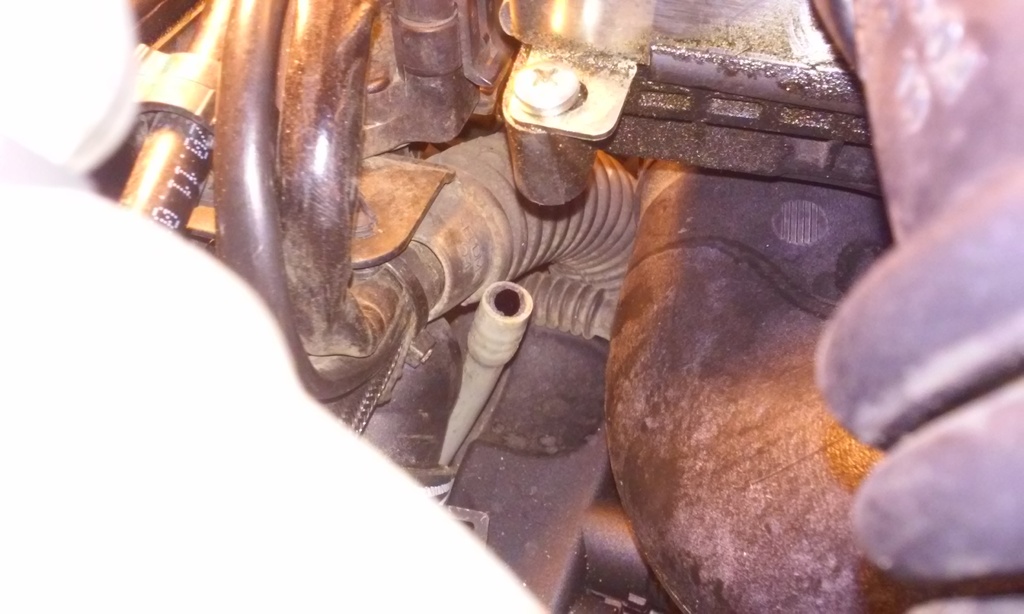
I'd say around five to six hours taking my time and referring back to the video. Everything about the job was foreign to me having never touched a mini cooper. The hardest part was removing and reassembling the intake tube. It's a very tight fit. I found it easier to put my fingers on the removed throttle body end and pull down with great force, once the round hose is free, I then pulled the intake side off. You'll see what I mean once you get that far.
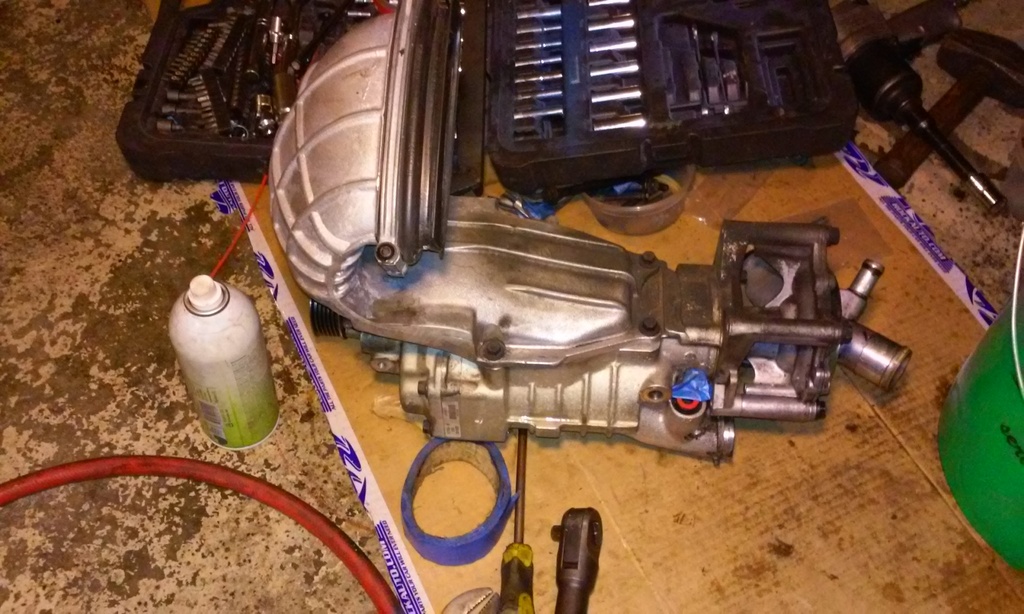
The PTO side had very little oil, the snout side had plenty. Very smelly stuff, don't get it on your fingers.
I also changed the green intake gasket, orange throttle body gasket, water pump o ring and the crank sensor o ring. I'm loving the piece of mind.
 
  #4  
Old 12-15-2015, 04:45 AM
JAB 67's Avatar
JAB 67
JAB 67 is offline
6th Gear
iTrader: (1)
Join Date: Oct 2006
Location: Fairfax, VA
Posts: 2,659
Likes: 0
Received 57 Likes on 50 Posts
Why didn't you also change the thermostat and thermostat housing gasket?
 
  #5  
Old 12-15-2015, 05:43 AM
graveshaker's Avatar
graveshaker
graveshaker is offline
2nd Gear
Thread Starter
Join Date: Nov 2015
Location: Saginaw, MI
Posts: 74
Likes: 0
Received 0 Likes on 0 Posts
Originally Posted by JAB 67
Why didn't you also change the thermostat and thermostat housing gasket?
Those two components are in an entirely different area and can be changed at any time without going into front service mode. There isn't a need to change those if they are not leaking or functioning properly.
 
  #6  
Old 12-16-2015, 11:11 AM
qolor's Avatar
qolor
qolor is offline
4th Gear
Join Date: Jul 2014
Posts: 457
Received 10 Likes on 9 Posts
I did mine this weekend too. I replaced the p/s lines, oil pan gasket, serviced supercharger, did an oil change, coolant change, and soldered on a new low speed fan resistor. I watched his videos once or twice then went for it (have been a mechanic in *training* for 1.5yrs now)

i am confident i could service a supercharger in less than 4hrs now.

working on these cars is fun and rewarding BESIDES FOR HOSES


  #7  
Old 12-16-2015, 11:48 AM
graveshaker's Avatar
graveshaker
graveshaker is offline
2nd Gear
Thread Starter
Join Date: Nov 2015
Location: Saginaw, MI
Posts: 74
Likes: 0
Received 0 Likes on 0 Posts
^^^^^Did you take you A/C condenser completely off???

Be careful putting it back together I somehow broke the map sensor tube and had to tear it all apart again. But I was able to do it in less than half the time. I was blowing threw it like a seasoned mechanic lol. Yeah I've watched almost all his videos, my next project is the inner CV boot. I caught it in time to only have to replace the boot and not the whole axle.


I'm digging the red belt line by the way.


Name:  20151215_202028_zpseolzafym.jpg
Views: 3543
Size:  178.0 KB
 
  #8  
Old 12-16-2015, 12:06 PM
qolor's Avatar
qolor
qolor is offline
4th Gear
Join Date: Jul 2014
Posts: 457
Received 10 Likes on 9 Posts
A/C condensor is still on, just extremely tucked to the side. almost laying flat in the air.

Thanks on the red. I am doing a set of red stripes next

Also - while you are in there take off the BPV valve and adjust it. I was going to install a detroit tuned BPV but i forgot about it ;(
 
  #9  
Old 12-16-2015, 12:10 PM
graveshaker's Avatar
graveshaker
graveshaker is offline
2nd Gear
Thread Starter
Join Date: Nov 2015
Location: Saginaw, MI
Posts: 74
Likes: 0
Received 0 Likes on 0 Posts
Originally Posted by qolor
A/C condensor is still on, just extremely tucked to the side. almost laying flat in the air.

Thanks on the red. I am doing a set of red stripes next

Also - while you are in there take off the BPV valve and adjust it. I was going to install a detroit tuned BPV but i forgot about it ;(
How do you adjust it? I saw Mini mods video on replacing but didn't know you can adjust it. The springs feels strong when pushing.
 
  #10  
Old 12-16-2015, 12:12 PM
qolor's Avatar
qolor
qolor is offline
4th Gear
Join Date: Jul 2014
Posts: 457
Received 10 Likes on 9 Posts
Originally Posted by graveshaker
How do you adjust it? I saw Mini mods video on replacing but didn't know you can adjust it. The springs feels strong when pushing.
There is a little allen head set screw. Big threaded tube. Controls how much the valve can shut under boost.
 
  #11  
Old 12-16-2015, 12:20 PM
graveshaker's Avatar
graveshaker
graveshaker is offline
2nd Gear
Thread Starter
Join Date: Nov 2015
Location: Saginaw, MI
Posts: 74
Likes: 0
Received 0 Likes on 0 Posts
I'm going to have to research it more, I'm still unclear of how and why it works. I do remember Mini mod saying the early year BPV had week springs. I may just drive down to Detroit Tuned and pick one up. I've been wanting to check them out, it's only an hour drive for me.
 
  #12  
Old 12-19-2015, 03:08 AM
homestudiomusician's Avatar
homestudiomusician
homestudiomusician is offline
1st Gear
Join Date: Jun 2011
Location: KS
Posts: 25
Likes: 0
Received 1 Like on 1 Post
Hey all,

I second & commend the OP for doing their Supercharger oil service.....it's really NOT a hard job but it is a good amount of tear down and front-end disassembly to get at the Supercharger to remove it.

I am in the video business and actually video'd (and took lots of pics) every step in my own work with the intention of starting a new MINI maintenance website that goes "even deeper" than Kurt does on his Mod Mini Channel.

On that note, for providing ALL of us with the pure confidence (alone) to attempt to do these kind of DIY repairs to our Mini's, I would like to personally thank Kurt for his incredible contribution to the Mini DIY community with his awesome YouTube Channel.

Lastly, after finding 1 or 2 posts here on NAM forums from guys who had modded their Supercharger's PTO-side "fill-port" with "drain/refill/dipstick" capability, I took their lead and went to Home Depot to find some brass metal tubing to do the same on my R53.

And, it was NOT that hard to put together so the next time I need to do the S/C oil service, I will not have to remove the S/C from the car to do it!

I am planning on having a new site built within the next several months during 2016 (all the videos & pics of up to 20+ Mini DIY jobs will be available) with the specific aim of providing NON-mechanically inclined Mini owners a place they can "watch" how these repairs are done (step-by-step-by-step) & gain the confidence to try one, themselves.

More updates to follow on this in 2016 & here's to saving all of our hard-earned money & keeping it in our pockets to spend on new or better parts for our Coopers!!!

Happy Holidays to All!!!
 
  #13  
Old 12-19-2015, 08:59 AM
graveshaker's Avatar
graveshaker
graveshaker is offline
2nd Gear
Thread Starter
Join Date: Nov 2015
Location: Saginaw, MI
Posts: 74
Likes: 0
Received 0 Likes on 0 Posts
That's good to hear, look forward to seeing your videos!
 
  #14  
Old 12-22-2015, 07:06 AM
ECSTuning's Avatar
ECSTuning
ECSTuning is online now
Platinum Sponsor
Join Date: Jan 2013
Location: Wadsworth, Ohio
Posts: 34,847
Received 1,974 Likes on 1,772 Posts
Nice DIY.
 
__________________

MINI Guru/ MINI Owner Since 2004 | NEW Lifetime Part Replacement | Local Pickup
Milltek | Genuine MINI | Forge Motorsport | NM Engineering | ECS Performance | M7 Speed
Customer Service Hours: 8am-8pm EST|Sales Team Hours: 8am-11pm | SAT 10am-7pm 800.924.5172
Related Topics
Thread
Thread Starter
Forum
Replies
Last Post
silence2-38554
R50/R53 :: Hatch Talk (2002-2006)
25
08-07-2019 01:23 PM
Whodeyfan
MINI Parts for Sale
14
01-03-2016 02:40 PM
haztronic
R60 :: Countryman Talk (2010-2015)
8
11-16-2015 01:09 PM
Mini Mania
Drivetrain Products
0
10-29-2015 11:04 AM
Mini Mania
Suspension Products
0
10-29-2015 10:23 AM


Quick Reply: Drivetrain Supercharger oil change, I did It!


All times are GMT -7. The time now is 11:54 PM.