
Touch-up advice


Thread Starter
|
2nd Gear
Joined: Mar 2013
Posts: 83
Likes: 2
Touch-up advice
So, I've never actually done much touch-up painting before, and a few of the flaws in my Mini's paint have me looking for advice.
1) A bunch of very small chips (to the point where I'm not sure my hands are steady enough to actually get, say, primer or rust converter onto without also hitting the paint) on the front of the hood, some of which are down to metal, and some of which may have rust inside.
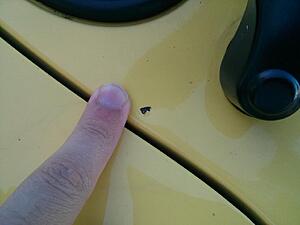
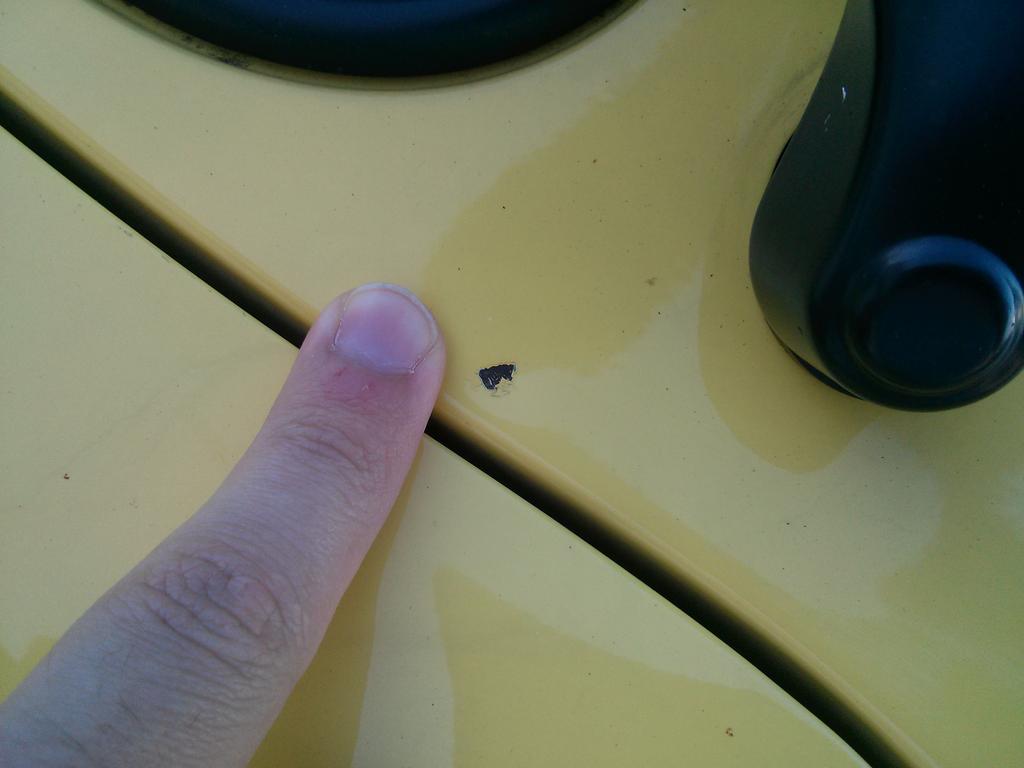
2) A largish chip down to metal with rust or maybe primer inside. Just fill it in with paint? Picture:
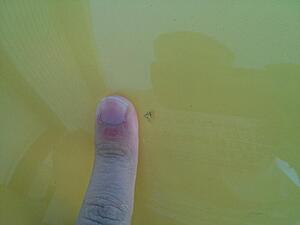
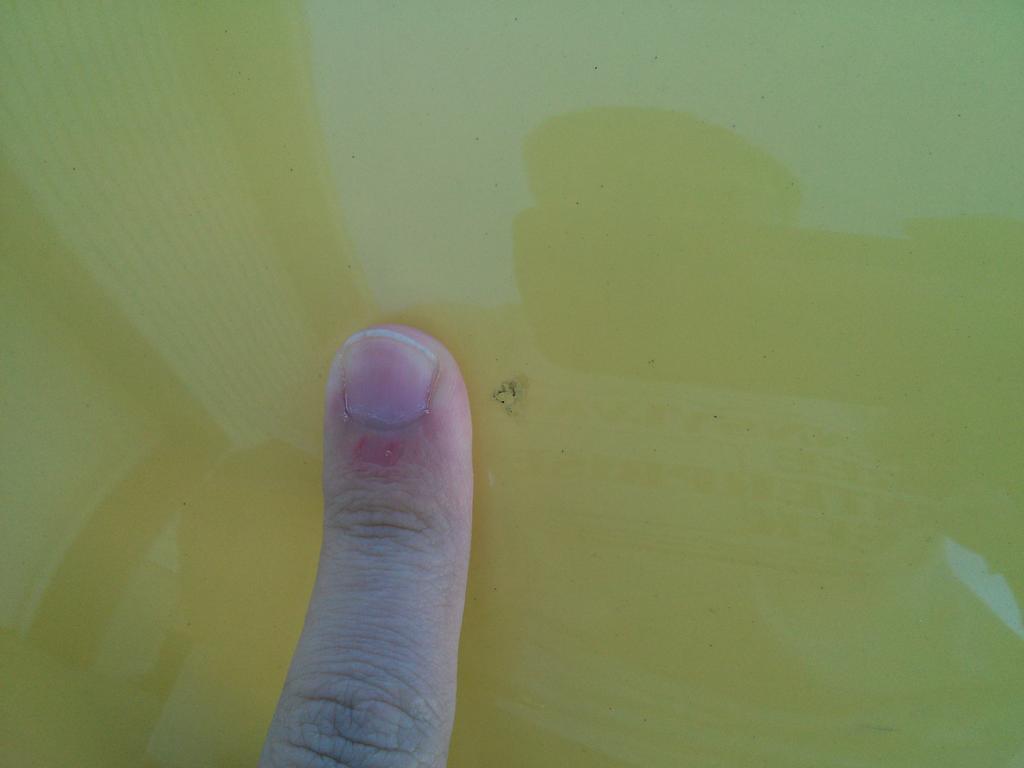
3) Two flaws of this sort: the paint is raised at these points, and there are some gaps in coverage and discoloration around them. My inclination is to sand these ones and touch up the new hole. Does that sound right, or is there some other way? Picture:
Thanks for the help.
1) A bunch of very small chips (to the point where I'm not sure my hands are steady enough to actually get, say, primer or rust converter onto without also hitting the paint) on the front of the hood, some of which are down to metal, and some of which may have rust inside.
2) A largish chip down to metal with rust or maybe primer inside. Just fill it in with paint? Picture:
3) Two flaws of this sort: the paint is raised at these points, and there are some gaps in coverage and discoloration around them. My inclination is to sand these ones and touch up the new hole. Does that sound right, or is there some other way? Picture:
Thanks for the help.
6th Gear

Joined: Oct 2008
Posts: 4,963
Likes: 393
From: In the here and now, for now.
I tried a touch up kit ordered to the specific color/build date on a couple of small chips and was not happy with the result. Poor skill level or WAG factor on mixing paint, who knows, so I just think of them as hash marks or battle ribbons from all the adventures we've had and keep the rest of everything as close to show room as possible. Doesn't really answer your question but may provide an alternative viewpoint.

So, I've never actually done much touch-up painting before, and a few of the flaws in my Mini's paint have me looking for advice.
1) A bunch of very small chips (to the point where I'm not sure my hands are steady enough to actually get, say, primer or rust converter onto without also hitting the paint) on the front of the hood, some of which are down to metal, and some of which may have rust inside.
2) A largish chip down to metal with rust or maybe primer inside. Just fill it in with paint? Picture:
3) Two flaws of this sort: the paint is raised at these points, and there are some gaps in coverage and discoloration around them. My inclination is to sand these ones and touch up the new hole. Does that sound right, or is there some other way? Picture:
Thanks for the help.
You can google for DIY tips, but here is one generic how-to site that should get you going: http://www.dummies.com/how-to/conten...paint-job.html
#2 (picture 1) looks like a stone chip to the (oxidized? rusted?) bare metal. Either way, remove the rust, apply the touch up paint, claybar, polish, wax.
#3 (picture 2) looks like a chip in the clear coat only, with paint either partially or fully intact. Here you can either buy clear coat and try to apply it to the effected spot, or clay-bar the area smooth and leave it at that. Hard to call from just looking at the picture.
HTH,
a
Thread Starter
|
2nd Gear
Joined: Mar 2013
Posts: 83
Likes: 2
Thanks for the advice. Picture #1 is right by the wiper arm, so it should be a relatively easy one. The two flaws of which picture #2 is an example are both vertical. They're both a little raised compared to the surrounding paint, which suggests to me more than just a chip.
I guess I'll see how well my touch-up paint matches (it wasn't great on the test card, so I'll try some out of sight somewhere), and then I'll go from there. The picture 2 flaws are both in fairly obvious places, so if the match is too far off I might want to try something else.
I guess I'll see how well my touch-up paint matches (it wasn't great on the test card, so I'll try some out of sight somewhere), and then I'll go from there. The picture 2 flaws are both in fairly obvious places, so if the match is too far off I might want to try something else.

1st Gear
Joined: Apr 2012
Posts: 46
Likes: 0
From: Maple, Ontario
You might want to try the Langka touch up paint system. After cleaning out the rust etc from a deep chip, you fill the chip with the OEM touch up paint, applying in thinnish coats until you have a slight bubble built up over the chip. The key to the kit is the second step which is some kind of thinner that you apply with a microfiber with a stiffish backing. It slowly starts to dissolve the bubble leaving you with a relatively smooth chip refill. I've had relatively good results with this without having to resort to sanding etc. I feel with wet sanding that it's too easy to make a mistake and end up sanding down to the primer. After the bubble is leveled, finish as you normally would with some kind of sealant/wax. I find this method less intrusive. I've filled some bad chips and unless you're right up close, you can't see them.

Thread
Thread Starter
Forum
Replies
Last Post
bradstyle
F55/F56 :: Hatch Talk (2014+)
4
Oct 1, 2015 11:15 AM