
Pop-rivets = WIN.


Thread Starter
|
6th Gear
Joined: Jun 2006
Posts: 5,692
Likes: 2
Pop-rivets = WIN.
As some of you know, I unearthed a moderate case of "tin worm" incursion in my passenger-side floor pan and sill a few months ago. I looked at several options to repair it: welding, gluing, etc.
Finally, I got sick of waiting to find someone that could weld a patch on Fiona's floor pan, and I was also tired of being afraid of driving my car in anyhting but 0% chance of rain (the one time I tried in the wet my carpets got totally SOAKED), so I took matters into my own hands. I was talking to a friend of mine that's worked on Minis for decades, and he recommended a radical idea for the repair, one I'd considered briefly but rejected:
Pop-rivets.
Scoff if you like (and I'm sure some will), but the repair ended up costing me only about $20 - that included the tool, 100 rivets and the steel to fabricate the patch, and took about 20 minutes to complete. As I've been waiting for over 4 months now, trying to find someone with a welding rig and the skill to use it, I feel a bit foolish that I disregarded this option for so long.
I ended up making *2* patches actually, an inner and an outer as the Mini has those weird 2-layer floor pans, both of which had been compromised by rust. Both patch pieces are well sealed with silicone, and additional silicone was injected into the bone-dry interior of the pan.
I know that eventually the dreaded "tin worm" will require me to procure and install new floor pans, in a few years, but for $20 it's a hard repair to find fault with. Even if it buys me only 2 or 3 years, that's a win in my book...
Last edited by ImagoX; Apr 21, 2008 at 09:30 AM.

Thread Starter
|
6th Gear
Joined: Jun 2006
Posts: 5,692
Likes: 2
Exacatly... between the carpeting and the underbody spray, nobody's ever gonna see it, and I'm not in the habit of entering Concours competitions (I look silly in spats and a top hat).
I'll take some photos - I had no idea people would want to see the repair. I've already painted the interior peice but the exterior is still not coated - was just wanting for my silicone to cure.
I'll take some photos - I had no idea people would want to see the repair. I've already painted the interior peice but the exterior is still not coated - was just wanting for my silicone to cure.

3rd Gear
Joined: Jul 2006
Posts: 236
Likes: 0
From: Spanish Fort, Alabama
Be careful with the silicone - acetic acid is released on cure. It might add to the corrosion potential. 3M's Automix is good stuff for seam sealing.
Trending Topics
Thread Starter
|
6th Gear
Joined: Jun 2006
Posts: 5,692
Likes: 2
Hrm... well it's on there now - just have to grin and bear it. There's good metal left there if (when) I corrode out again. Or I'll probably just replace the whole sill/pan for the next go round. I'll investigate that 3M stuff though - thanks!!

Actually my auto body teacher recommended I pop rivet the floor in my old truck. I couldn't get at the back side of it to seal it from behind after welding so I used rivets. He said to cover the whole patch with roofing tar and then put wax paper over top of it to keep the tar from getting on everything. It's holding up real well. I hope you cut out all of the cancerous material around the hole though.
Also, you probably want to use some sort of etching primer on the bare metal before you paint. It reacts with the tiny but of surface rust that you cant see and turns it into a protective layer.
Also, you probably want to use some sort of etching primer on the bare metal before you paint. It reacts with the tiny but of surface rust that you cant see and turns it into a protective layer.
Last edited by stratman977; Apr 21, 2008 at 02:35 PM.

6th Gear
Joined: Dec 2002
Posts: 1,539
Likes: 0
Good for You. It will work as a good temporary patch if sealed and allow you to get use of the car.  BTW, Mini floors are single layer, not double. The sills attach at the sides of the floor. Maybe that is what you meant?
BTW, Mini floors are single layer, not double. The sills attach at the sides of the floor. Maybe that is what you meant?

6th Gear

Joined: May 2007
Posts: 3,790
Likes: 10
From: Kansas City
I can't believe you can't find a welder in your area, any body shop in town could have done that for you for a minimal cost - or maybe even a votech body school?
Anyway, it's good that you're back on the road again..........
Anyway, it's good that you're back on the road again..........


4th Gear
Joined: Feb 2008
Posts: 334
Likes: 0
Some late 40's ferraris have whole bumpers made of signs because of a lack of materials after the war.
Anywayz... I love pop rivets. Ive fixed two trucks MANY times with them... they come out clean
Thread Starter
|
6th Gear
Joined: Jun 2006
Posts: 5,692
Likes: 2
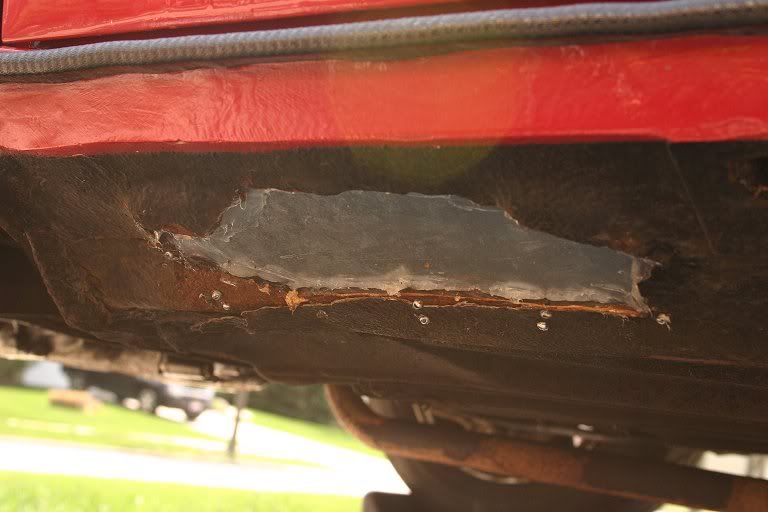
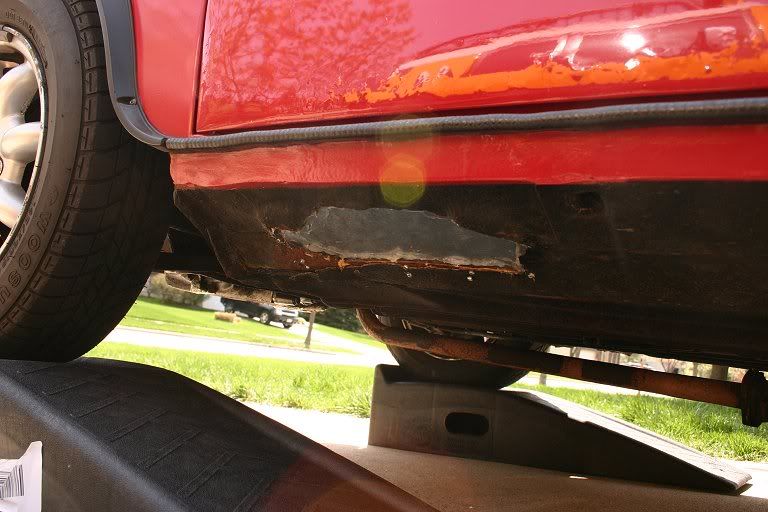
Don't know why people want to see the repair, but here are the pics... From the outside the edges look ragged, but I did sand them down on the inside all the way to the bare metal before sealing. The inner patch is curved to meet the side of the door sill (it doesn't show in the photo all that well).
Before coating:
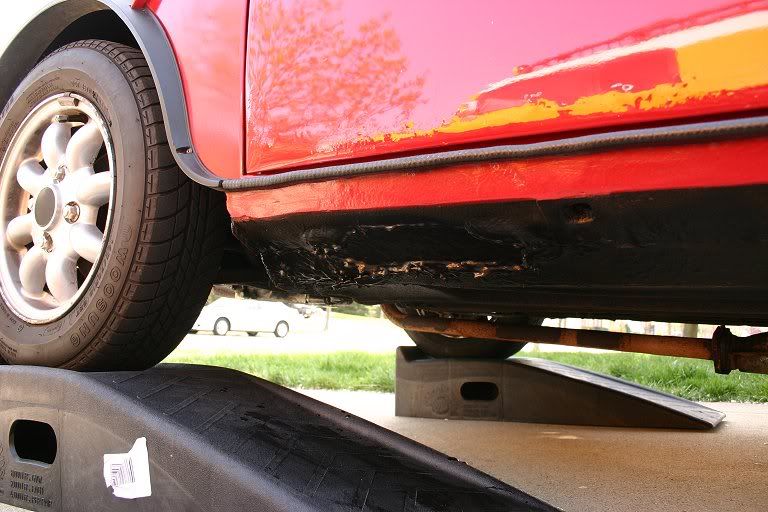
After rubber undercoating (3 coats):
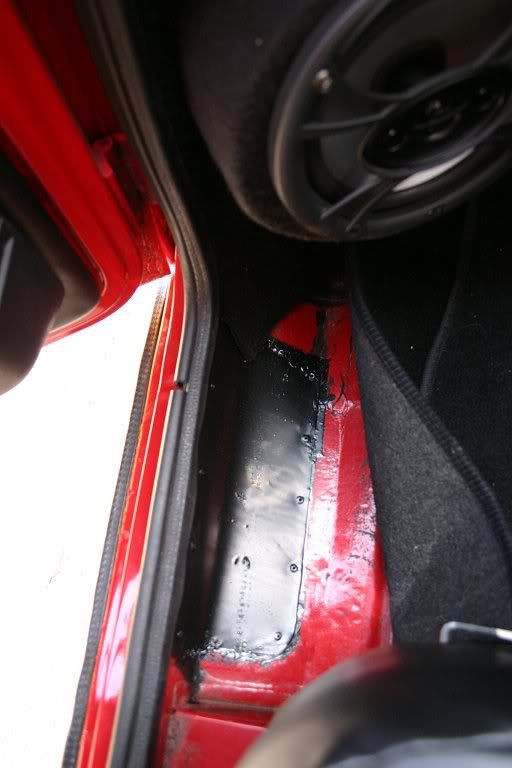
Inside:
Before coating:
After rubber undercoating (3 coats):
Inside:

2nd Gear
Joined: Apr 2007
Posts: 69
Likes: 0
What kind of dumb a*!
would give a comment like the one above? Someone asks the guy to post pictures and then some other moron picks it apart. I don't think Imagox was professing to be a professional bodyman, and certainly deserves credit for doing a project on his own. All I can say is if you have nothing positive to say , why not just shut up. Motor on with pride IMAGOX! I've read about and seen some of the talented things you have done to your MINIs. Keep up the good work!
Thread Starter
|
6th Gear
Joined: Jun 2006
Posts: 5,692
Likes: 2
Eh... probably. I could have cut the patch edges clean across - that's for sure. I was a bit worried about cutting away at the sill though - they're not huge to BEGIN with....
But it'll probably rust out again in a few years and I'll just swap the whole pan then. Until then, all I wanted to do was keep water from coming in. The repair is under the car and concealed by carpeting as it is...
Now I have to figure out why she's running rough - figures I finally fix this problem just in time for something ELSE to go wrong (sigh)...
Thanks, Viper - I'm certainly nobody's idea of an expert, but I am pretty pleased that I DIY'd it. I gota admit though that I'm considering just learning to arc weld. I figure if I'm going to have British cars, it's a skill that one should have.
Last edited by ImagoX; Apr 27, 2008 at 03:30 PM.
4th Gear
Joined: Feb 2008
Posts: 334
Likes: 0
would give a comment like the one above? Someone asks the guy to post pictures and then some other moron picks it apart. I don't think Imagox was professing to be a professional bodyman, and certainly deserves credit for doing a project on his own. All I can say is if you have nothing positive to say , why not just shut up. Motor on with pride IMAGOX!
Dude chillax... Why you getting your panties in a bunch!?
PS... The inside looks GREAT... just the outside
Last edited by Rocan; Apr 27, 2008 at 03:49 PM.

3rd Gear
Joined: Apr 2008
Posts: 209
Likes: 0
From: Palo Alto, CA
Very nice. As someone who has no mechanical/repair skills I am in awe when I see someone else figure out a solution to a problem and then go ahead and do the job. Good for you.
Tony
Tony
Thread Starter
|
6th Gear
Joined: Jun 2006
Posts: 5,692
Likes: 2
It was actually much easier than I figured it would be. Like everything, having the right tools helped immensely - tin snips, gloves and the rivet tool. Oh, and a Dremel to cut away the old, rotten stuff. You can't see it from the outside, but I cut away several inches of rot on the inside edge of the hole - THAT edge was nice and straight to match the patch. The nice thing about the steel I used was that I managed to bend it by hand using gloves to make that curve - even as thin as it is, my wife can rest her foot against the repair and it feel as solid as can be (maybe because of the curve).
The nice thing about the steel I used was that I managed to bend it by hand using gloves to make that curve - even as thin as it is, my wife can rest her foot against the repair and it feel as solid as can be (maybe because of the curve).
You could have put fiberglass filler on both sides of that patch and no one would even know it was there. You even did a decent job with the bend on the inside, it looks like if fits tightly.
If you cut out all of the cancerous metal and sealed it up real well you probably won't even need to fix this later unless it bothers you.
Since you plan on ripping this out in a few years anyway you don't want to attach it in there so well thats it's impossible to remove.
If you cut out all of the cancerous metal and sealed it up real well you probably won't even need to fix this later unless it bothers you.
Since you plan on ripping this out in a few years anyway you don't want to attach it in there so well thats it's impossible to remove.