Mini Cooper 2007-2013: How to Replace Serpentine Belt
Changing the serpentine belt on your 2nd generation Mini Cooper shouldn't be something to run away from. You can do it relatively easily once you know the proper way to do it.
This article applies to the Mini Cooper (2007-2013).
If you have heard horror stories about changing the serpentine belt on your Mini Cooper, make sure that you aren't listening to owners of a 1st generation Cooper. The procedure to do the 2nd generation is a lot different, and easier, than how to do it on earlier generation cars. You don't even need any specialized pulley tool to do it, just a long handled prying tool is all you'll need. If you are ready, read on and let's get started.

Materials Needed
- Pulley tool (not required) or a long handled tool for prying
- Replacement belt
- A second set of hands will make the job easier
- Hydraulic floor jack and jack stands
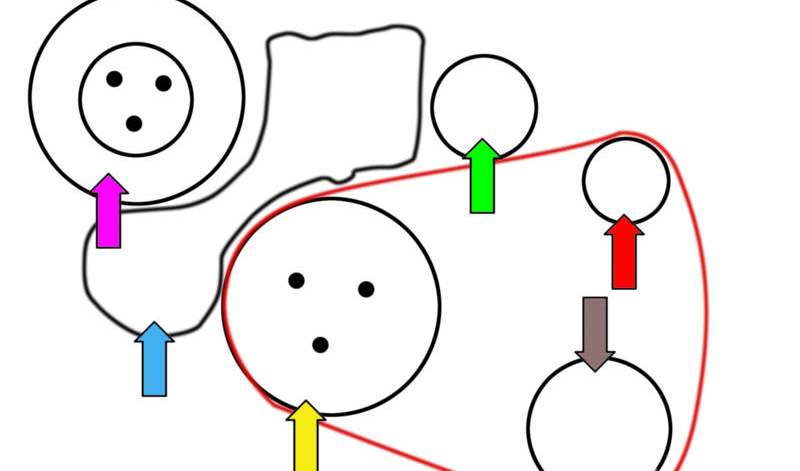
With the close quarters and small size of the Mini, it can be hard to know exactly what you are working on in the engine compartment. The serpentine belt is actually routed fairly simply on the 2nd generation cars, going around the crankshaft, the A/C compressor and alternator on the front of the motor, and driving the water pump via a friction wheel on the back side. This is what it would look like if the motor was out of the car. Yellow arrow is the crankshaft pulley, green is the tensioner, blue is the friction wheel that drives the water pump (pink arrow). The red arrow is the alternator and the brown arrow below is the A/C compressor.
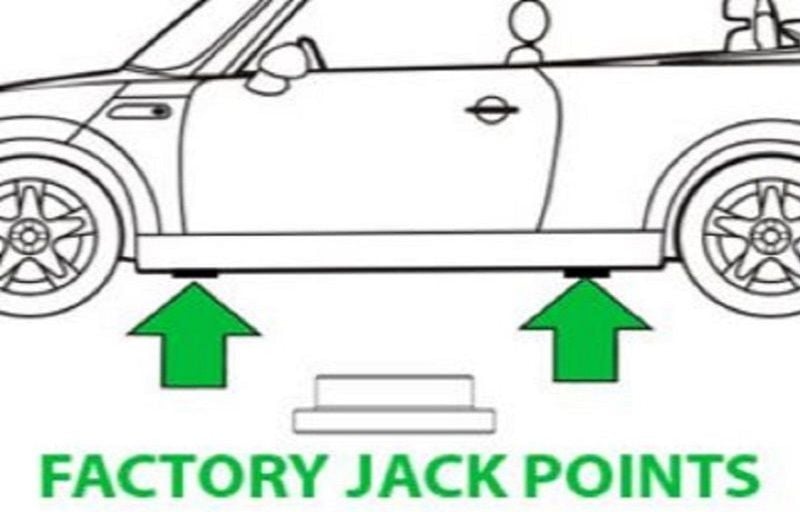
Step 1 – Jack up your front end
Use a hydraulic floor jack and jack pad adapters or wood blocks to prevent damage to the jacking points, and lift the front of the car to make it easier to work on. Place jack stands under it to hold it safely. Only the front needs lifted for this, but you can feel free to place all fours up for more room if you need it.
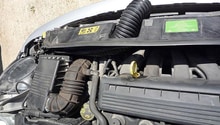
Step 2 – Remove the passenger front wheel and inner fender
You need to remove the front passenger side tire and the inner plastic wheel well in order to have access to the pulleys and belt. There are plastic rivets that look like Phillips head screws holding the inner fender in place. Turn them out with the screwdriver, then pry the rivets out. Now you should be able to pull the inner fender back enough to access the belt.
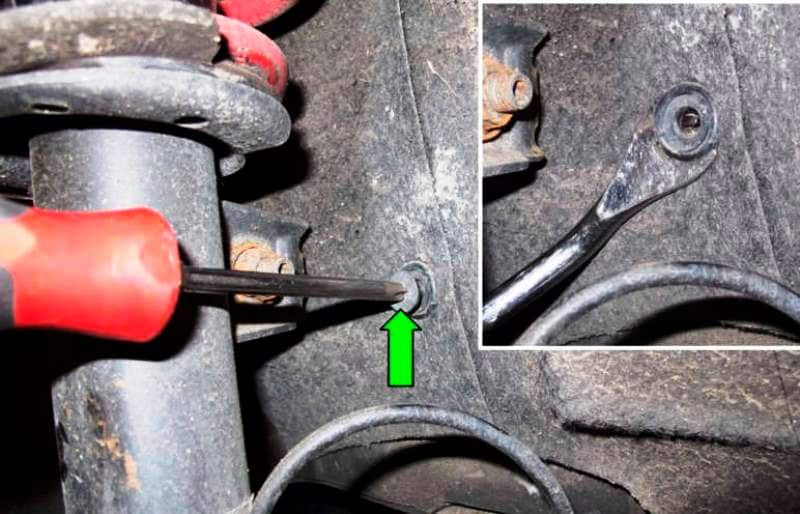
Figure 3. Take care when removing the rivets holding the fender in place and have some new spares on hand. 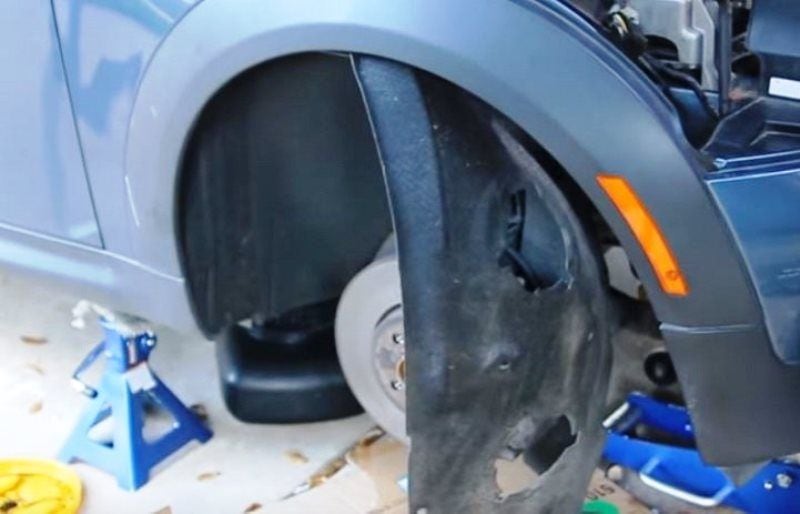
Figure 4. Pull the fender liner back to reach the belt.
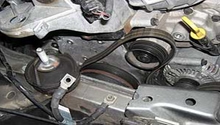
Step 3 – Pry up the tensioner pulley
If you don't have the special pulley tensioner tool, a long handled pry bar, screwdriver or breaker bar can be used. Press the tensioner back to remove the tension on the belt. It will be fairly obvious which direction it has to move. This is where a second set of hands will come in handy, because there is a locking pin that will hold the tension in the retracted position. Once you get the pulley up, have your assistant press the locking pin to hold it in place.
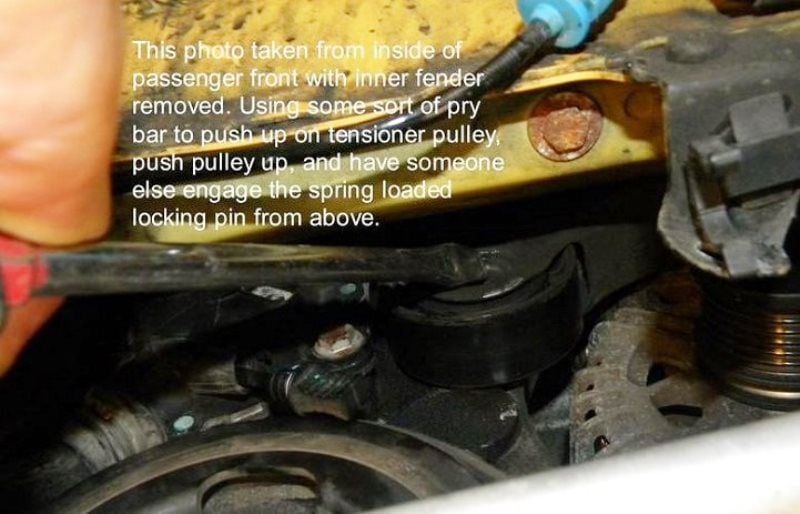
Figure 5. Use you long handled tool to push up on the tensioner pulley. 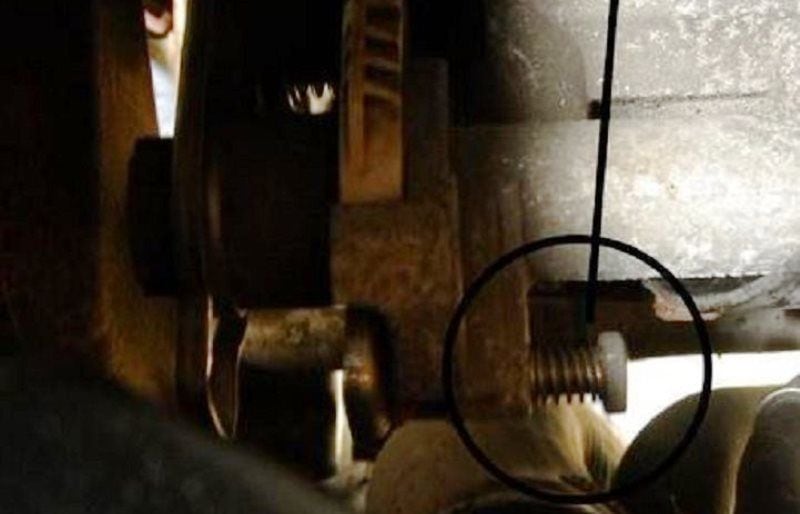
Figure 6. While pushing up on the tensioner, have an assistant press the service lock pin in.
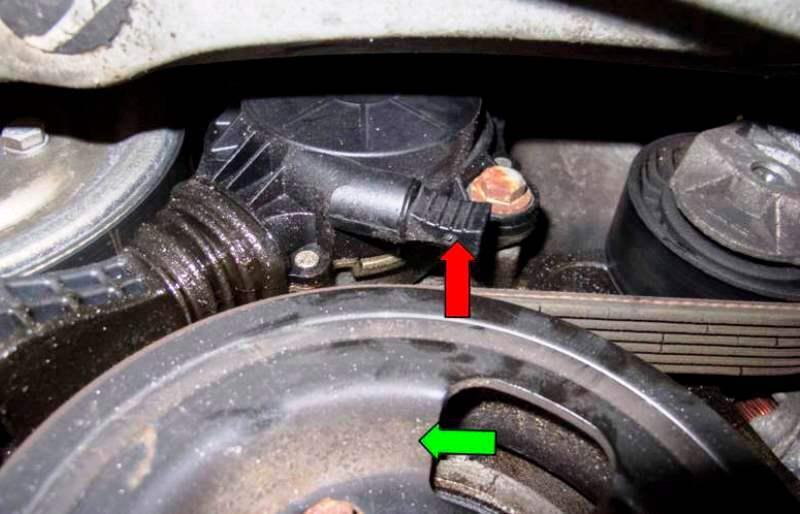
Step 4 – Release friction wheel tab and remove old belt
Even with the tension removed, the belt is held in place by the friction wheel on the water pump. Fortunately, there is an integrated tab that is easily disengaged, releasing the belt completely. Simply pull the tab out and, while holding, slide the belt off the pulley.
Step 5 – Install your new belt
Follow the illustrated diagram at the top (Figure 1) on how to thread your new belt back over the pulleys.
- Feed it around the A/C compressor and alternator.
- Pull the friction wheel tab and slip belt over crank pulley.
- Press up on the tensioner pulley just enough to disengage the retaining pin and it should pop out.
- The tension should be back in place on the new belt once you stop pushing on the tensioner.
- Replace the inner fender cover and use new rivets if you broke any on the way out
- Replace the passenger wheel and drop your car.
- Take her for a test spin and make sure there's no squealing as well as warning lights illuminated.
Featured Video: 8 Steps to Water Pump Change
Related Discussions and Site
- R56 Serpentine Belt Replacement - NorthAmericanMotoring.com
- Serpentine Belt Friction Pulley Stuck - NorthAmericanMotoring.com
- Serpentine Belt Replacement - PelicanParts.com