Mini Cooper 2007-2013: How to Install Amplifier Power Wire
In modern car, with complex switched, computer controlled electronics, it can be hard to find a proper amperage power source for a high powered amplifier. Read on and we'll help you with that Mini stereo upgrade.
This article applies to the Mini Cooper (2007-2013).
So you just got yourself a really nice six channel amplifier to blow the windows out of your Mini and you've already got the spot set up for it, but now you're wondering, "how do I power this thing?" Powerful amps need a good amount of amperage to deliver all those watts, and you also need a noise-free power source that is properly switched. Look no further, as this guide was made for you. In no time at all you'll be listening to some sweet thumping bass.

Materials Needed
- 4 - 8 gauge power wire (depending on amplifier)
- 18 gauge remote turn off wire
- 16 gauge speaker wire
- In-line fuse holder with appropriate sized fuse
- Crimp connectors
- Ring terminals
- Plastic trim tool
- Flat head screwdriver
- Razor
- Wire cutters
- Wire strippers
- Wire crimpers
- Soldering iron and solder
- Heatshrink and heat gun
- Zip ties
Whenever working on electrical systems of your car, disconnect the battery before you start. Not only can shorts cause sparks and possibly fire, but you can mess up the car's computer or ruin the stereo equipment you are trying to install.
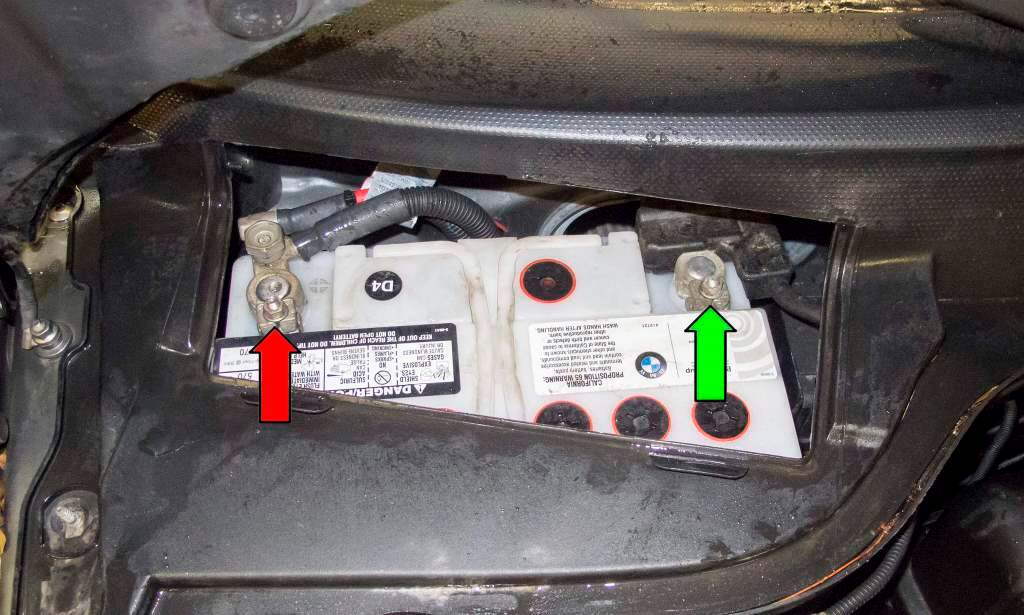
Step 1 – Connect power wire to battery cable
High power amplifiers need a lot of power, more than you can get from any of the thin wires already in the car, so you'll have to power it directly from the battery. A common rule of thumb is to look at the fuse provided in the amp's wiring, and divide by two to get the current draw, which means even the smallest unit needs more than 12 amps of continuous power. In order to wire in an amplifier, you have to start with a large gauge wire (smaller the number, the larger the wire) and an in-line fuse.
- If your in-line fuse holder did not come pre-installed on the power wire, solder or crimp it on now.
- You need a length of four to eight gauge wire long enough to go from the fuse holder under the hood to your amplifier.
- The other end will go from the fuse holder to the battery cable.
- Crimp or solder a ring terminal on the end of the wire to connect to the battery cable.
Step 2 – Route power wire to the amp
Now that you have a proper fused wire from the battery installed for power, it's time to route that wire through the car. To get it past the fire wall, you'll need to find the grommet in the fire wall where the main wire loom passes through. Usually it's not big enough to fit an extra wire of the thickness you need, so you'll need to make a small slice in the rubber and squeeze the wire through that. How much wire you need and where you route it is very much dependent on where you place the amp. The most popular location is in the cargo area, under a factory side panel. You'll need to start taking out panels like the kick panels under the glove box, the door trim, the B and C pillars or the rear cargo panels for a clean installation, so you don't see the wires. Use a plastic trim tool to remove the panels without scratching them.
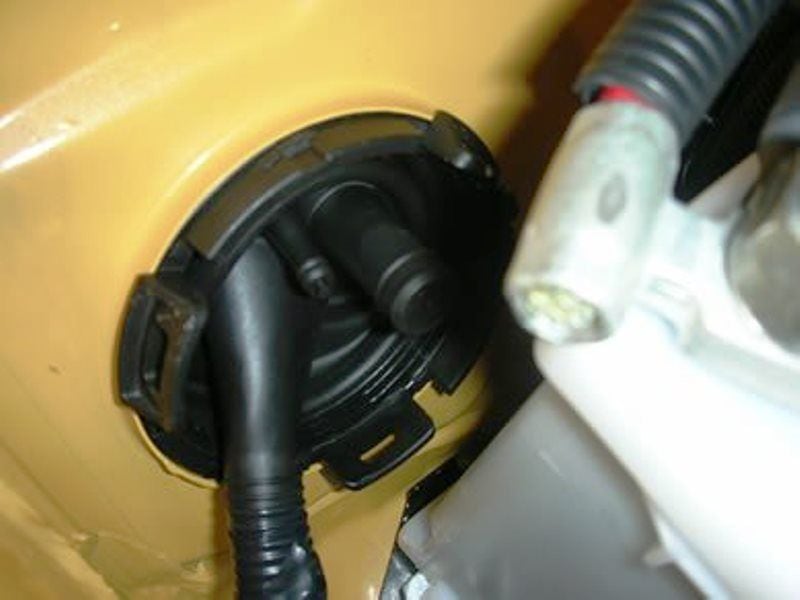
Figure 2. Pass the power wire through the fire wall grommet. 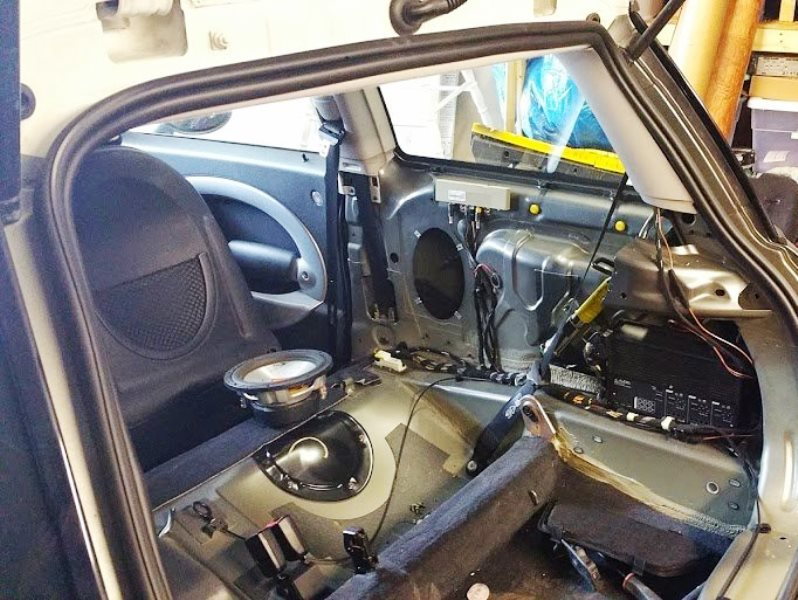
Figure 3. Remove the rear panels to access rear speaker wiring.
Step 3 – Connect power and ground wires
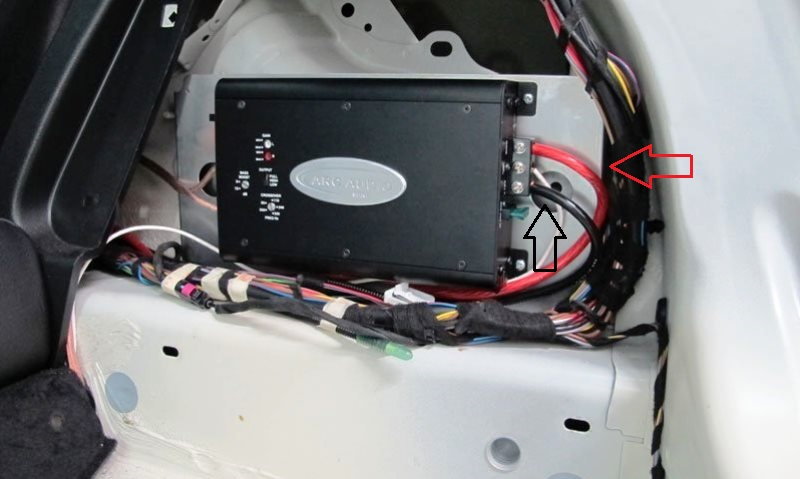
Once you've got your length of power wire all the way from the battery to the amplifier, you'll still need to install a terminal at the amplifier end. Crimp whatever type of connector the amp accepts to the end, leaving a bit of slack to be able to make it easy to connect and remove the amp. Find a good screw for a chassis ground near the amp and run a length of wire from there to the amp, with the proper terminals crimped to both ends.
Step 4 – Install input and remote turn on wire
Amplifiers use a lot of power, so they typically have a built-in relay to turn them on and off with the head unit, or ignition. Of course, you'll also have to get a signal to the amp and out to the speakers, too.
Depending on the amp, you may need to pass the input wires from your Mini head unit through a line level converter first. If you are installing the amp in the rear cargo area, you can easily take the input from the wires back there to power the rear speakers, especially if the amp is just going to power those speakers. However, Mini limits the bass signal going to the rear speakers, so you don't want to use that channel unless you first do the X9331 channel swap. This swap send the former rear channel signal to the front door speakers, and the front channel to the back. It is a simple matter of popping out the wires in the multi-pin connector under the driver side kick panel, and swapping them around.
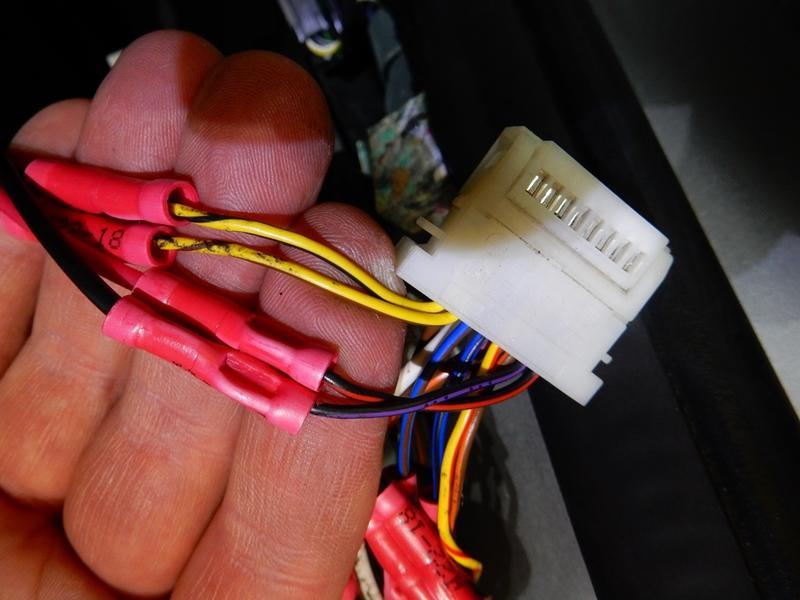
Figure 5. The X9331 plug has all the speaker and stereo power connections. 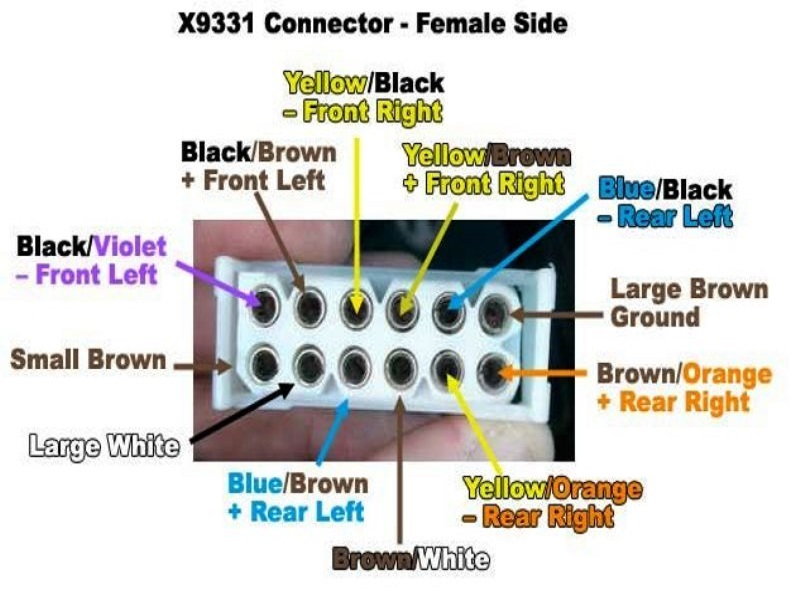
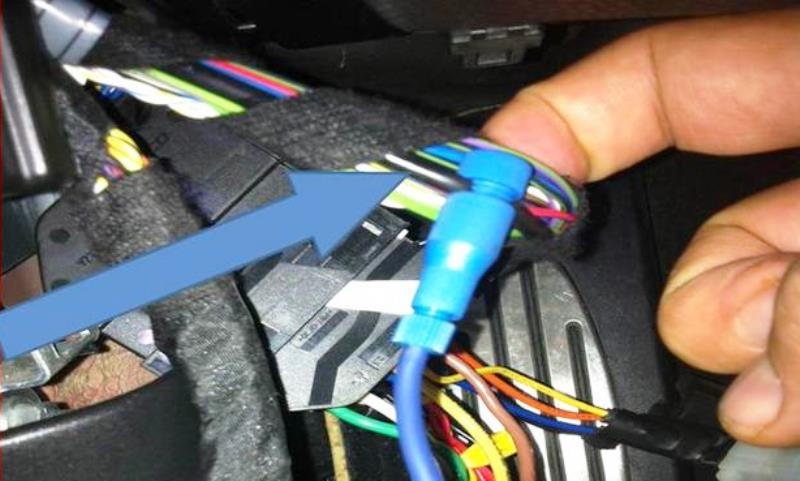
Figure 6. Carefully swap the front and rear speaker wires in the connector.
For the remote turn on, you can tap into any wire that's on when the ignition is on or when the stereo head unit is on. If you can find the X15 connector, near the X9331 connector, pin #1 with the black wire in it is meant to turn on the factory amplifier with the stereo on cars with the upgraded sound system. You can also find the power wire for the cigarette lighter, or even test the fuses for one that goes on and off with the key.
Step 5 – Finish setup and test
Once all your other wires are hooked up, it's time to test the amp. Reconnect the positive battery cable and make sure you have an appropriately sized fuse installed in the power lead. First test to make sure the amp is powered up when you turn on the ignition, and off when you want it to be. If you have tapped into the stereo turn on circuit, you will have power to the amp for up to 15 minutes after the key is off, or until the door is opened. Next, test to make sure the stereo signal is getting through okay by playing some music through the stereo.

Pro Tip
It's best to keep the power wire and the speaker wires separated, because engine noise comes through the amp if they interfere.
Related Discussions
- Subwoofer and Amp DIY? - NorthAmericanMotoring.com
- NOOB Mini BOOST Stereo Sucks, Need Help - NorthAmericanMotoring.com
- Guide and Thoughts: Upgraded My R56 with HiFi to H/K Sound - NorthAmericanMotoring.com
- Pics of My R56 Custom Amp/Sub/False Floor install - NorthAmericanMotoring.com