Mini Cooper 2001-2006: How to Replace ABS/Wheel Speed Sensor
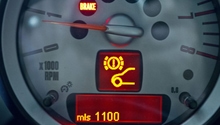
A common issue that is found on many first generation Mini Cooper models is an illuminated ABS trifecta light on the dash. This problem is often linked to a faulty wheel speed sensor and causes the ABS and DSC systems to become non-operational. With the use of the proper scan tool, the exact wheel speed sensor can be diagnosed and replaced rather easily.
This article applies to the Mini Cooper and Cooper S (2002-2006).
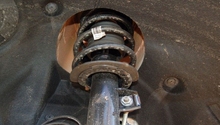
The wheel speed sensors do just as their name suggests: monitor the speed of each wheel as the vehicle is moving. The wheel speed sensors measure the speed of a magnetic tone ring attached to the wheel bearing and sends the electrical pulses back to the anti-lock brake system (ABS)/dynamic stability control (DSC) module. Measurements from each wheel are constantly evaluated and the ABS and DSC systems intervene when wheel speeds deviate from each other to ensure safe vehicle operation. Unfortunately, these sensors see regular failure from the buildup of excessive dirt, grime, brake dust, and road debris. Similarly, impacts or abrasion can easily damage the sensor wiring and trigger the ABS trifecta light on the dash. The good news is that these sensors are relatively inexpensive and are quite easy to replace at home. This article will outline the ABS wheel speed sensor(s) replacement procedure on the 2002 to 2006 Mini Cooper as well as Cooper S models.

Materials Needed
- Floor jack and jack stands
- Tire iron
- Metric Allen wrench set
- Phillips and flat head screwdrivers
- Pliers
- Anti-seize paste
- Cleaning solvent (electrical parts cleaner, brake cleaner, acetone, etc.)
- Wire ties (zip ties)
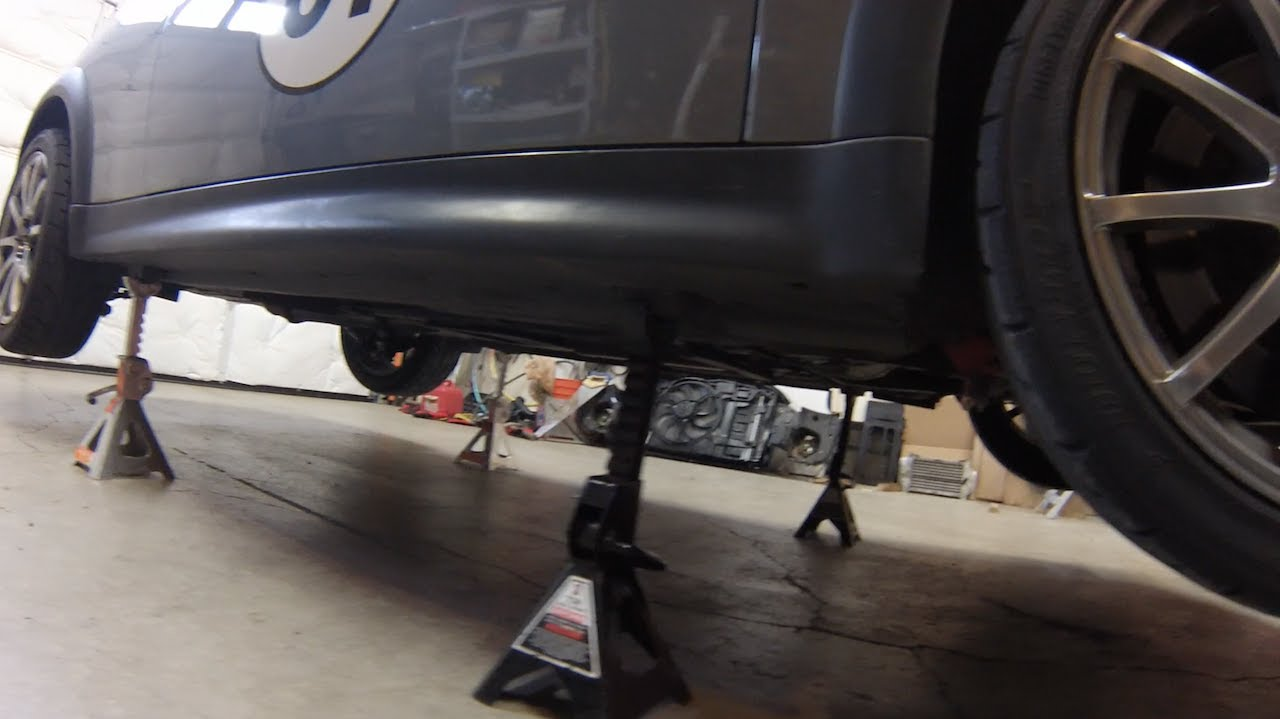
Step 1 – Lift vehicle and remove wheel(s)
In order to easily access the wheel speed sensors, it is best to lift the vehicle with a floor jack and support it with jack stands. Additionally, if replacing a front wheel speed sensor, the wheel will need to be removed. Use your 17mm socket and impact gun here. The rear wheel speed sensors can be accessed with the wheels installed, but will require the vehicle to be lifted high enough to allow for adequate space while working under the vehicle.
(Related Article: How to Jack Up Your Car - NorthAmericanMotoring.com)
Step 2 – Remove inner fender liner
To access the front wheel speed sensor wiring, remove the inner fender liner. While the front liners will need to be removed for sensor replacement, the rears can be accessed with the liners in place.
- To remove a front fender liner, begin by removing the (2) Phillips screws towards the top of the liner as shown.
- Next, remove all expansion rivets from the liner before sliding the liner out of the wheel well.

Step 3 – Replace wheel speed sensor
- Cut the wire tie securing the sensor plug in place before disconnecting the plug.
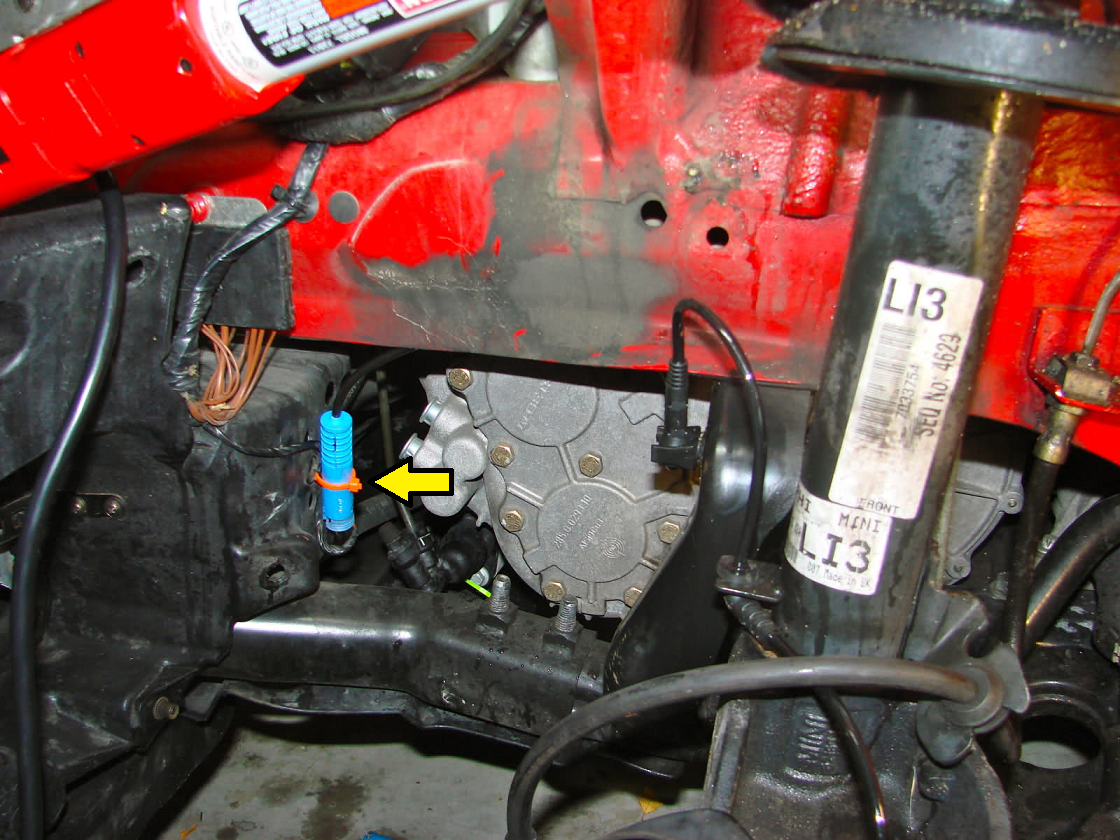
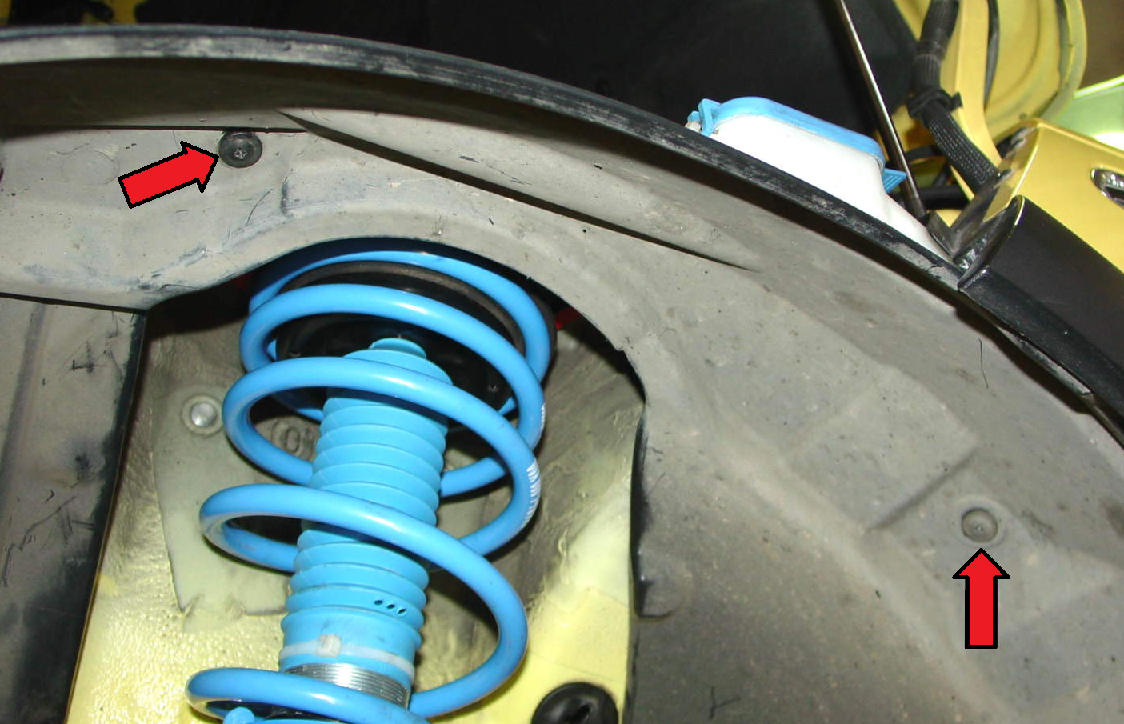
- The wheel speed sensor wiring is secured via retaining clips and a grommet on the front sensors, or a couple of grommets on the rear sensor to prevent abrasion against surrounding components. Free the wiring from the retaining clips/grommet using a small flat head screwdriver.
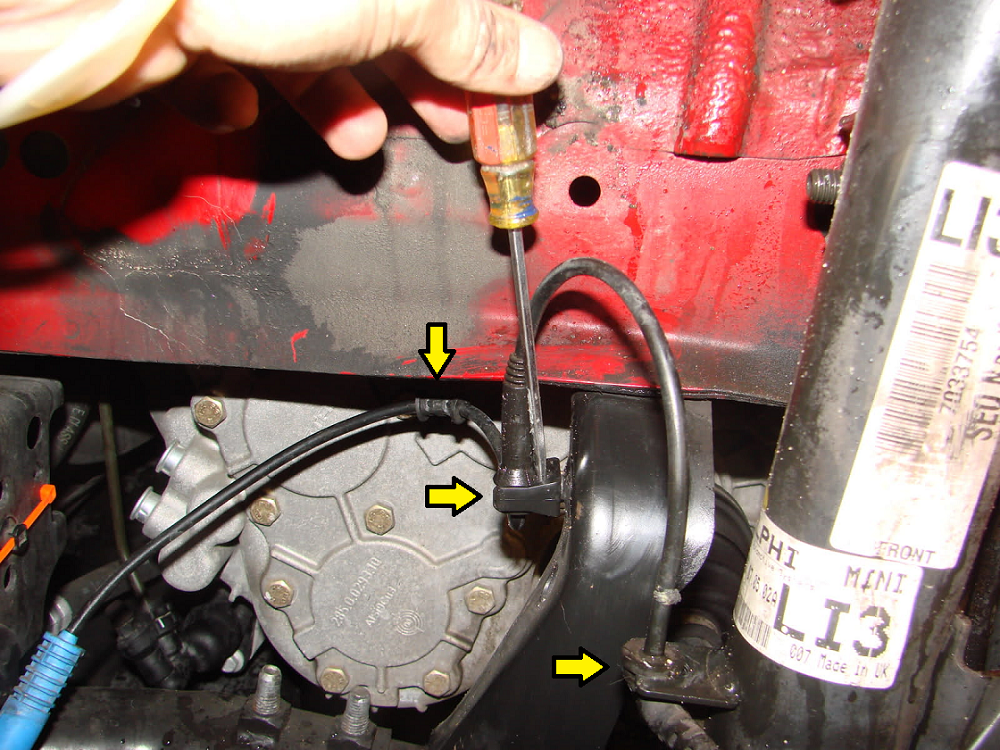
Figure 5. Front speed sensor wiring retainers. 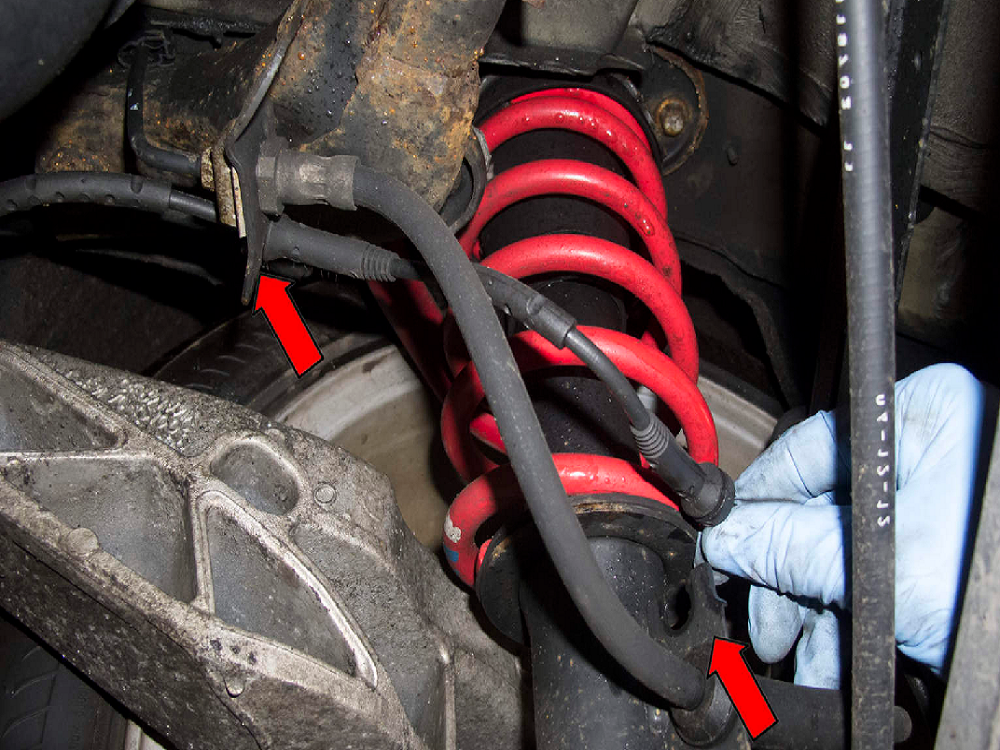
Figure 6. Rear sensor wiring hold down grommets.
- Prior to removing the sensor from the hub, clean the area to prevent any dirt or debris from falling into the sensor hole and soiling the tone ring.
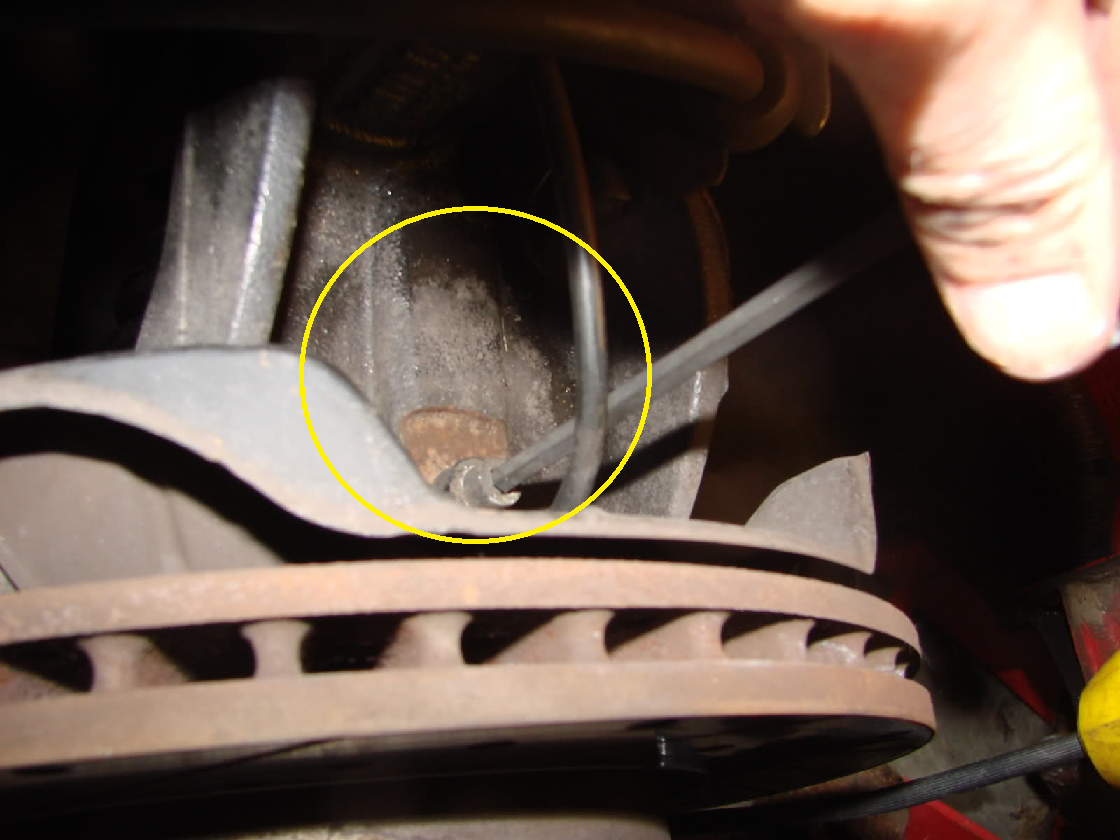
- With the hub clean, remove the sensor hold down bolt with a 5mm Allen wrench and lift the sensor from the hub. Discard the old sensor.
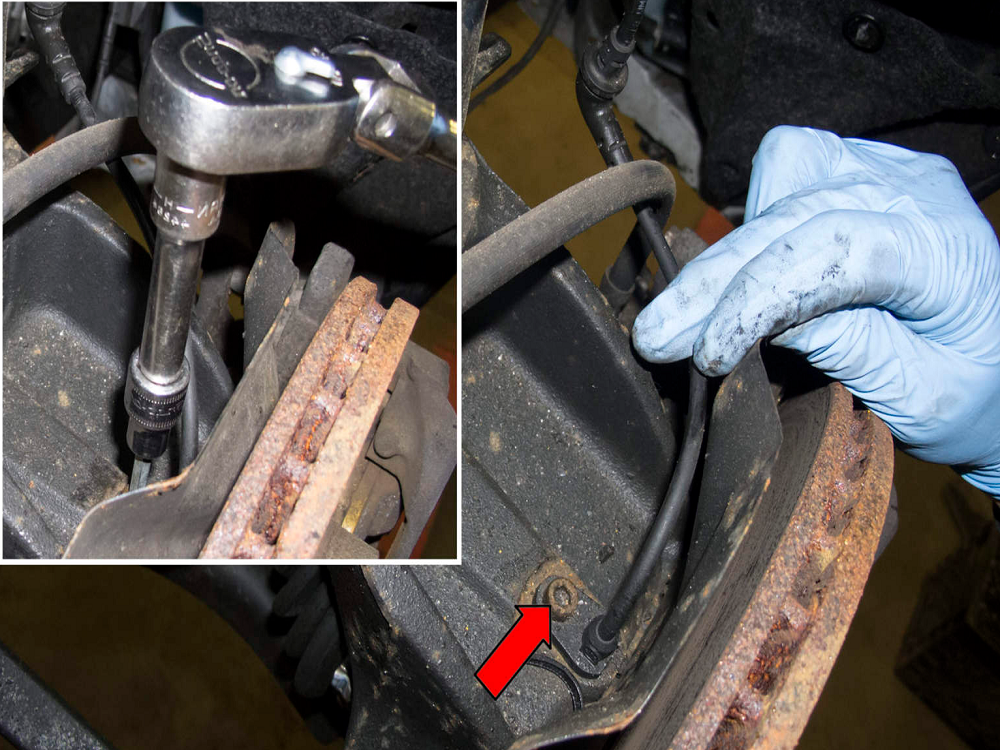
Figure 8. Front wheel speed sensor removal. 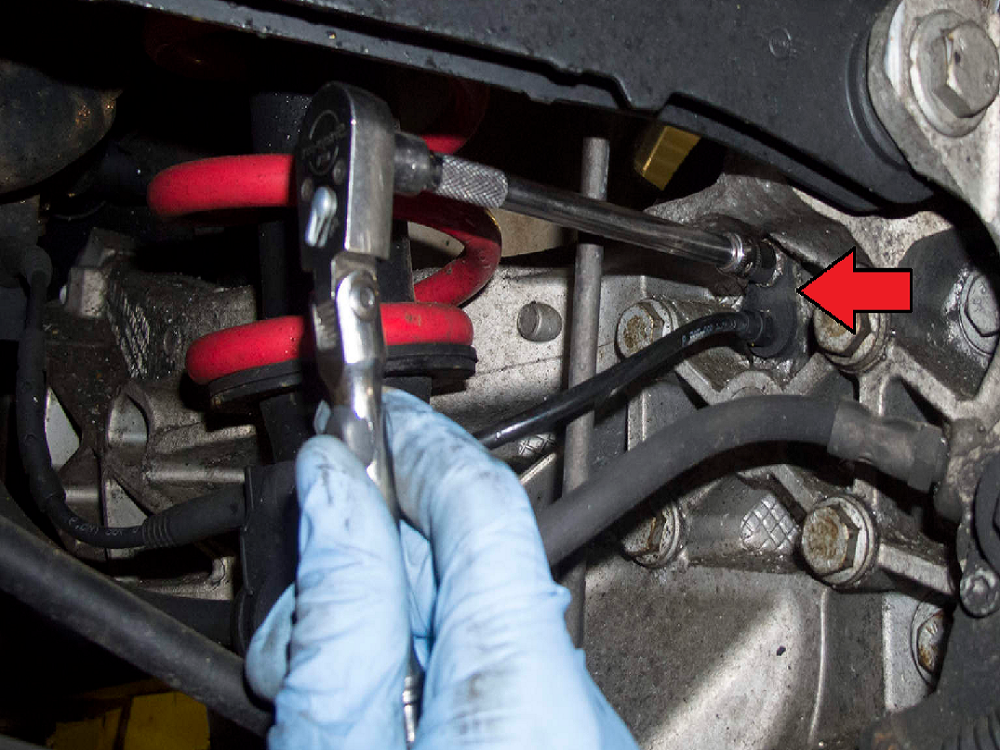
Figure 9. Rear wheel speed sensor removal. 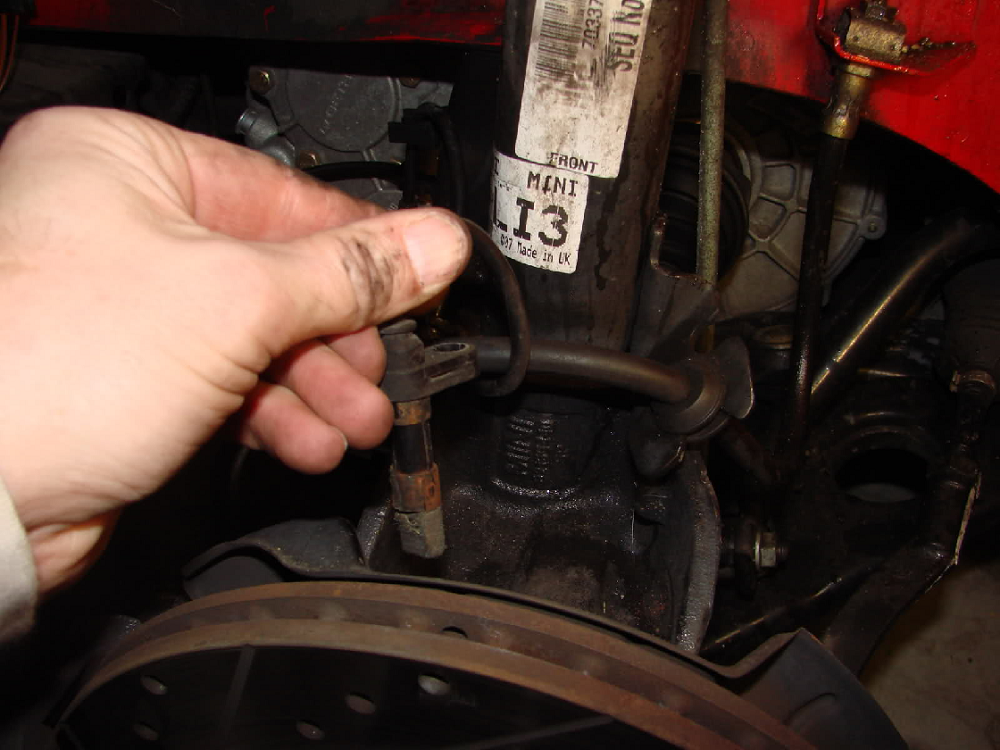
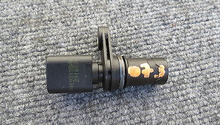
Figure 10. Sensor removed from hub.
Pro Tip
The wheel speed sensors typically gather debris, which can adversely affect their ability to measure the wheel speed. A seemingly faulty sensor can sometimes be fixed by simply cleaning it off and reinstalling.
Step 4 – Installation and reassembly
- Clean the sensor mounting area of the hub before installing the new sensor. It is recommended that a dab of anti-seize paste be applied to the sensor and housing prior to installation. With the sensor in place, torque the fastening bolt to 72 In/lbs.
- Attach the new sensor wiring to the hold down grommets and retaining clips.
- Connect the sensor plug and tie it off with a wire tie to prevent vibration/abrasion that could lead to premature sensor failure.
- Repeat for other wheel sensors if necessary.
- Install the inner fender liner if removed.
- Install the wheel(s) if removed and let the vehicle down off of jack stands.
Pro Tip
The dash warning light (trifecta light) should go out as soon as the vehicle moves enough for the wheel speed to be monitored.
Featured Video: Mini Cooper Wheel Speed Sensor Replacement
Related Discussions
- The Dreaded Wheel Sensor - How to Fix it - NorthAmericanMotoring.com
- Trifecta Light Help (and then some) Already Replaced Wheel Sensor - NorthAmericanMotoring.com
- Light Trifecta: ABS, DSC, Tire Pressure - NorthAmericanMotoring.com