Mini Cooper 2001-2006: How to Install Lowering Springs
Installing shorter, stiffer springs on your stock suspension can lower your car, giving you more sporty handling and a better look at the expense of worse ride quality. Read on and we'll outline all the steps involved.
This article applies to the 1st generation Mini Cooper (2001-2006).
A quality set of lowering springs will drop your car down, and firm it up, but with minimal impact on your ride quality. Buying the cheap generic stuff, or worse yet, cutting your stock springs, may drop it the same amount, but your ride quality will be awful and your handling likely won't improve at all. If you are lowering your car for handling and cornering, and not just to look cool, you must buy the right parts. A new set of shocks/struts designed specifically for lowered cars will help even more. For the ultimate in lowness and sportiness, a set of adjustable coilovers are the way to go. No matter how far down this path you are headed, this guide will give you the basics of changing over the springs on your 1st generation Mini Cooper's suspension.

Materials Needed
- Impact gun or breaker bar
- Floor jack with 2-4 jack stands
- Wheel chocks
- 1/2" and 3/8" racthets
- Hammer
- Pry bar
- Flat head and Phillips head screwdrivers
- Socket set (8mm-19mm)
- 3" and 6" extensions
- White marker or paint pen
- 17mm wrench
- Vice grip
- Allen head socket set
Step 1 – Raise the car and remove wheels
First loosen the wheel lug nuts with the tires touching the ground, then jack up your Mini Cooper and support securely with jack stands. Refer to the article: How To Jack Up Your Car for more information. If the wheel is stuck to the hub, you may need to use a rubber mallet and smack the inner side of the tire until it's loose. You can also use a pry bar to apply pressure between the rim and spindle.

Figure 1. Jack points. 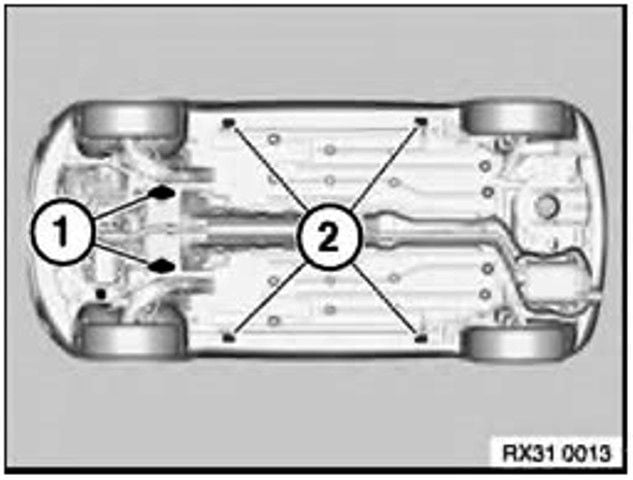
Figure 2. A floor jack can be used at either #1 locations to lift the front of the car.
Step 2 – Remove the rear shocks
The rear shocks on the Mini Cooper are much easier to remove than the front struts, so we will start there.
- Begin by removing the lower bolt holding the shock to the spindle.
- Remove the ABS sensor wire and brake sensor wire from the strut.
- Remove the two bolts holding the top of the strut to the vehicle body.
- Slide the strut down and out of the vehicle.
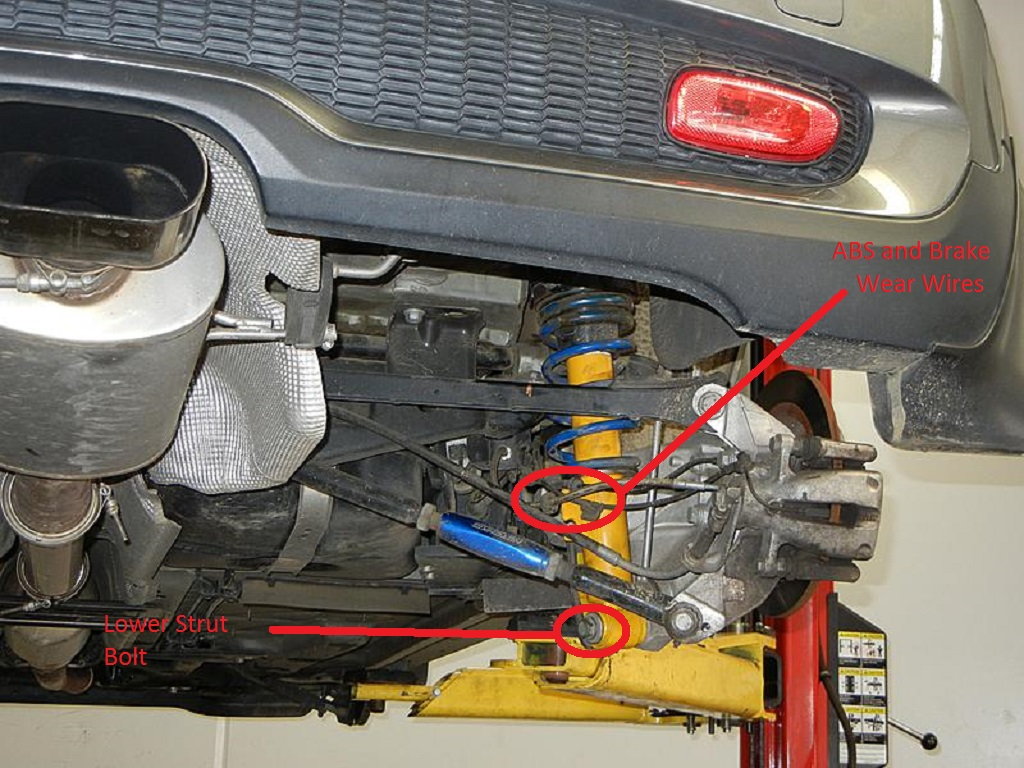
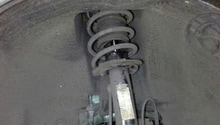
Figure 3. The lower portion of the rear shock. 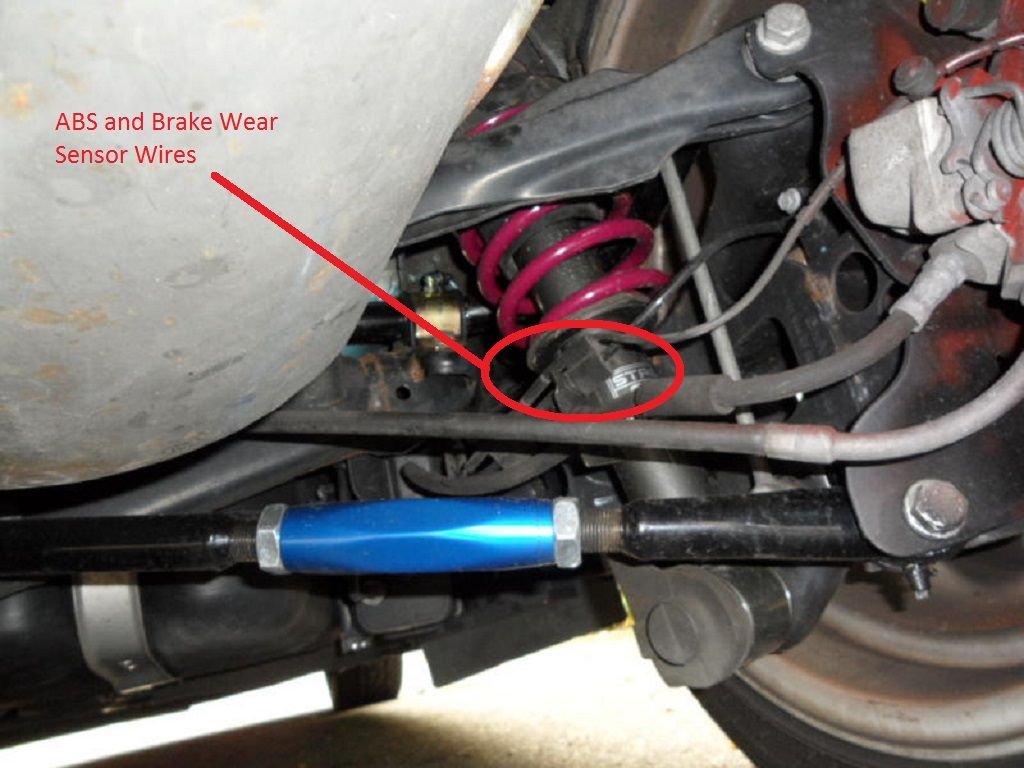
Figure 4. Another view of the wiring attached to the strut.
Step 3 – Remove the front struts
The front of the Mini Cooper uses struts, which not only dampen the motions of the wheels, but locates and aligns them as well. If done correctly, you can get the alignment pretty close after installation, but a trip to a professional shop should be in the near future.
- To maintain your wheel alignment, use a white paint pen to outline the upper and lower strut mount bolts before you loosen them.
- Remove the brake and wheel speed sensors from the strut.
- Unbolt the sway bar end link from the strut with a 17mm socket/ratchet and wrench.
- Remove the lower strut mount bolt, you may need a breaker bar or impact gun.
- With the bolt removed, wiggle the spindle and strut apart.
- Remove the three nuts at the top of the strut mount.
- Be careful and hold the strut to prevent it from dropping.
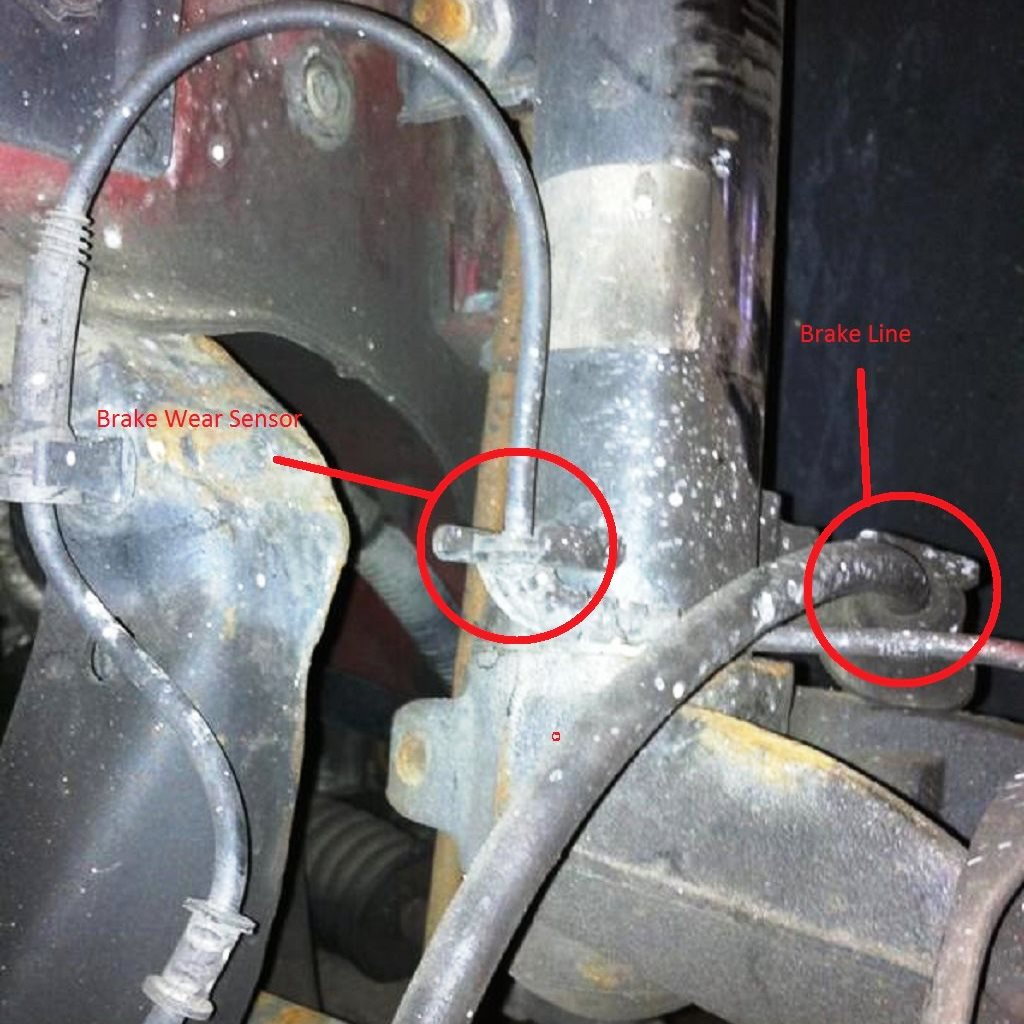
Figure 5. Remove the brake sensor and brake line from the strut. 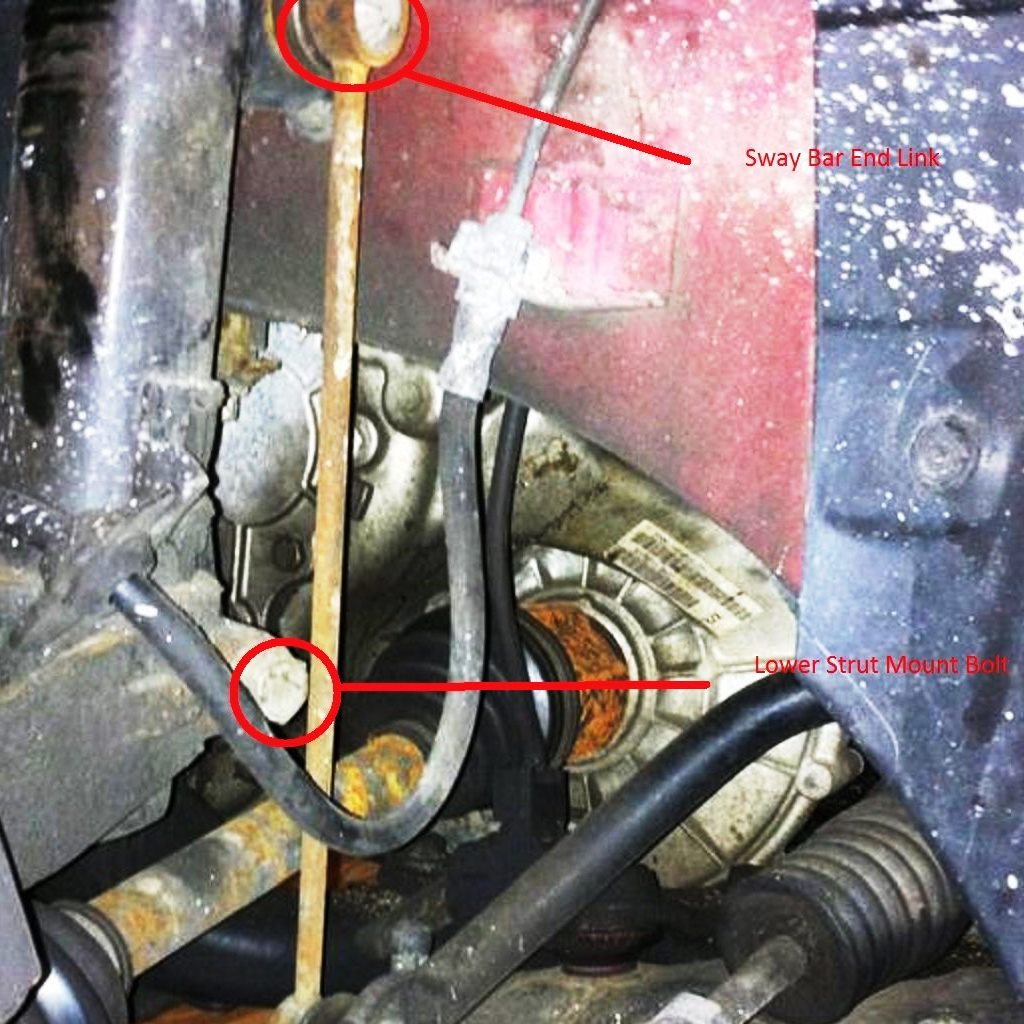
Figure 6. Remove the sway bar end link and front strut lower mounting bolt. 
Figure 7. The three upper strut tower bolts.
Step 4 – Install the lowering springs
Once you have the old shocks and struts out, it is time to swap the new springs on. You will need a spring compressor to take the tension off so you can remove the top of them.
- Remove the strut center nut cover with a flat head screwdriver.
- Remove the center nut with a socket and impact wrench.
- An Allen key can be used to hold the strut rod in place while you loosen it.
- You may need to use a vice grip if the Allen key doesn't work. Place a towel between the shock tube and vice grip to prevent damage.
- To maintain rear wheel travel with your new lower springs, you may want to cut the foam bump stops by the amount as the change in ride height.
- Place the lowering spring onto the strut/shock and re-assemble the strut components.
- Make sure the top and bottom of the spring fit into the grooves on the strut spring mounts. You may not need to use a spring compressor to install the new springs because of their shorter length.
- Use an Allen hey to hold the strut rod while you tighten the center nut.
- Torque the center nut to 47 ft/lbs on the front struts and 22 ft/lbs on the rear strut.
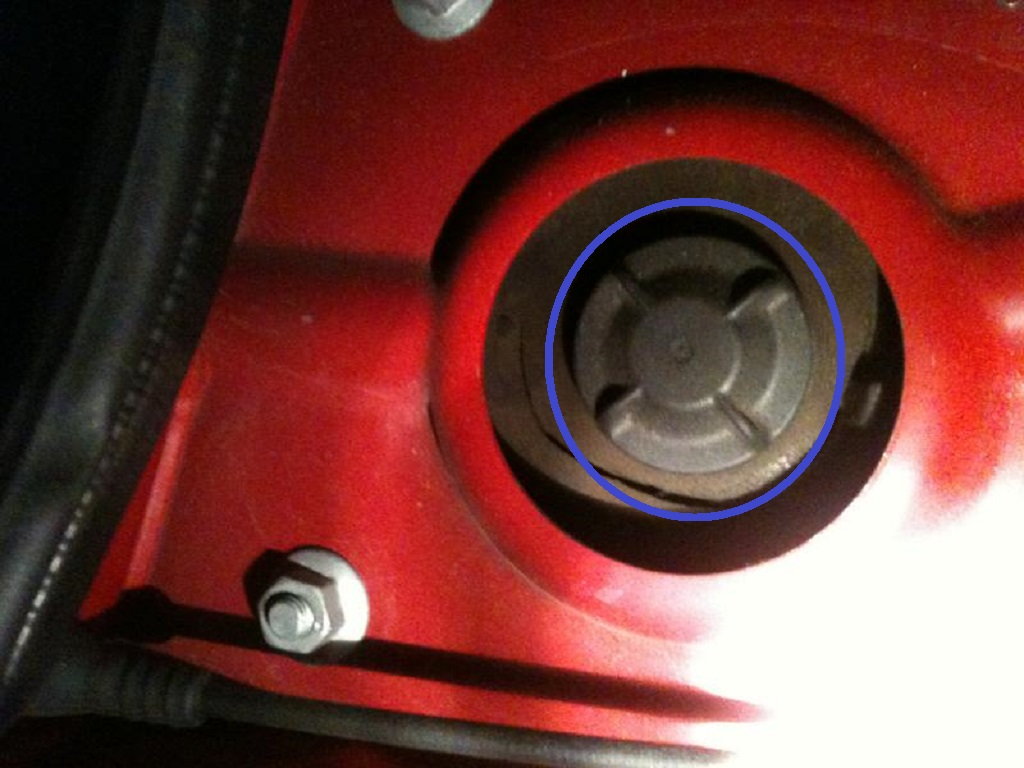
Figure 8. Removing the center nut cover. 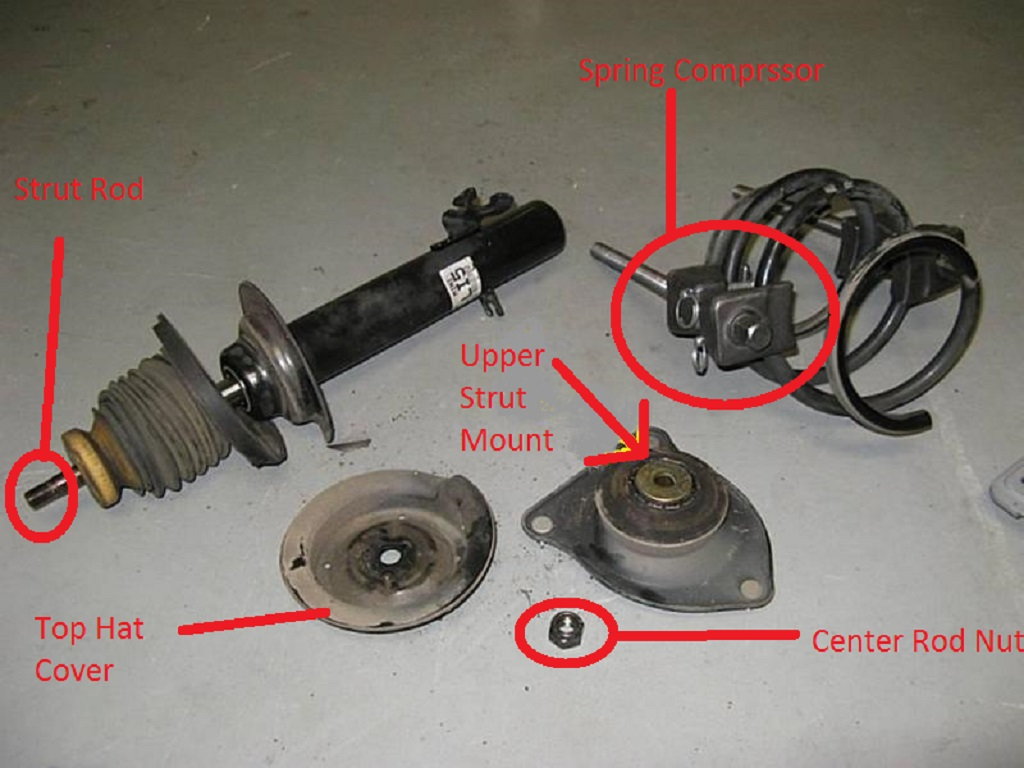
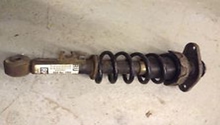
Figure 9. The different parts of the strut assembly.
Step 5 – Re-install the struts
Installing the struts with the new springs is just the opposite of removing them.
- Line up the upper strut mounts with the mounting holes in the vehicle body.
- Use the paint markings you created earlier to match the struts close to there previous position.
- Use the following torque specs for the front:
- Upper strut mounts nuts - 25 ft/lbs
- Strut to hub carrier pinch bolt - 60 ft/lbs
- Sway bar end link to strut - 41 ft/lbs
- For the rear:
- Strut lower mounting bolt - 103 ft/lbs
- Strut upper monuting bolts - 41 ft/lbs
Featured Video: Mini Cooper Performance Coilover Install
Related Discussions
- H & R Spring Install - NorthAmericanMotoring.com
- Coilovers vs. Lowering Springs - NorthAmericanMotoring.com