Mini Cooper 2001-2006: How to Recharge Air Conditioning
After many years of use, the A/C system in any car may need a bit of rejuvenation to bring it to proper working order. What you need to do is simple enough, but get it wrong and it can spell disaster for your Mini's A/C system. Read this how-to for the basic instructions.
This article applies to the Mini Cooper (2001-2006).
The A/C system in most cars should be used regularly in order to maintain performance and remain sealed. Even in the winter months, using it as part of the defrost system will help the vehicle maintain a clear windshield. Even with regular use, the A/C can weaken with age. To do this job correctly, you need to know the ambient temperature. Without it, overcharging the system can happen quite easily, which will ensure the future death of your system. If you feel uncomfortable about what's been said and your abilities, you should probably take your vehicle to an A/C shop to have it evacuated and charged with the right amount of refrigerant.

Materials Needed
- Recharge kit with pressure gauge and trigger release
- Ambient temperature thermometer
This procedure assumes your Mini's A/C system is blowing cool, but not cold air. You should be able to see/hear the A/C compressor clutch kicking on and off systematically. If you do not see this occurring, or if the system is completely flat (no pressure at all), it is highly recommended you take your car to a professional A/C shop for diagnosis, fix, evacuation, and recharge. This type of work is best left to the professional.
Step 1 – Obtain ambient temperature
While this may seem arbitrary, getting the ambient temperature is very important. As the ambient temperature goes up, so will the low pressure side reading go up. To ensure proper refrigerant load, this is very important. Once the temperature is obtained, follow this general guideline:
| Outside Temp | Low Side Pressure | High Side Pressure | Center Vent Temperature |
|---|---|---|---|
| 60°F | 28-38 PSI | 130-190 PSI | 44-46° |
| 70° | 30-40 PSI | 190-220 PSI | 44-48° |
| 80° | 30-40 PSI | 190-220 PSI | 43-48° |
| 90° | 35-40 PSI | 190-225 PSI | 44-50° |
| 100° | 40-50 PSI | 200-250 PSI | 52-60° |
| 110° | 50-60 PSI | 250-300 PSI | 68-74° |
| 120° | 55-65 PSI | 320-350 PSI | 70-75° |
Note
The high side pressures are given in case a manifold is available for this procedure.
Pro Tip
A meat thermometer stuck into a vent will give an accurate enough output reading for the purposes here.
Step 2 – Recharge A/C system
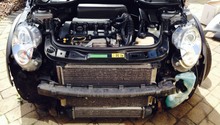
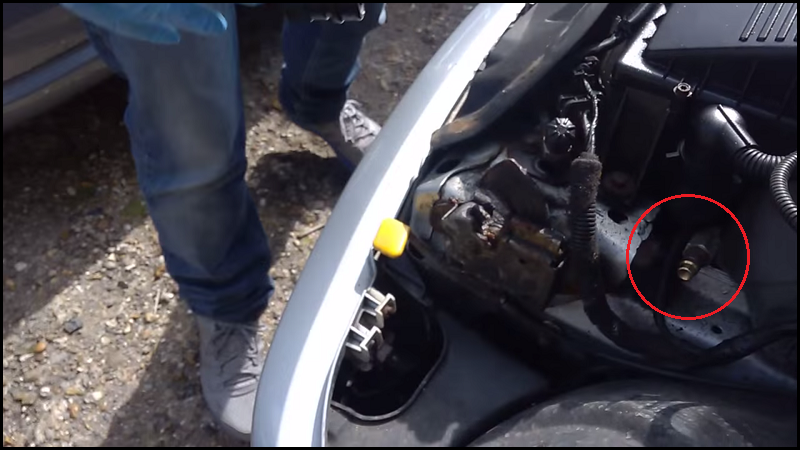
Find the low pressure side access port on your Cooper (Figure 1). Remove the low side cap and set it aside where it won't get lost.
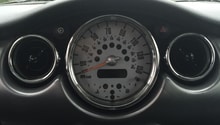
Screw the recharge can of refrigerant into gauge/trigger/hose assembly. There will be a piercing part which will puncture the top of the can. None of the R134a will escape due to there being a trigger mechanism on the assembly. Attach the clip at the end of the hose onto the low side port. Start the vehicle and turn the A/C to max (or Low if an automatic system). Turn the fan on high. Read the pressure on the low side port when the clutch and A/C are engaged. The pressure will go above expected when the A/C compressor is disengaged. With knowing the ambient temperature, raise the pressure in the system by squeezing the trigger for approximately 5-10 seconds at a time. This will slowly raise the pressure. When it gets to the target zone, allow the system to continue running for a few minutes to ensure it is correct. Check the inside temperature inside the vehicle at the vent to ensure it is cooling properly. Once satisfied, disconnect the hose from the low side port and replace the cap.
Pro Tip
According to AriaZone, the total amount of refrigerant needed to completely recharge the A/C is 415g +/- 10g. That equates to ~14.6oz. A typical recharge can is 12-20oz. Using an entire can on a partially functioning system will DEFINITELY overcharge it. Be careful.
Featured Video: How to Recharge AC on 2003 Mini
Related Discussions
- Which is the AC High and Low Port - NorthAmericanMotoring.com
- R53 AC Problem Detailed - NorthAmericanMotoring.com
- Air Conditioning Recharge DIY - NorthAmericanMotoring.com
- Not Your Average AC Problem - NorthAmericanMotoring