
Heater Core Replacement


Which set of clamps, both sucked royally.
I started on the ones in the engine bay which I dont think midget contortionists could get to and gave up. I just lined the interior with some bags and a piece of tupperware to collect coolant which worked great until...I guess one of those crappy aluminum clamps that comes with the mounting kit I bent oddly when putting it on so it had a pinhole leak after I replaced the coolant so there went most of my coolant. After a trip to the auto parts store for a lil more coolant and were all good. Nice cold AC and warm defroster with no stink, no leaks, no wet pants and no more cursing.
I love to work on my cars but sometimes I come across something that just sucks and this whole heater core thing was just that. The replacing of it wasnt too bad just a nuisance but the wet floors, not being able to use the defrost last week and the stink just made this a suck deal. I also had a neighbor inform me that were not allowed to work on our cars in the driveway so from now on your getting my car Way

6th Gear
Joined: Jun 2004
Posts: 1,522
Likes: 7
From: San Diego, CA
That's what I'm paying for right now (almost 89,000 miles on my 04 MCS). $700 total. It's not a matter of ethics, they have to go with the standard flat rate for these things. (For comparison, the flat time for a rear sway bar install is five hours.) Maybe the ethics argument could be had with whoever (Mini?) sets that standard.
For people who may be searching for symptoms of heater core replacement:
1. The first clue was probably a white fog from the dash vents. This occurred a few months ago, but resulted in an AC top-off. My guess based on this thread is that a thorough inspection would have found the heater-core damage.
2. Running water/sloshing water noise from behind the dashboard when starting the car in the morning.
3. Symptom 2 was the result of the coolant level dropping due to a leak.
4. Passenger-side windshield fogging up when the heater is on.
6 hours??? AC and dash??? I'd REALLY go question the dealers business ethics! The core is designed to be removed without ripping the car apart. I skipped disconnecting the 2 hoses going through the firewall and spent the extra 5 mins draining the core into a cup.
1. disconnect main coolant hose from rad and drain
2. remove heater core cover
3. remove heater core clamps
4. drain heater core
5. swap cores
6. put everything back together
7. clean all carpets (shoes+coolant+pedals dont mix)
good luck!
phil.
1. disconnect main coolant hose from rad and drain
2. remove heater core cover
3. remove heater core clamps
4. drain heater core
5. swap cores
6. put everything back together
7. clean all carpets (shoes+coolant+pedals dont mix)
good luck!
phil.

Just did this today, and can verify that it's a p.i.t.a. job...but all things considered not terribly complicated.
My heater core ("heater matrix" as the Brits call it) went at about 125K. Stinky fog from the vents, needed to run the AC all the time to clear the windows, etc. I spent some time trying to be sure that the leak was in the core itself (which has been the case in every German car I've owned over 100K miles) or perhaps at/in one of the pipes leading up. Eventually, I removed the cover trim (a HUGE pain given that one screw is nearly impossible to reach in a US car as it's essentially behind the accelerator....clearly not a problem in the RHD cars covered in the Haynes manual. Ugh.) and found that indeed the pipes were fine. So the leak was in the core itself.
I got the replacement core and the fitting kit (seals/clamps) from one of the NAM vendors (a dealer) for about $100 and was good to go. Apparently the core itself is somewhat hard to find as the part has limited availability from BMW/MINI. The pipes (which I would have got for good measure) were not available except by special order.
FWIW, I didn't actually disconnect the pipes from the engine side of the firewall as the Haynes manual suggests. Frankly, I removed the intake box (I have an MCS) and still couldn't find them. And no doubt if I did find them I'd not have the tiny little hands (Carneys...smell like cabbage) necessary to get in there and remove the clamps from above. Fortunately, it seems totally possible to do this job by only removing the end of the pipes at the heater core side (although this may be why I dumped more coolant on my carpet than would have been the case otherwise).
So, aside from some wet carpet (seems unavoidable), the hardest part was getting the clamps on the core joints with the inlet/outlet pipes. VERY tough to line up correctly...and eventually, I ended up reusing the old clamps as they seemed a bit wider (and hence better gripping) than the ones I paid for in the "fitting kit". Oh well. But after dumping more coolant on the carpet due to a bad clamping job the first time around, I readjusted the things and now it seems like I have a good seal.
(btw, the two screws that hold the core in place are totally pathetic. I used a small washer - although a larger screw head would accomplish the same thing - to allow for a better grip on the tiny little flange that engages the screw and holds it "tight" against the plastic heater core box)
I'm leaving off the trim piece so that I can watch the thing for a couple of days before putting it all back right (and you can be darn sure that I'll NOT replace that 3rd screw behind the accelerator! )
)
Looking forward to driving my car without smelling curry (which is always what I think coolant smells like when hot) and having foggy windows.
My heater core ("heater matrix" as the Brits call it) went at about 125K. Stinky fog from the vents, needed to run the AC all the time to clear the windows, etc. I spent some time trying to be sure that the leak was in the core itself (which has been the case in every German car I've owned over 100K miles) or perhaps at/in one of the pipes leading up. Eventually, I removed the cover trim (a HUGE pain given that one screw is nearly impossible to reach in a US car as it's essentially behind the accelerator....clearly not a problem in the RHD cars covered in the Haynes manual. Ugh.) and found that indeed the pipes were fine. So the leak was in the core itself.
I got the replacement core and the fitting kit (seals/clamps) from one of the NAM vendors (a dealer) for about $100 and was good to go. Apparently the core itself is somewhat hard to find as the part has limited availability from BMW/MINI. The pipes (which I would have got for good measure) were not available except by special order.
FWIW, I didn't actually disconnect the pipes from the engine side of the firewall as the Haynes manual suggests. Frankly, I removed the intake box (I have an MCS) and still couldn't find them. And no doubt if I did find them I'd not have the tiny little hands (Carneys...smell like cabbage) necessary to get in there and remove the clamps from above. Fortunately, it seems totally possible to do this job by only removing the end of the pipes at the heater core side (although this may be why I dumped more coolant on my carpet than would have been the case otherwise).
So, aside from some wet carpet (seems unavoidable), the hardest part was getting the clamps on the core joints with the inlet/outlet pipes. VERY tough to line up correctly...and eventually, I ended up reusing the old clamps as they seemed a bit wider (and hence better gripping) than the ones I paid for in the "fitting kit". Oh well. But after dumping more coolant on the carpet due to a bad clamping job the first time around, I readjusted the things and now it seems like I have a good seal.
(btw, the two screws that hold the core in place are totally pathetic. I used a small washer - although a larger screw head would accomplish the same thing - to allow for a better grip on the tiny little flange that engages the screw and holds it "tight" against the plastic heater core box)
I'm leaving off the trim piece so that I can watch the thing for a couple of days before putting it all back right (and you can be darn sure that I'll NOT replace that 3rd screw behind the accelerator!
)Looking forward to driving my car without smelling curry (which is always what I think coolant smells like when hot) and having foggy windows.

1st Gear
Joined: Apr 2003
Posts: 22
Likes: 0
From: Southern California
My heater core went out, so I'm going through the same repair job and finding the same problems/difficulties as you've experienced.
Regarding the clamps, those have been the most challenging part of all of this. It's difficult because the aluminum tube and heater core inlet has to be pushed together really tight in order to get the clamp to apply pressure on both side to ensure a proper fit. The hard part is squeezing or pushing these two parts together, and at the same time, getting the clamp in place and screwed in.
The bottom clamp went on pretty easily - maybe there's naturally more leverage so the fit between the tube and heater core was pretty tight already.
I gave up on it today and will retry tomorrow (hands are too sore hehe).
If I find a good technique, I'll post it.
1st Gear
Joined: Apr 2003
Posts: 22
Likes: 0
From: Southern California
It's a giant PITA and I have not been able to get mine back together properly. The clamps are so narrow which requires the aluminum tube and heater core to butt up against each other really closely... tough to do with only two hands and not much room for leverage.

Neutral
Joined: Nov 2012
Posts: 5
Likes: 0
I would just like to say thank you to all of the contributors in this thread. The heater core in my wife's Mini went out last week and I called the local BMW dealer here in Springfield, MO and they quoted me $176 dollars for the part AND 13 HOURS LABOR!!! They want over $1,500 to replace the heater core in her car. So again, thank you all so much for this very informative thread. With the information presented here I am very confident I can not only do this myself but also have it completed in far less than 13 hours.

3rd Gear
Joined: Sep 2006
Posts: 227
Likes: 1
From: Orlando FL
To help extend the life of the heater core I recommend turning on the heat for a few minutes every couple of months to circulate the fluid. Also replace your coolant about every 3 years. Use distiller water if adding water to the overflow tank or diluting coolant. My core is nearing 11 years old and no problem. My first coolant change was at 8 years. I used Prestone All Systems antifreeze.

3rd Gear
Joined: Nov 2012
Posts: 162
Likes: 2
I would just like to say thank you to all of the contributors in this thread. The heater core in my wife's Mini went out last week and I called the local BMW dealer here in Springfield, MO and they quoted me $176 dollars for the part AND 13 HOURS LABOR!!! They want over $1,500 to replace the heater core in her car. So again, thank you all so much for this very informative thread. With the information presented here I am very confident I can not only do this myself but also have it completed in far less than 13 hours.

1st Gear
Joined: Mar 2011
Posts: 35
Likes: 0
From: Los angeles ca
im from los angeles ca and i did my heatercore due to leakage and honestly it took me roughtly 1 hr or 2 but when changing u leake some water in ur carpet but then again ita never too late for some cleaning  if anyone needs help im gladly here to help
if anyone needs help im gladly here to help

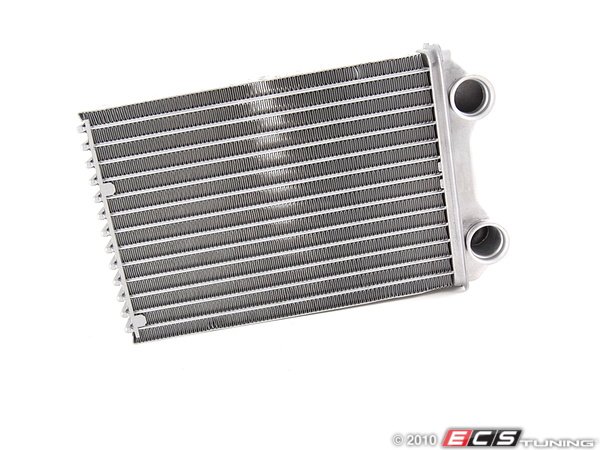
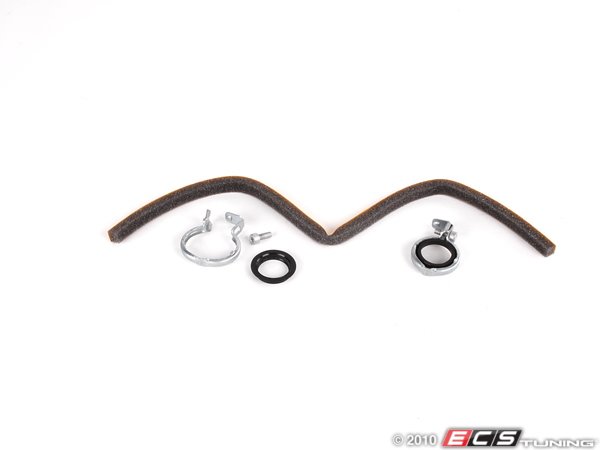
The heater core does have an install kit that is separate form the heater core itself , it was mentioned above a little bit. You can check out the picture below.
Heater core: 64111497527
http://www.ecstuning.com/Search/64111497527/
And don't forget the heater core kit:
http://www.ecstuning.com/Search/64116910914/ES176630/
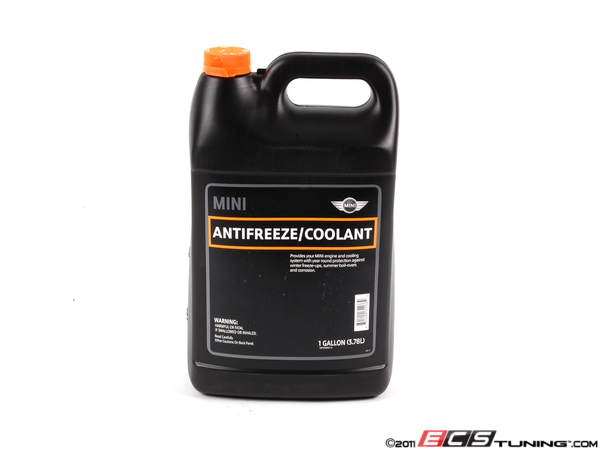
Recommend the MINI OEM coolant and mix with distilled water.
http://www.ecstuning.com/Search/82140031133/ES196253/
Thanks and good luck with the install.
Heater core: 64111497527
http://www.ecstuning.com/Search/64111497527/
And don't forget the heater core kit:
http://www.ecstuning.com/Search/64116910914/ES176630/
Recommend the MINI OEM coolant and mix with distilled water.
http://www.ecstuning.com/Search/82140031133/ES196253/
Thanks and good luck with the install.
__________________

MINI Guru/ MINI Owner Since 2004 | NEW Lifetime Part Replacement | Local Pickup
Milltek | Genuine MINI | Forge Motorsport | NM Engineering | ECS Performance | M7 Speed
Customer Service Hours: 8am-8pm EST|Sales Team Hours: 8am-11pm | SAT 10am-7pm 800.924.5172
MINI Guru/ MINI Owner Since 2004 | NEW Lifetime Part Replacement | Local Pickup
Milltek | Genuine MINI | Forge Motorsport | NM Engineering | ECS Performance | M7 Speed
Customer Service Hours: 8am-8pm EST|Sales Team Hours: 8am-11pm | SAT 10am-7pm 800.924.5172
Last edited by ECSTuning; Feb 8, 2016 at 11:23 AM.

3rd Gear
Joined: May 2013
Posts: 185
Likes: 0
Hate to dredge up old threads but I was swapping out my front shocks and noticed that there are two hoses coming up from below the power steering hose that are disconnected. I'll climb under the car tomorrow but could those be heater core hoses? Bought the car about 6 weeks ago and never noticed this. Car doesn't overheat but I have to add coolant to the expansion tank every week or so. Can't find a leak anywhere though.
Car is an '06 with 108k miles on it.
Car is an '06 with 108k miles on it.
Last edited by tbearmini; Jun 19, 2013 at 07:54 PM.


2nd Gear
Joined: Jul 2008
Posts: 135
Likes: 4
From: Chicago, IL
Heater diagnosing
So around the time when my supercharger on my 02 mini was on its last legs, 2011ish, I noticed the coolant overflow tank had that rusty sludge coming in. (The supercharger, water pump, overflow tank and thermostat were all replaced that same week, as well as a flush performed) - Although since then, my heater has always failed to blow hot, not even warm. Only in the summer, but that doesnt do me any good in Chicago. Since then, the coolant does not appear to have sludge any longer, but I still do not get any heat even after another flush.
Would this mean it's my heater core that needs replacing? Is there something else I should look at? I'm guessing it's clogged from the time I was getting all that residue.
Also, is there a step by step with pictures somewhere on replacing the core?
Sidenote, got my radiator fan replaced recently. Also, AC isn't working either. No clutch engagement sound.
Thanks! Trying to get this done before winter cometh. :P
Oh! Forgot to add: No coolant leaking issues, no smells, no vapor..
Last edited by thevastdifference; Oct 20, 2013 at 04:40 PM.
Neutral
Joined: Nov 2012
Posts: 5
Likes: 0
Hey Tummi_gummi sorry man, I didnt see this post until now. Just wanted you to know I wasn't trying to be rude and ignore you I imagine you have probably fixed this issue by now but if not I would be happy lend some advice! (I don't live in Springfield anymore so that's the best I can do)
I imagine you have probably fixed this issue by now but if not I would be happy lend some advice! (I don't live in Springfield anymore so that's the best I can do)
3rd Gear
Joined: May 2013
Posts: 185
Likes: 0
So around the time when my supercharger on my 02 mini was on its last legs, 2011ish, I noticed the coolant overflow tank had that rusty sludge coming in. (The supercharger, water pump, overflow tank and thermostat were all replaced that same week, as well as a flush performed) - Although since then, my heater has always failed to blow hot, not even warm. Only in the summer, but that doesnt do me any good in Chicago. Since then, the coolant does not appear to have sludge any longer, but I still do not get any heat even after another flush.
Would this mean it's my heater core that needs replacing? Is there something else I should look at? I'm guessing it's clogged from the time I was getting all that residue.
Also, is there a step by step with pictures somewhere on replacing the core?
Sidenote, got my radiator fan replaced recently. Also, AC isn't working either. No clutch engagement sound.
Thanks! Trying to get this done before winter cometh. :P
Oh! Forgot to add: No coolant leaking issues, no smells, no vapor..
Would this mean it's my heater core that needs replacing? Is there something else I should look at? I'm guessing it's clogged from the time I was getting all that residue.
Also, is there a step by step with pictures somewhere on replacing the core?
Sidenote, got my radiator fan replaced recently. Also, AC isn't working either. No clutch engagement sound.
Thanks! Trying to get this done before winter cometh. :P
Oh! Forgot to add: No coolant leaking issues, no smells, no vapor..
3rd Gear
Joined: Nov 2012
Posts: 162
Likes: 2
Hey Tummi_gummi sorry man, I didnt see this post until now. Just wanted you to know I wasn't trying to be rude and ignore you I imagine you have probably fixed this issue by now but if not I would be happy lend some advice! (I don't live in Springfield anymore so that's the best I can do)
I imagine you have probably fixed this issue by now but if not I would be happy lend some advice! (I don't live in Springfield anymore so that's the best I can do)
2nd Gear
Joined: Jul 2008
Posts: 135
Likes: 4
From: Chicago, IL
Turns out it was the heater core indeed. Whole process took me about 3 hours, just getting to the screw way in the back took 30 min, until I got a mirror to see where I was going. Getting those clamps on wasn't as hard as I imagined, just making sure its on right is the tough part, then pinching the clamps with your fingers is quite easy once its aligned. My core was filled with a rusty colored sludge! I got my ACM core and from Amazon for about 89.99 and the kit for 20.99, got $50 off with the amazon card.. and I'm ready for the Chicago winter!

1st Gear
Joined: Jan 2012
Posts: 24
Likes: 0
this is insane!!! my heater core failed again!!!...the original one broke down this february, bought at pelicanparts the valeo oem replacement, got it changed just to fail 3 months short of sporadic use (it my secondary car). pelican honored the guarantee but took them about 3 months to send me the new part (consider that i'm from chile, south america)...got it installed on late september just fail again last sunday....
my mechanic tells me it is not strange, as it could be a bad batch of cores...he thinks pelican has a "box" of bad replacements...
as i'm not sure, i'd appreciate feedback on anyone having this same problem, or if i should look on other source of the problem...thinking like excesive pressure?...if so i tend to think that a hose should break before the heater...or not?
but i think i'm done with Mini...in less than 2 years i've had:
crank pulley failure
ignition coil rust and cable failure
front end bushing replacement
clutch replacement
throttle body failure
3 heater core changes...
btw...my belt tensioner is bouncing, so i think i also need the Alta belt tensioner assembly....

1st Gear
Joined: Jul 2012
Posts: 18
Likes: 0
From: Italy
Couple more hints...
Ok... just swapped my core on my lunch break (blew up on the way to work... never drive your mini in Naples  ). Since this thread seems to be a high hit for Google... I got a couple notes for anyone who just stumbled in.
That last screw in the back of the kick panel..... just put your T20 driver against the firewall/behind the steering column in line with the top of the panel, and it'll point right to it. I tucked the corner of a trash bag under the heater core and used it to line the foot well. Threw in a couple towels and caught a few cups of fluid.
Couldn't get the seal/clamp kit quickly so I reused the old ones. They're soft, so be careful. The hardest part for me (most of us?) was getting the pipes seated back on the heater core tight enough for the clamps to go back on. IMPORTANT: there are 4 tiny tabs on each clamp. Bend these tiny tabs in about 15 or 20 degrees towards each other. Then they help pull the pipe and core flanges together when you install them. Also, the pipes need to be rotated slightly to sit flush. As you twist them, they will seat and unseat (probably in the back where you can’t see).
Also, if you look at the clamp screw tabs, there is a flap on top of one with a dimple in it. If you bend this in a little, it'll catch the other tab and hold the whole thing together while you fiddle the screw back in. I used one hand to hold the core and pipe together (rotating the pipe slightly to change the angle while using a mirror to check the back), then slipped the clamp in place and used a small slip joint wrench to pinch the tabs until the dimple caught. Then inspect with a mirror to be sure you've captured everything. Then put the screw in. Easier to do than describe.
If I had a choice, I'd have splurged for the install kit, since the clamps would have been the right shape already. Everyone saying this is a cake job, clearly had new clamps, but if you prep yours like I mentioned, it should go together smooth.
). Since this thread seems to be a high hit for Google... I got a couple notes for anyone who just stumbled in. That last screw in the back of the kick panel..... just put your T20 driver against the firewall/behind the steering column in line with the top of the panel, and it'll point right to it. I tucked the corner of a trash bag under the heater core and used it to line the foot well. Threw in a couple towels and caught a few cups of fluid.
Couldn't get the seal/clamp kit quickly so I reused the old ones. They're soft, so be careful. The hardest part for me (most of us?) was getting the pipes seated back on the heater core tight enough for the clamps to go back on. IMPORTANT: there are 4 tiny tabs on each clamp. Bend these tiny tabs in about 15 or 20 degrees towards each other. Then they help pull the pipe and core flanges together when you install them. Also, the pipes need to be rotated slightly to sit flush. As you twist them, they will seat and unseat (probably in the back where you can’t see).
Also, if you look at the clamp screw tabs, there is a flap on top of one with a dimple in it. If you bend this in a little, it'll catch the other tab and hold the whole thing together while you fiddle the screw back in. I used one hand to hold the core and pipe together (rotating the pipe slightly to change the angle while using a mirror to check the back), then slipped the clamp in place and used a small slip joint wrench to pinch the tabs until the dimple caught. Then inspect with a mirror to be sure you've captured everything. Then put the screw in. Easier to do than describe.
If I had a choice, I'd have splurged for the install kit, since the clamps would have been the right shape already. Everyone saying this is a cake job, clearly had new clamps, but if you prep yours like I mentioned, it should go together smooth.