

R56 The Infamous Joey Mod!


6th Gear
Joined: May 2007
Posts: 1,442
Likes: 0
From: Sacramento, Ca
The club is growing Celia!! We seriously got to get a club badge or something


It was actually pretty easy, but taping the damn things is what took forever. I ended up just leaving the reflector in the headlight casing when I painted it.
I also didn't paint the bulb shield thing, but now that I think about it I probably could, I just wasn't sure whether the Krylon would hold up on it since its metal.
I also didn't paint the bulb shield thing, but now that I think about it I probably could, I just wasn't sure whether the Krylon would hold up on it since its metal.

Wow that looks amazing...i cant wait for another pic so I can see how that looks on the halogens because i have halogens and that what I really want to do
What method did you use to break the seal? bake or heat gun? how long did it take? Also where there any special tools need to take the chrome piece of the big lens? and also did it look like the reflector portion was held on any special way?
I think I may do mine tomorrow
What method did you use to break the seal? bake or heat gun? how long did it take? Also where there any special tools need to take the chrome piece of the big lens? and also did it look like the reflector portion was held on any special way?
I think I may do mine tomorrow
Last edited by checkercoop; Feb 9, 2008 at 11:38 AM.
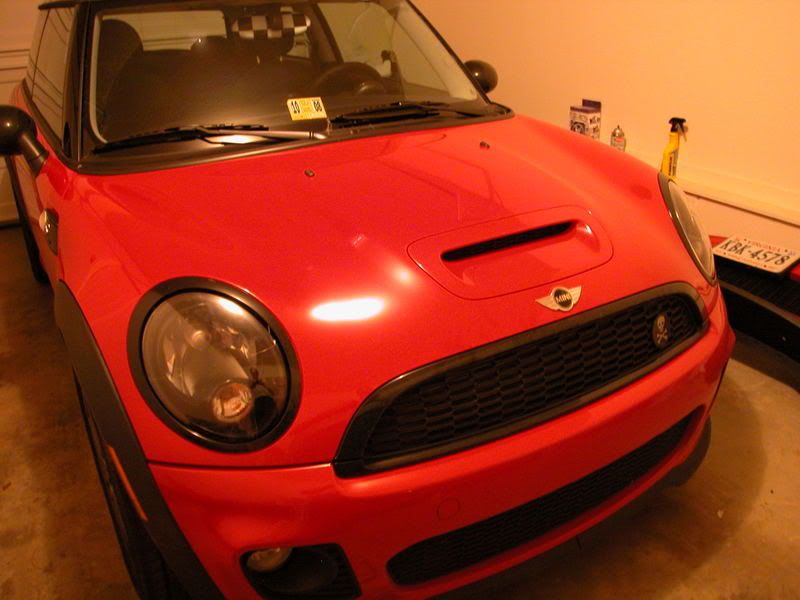
Do it! Its actually a lot easier than you would think. I posted more pics here, but here's one that I took today:
https://www.northamericanmotoring.co...=1#post2030161
https://www.northamericanmotoring.co...=1#post2030161
Do it! Its actually a lot easier than you would think. I posted more pics here, but here's one that I took today:
https://www.northamericanmotoring.co...=1#post2030161
https://www.northamericanmotoring.co...=1#post2030161
Im thinking about doing it the way Celia did and just leaving the housing attached and using a heat gun to work the sealant...my only question is how did the reflector portion look like it was attched?
Im hoping its not held on some crazy way so I dont have the take the housing out once I've already cracked it open

Do it! Its actually a lot easier than you would think. I posted more pics here, but here's one that I took today:
https://www.northamericanmotoring.co...=1#post2030161
https://www.northamericanmotoring.co...=1#post2030161

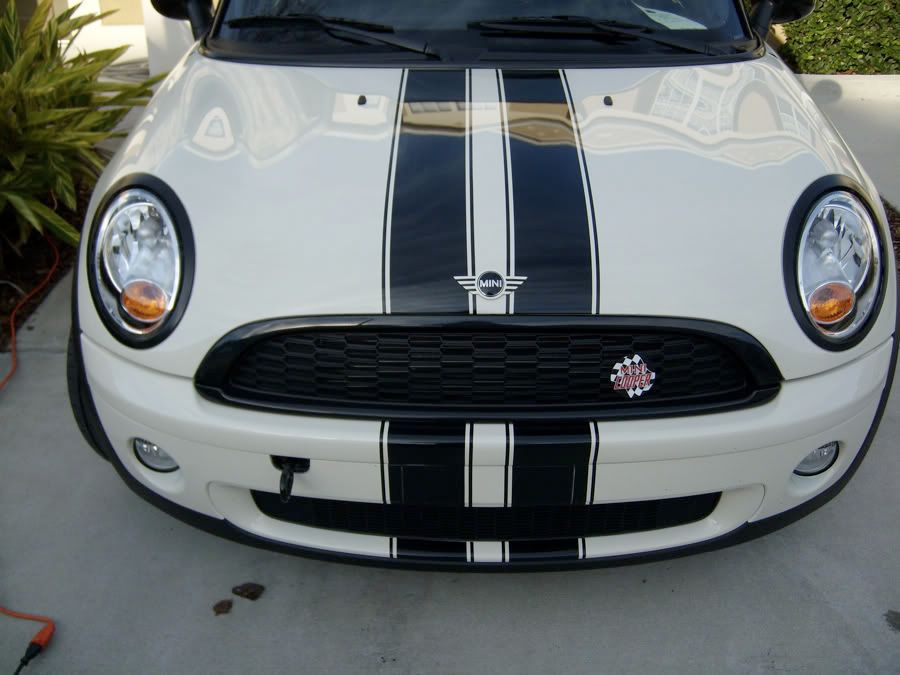
Ok so I did it!!!!!!
OMG it seriously is one of the best and cheapest mods (yes a little scary to crack open the lights, but what fun it was and how great it looks.
I used the heat gun method...thanks Celia
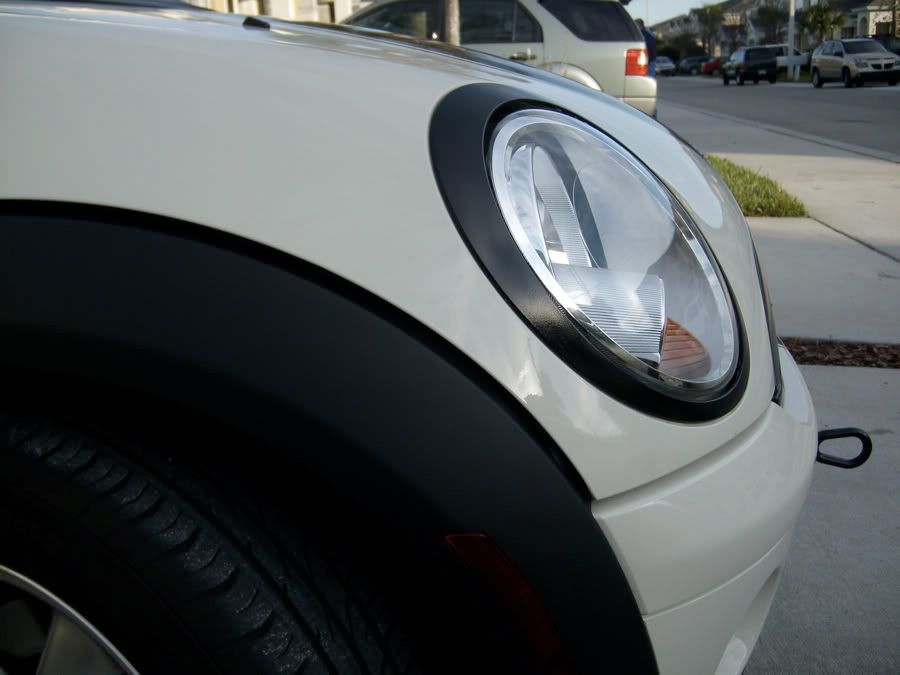
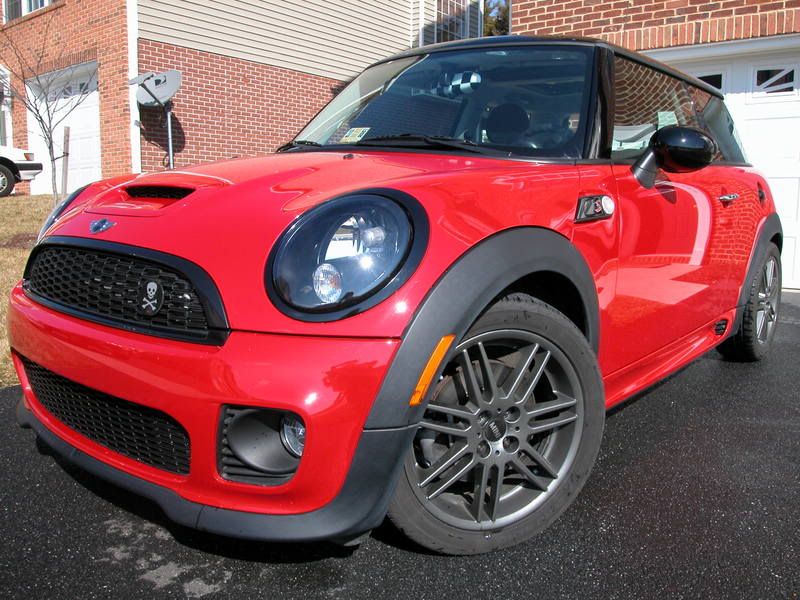
I actually really like the way it cames out on the halogens
Thank you VicSkimmr for showing how it looks on the halogens
OMG it seriously is one of the best and cheapest mods (yes a little scary to crack open the lights, but what fun it was and how great it looks.
I used the heat gun method...thanks Celia
I actually really like the way it cames out on the halogens
Thank you VicSkimmr for showing how it looks on the halogens

4th Gear
Joined: Oct 2007
Posts: 510
Likes: 0
From: Kansas City
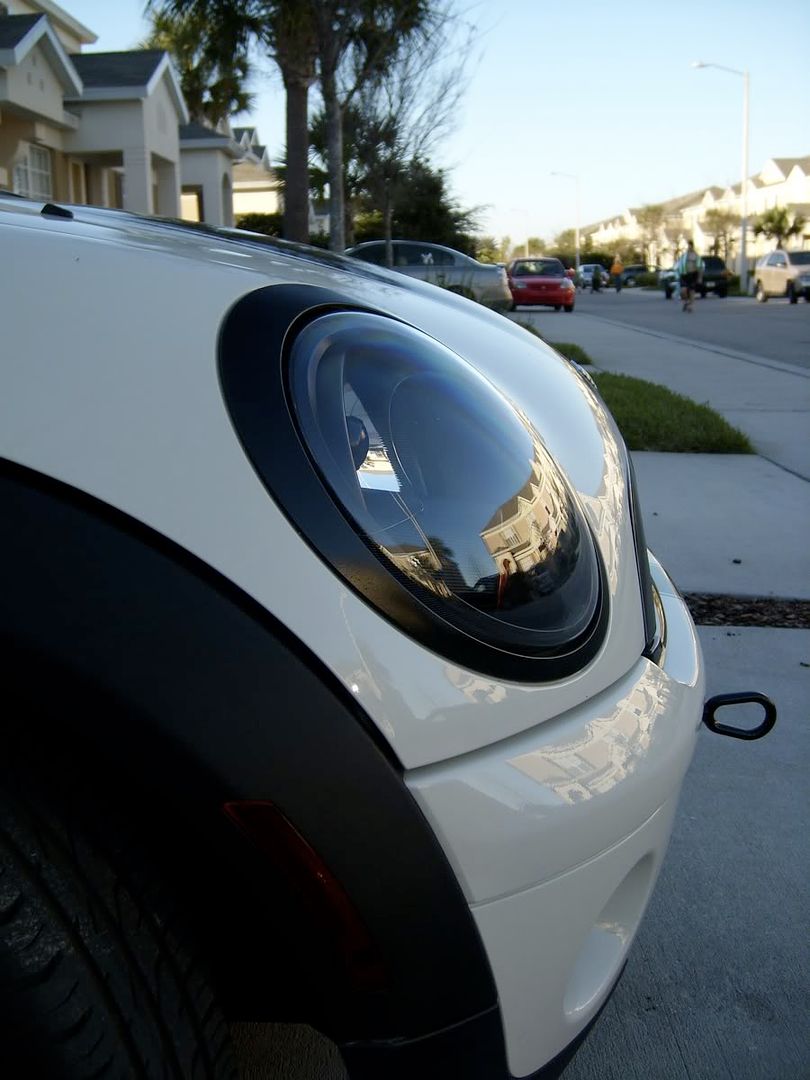
Great job, checkercoop!!! Now we know what it looks like with the center lamp cap painted. Looks great! Have you run the lights to make sure the center cap paint doesn't have a problem with the heat? What paint did you use there? What paint did you use everywhere else? Did you scuff any of the surfaces?
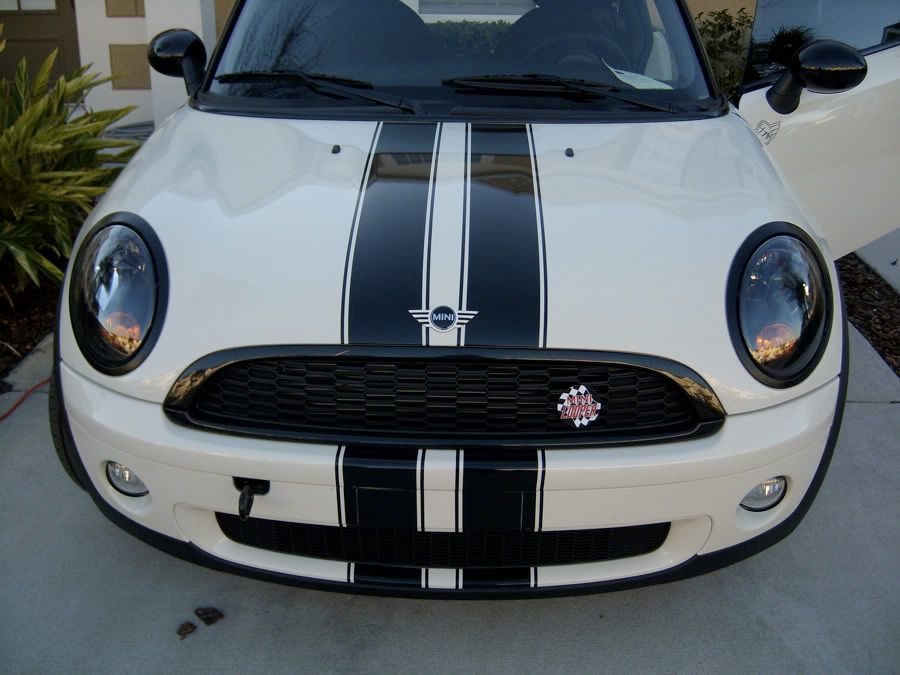
I would also like to see a shot of these in direct sunlight to show even more detail, if you guys get a chance. Thanks!
I would also like to see a shot of these in direct sunlight to show even more detail, if you guys get a chance. Thanks!

1st Gear
Joined: Aug 2007
Posts: 43
Likes: 0
everybody's joey moded lights look freakin amazing
anybody feel like helping out a newbie fellow NAM'er in the North Jersey Area??? headlights in oven = not a job for a newbie DIY'er!
anybody in norther NJ/NYC?
adam
anybody in norther NJ/NYC?
adam

6th Gear
Joined: Sep 2004
Posts: 3,821
Likes: 1
From: Mililani,Hawaii

Former Vendor
Joined: Jan 2004
Posts: 8,337
Likes: 8
From: oh10
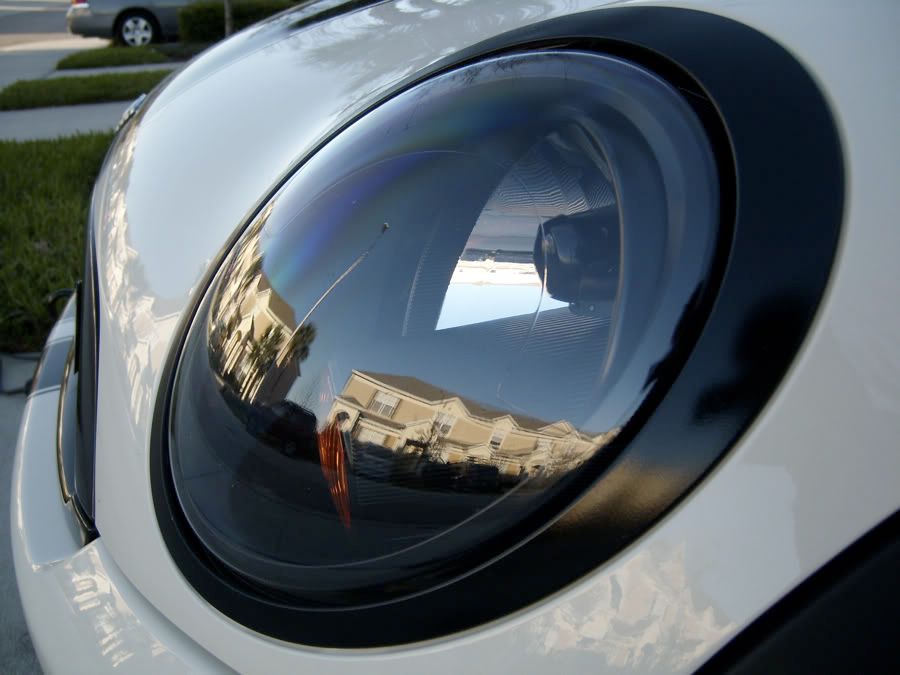
You can see in this pic the flat textured surface. This doesn't act to reflect light...especially since it's pointed sideways. This is what you would paint:
Last edited by Rally@StanceDesign; Feb 10, 2008 at 04:21 PM.
Former Vendor
Joined: Jan 2004
Posts: 8,337
Likes: 8
From: oh10

Great job, checkercoop!!! Now we know what it looks like with the center lamp cap painted. Looks great! Have you run the lights to make sure the center cap paint doesn't have a problem with the heat? What paint did you use there? What paint did you use everywhere else? Did you scuff any of the surfaces?
I would also like to see a shot of these in direct sunlight to show even more detail, if you guys get a chance. Thanks!
I would also like to see a shot of these in direct sunlight to show even more detail, if you guys get a chance. Thanks!
 but I just ran them twice tonight for about 15 minutes each...im not exactly sure how that center cap held up, but i guess I'll see in the morning and I think I'll run my lights in the day when going to school and see how that turns out (like a 30 minute drive)
I used the same paint for every piece...first an automotive primer and then the krylon plastic satin black (figured not to big a deal on the metal because no contact with it...but didnt think about heat)
I scuffed all the pieces (except the center lamp cap) down to the cream plastic (very easy to do) and then primed then painted
Just sanded down the pieces to the cream plastic (use fine sandpaper...normal roughness is too rough...very easy to do the chrome paint is cheap) then I used an automotive primer and then the krylon paint for plastic: Satin black
I say definitely go for it it is such a fun mod to do....just make sure you have a T20 star screw bit...without it you cannot do anything every piece uses this bit...i had a cheapo 1 that stripped so i had to run out and I got a black and decker one
Also if you have halogens there are 3 points on contact that can be a pain unless you find out the best way:
There is only 2 screws (attached to the same piece) that face forward after you take the lens off...I suggest this being the only 2 screws you unscrew for the reflector piece...the 2 other points of contact are best to just pop the ball joints out (their screws are one the back and the top one will still not separate even if you unscrew it...just pop it out of its joint)
Last edited by checkercoop; Feb 10, 2008 at 07:42 PM.

4th Gear
Joined: Sep 2007
Posts: 395
Likes: 0
From: Houston
WOW...what a difference...looks awesome
Ok so I did it!!!!!!
OMG it seriously is one of the best and cheapest mods (yes a little scary to crack open the lights, but what fun it was and how great it looks.
I used the heat gun method...thanks Celia
I actually really like the way it cames out on the halogens
Thank you VicSkimmr for showing how it looks on the halogens
4th Gear
Joined: Oct 2007
Posts: 510
Likes: 0
From: Kansas City
Well i actually never thought about that but I just ran them twice tonight for about 15 minutes each...im not exactly sure how that center cap held up, but i guess I'll see in the morning and I think I'll run my lights in the day when going to school and see how that turns out (like a 30 minute drive)
I used the same paint for every piece...first an automotive primer and then the krylon plastic satin black (figured not to big a deal on the metal because no contact with it...but didnt think about heat)
but I just ran them twice tonight for about 15 minutes each...im not exactly sure how that center cap held up, but i guess I'll see in the morning and I think I'll run my lights in the day when going to school and see how that turns out (like a 30 minute drive)I used the same paint for every piece...first an automotive primer and then the krylon plastic satin black (figured not to big a deal on the metal because no contact with it...but didnt think about heat)

6th Gear
Joined: May 2007
Posts: 1,442
Likes: 0
From: Sacramento, Ca
My thought is that it is a metal piece for a reason, mainly because it is so close to the actual lamp. The rest is plastic with a chrome coating so it must not be subject to the same temperatures than the metal shroud right next to the lamp. I was planning to use krylon satin black for the plastic parts and a high temp paint for BBQ grills for the metal shroud. I also thought with my black/red color scheme that I might do the shroud in red. Now that would be evil looking.
Oooh...I like the sound of that! I think you should do it. I would LOVE to see how that turns out!