When you click on links to various merchants on this site and make a purchase, this can result in this site earning a commission. Affiliate programs and affiliations include, but are not limited to, the eBay Partner Network.
My �04 headlight lenses are getting yellow with age, I plan to use a Meguires polishing kit to try to take some haze out but I�ve used this kit on other cars and found while it�s great for clearing up scratches that cause haze/opaqueness, not so much for discoloration.
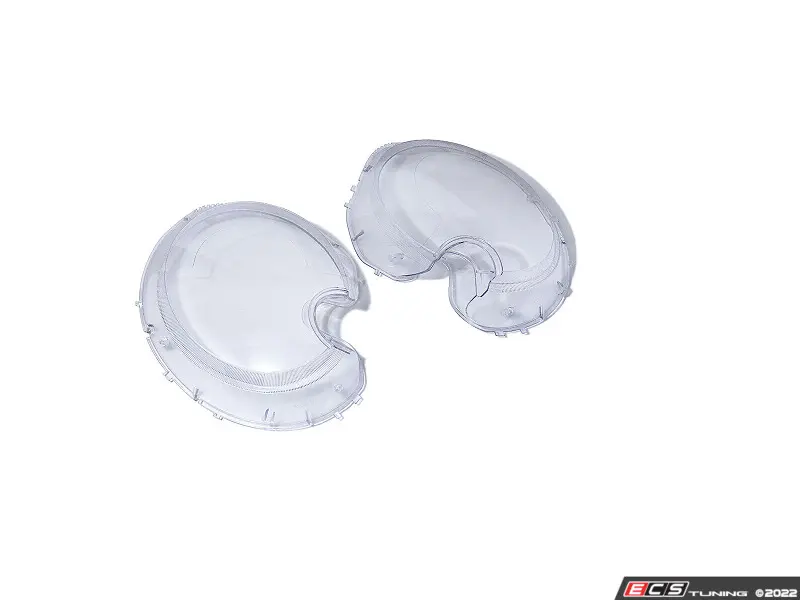
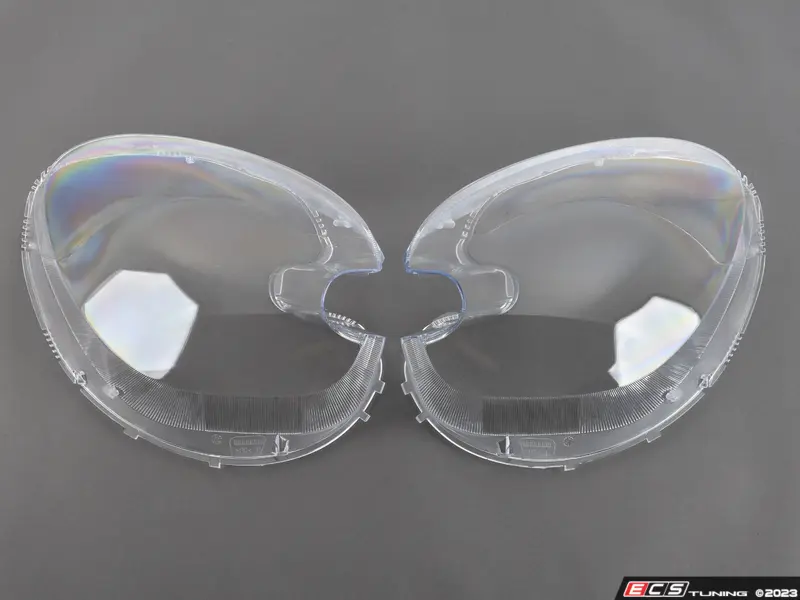
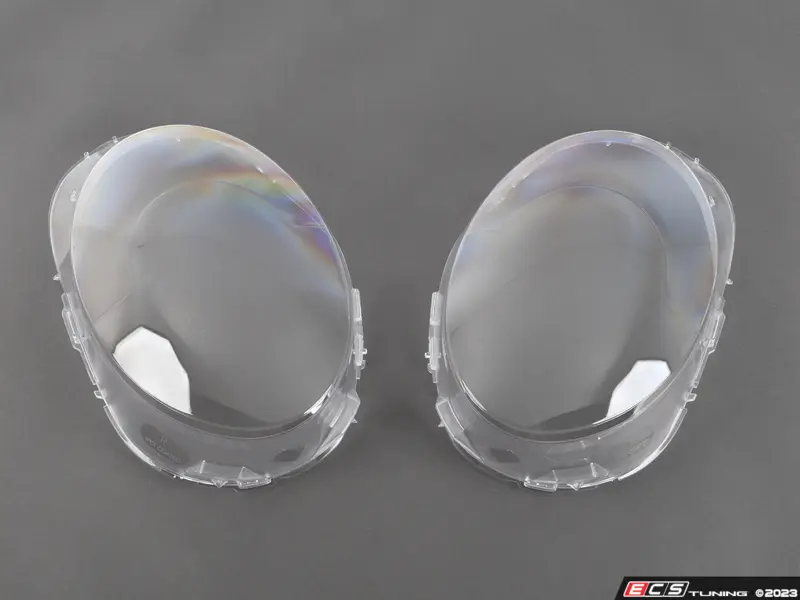
Is the lense/cover replaceable? On most other cars it�s not, or only available on a complete new headlight assembly.
Not bothered by the looks, just trying to improve the light performance, otherwise I�m looking at adding aux/driving lights. And on a high mileage �04, I�m not looking to put major $$$ into upgrades. I love the looks of the factory �rally lights� but just too pricey.
As a weird/temporary hack, put bug spray on a rag, and rub. Clears it up quickly, though the 'clear' doesn't last.
Cheap/fast while you find a true fix.
a quick 15 minute polish with my Mothers kit (I think I called it Meguires, but it’s just polishing compound, applicator pad and a foam buffing ball that fits on a drill) made a huge difference.
I also tried it on the rear light covers which were much more opaque but seemed to make no difference.
after the polish, I hit them with some Plexus spray. It’s all I’ve used on motorcycle windscreens & face shields.
If it’s good for 6 months I’ll gladly do it again.
And anyone got the p/n or link to factory driving light brackets? I may look into that plus the ‘Hella’ cool driving lights. Or is anyone making LED driving/rally lights with the old school chrome housings?
If you dig the looks of the OEM MINI Driving lights but don't want to pay the big price tag you'll need a set of these brackets in order to mount a set of lights up front. While this kit is only the two mounting brackets, it opens up lots of options for using Hella, Piaa, IPF or other brands of lights that are more affordable than the OEM MINI driving lights. Sold as a set of two. Designed to work with any factory installed grill on the Gen 1 MINI. Does NOT include any lights, wiring, etc.
Got a link for ECS replacement lens? ... thank you in advance .
Would be great to buy new lenses alone.... the "joey mod" shows us it is not to difficult to change a lens... and polishing is "ok" at best... the plastic gets changed below the surface... an new lens (or entire assy) is really noticeable on a car.
Here was one that I was looking at... but the price is not so low that I'll be the 'guinea pig' at this point.
yes if you need more i will give you some discount
mountain horse:
Do you have photos of these lenses?
I do have PayPal.
Thank you for your follow up.
Is there a discount for quantities of 10 right and 10 Left?
-----Original Message-----
From: oemxenonshop <oemxenonshop@gmail.com>
To: mountain horse
Sent: Thu, Mar 25, 2021 10:27 pm
Subject: Re: Headlight lens cover.
Hello Again
Thank you for your detail info.
This Car two lens cover price is $240 usd shipped to your home (include the shipping cost to USA)
We choose usps, 18-25 working days you can get it .
if you accpet i will give you payment detail.
BTW do you have paypal account?
mountain horse
On Thursday, March 25, 2021, 11:46:51 PM EST, oemxenonshop <oemxenonshop@gmail.com> wrote:
Do you have your car picture ? i need confirm it .
mountain horse:
Hello,
I'm looking for a pair of new headlight lenses for my 2006 Mini Cooper S with the factory Zenon HID headlamps...
1) I am located in California, USA postal code
2) My car is a 2006 Mini Cooper-S produced in January of 2006
3) I need just the headlight lenses for this car.
4) 2 lenses: 1-each Left and 1-each right
Thank you for your time,
mountain horse
1. Please let us know where are you come from (We can check shipping cost to your place directly with this information.)
2. Email us the production year and model of your car.
3. It's better to show us the picture of the part you need or tell us the part number.
4. The order quantity you need.
.
Last edited by mountainhorse; Jun 11, 2021 at 07:54 PM.
Wow, $120 each is kinda high for pieces of plastic. Did anyone ever find them on ecs' site someone mentioned above? I see lots of assemblies, bulbs, laminates, and trim pieces, but no plastic lenses.
I sanded mine with 400, 800, 1500, and then compounded and polished. Over a year ago, and they still look great. Mine is garaged though - probably makes a difference. When I eventually get my turbine sprayer to start repainting bumpers, doors - going to resand them and do a clear coat.
Are you sure they need replaced? These were mine before I worked on them. Started with 320, then 500, and finally painted them with 2K clear. Look like new, and it only took a couple hours of work.
We never had the lens alone, they were never offered in Genuine MINI. We did have the lens for the Rally lights for Gen 2 MINIs. Maybe thats what you were thinking about. We did have a OEM+ option but due to covid alot of the headlights from TW went on Back Order aka Helix and pretty much most aftermarket headlights.
Hi this worked on my 2004 truck mix deep woods off ( bug spray) with kids SPF 70 or higher sunscreen and add elbow grease to your head light covers it's a 30min job and they look better..
Long way is wet sand paper 3000...and 5000 using water..then alcohol to clean off ..then liquid polish them clear....use auto wax for protection...
hope that helps
One word of caution, if you're sanding the lense then what you're taking off is the UV coating. I'm not sure 3000 will be aggressive enough, but it you're only polishing afterwards it won't matter since you'll be doing it again soon.
If sanding you, you need to replace the UV coating by spraying with 2K clear. Otherwise the lenses will just yellow again quickly.
2k Clear does wonders...one of a million videos on it
Problem for me is that the plastic is not just changed on the surface... If you look closely ... an aged lens has issues IN the plastic over the years.... can't be polished out.
My �04 headlight lenses are getting yellow with age, I plan to use a Meguires polishing kit to try to take some haze out but I�ve used this kit on other cars and found while it�s great for clearing up scratches that cause haze/opaqueness, not so much for discoloration.
Is the lense/cover replaceable? On most other cars it�s not, or only available on a complete new headlight assembly.
Not bothered by the looks, just trying to improve the light performance, otherwise I�m looking at adding aux/driving lights. And on a high mileage �04, I�m not looking to put major $$$ into upgrades. I love the looks of the factory �rally lights� but just too pricey.
Just did this last night. VERY easy. Go to Lowe's or Home Depot or ACE and get the following:
1) Wide Painters tape (easier than the skinny tape)
2) Cheapest drop cloth you can buy
3) If you don't have one, a razor blade
4) 400 and/or 600 grit wet sand paper (or block...I like the little foam sanding blocks better...you can also get them from an autoparts store). 400 is all you need. My 400 block was toast, so I used 600
5) Can of 2k Clear Coat. If you are painting inside a garage, I'd suggest a respirator. I was in the driveway and I used my shop fan to make sure the wind was to my back. 2k Clear contains Isocyanates, so beware.
Tape off headlight, cut excess tape with razor blade. You can see the line to cut under the tape.
Get a bowl of soapy water, soak your block/sandpaper in the water for a few minutes
Grab a couple towels.
Wet one towel and wet the headlight
Sand away to hearts content. More is better. Keep going back for more soapy water, too. When you think you're done, have a beer and hit it again. After you're done, shoot some hoops, come back and hit it again. Not sure you can sand too much. Keep it lubed, sand. Wipe with towel to see if you're getting a uniform haze.
Once you are content, dry with leaf blower and towel. Paint hates water. If you don't have a leaf blower, then you'll need to wait until its completely dry.
Next Tape drop cloth to painters tap around headlight. Use a pair of scissors to cut your holes and painters tape to tape the drop cloth to the outside of the lens on the painters tape that is already there.
Before painting, I wiped mine with alcohol before applying 2K clear. I'm sure MEK or some other solvent will work fine as well.
Lay down a light coat of 2K clear. Let it flash for 10 minutes, maybe longer if its cold outside its like 1000 degrees right now, so 10 minutes was enough. I wouldn't let it flash for more than 15 minutes before coat 2. Minimum would be 5 minutes.
Lay down a medium coat. As it dries it should either be clear or have a slight orange peal look to it, if it looks hazy, you didn't put it on thick enough, no worries, just put the next coat on thicker. Let flash for 15 minutes
Lay down another medium coat. As it dries is should REALLY be clear. If its a tad foggy, like there is water in there, it will clear up, you probably didn't let the first coat flash long enough.
This was 3 coats, 1 light, 2 medium. They look new.
I tried the Mothers polish kit on my Tahoe and they turned out good. This method was a third of the effort and looks a good bit better. I mean, it looks new. Plus, you can now wax or ceramic coat them and they should last a LONG time.
Before I started, painters tape on
After about 20 minutes of 600 grit wet sanding. I was just chilling, it was a lovely evening. No big hurry.
I
Next morning, after 3 coats of 2K clear. The entire job took about 1,5 hours. It was hot as hell and humid as heck. I barely broke a sweat.