
Interior/Exterior Gauges and other bits Installed


Gauges and other bits Installed
G2X is it's most basic is GPS based track mapping tool that measures and records lap times. For all the details of what the G2X can do please see http://www.g2extreme.com/
Recently we installed such a system in my mini, GNAT, and of par for the course we went a bit overboard with the specs and implementation. Besides the basic system with it's dash display we added a gauge cluster. Gauges are housed in the Craven Speed Flexpod. Thanks to Kellen at Craven for creating 66mm cups from a conversation we had at AMVIV.
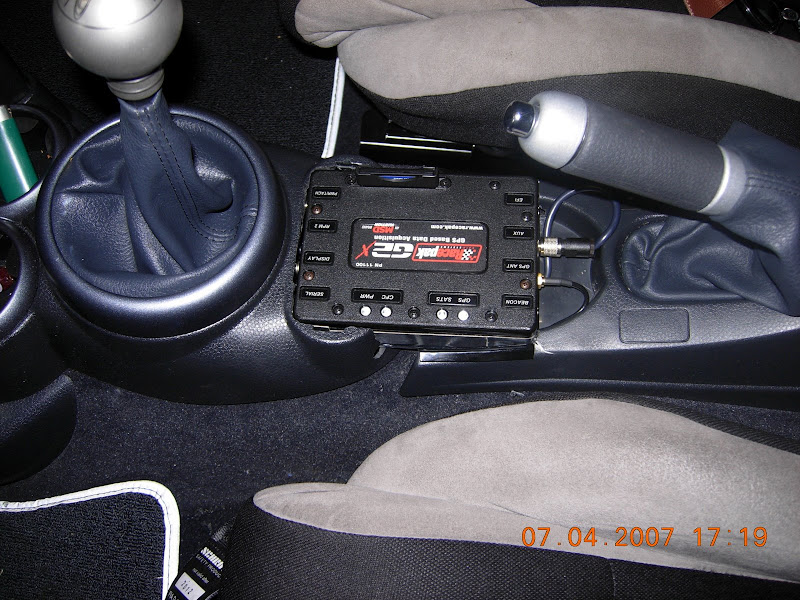
The base unit was mounted behind the shifter. Since I no longer have heated seats or electric mirrors that switch panel could be sacrificed.
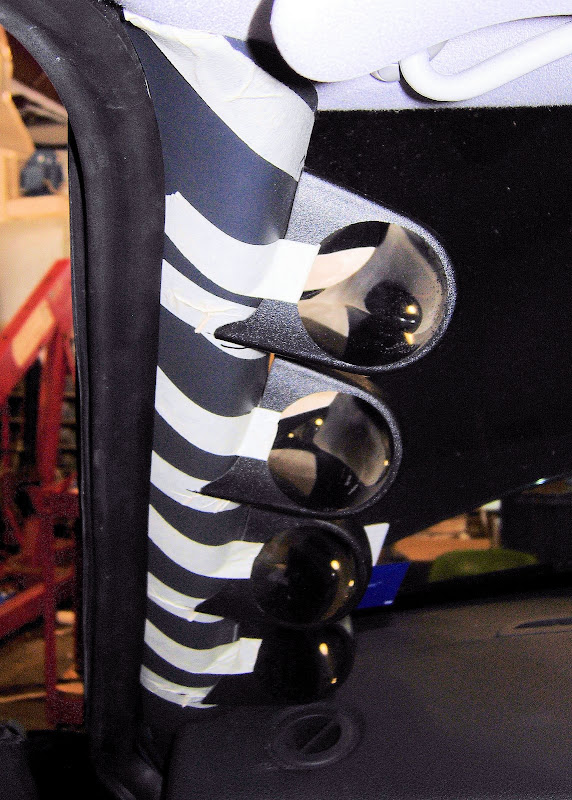
To avoid the gauge clutter around the steering wheel and keep the G2X dash display visible the other gauges are house in a custom built A Pillar. Starting with am OEM pillar generic off the shelf 66mm pods were fitted, The picture below does not due the detail and finish of the pillar justice.
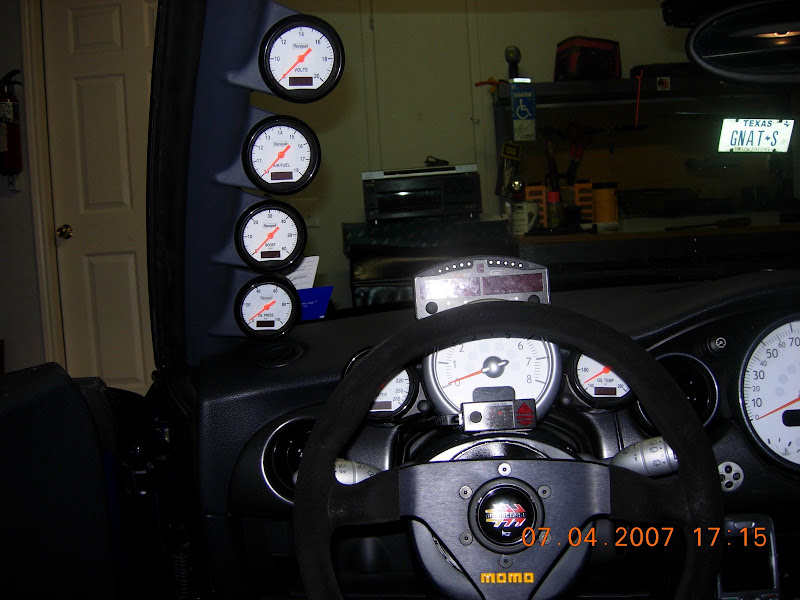
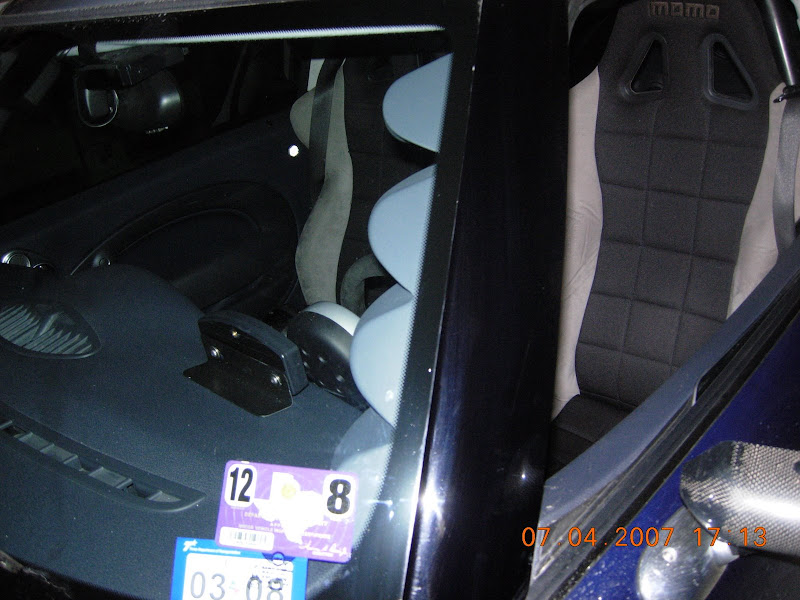
Sitting in the drivers seat the pillar is not as bulky as it looks in the photo. The front section visible through the windscreen is also finished to a very high standard. The back of the G2X Dash display is also shown here.
Many of you will think this is overkill, yeah it is, it's over the top, it's excessive, that I must be :nuts:. Yeah Its all true. :D
Recently we installed such a system in my mini, GNAT, and of par for the course we went a bit overboard with the specs and implementation. Besides the basic system with it's dash display we added a gauge cluster. Gauges are housed in the Craven Speed Flexpod. Thanks to Kellen at Craven for creating 66mm cups from a conversation we had at AMVIV.
The base unit was mounted behind the shifter. Since I no longer have heated seats or electric mirrors that switch panel could be sacrificed.
To avoid the gauge clutter around the steering wheel and keep the G2X dash display visible the other gauges are house in a custom built A Pillar. Starting with am OEM pillar generic off the shelf 66mm pods were fitted, The picture below does not due the detail and finish of the pillar justice.
Sitting in the drivers seat the pillar is not as bulky as it looks in the photo. The front section visible through the windscreen is also finished to a very high standard. The back of the G2X Dash display is also shown here.
Many of you will think this is overkill, yeah it is, it's over the top, it's excessive, that I must be :nuts:. Yeah Its all true. :D
The A-Pillar is a one of. We took an OEM pillar cover and grafted in generic Greedy gauge cups.


OVERDRIVE
Joined: May 2005
Posts: 8,233
Likes: 127
From: San Francisco
Nice job! Are those the white speedo and tach dials from Outmotoring? This is the first that I've seen how they look. Any more pics of them?
Trending Topics


Always ahead of the curve, Nate.
Gnat looks fantastic!
Personally, I would have wanted a better view of the altimeter and the vertical speed indicator, but I tend to have trouble landing.
Gnat looks fantastic!
Personally, I would have wanted a better view of the altimeter and the vertical speed indicator, but I tend to have trouble landing.
__________________

At this time I have no other pictures.
There was probably a good 40 some hours in fabbing the pillar. I'm very lucky to have a fab and paint guy that is this good at my disposal.
The picutres do not do it justice, all that have seen it are amazed at the OEM type finish.
The picutres do not do it justice, all that have seen it are amazed at the OEM type finish.
7th Gear
Joined: Sep 2006
Posts: 1,559
Likes: 0
From: Orange County NY
Just amazing...
Can't wait to see some night time pictures.
Can't wait to see some night time pictures.

I want that OEM look A-pillar gauge pod sooo bad!!! Why won't a vendor sell one? Screw the side impact air bags!
I assume the gauge pod was hand made fiberglass? Did he make an extra mold!?
I assume the gauge pod was hand made fiberglass? Did he make an extra mold!?
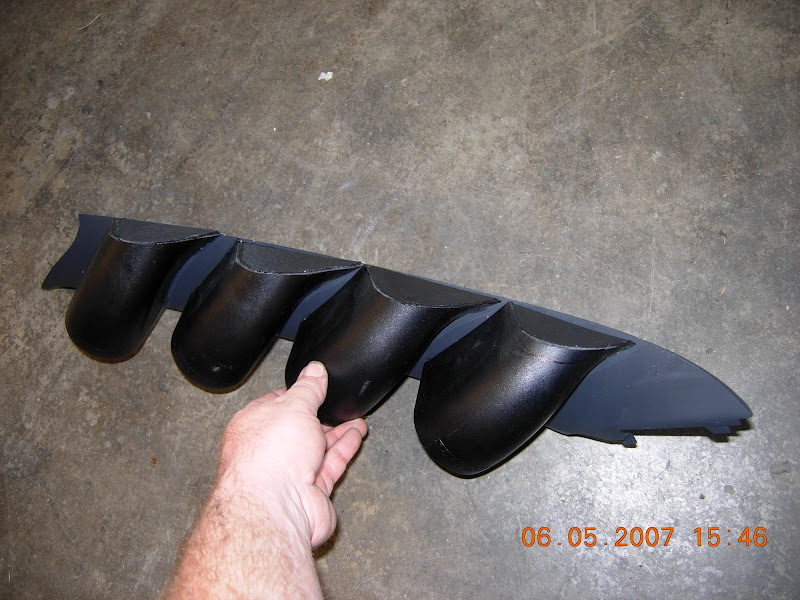
It's not hand made fiberglass. We took an OEM pillar and mated 4 generic Greddy A pillar cups to it. The gauges are 2 5/8" or 66mm and the largest cups we could find were 60 mm there was some relief work in that area as well. The Craven cups required a very light pass with emory cloth to remove the interior anodizing and the gauges were still a bit of a tight fit, they won't be moving around.
We started off with these:

After some intial trimming this is a mockup to see how placement would work.
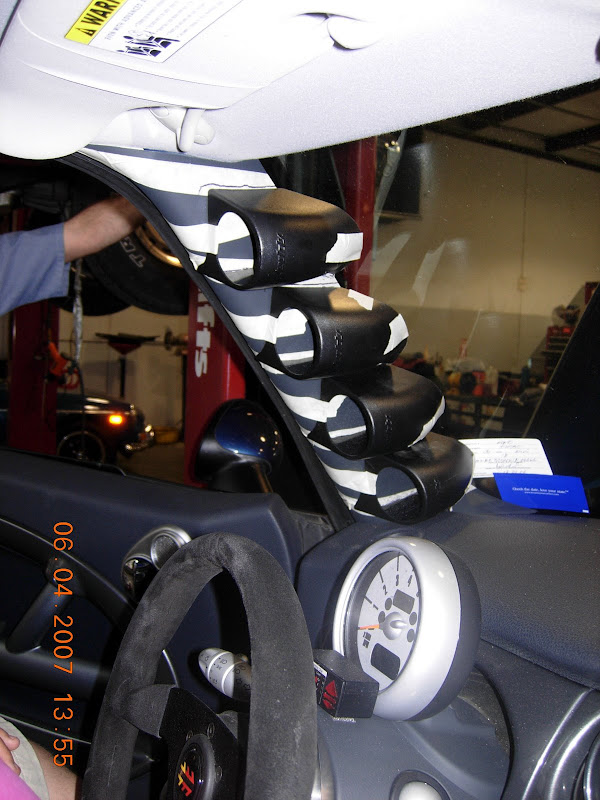
This will give you some idea of the amount of trimming reqired.
The entire rear of the pod had to cut off and new ones fabricated.
This is the best shot I currently have of the finished product.

From top to bottom.
Volts
Air/Fuel Ratio
Boost
Oil Pressure
In the Craven pod
Water Temp
Oil Temp
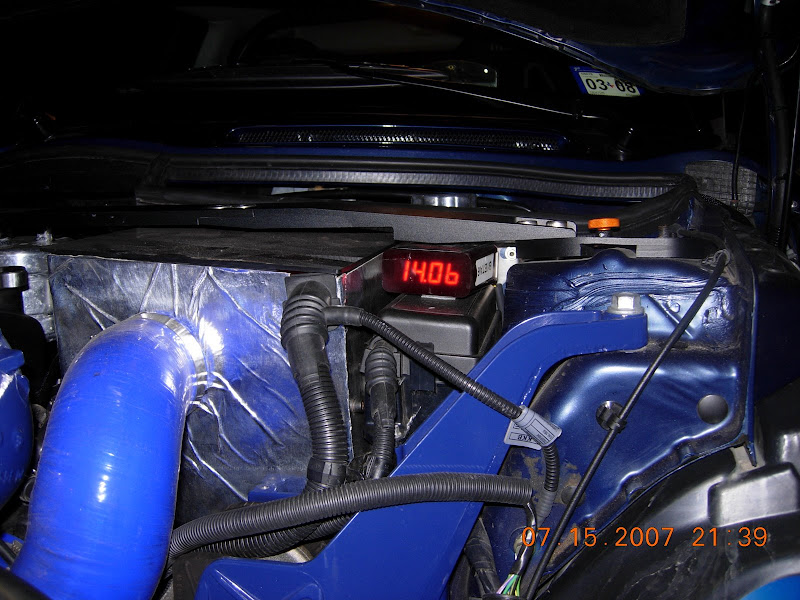
Along with the analog type needle there is a digital readout located in the lower face of the gauge. The A/F R kit also contains a module with a digital readout that was placed under the bonnet. This allows for live readings during dyno testing. As stated in the first post all the data is also logged via the G2X brain on a CF card. A 512MB card, the upper size limit the unit can handle, will hold approximately 25 hours of data. A 25 min track session took just over 1MB on the card.
Last edited by gnatster; Jul 15, 2007 at 10:49 AM.


OVERDRIVE


Joined: May 2003
Posts: 7,926
Likes: 40
From: Greensboro, NC
 ...can you read:
1-calculated load value?
2-AIT in intake manifold?
3-AIT pre/post intercooler?
4-EGT?
5-WMI pressure?
6-timing advance?
7-GPS calculated speed?
8-fuel trim?
9-read/erase error codes?
Ok...you got me on the G2X...been trying to get one of those for a couple of years now but the price keeps going up...

Still got ya beat ...can you read:
1-calculated load value?
2-AIT in intake manifold?
3-AIT pre/post intercooler?
4-EGT?
5-WMI pressure?
6-timing advance?
7-GPS calculated speed?
8-fuel trim?
9-read/erase error codes?
Ok...you got me on the G2X...been trying to get one of those for a couple of years now but the price keeps going up...
...can you read:1-calculated load value?
2-AIT in intake manifold?
3-AIT pre/post intercooler?
4-EGT?
5-WMI pressure?
6-timing advance?
7-GPS calculated speed?
8-fuel trim?
9-read/erase error codes?
Ok...you got me on the G2X...been trying to get one of those for a couple of years now but the price keeps going up...
Error Codes, yes, the Auterra software in my Treo does that.
I'm not sure about the rest, still learning what Auterra can do for me.

IT IS overkill, over the top, excessive, and you are nuts BUT WE understand and you are not alone this is NAM after all.

5th Gear
Joined: Mar 2007
Posts: 678
Likes: 5
Dual A-Pillar Gauge Cluster
I was looking into this Gauge pod before going with the Craven.
http://www.minispeed.co.uk/new_mini/...duct&id=mrb164
The picture shows the British version opposite side but they do make it for the left A-Pillar
Available in black as well as Carbon Fiber.
I've installed the Volt/Boost and Air/fuel ratio gauges.
Good Luck!
http://www.minispeed.co.uk/new_mini/...duct&id=mrb164
The picture shows the British version opposite side but they do make it for the left A-Pillar
Available in black as well as Carbon Fiber.
I've installed the Volt/Boost and Air/fuel ratio gauges.
Good Luck!
Last edited by MidniteCoop; Jul 20, 2007 at 02:07 PM.

Peace Keeper
Joined: Dec 2006
Posts: 2,747
Likes: 1
From: Defiance, Ohio
#2
Here is the start of my version of gnatster's gauges. I have to wait because I have to get two more greddy pods in to finish this up. I will be forming the last two pods soon and then it is time to find the proper bondo (maybe fiber-glassing) and lastly I think that I am going to go with an ultra flat black and do all of my pillars and other "upper-half" interior pieces of trim in the ultra flat.