
JCW "Flap Mod" Question


Thread Starter
|
1st Gear
Joined: Nov 2018
Posts: 21
Likes: 2
JCW "Flap Mod" Question
Hello NAM,
Okay - I don't want to beat a dead horse here, but I have a question about removing the flap in the intake of my '06 JCW.
I have been looking through the site for a few days and all I can find are people saying that they removed the flap, no clear instructions on how to do it. I looked on youtube hoping for a video, but all I could find was a video from Madness Motorworks where they leave the flap in, but jam it open with the linkage. I would much rather just remove the flap altogether.
So, is there a definitive how-to on this? Is it pretty straight forward once you have the top of the intake off and on the table?
I know this is a pretty old topic, but I just bought my first Mini and this stuff is all new to me!
6th Gear
Joined: May 2007
Posts: 1,305
Likes: 117
From: Gulf Coast FL
Hello NAM,
Okay - I don't want to beat a dead horse here, but I have a question about removing the flap in the intake of my '06 JCW.
I have been looking through the site for a few days and all I can find are people saying that they removed the flap, no clear instructions on how to do it. I looked on youtube hoping for a video, but all I could find was a video from Madness Motorworks where they leave the flap in, but jam it open with the linkage. I would much rather just remove the flap altogether.
So, is there a definitive how-to on this? Is it pretty straight forward once you have the top of the intake off and on the table?
I know this is a pretty old topic, but I just bought my first Mini and this stuff is all new to me!
Okay - I don't want to beat a dead horse here, but I have a question about removing the flap in the intake of my '06 JCW.
I have been looking through the site for a few days and all I can find are people saying that they removed the flap, no clear instructions on how to do it. I looked on youtube hoping for a video, but all I could find was a video from Madness Motorworks where they leave the flap in, but jam it open with the linkage. I would much rather just remove the flap altogether.
So, is there a definitive how-to on this? Is it pretty straight forward once you have the top of the intake off and on the table?
I know this is a pretty old topic, but I just bought my first Mini and this stuff is all new to me!
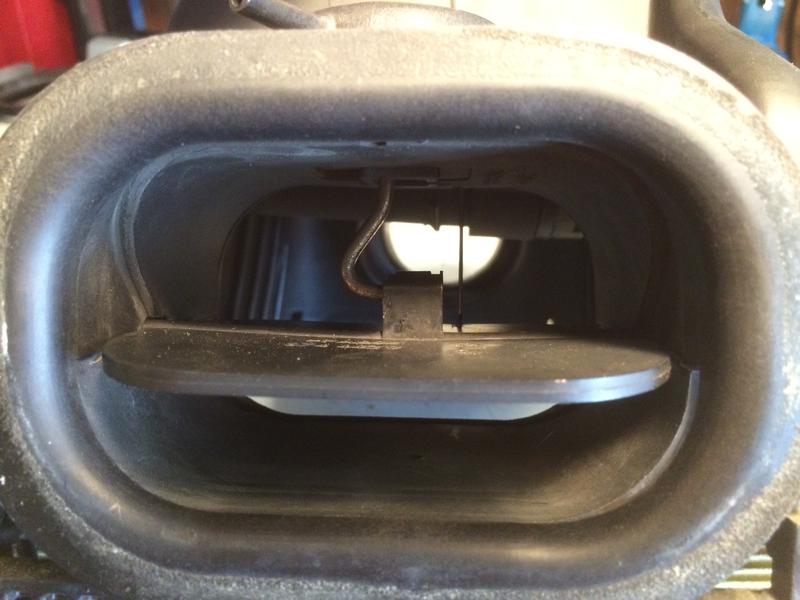
Or you could just remove the flap itself and cap the bypass valve vacuum line (27), leaving the dead equipment in the airbox.

This is the actual flap, looking into the airbox.

5th Gear
Joined: Mar 2018
Posts: 795
Likes: 122
From: SoCal
Or just remove the butterfly...period.
Leave everything else connected. That way, the engine management system thinks everything is working properly.
JUST remove the four screws that hold the top of the oval part of the housing (that covers the butterfly), remove the butterfly, replace the housing cover, reassembly the top of the airbox to the lower part of the airbox. Reconnect all vacuum and electrical connections.
I did this right after buying my JCW. Been good ever since.
Mike
6th Gear
Joined: May 2007
Posts: 1,305
Likes: 117
From: Gulf Coast FL
The car won't know any different unless there is a vacuum leak.

Thread
Thread Starter
Forum
Replies
Last Post