
How To Install a DSP Amplifier behind Dashboard – F56 – Base Audio – Match Up 7BMW


Thread Starter
|
Neutral
Joined: May 2023
Posts: 1
Likes: 2
From: Amsterdam
Install a DSP Amplifier behind Dashboard – F56 – Base Audio – Match Up 7BMW
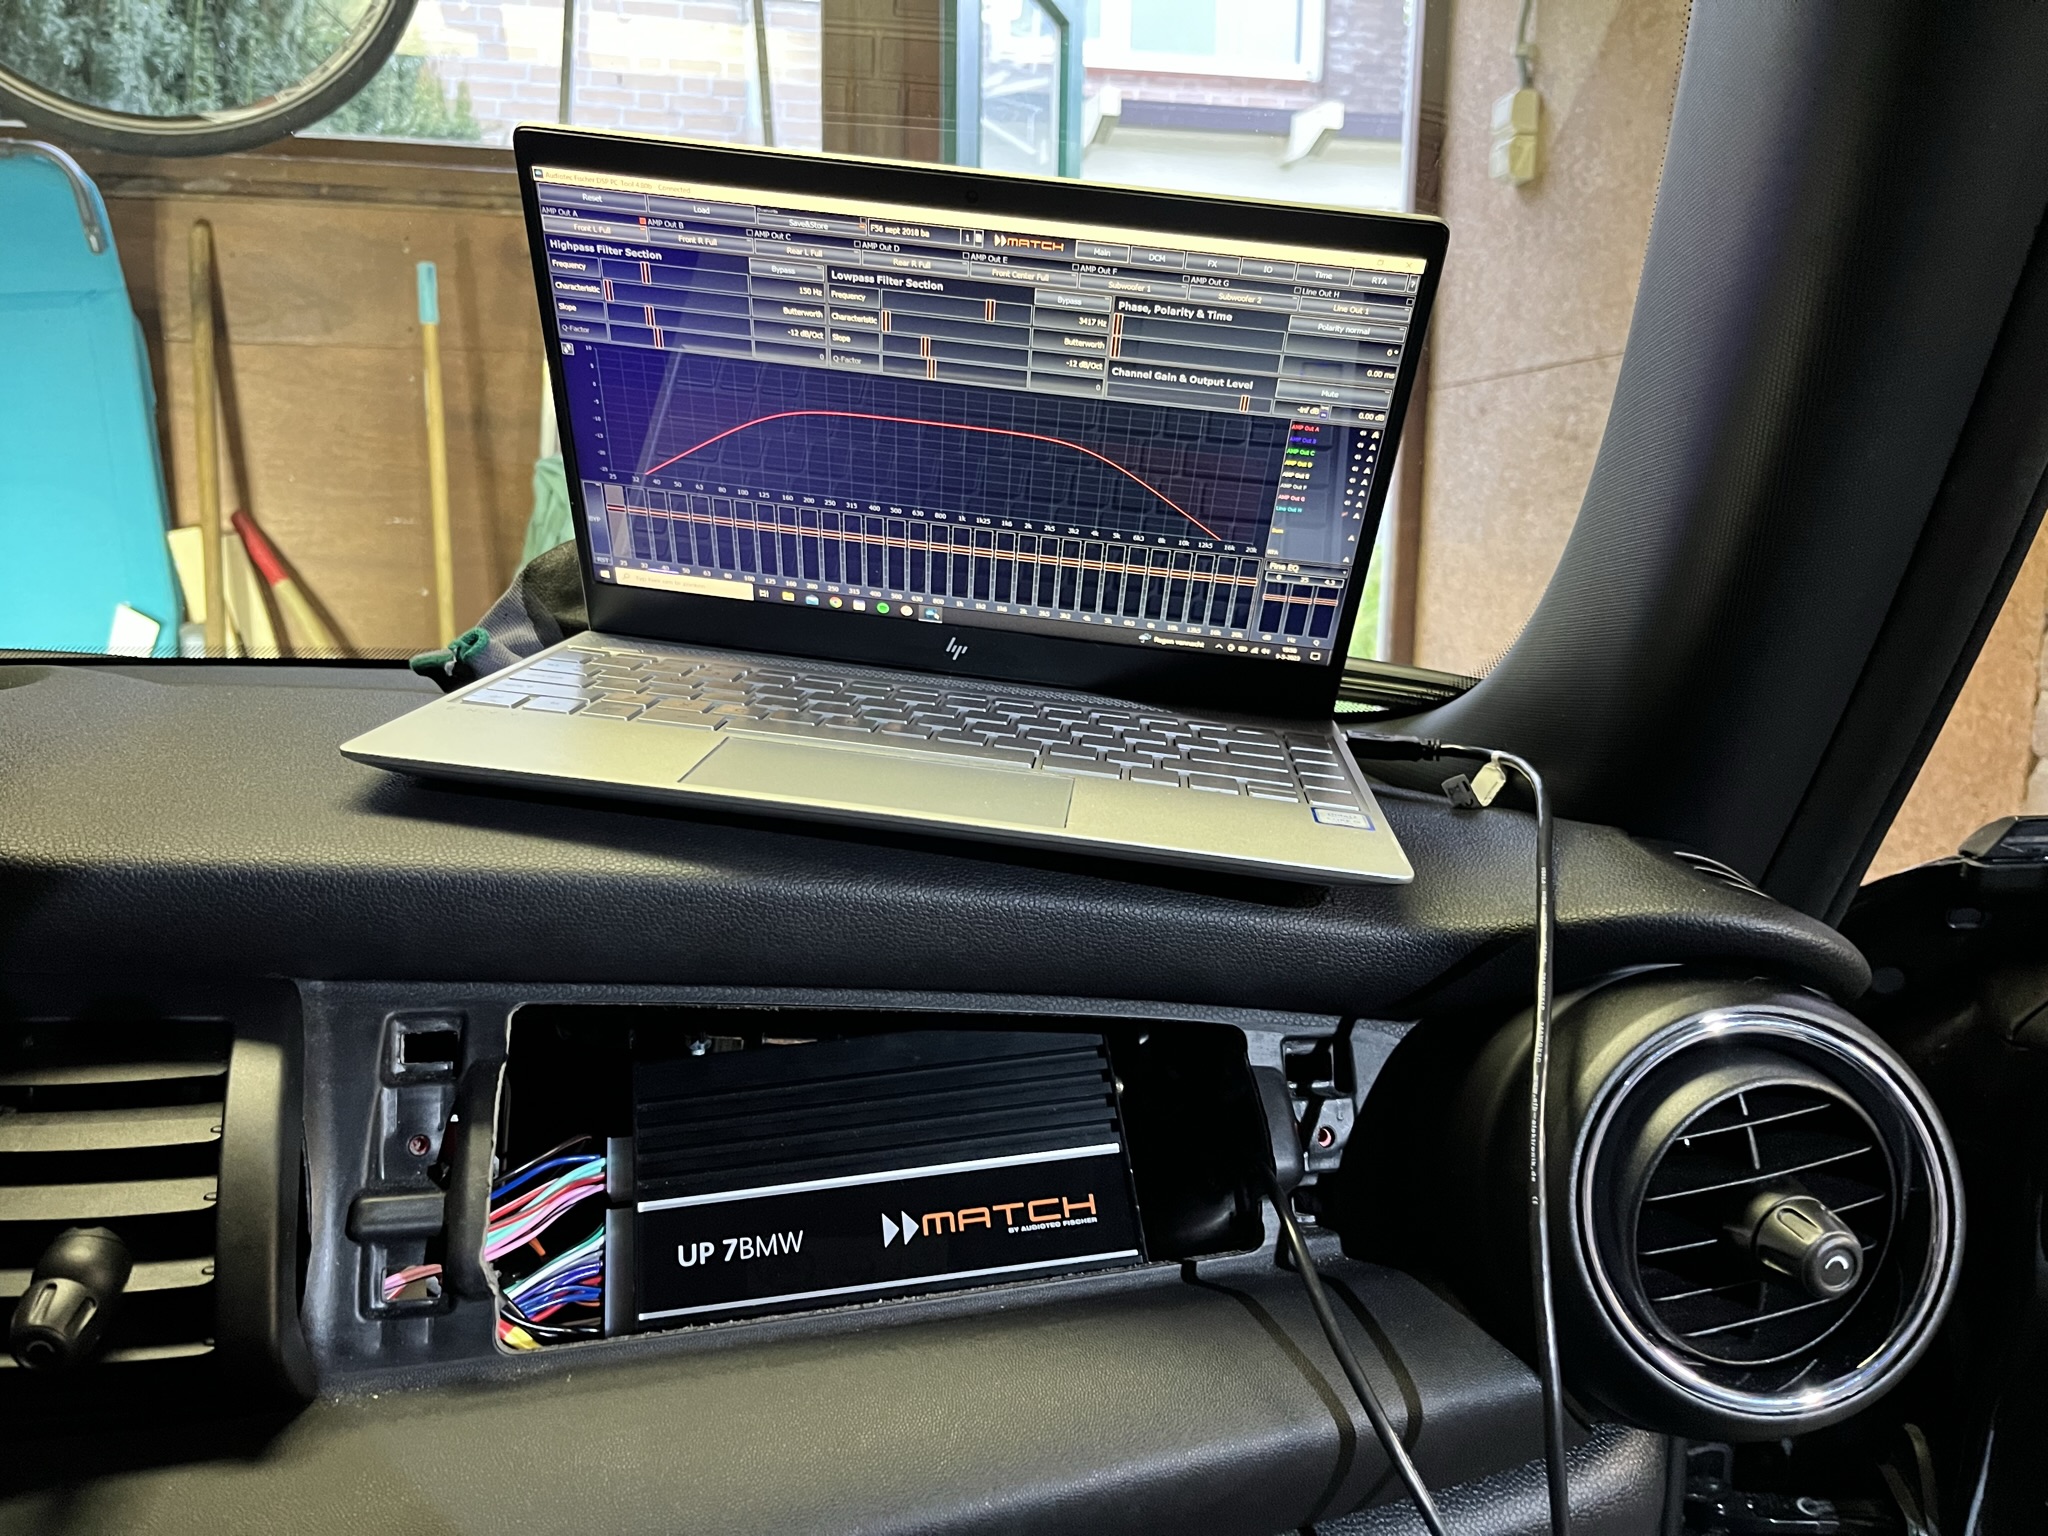
I recently installed a Match UP 7BMW DSP Amp in my F56 Mini Cooper LCI – Sept. 2018.
There are many aftermarket amplifiers available, which are plug and play IF you already have a HIFI or HK amplifier installed. My mini came with Base (or Stereo) audio, which makes the task a bit more difficult.
One option is to retrofit the wiring harness for the HIFI or HK option, but that means you have to basically take apart half the car...
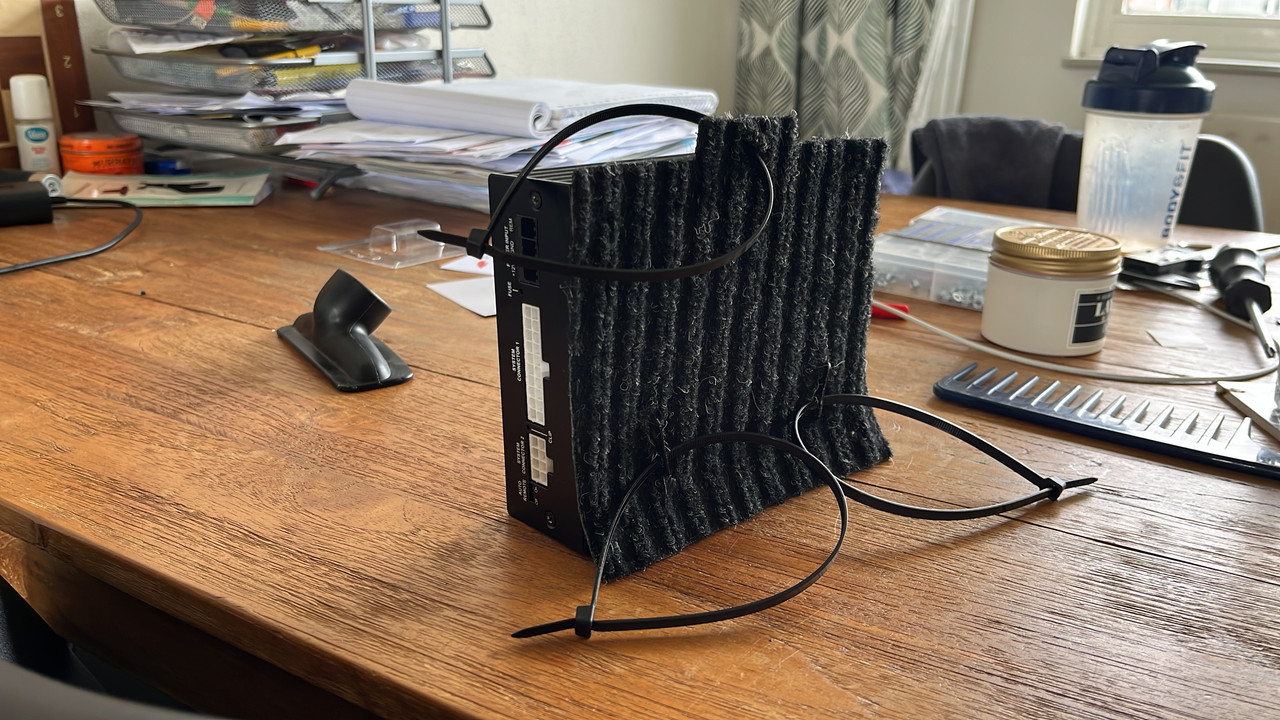
So I came up with a different approach, which looks like this once installed:
Open…
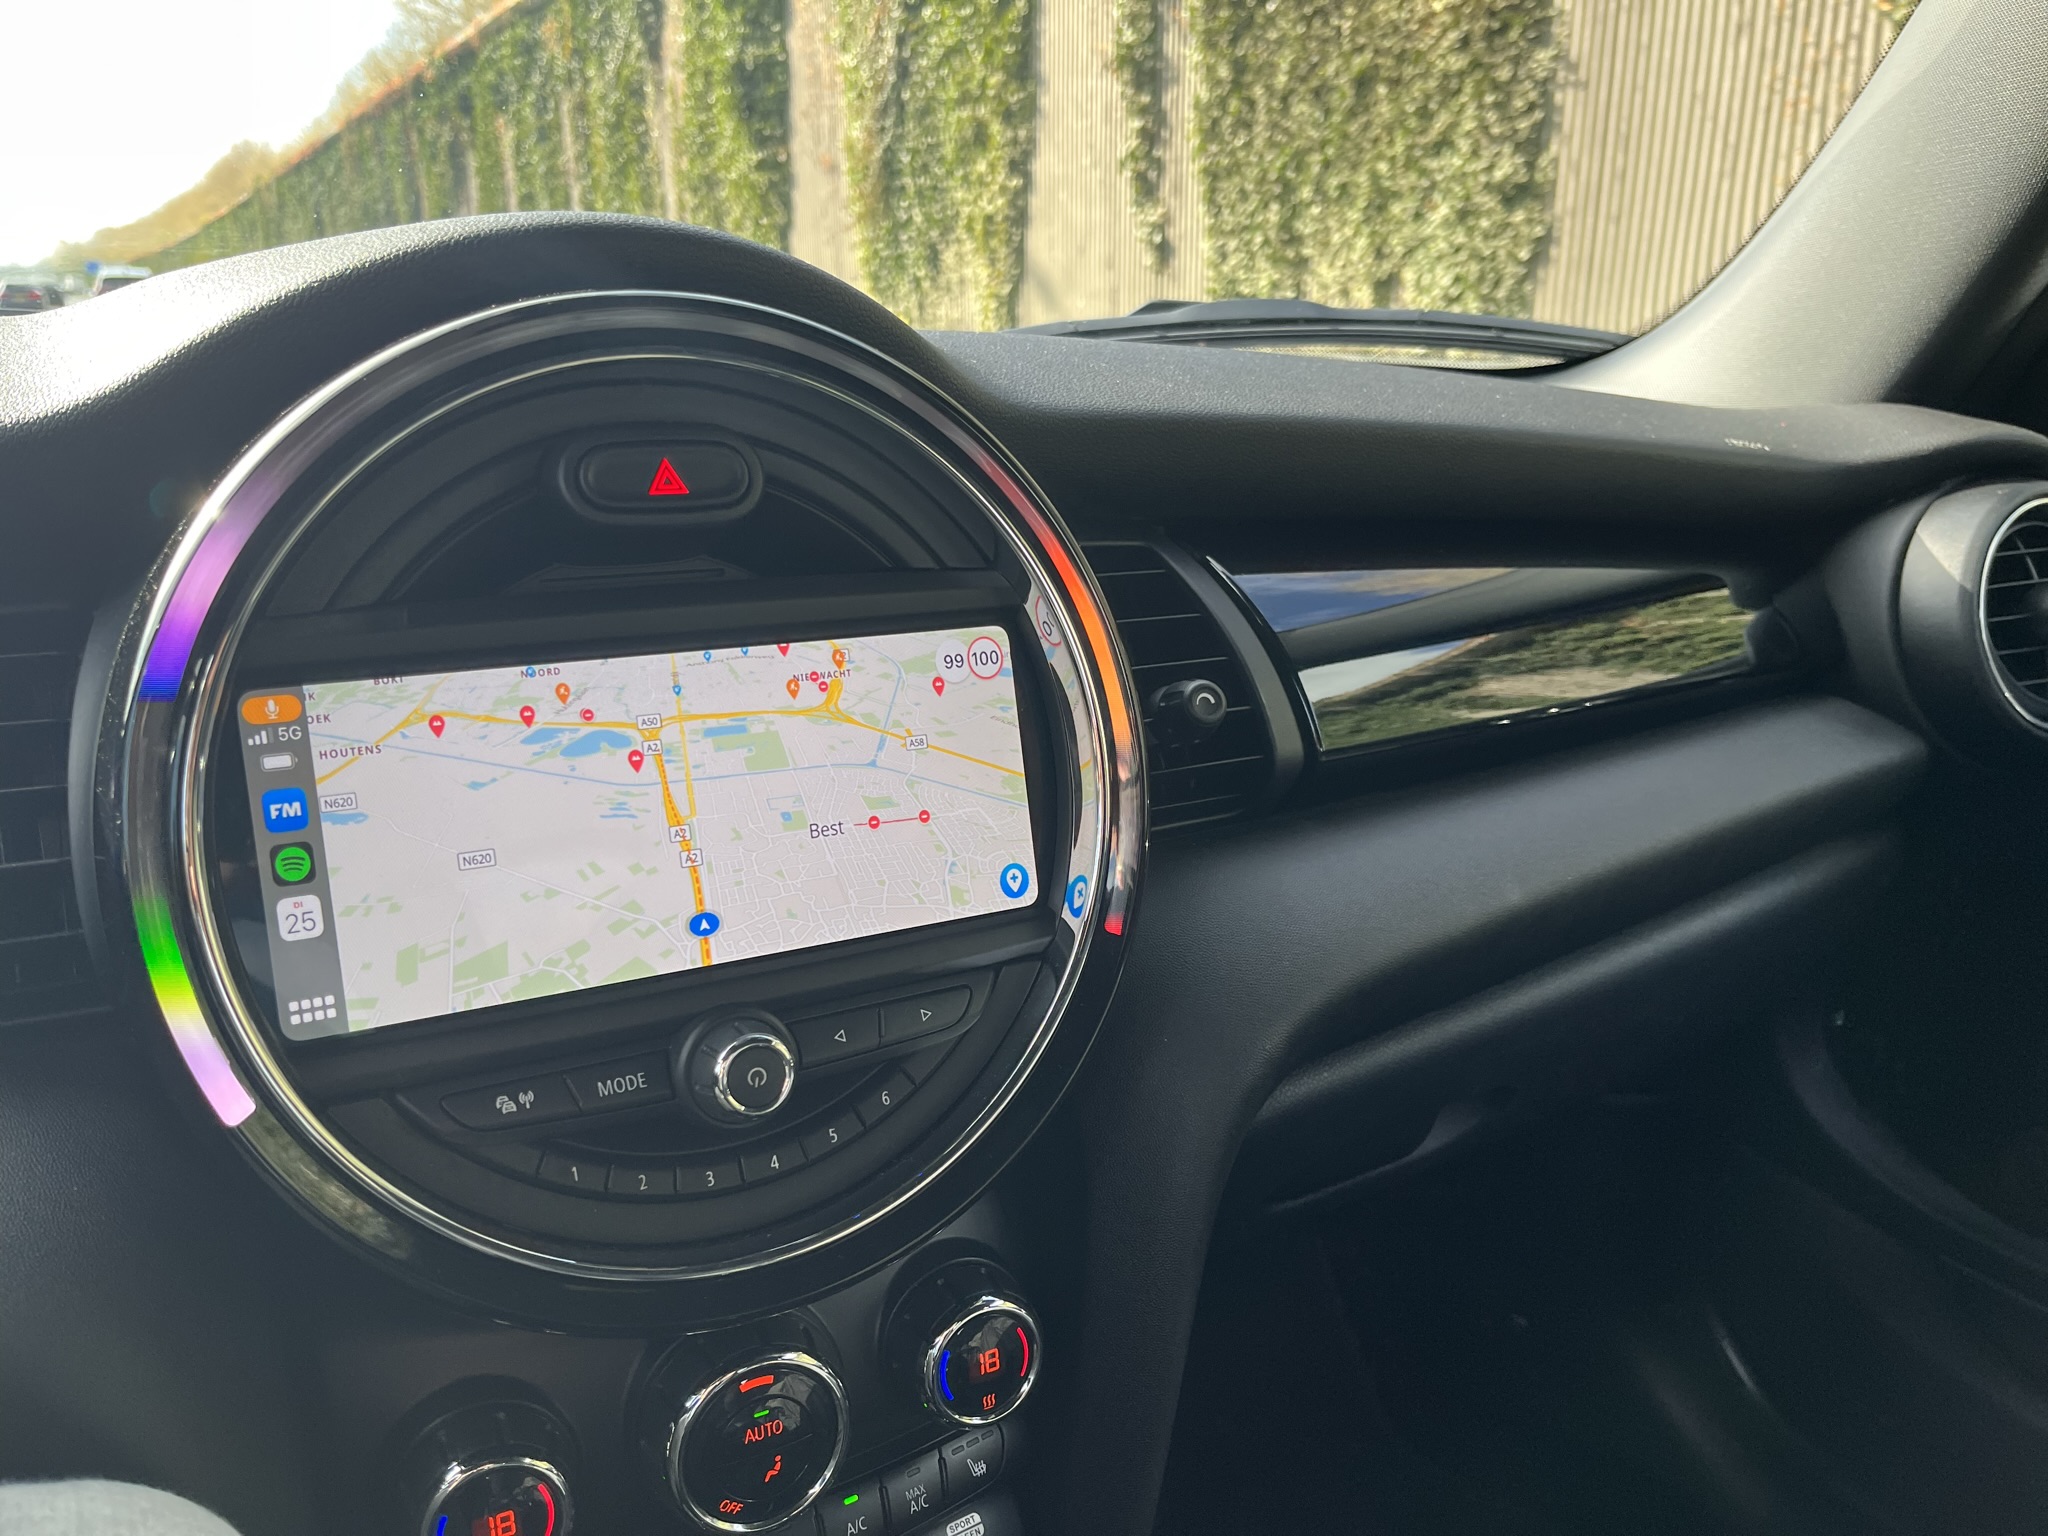
And closed:
To install the amp in this manner, I took the following steps:
1. Make a custom wiring harness
2. Connect it to the head unit, the fuse box and the front speakers
3. Code the head unit to HIFI
4. Adjust a bit of the trim panel above the glovebox for easy access
*I also posted this on the Dutch forum, so excuse me if you find some Dutch words in the pictures below. Google is your friend
__
1. The wiring harness
To give you an idea, here is a simplified version of the wiring:
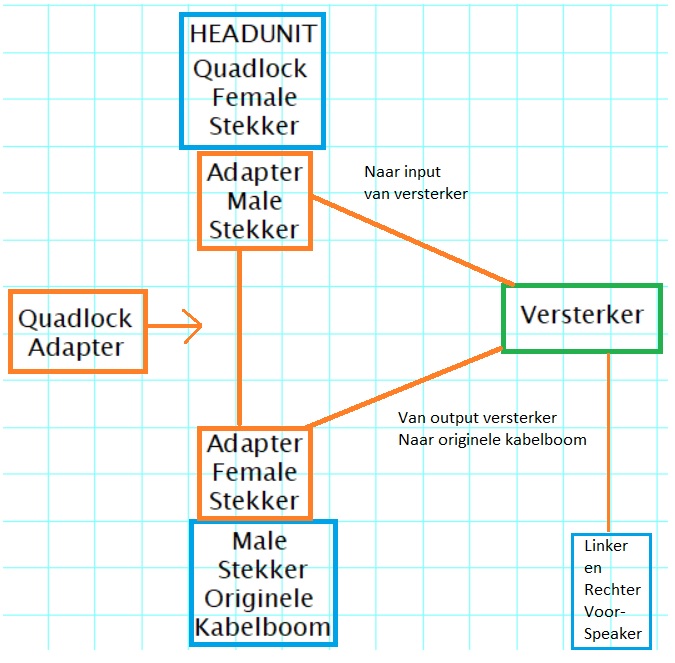
It’s important to know that the wiring originally comes from the head unit and then directly to the speakers in the following manner:
Soundwise, this is far from ideal. With the DSP amp, we want to give each front speaker their own output channel from the amp.
__
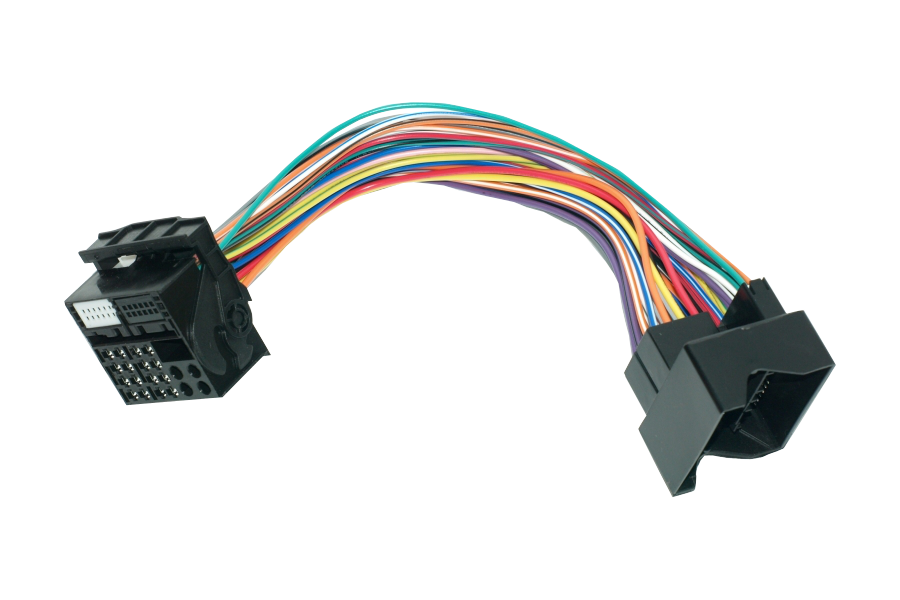
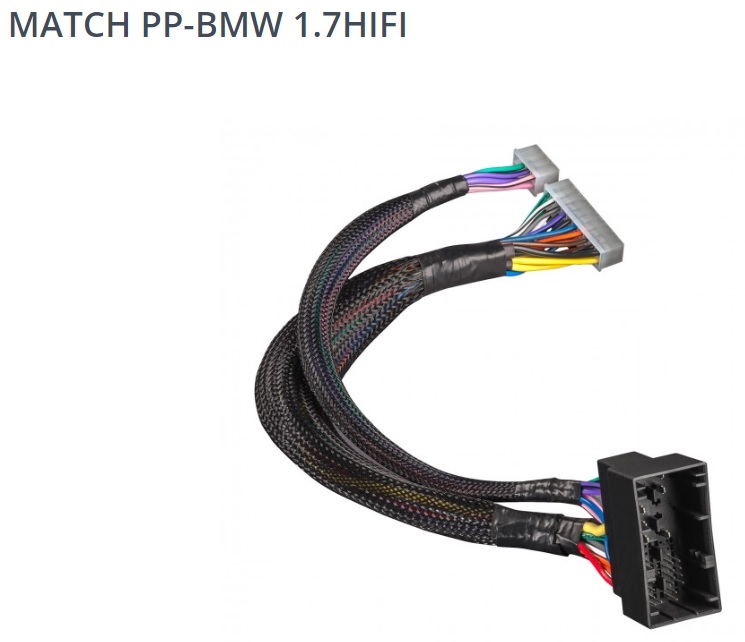
The basis of the custom harness is a 40 pin quadlock adapter and the wiring harness I got with the amp.
Quadlock adapter:
The Match wiring adapter:
__
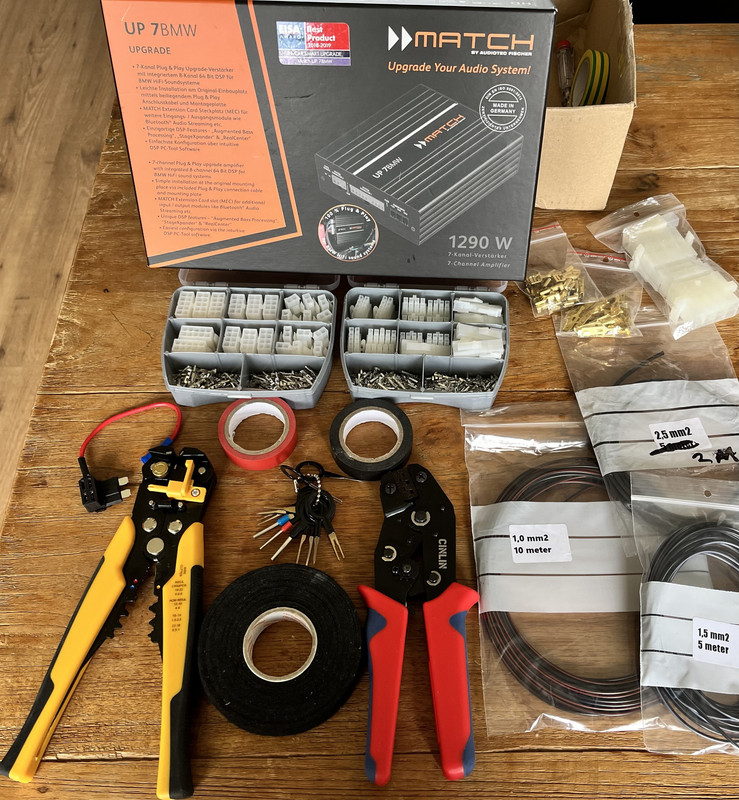
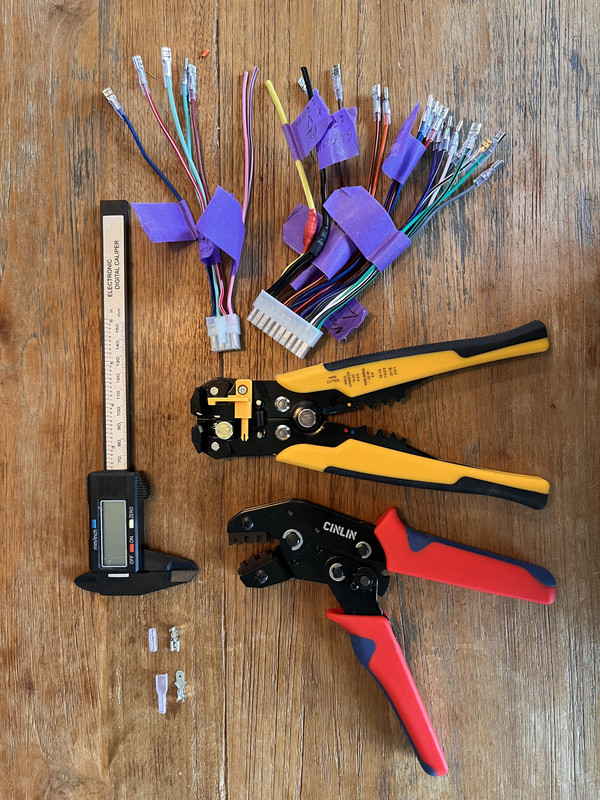
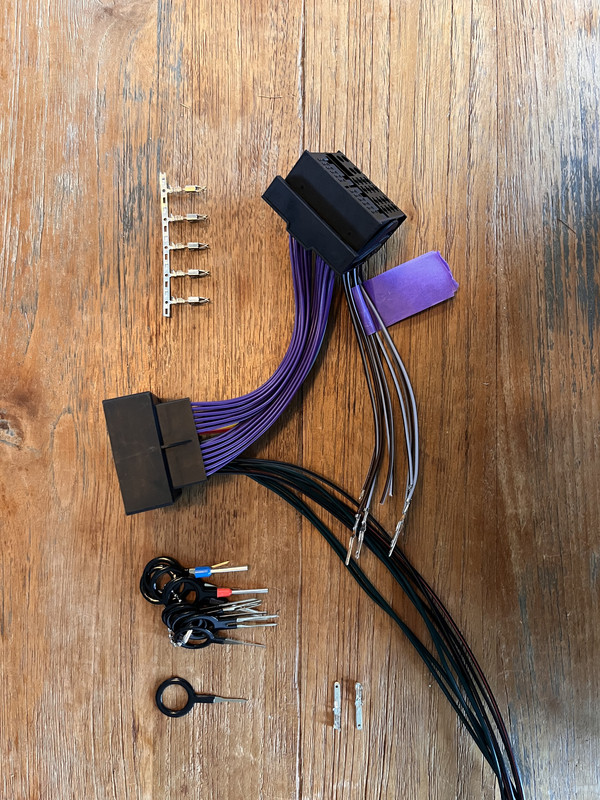
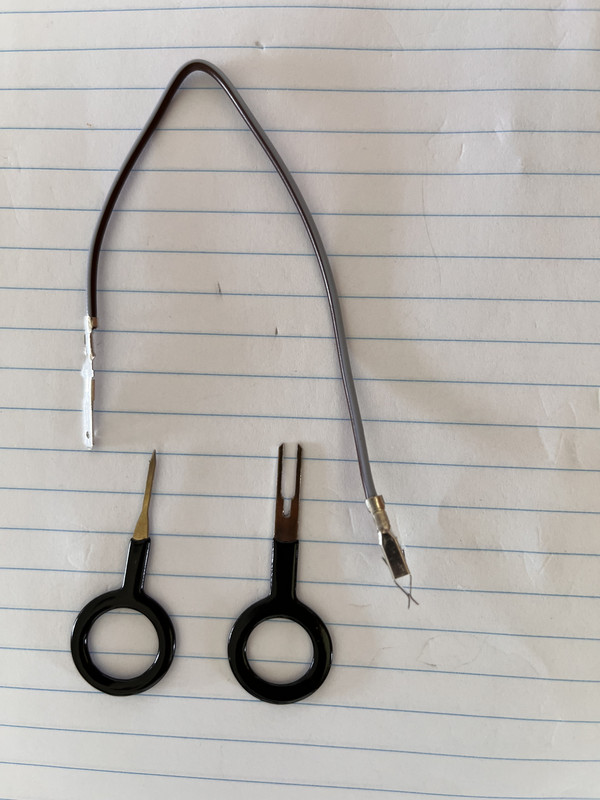
Here’s a couple of pictures of what I used to make the custom wiring harness:
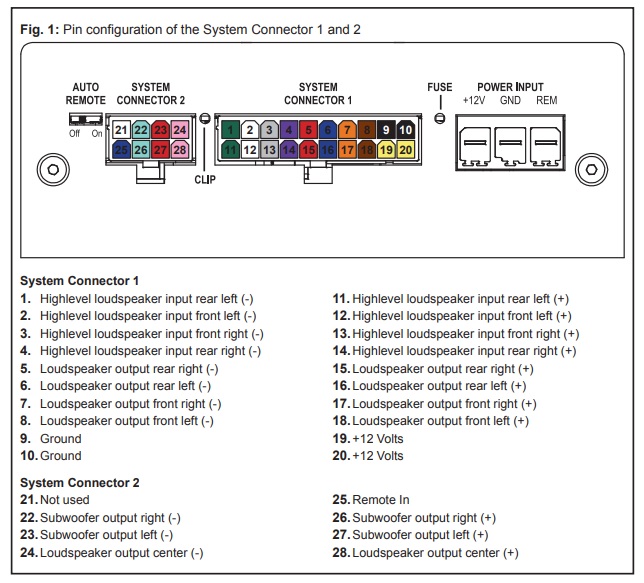
This is a picture I found in the manual of the amp:
__
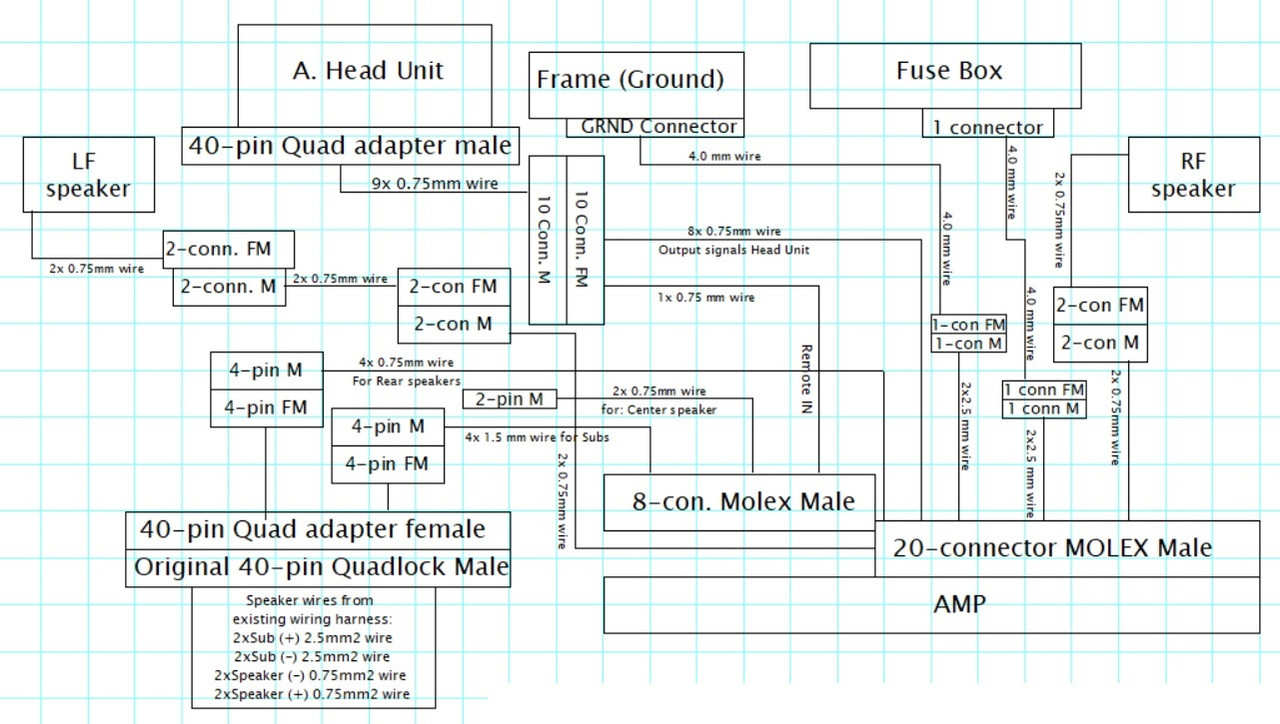
Here is a less simplified drawing of what it should look like on paper:

*this image is drawing is a bit different from how I eventually made the wiring harness:
- 4mm wires should be 2.5mm wires
- 2.5mm wires should be 1.5mm wires.
- 0.75mm wires should be 1mm wires
- I used less conectors in the end.
Some pictures of the work in progress:
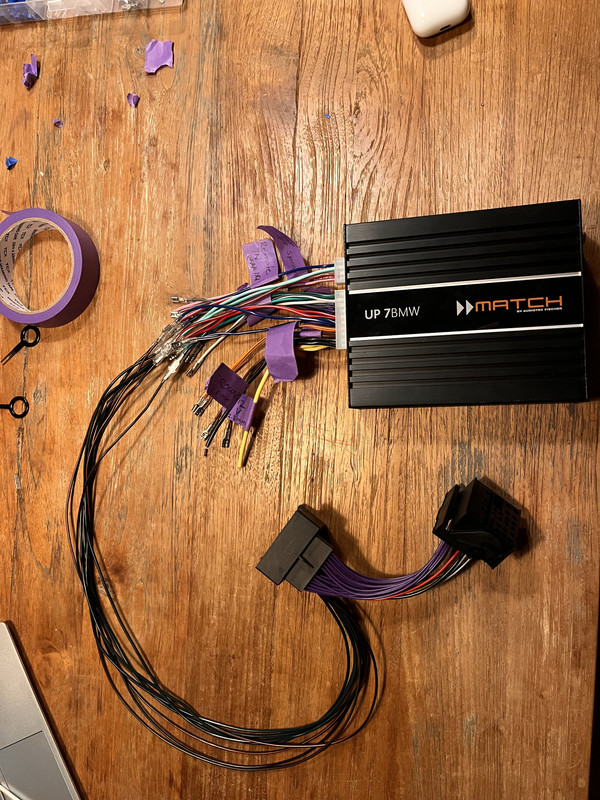
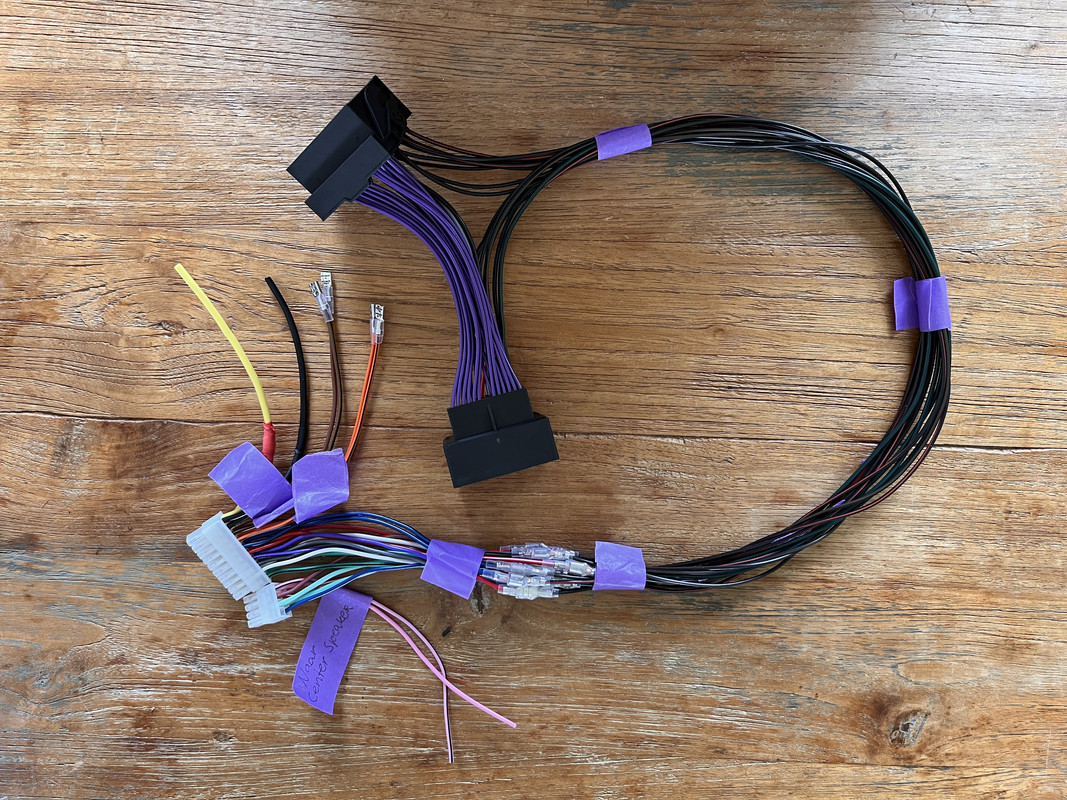
All done! 😃
2. Connecting to the head unit, the fuse box and the front speakers
*Before you connect anything, it is advised to disconnect the battery. So you should disconnect the Ground (-) of the battery before commencing.
The fuse box:
Its not that difficult to hardwire to the fuse box which is located behind the glovebox, but for the sake of keeping this tutorial a bit short, you can see how it works here:
DIY: Hardwiring Aftermarket Accessories the OEM Way Using The Trunk Fuse Box
An easier way to connect to the fusebox would be using “add-a-fuse” and connect it so a socket which has a 30A fuse in it.
Add a fuse looks like this:
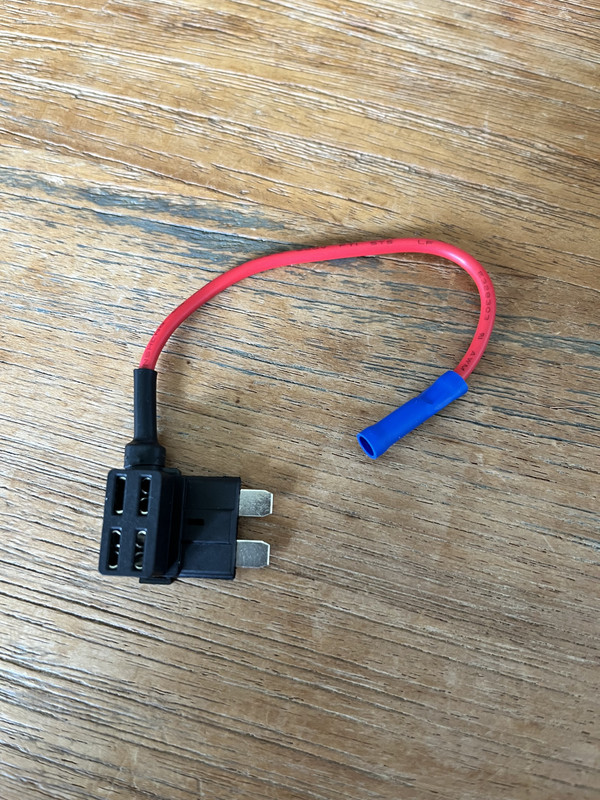
You can connect the ground (-) to many ground points is the car. I used one which is located behind the panel to the right of the passengers feet.
The ground is the black wire with the blue “crimper” on it.
___ _
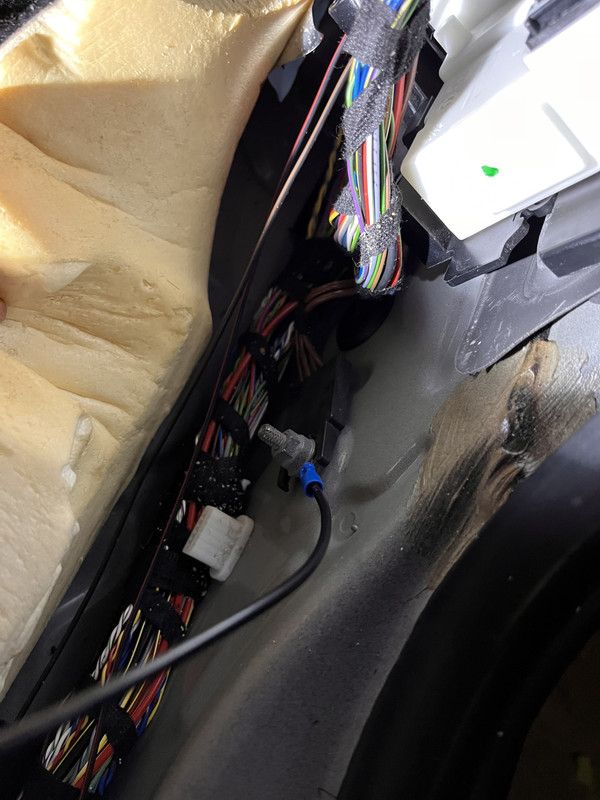
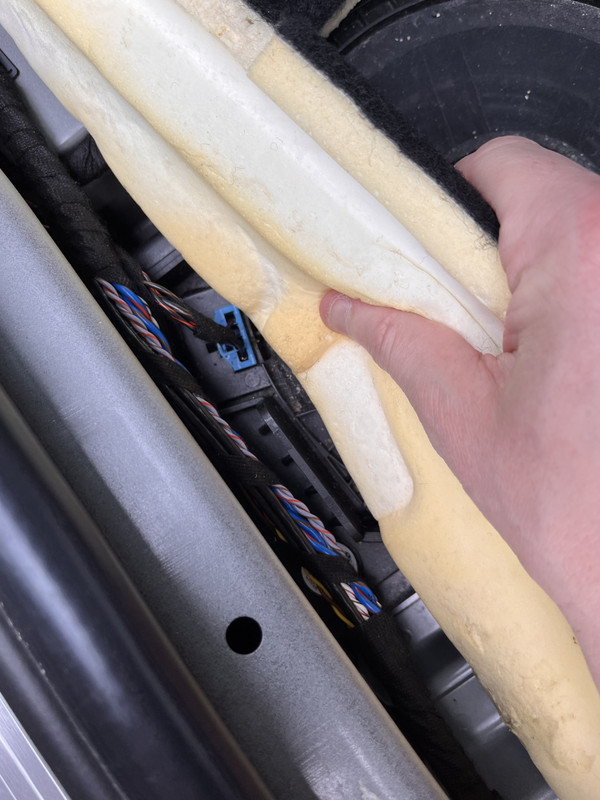
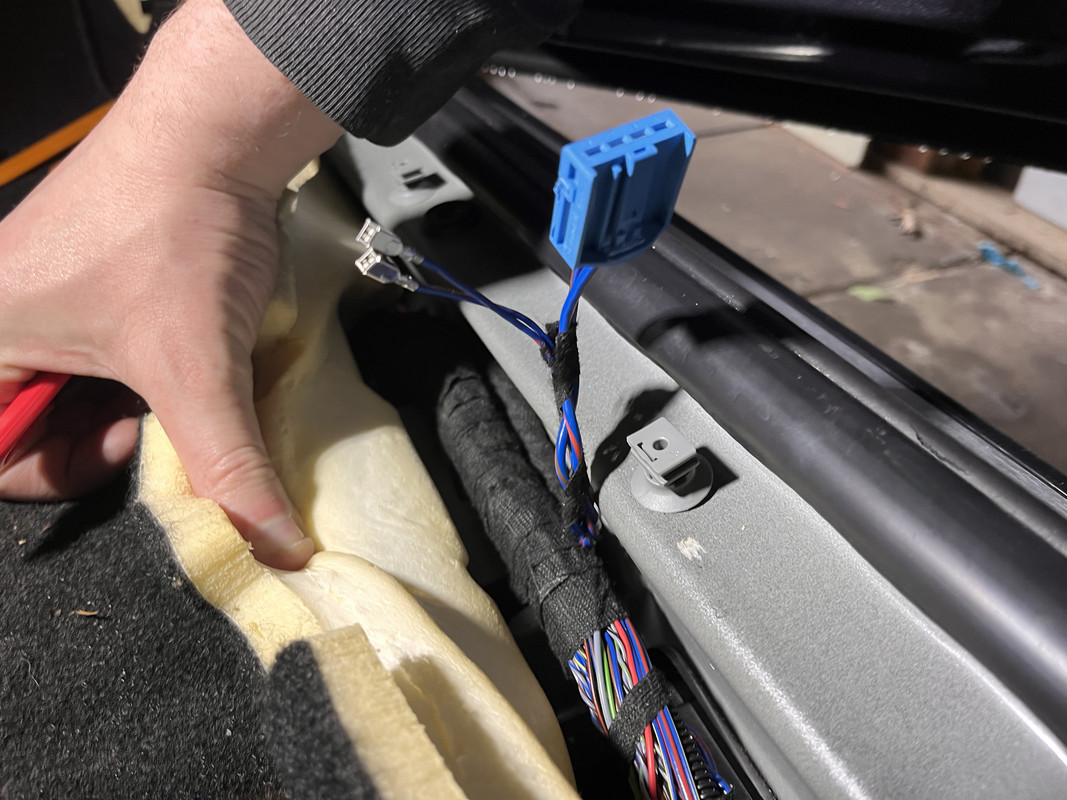
Connecting the front speakers:
You can pick up the wires for the front speakers at the location of the underseat woofers. You can pry them out of the connector at the underseat and then extend them towards the amp, following the many wires which are running there already.

*You don't have to remove the seat!
____ -
Now everything can be connected tot the HU and the amp. To do so, you need to remove the display, the air vent and the plastic trim above the glovebox.
I connected the amp to the frame, using the tie-wraps. This way you would be able to remove other parts, without having to remove the amp to do so.
____
3. Coding
The HU should be coded to HIFI, because the Match UP 7BMW is specifically designed as an upgrade tot the HIFI or HK amp. If you’re lucky, you can do this with bimmercode. If not, you can ask someone or some company to do it for you through a remote coding session.
I had mine coded by forum member “Umlautian”.
____
4. Adjust a bit of the trim panel above the glovebox for easy access
This is pretty straight forward. I used a tiny saw to remove a bit of the trim panel and removed 2 of the 4 clips, to make the amp easy to access with a little help of a prying tool.

Alright, that was all! Enjoy your new high end audio!
*If you have any questions, or need help making the wiring harness, feel free to send me a PM!
There are many aftermarket amplifiers available, which are plug and play IF you already have a HIFI or HK amplifier installed. My mini came with Base (or Stereo) audio, which makes the task a bit more difficult.
One option is to retrofit the wiring harness for the HIFI or HK option, but that means you have to basically take apart half the car...
So I came up with a different approach, which looks like this once installed:
Open…
And closed:
To install the amp in this manner, I took the following steps:
1. Make a custom wiring harness
2. Connect it to the head unit, the fuse box and the front speakers
3. Code the head unit to HIFI
4. Adjust a bit of the trim panel above the glovebox for easy access
*I also posted this on the Dutch forum, so excuse me if you find some Dutch words in the pictures below. Google is your friend
__
1. The wiring harness
To give you an idea, here is a simplified version of the wiring:
It’s important to know that the wiring originally comes from the head unit and then directly to the speakers in the following manner:
- 4 wires go to the rear speakers (Left +/- and Right +/-)
- The other 4 wires are thicker (1.5mm) and go to the underseat woofers (L/R +/-) and from the underseats, they proceed towards the front speakers.
Soundwise, this is far from ideal. With the DSP amp, we want to give each front speaker their own output channel from the amp.
__
The basis of the custom harness is a 40 pin quadlock adapter and the wiring harness I got with the amp.
Quadlock adapter:
The Match wiring adapter:
__
Here’s a couple of pictures of what I used to make the custom wiring harness:
This is a picture I found in the manual of the amp:
__
Here is a less simplified drawing of what it should look like on paper:
*this image is drawing is a bit different from how I eventually made the wiring harness:
- 4mm wires should be 2.5mm wires
- 2.5mm wires should be 1.5mm wires.
- 0.75mm wires should be 1mm wires
- I used less conectors in the end.
Some pictures of the work in progress:
All done! 😃
2. Connecting to the head unit, the fuse box and the front speakers
*Before you connect anything, it is advised to disconnect the battery. So you should disconnect the Ground (-) of the battery before commencing.
The fuse box:
Its not that difficult to hardwire to the fuse box which is located behind the glovebox, but for the sake of keeping this tutorial a bit short, you can see how it works here:
DIY: Hardwiring Aftermarket Accessories the OEM Way Using The Trunk Fuse Box
An easier way to connect to the fusebox would be using “add-a-fuse” and connect it so a socket which has a 30A fuse in it.
Add a fuse looks like this:
You can connect the ground (-) to many ground points is the car. I used one which is located behind the panel to the right of the passengers feet.
The ground is the black wire with the blue “crimper” on it.
___ _
Connecting the front speakers:
You can pick up the wires for the front speakers at the location of the underseat woofers. You can pry them out of the connector at the underseat and then extend them towards the amp, following the many wires which are running there already.
*You don't have to remove the seat!
____ -
Now everything can be connected tot the HU and the amp. To do so, you need to remove the display, the air vent and the plastic trim above the glovebox.
I connected the amp to the frame, using the tie-wraps. This way you would be able to remove other parts, without having to remove the amp to do so.
____
3. Coding
The HU should be coded to HIFI, because the Match UP 7BMW is specifically designed as an upgrade tot the HIFI or HK amp. If you’re lucky, you can do this with bimmercode. If not, you can ask someone or some company to do it for you through a remote coding session.
I had mine coded by forum member “Umlautian”.
____
4. Adjust a bit of the trim panel above the glovebox for easy access
This is pretty straight forward. I used a tiny saw to remove a bit of the trim panel and removed 2 of the 4 clips, to make the amp easy to access with a little help of a prying tool.
Alright, that was all! Enjoy your new high end audio!
*If you have any questions, or need help making the wiring harness, feel free to send me a PM!

Neutral
Joined: Mar 2023
Posts: 9
Likes: 3
I have everything on the 20-pin input lined up, but I don't understand the second 8-pin input... I have the remote in, but am I running these sub wires under each seat? And I can just ditch the center channel?
Last edited by Mini6ix; Jan 13, 2024 at 12:50 PM.

5th Gear


Joined: Aug 2017
Posts: 1,055
Likes: 383
Hey @EV8 , been a while since you posted this, how are you liking the sound quality/improvement from putting this amp in, and what would you say are the aspects that made you happy? Looking to put an amp in mine (no HK, base ENTRYNAV2 head unit), and I'm tired of wind noise out-cranking my cranked stereo with the windows down on the highway 

Thread
Thread Starter
Forum
Replies
Last Post
GP0256
MINI Parts for Sale
7
Jun 26, 2012 03:44 AM
Navigation & Audio Hiding iphone/audio cables behind the dashboard
adgeman
Navigation & Audio
1
Oct 8, 2010 01:12 PM

