
How To Exterior:: How to install GP2 Diffuser


Nevermind. I didn't realize you had to push it so hard. I don't like going all hulk on it when it's on jackstands.  Plus my original diffuser had fallen off months ago so there's all dirt in there now which is making it a pain in the ***. You can say that here right?
-Gene
Plus my original diffuser had fallen off months ago so there's all dirt in there now which is making it a pain in the ***. You can say that here right? -Gene


I installed mine this past weekend. I sourced some of the "missing" bolts and clips from my local Lowes. I posted about it here:
https://www.northamericanmotoring.co...7-post308.html
Might come in handy if you order the "kit" that didn't come with the extra pieces or your MINI dealer is too far away, etc..
-Z
https://www.northamericanmotoring.co...7-post308.html
Might come in handy if you order the "kit" that didn't come with the extra pieces or your MINI dealer is too far away, etc..
-Z

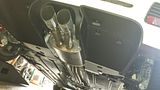
Installed today. I have to admit the fit and finish is kind of sloppy-looking. There's little margin for error with this thing as there are screw holes everywhere that stuff has to align. Still, there are gaps, one pretty big, that make it look kind of cheap up close. Here's a photo of the worst gap.
It's also a little harder to install than expected. There are screws that are supposed to go in the sides that can't be reached using any tool I have. They don't have any effect on the gap in my photo because of where they are placed at the far back left and right of the diffusor, but I found it impossible to get them back in and without them, there's a small gap at the edges.
You can't leave the exhaust bolts loose and fit the ramps because you can't reach them once the ramps are in place. So the bolts for the metal supports have to be secured before the ramps can go in.
Thread Starter
|
4th Gear
Joined: Mar 2009
Posts: 310
Likes: 3
From: Mililani, HI
Installed today. I have to admit the fit and finish is kind of sloppy-looking. There's little margin for error with this thing as there are screw holes everywhere that stuff has to align. Still, there are gaps, one pretty big, that make it look kind of cheap up close. Here's a photo of the worst gap.
It's also a little harder to install than expected. There are screws that are supposed to go in the sides that can't be reached using any tool I have. They don't have any effect on the gap in my photo because of where they are placed at the far back left and right of the diffusor, but I found it impossible to get them back in and without them, there's a small gap at the edges.
It's also a little harder to install than expected. There are screws that are supposed to go in the sides that can't be reached using any tool I have. They don't have any effect on the gap in my photo because of where they are placed at the far back left and right of the diffusor, but I found it impossible to get them back in and without them, there's a small gap at the edges.
As far as the screws on the side, I don't know why everyone is having such a hard time. I just used a torx bit with my 1/4" socket, and maybe a 2 inch extension, it came out pretty easy.
Should I add that stuff to the install guide?

You have to tighten those up before you tighten everything else. I actually laid under my car after I tightened those and used my knee to push the diffuser in to get the tunnel holes to line up.
As far as the screws on the side, I don't know why everyone is having such a hard time. I just used a torx bit with my 1/4" socket, and maybe a 2 inch extension, it came out pretty easy.
Should I add that stuff to the install guide?
As far as the screws on the side, I don't know why everyone is having such a hard time. I just used a torx bit with my 1/4" socket, and maybe a 2 inch extension, it came out pretty easy.
Should I add that stuff to the install guide?
Scooter, maybe you're thinking of different screws. These aren't torx head screws, they're small hex head screws that are located behind the folded lip of the bumper cover that mount to the corners of the stock diffuser.
They're just extremely difficult to get at. I had to use a tiny wrench and it was still the most time consuming part of the install.

5th Gear
Joined: Nov 2011
Posts: 1,073
Likes: 2
I removed those small horizontal side screws (hex head, torx, cant recall)by removing both end pieces of the fender they're attached to. Then removed the whole factory "diffuser" along with those fender pieces as one part. Once I got that off it was super easy to get to those two small fasteners. I then screwed those fender pieces to the main GP diffuser piece and snapped it all back in place as one unit.
I have all kinds of tools available but couldn't get those two fasteners to budge while still mounted on the car.
I have all kinds of tools available but couldn't get those two fasteners to budge while still mounted on the car.
Last edited by TerminalVelocity; Mar 13, 2013 at 07:43 PM.
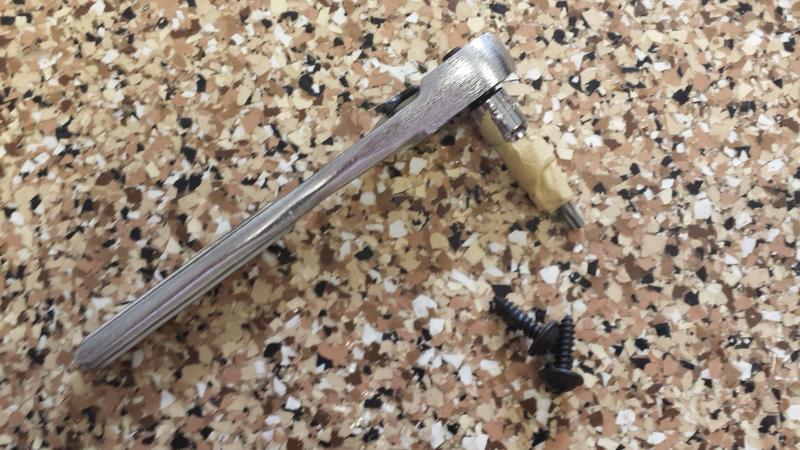
I was only able to get them off because I just happened to have this tiny wrench that luckily was the right size. You can see how small it is using the quarter as a reference.
No other tool I had would otherwise fit in there so that I could get at those screws.
Might be good to add all this info to the how to thread.
No other tool I had would otherwise fit in there so that I could get at those screws.
Might be good to add all this info to the how to thread.
5th Gear
Joined: Nov 2011
Posts: 1,073
Likes: 2
Ahh good deal Sooper! As for the diffuser being sloppy fitting, I didn't have that problem with mine. Fits very well but like mentioned above its best to attach the tunnels to the bumper portion first and adjust from there. It should pull everything tight.
I attached the bit to a socket with tape and put a 2" extension on the socket but didn't use a wrench, I just spun it with my fingers. When inserting the screw back in I just used tape to secure the screw to the bit and threaded it back in. To get it started I actually sat behind the car facing it and reached through the underside and around to start the screw in. It was easier than laying under the car IMO.

I think I found a way to get those pesky sideways screws in at the back bumper. There's some gray cardboard-like material that lines the back side of the wheel well. If you pull that out, you can wedge a long screwdriver (I used one with a flexible curved piece in the middle) to go straight in at the screw and tighten it. It's still pretty hard. I was only able to get one on so far. Spend 20 minutes with the second one before I had to abort and go somewhere. Here are pics of what I used:


The most difficult part of the install wasn't even the diffuser, it was the body panels. I didn't need 20 plastic nuts either since there were a bunch already in the body of the car already so that was a bummer that I ended up with a bunch of extra bolts that I guess I can't return. Other than that, happy with the diffuser and the panels!
No need to return them since my friend got them at cost which was 1/3 of the price I told you about, so I'll just keep them as spares if something happens and I need some bolts


1st Gear
Joined: Aug 2013
Posts: 19
Likes: 0
I installed mine this weekend. Really happy with this, as it sort of ties in all the black around the bottom edge of the car and really makes it look sportier - not to mention easy to install.
Sorry if this has all been suggested before by someone else in this thread; but here are some pointers:
Use a small 1/4" ratchet w/1/4" socket on your torx driver (pic below) for the 'sideways screws' at the corners. I wrapped it up with some tape so the torx driver wouldn't fall out of the 1/4" socket. I had the screws removed in 2 minutes. Getting them back in was a little more work just to get things aligned w/the new diffuser. Which is my second tip: install ALL BOLTS/SCREWS loose then work your way back to front, tightening the sideways corner screws up to the tunnels then to the clips, finally tightening the exhaust hanger bolts with a long extension and swivel (easier than it sounds - plenty of room to get in from the muffler side). My mistake was to tighten everything and leave the sideways screws last...the tunnel was too far back by about 1/8" which left the 'sideways' screw misaligned. Had to loosen up everything on that side to get it all to fit properly.


Last edited by koopy; Aug 26, 2013 at 07:18 AM.

