
How To Drivetrain :: Alternate DoS Intake Install Method


Thread Starter
|
2nd Gear
Joined: Aug 2010
Posts: 134
Likes: 0
From: SoCal
Drivetrain :: Alternate DoS Intake Install Method
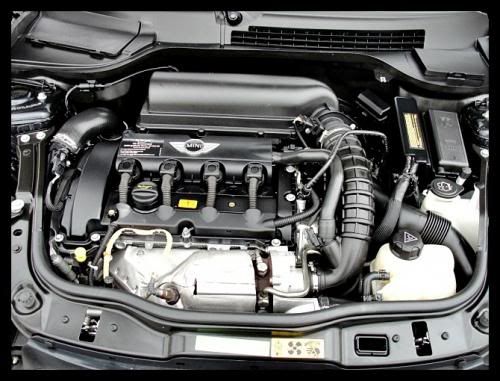
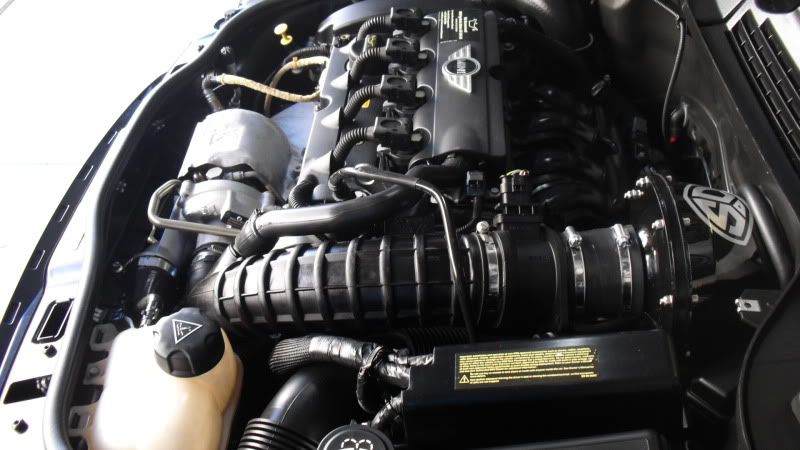
So after some research I decided to go with the DoS intake for my girl�s R56 based on the positive reviews and dealing with Clint. Being pretty handy with a wrench I decided that I would DIY this as from what I saw seemed to be a 2 wrench job on a scale of 1 to 5 which is a cake walk.
While doing this I forgot to print out directions at work, and I don�t have a printer at home to print the step by step instructions (which I would say are excellent and are better than a Haynes manual) so I just winged it. If you just look at everything for about 5 minutes it will be apparent for the order of removal.
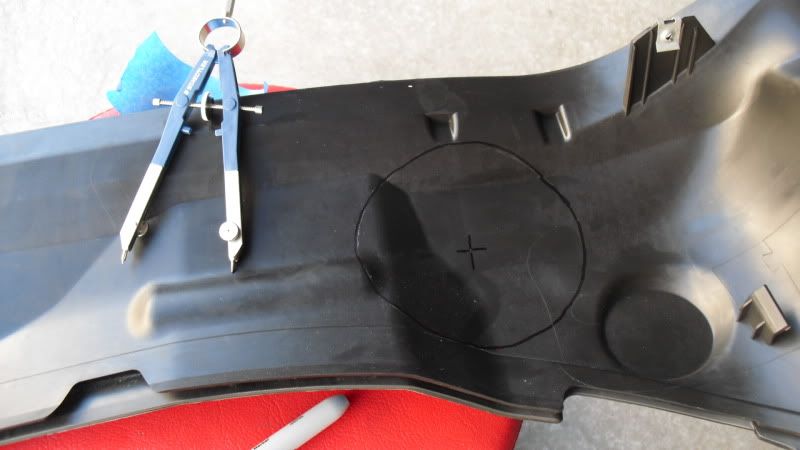
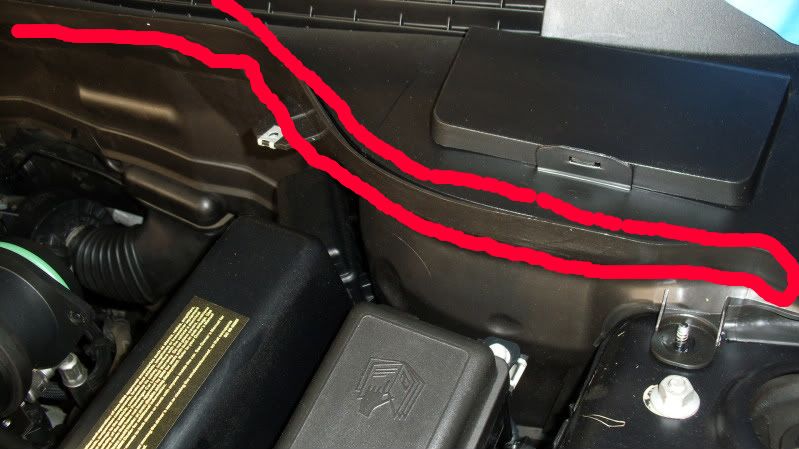
So to start I didn�t have the correct size hole saw, so I bagged that idea and decided to dremel out the plastic instead. To make the perfect circle for the intake I used a geo compass and cut out the plastic with the appropriate bit. After that I just cleaned up the rough edges with a sanding wheel. I also used a cutting wheel to cut off the rear tabs on the bulkhead so the seal sits properly around the hole. Protip: If you�re looking at the bulkhead it seems that one could easily cut the hole in place without removing it, but there would be no way to remove the tabs on the backside. So don�t be lazy, remove it. Like I said I didn�t have instructions but I had the bulkhead out in about 20 minutes with no issues at all, I didn�t even break anything!
My thoughts: This may sound odd to you but I wanted to do this so I could minimize the placebo effect. I put earplugs in and drove the car 5 miles prior to the install in a specific route and in a manner to repeat post install. About 2.5 hours after the drive I did the same drive with earplugs. I will admit that you are not going to be like OMG this thing pulls like a jet, but I will also admit that I did feel quicker throttle response in the mid range above 3500rpm, which would lead me to believe there is increased torque, this is obviously a plus. I did the same drive again without the plugs and I think it sounds great. The blow off venting is substantially increased, and is addicting, makes you want to repeatedly build the rpm�s and then release the throttle so it vents. What I could do without however, but is not a negative if I had to vote, is the high pitched whine that it will create around 4k-5k when you go WOT, this is reminiscent of a jet plane taking off. All the other sounds it makes, makes me all warm and fuzzy inside. Meanwhile the girl gets home and we go for a drive and she gave me the whole sideways look about the noise. But after a few miles of driving it grew on her and she really likes it. The next day she figured out how to manipulate the throttle to get it to vent whenever you want and how to modulate the throttle release to get the venting to sound different, she is getting a kick out of it now. I told her about the silencer and she said well what would be the point of making it sound stock, I hugged her and reminded her that I love her.
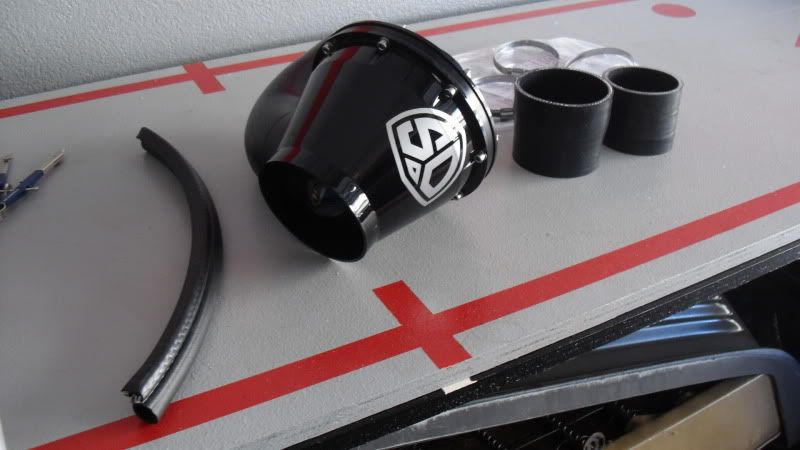
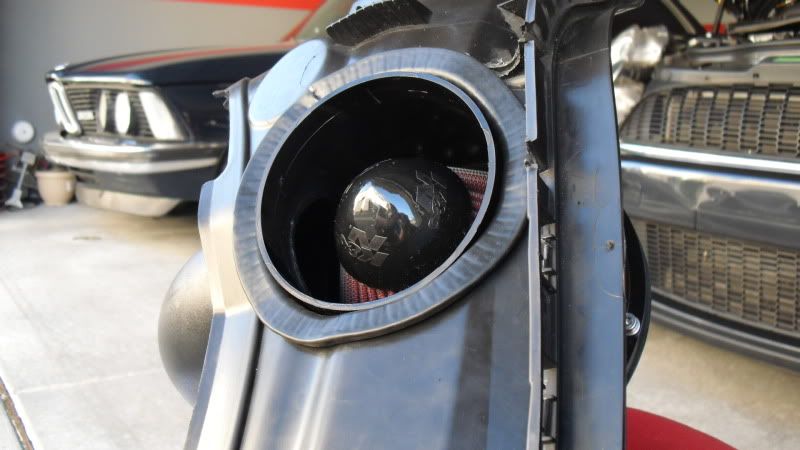
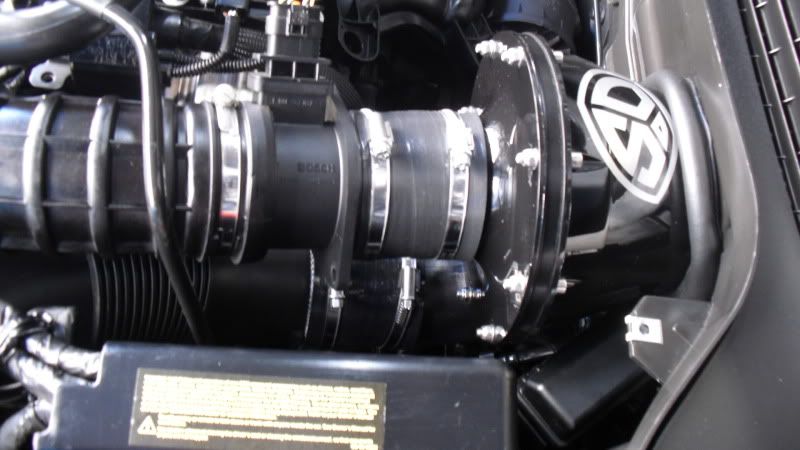
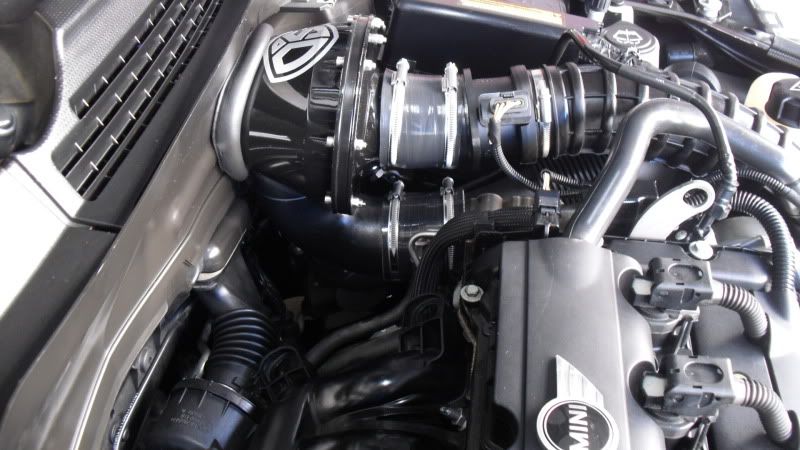
I�ll go ahead and place some pictures here for you to view. So if you don�t have a hole saw, and would rather do this on your own, it�s very possible to use a cutting tool like a dremel, I probably have 4 other tools that I could have made the hole with, put I felt this was the best.
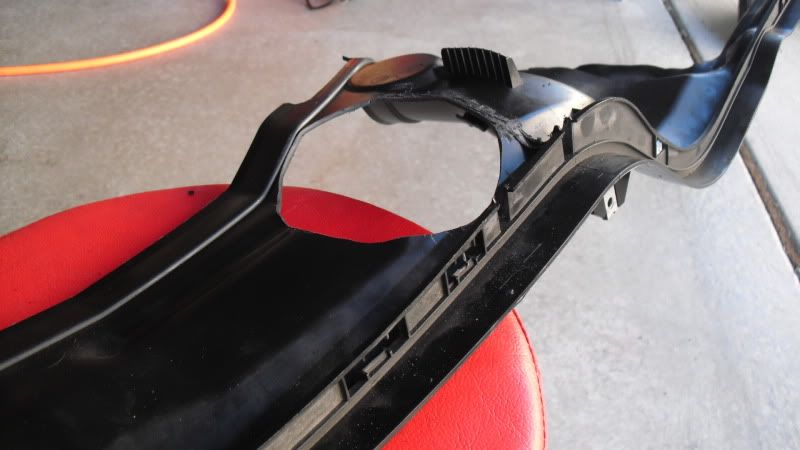
Question: Am I missing a weather seal here? The instructions tell you to remove the weather seal, ours didn�t have this, and it looks like it never did since the bulkhead showed no signs of wear or seating where it would have been attached.
While doing this I forgot to print out directions at work, and I don�t have a printer at home to print the step by step instructions (which I would say are excellent and are better than a Haynes manual) so I just winged it. If you just look at everything for about 5 minutes it will be apparent for the order of removal.
So to start I didn�t have the correct size hole saw, so I bagged that idea and decided to dremel out the plastic instead. To make the perfect circle for the intake I used a geo compass and cut out the plastic with the appropriate bit. After that I just cleaned up the rough edges with a sanding wheel. I also used a cutting wheel to cut off the rear tabs on the bulkhead so the seal sits properly around the hole. Protip: If you�re looking at the bulkhead it seems that one could easily cut the hole in place without removing it, but there would be no way to remove the tabs on the backside. So don�t be lazy, remove it. Like I said I didn�t have instructions but I had the bulkhead out in about 20 minutes with no issues at all, I didn�t even break anything!
My thoughts: This may sound odd to you but I wanted to do this so I could minimize the placebo effect. I put earplugs in and drove the car 5 miles prior to the install in a specific route and in a manner to repeat post install. About 2.5 hours after the drive I did the same drive with earplugs. I will admit that you are not going to be like OMG this thing pulls like a jet, but I will also admit that I did feel quicker throttle response in the mid range above 3500rpm, which would lead me to believe there is increased torque, this is obviously a plus. I did the same drive again without the plugs and I think it sounds great. The blow off venting is substantially increased, and is addicting, makes you want to repeatedly build the rpm�s and then release the throttle so it vents. What I could do without however, but is not a negative if I had to vote, is the high pitched whine that it will create around 4k-5k when you go WOT, this is reminiscent of a jet plane taking off. All the other sounds it makes, makes me all warm and fuzzy inside. Meanwhile the girl gets home and we go for a drive and she gave me the whole sideways look about the noise. But after a few miles of driving it grew on her and she really likes it. The next day she figured out how to manipulate the throttle to get it to vent whenever you want and how to modulate the throttle release to get the venting to sound different, she is getting a kick out of it now. I told her about the silencer and she said well what would be the point of making it sound stock, I hugged her and reminded her that I love her.
I�ll go ahead and place some pictures here for you to view. So if you don�t have a hole saw, and would rather do this on your own, it�s very possible to use a cutting tool like a dremel, I probably have 4 other tools that I could have made the hole with, put I felt this was the best.
Question: Am I missing a weather seal here? The instructions tell you to remove the weather seal, ours didn�t have this, and it looks like it never did since the bulkhead showed no signs of wear or seating where it would have been attached.


6th Gear
Joined: Sep 2004
Posts: 3,821
Likes: 6
From: Mililani,Hawaii
Quick question.. What happens to the intake when you get on it hard and the engine tilts backwards 2 inches? You'd probably have to have it on a dyno to see but I can see the DOS intake tube being pressed funny. The aren't really any good places for the tube to flex.

Best,
-Clint


Here is some info concerning cleaning intervals from the K&N Website that should be helpful.
(from http://www.knfilters.com/faq.htm )
" . . .
4. How often do I need to clean my K&N air filter?
If you have not experienced a decrease in mileage or engine performance, chances are your filter is fine and does not yet need cleaning. To be more specific, the filter does not require cleaning if you can still see the wire screen on the entire air filter regardless of how dirty it may appear. When the screen is no longer visible some place on the filter, it is time to clean it. When used in normal paved road, street or highway conditions, our replacement air filters that fit in the factory air box should require cleaning every 50,000 miles and our large conical filters on an intake system should require cleaning every 100,000 miles. When used in dusty or off-road environments, our filters will require cleaning more often. We recommend that you visually inspect your filter once every 25,000 miles to determine if the screen is still visible. . . ."
All that being said, I still check the ones that I use every 10,000-to-15,000 miles. You can pull the CAI and shine a shop light into it's large mouth to see if you can still see the wire screen that holds the cotton gauze filter material in place.
Finally, remember to not over-oil the filter. It only takes a small amount of oil to recharge the filtration ability of a cotton and wire mesh filter. I like to use the aerosol recharger kits. One light pass across the inside and outside is all it takes.
-Clint
Last edited by Mini'mon; Sep 15, 2010 at 08:09 PM. Reason: Do not over oil the filter.
Trending Topics
By the way . ..
blitzed310, nice images. DoS appreciates the writeup.
For those considering this mod, also keep in mind that you can borrow a hole saw from us. We ask for a deposit during the loan and completely refund this deposit after you use the hole saw. All that you pay for is shipping.
http://defendersofspeed.com/store/pr...?id_product=17
Last edited by Mini'mon; Sep 15, 2010 at 08:16 PM.
Thread Starter
|
2nd Gear
Joined: Aug 2010
Posts: 134
Likes: 0
From: SoCal
Though it looks and feels like a tight fit during installation, the CAI floats in its mounting hole. Secondly, the intake tube does flex along with the coupler before the MAF. Through those factors combined we allowed for that 2 inches of rearward travel that you mentioned above.
Best,
-Clint
Best,
-Clint
I use the "I can't see the wire case anymore". There are many people who will agree, that will say that the dirtier it gets, the better it filters, this is of course, only to a certain point where it becomes to dirty and clogged to allow the intended air to pass the filter.
3rd Gear
Joined: Apr 2010
Posts: 181
Likes: 0
Great write up! I would like to mention that the baffle doesn't get rid of the noise. It just mellows it a little bit. You'll still hear the turbo spooling and blowing off just like before, as well as all the induction noise. I'd describe the noise as just not as sharp.

3rd Gear
Joined: Jul 2007
Posts: 240
Likes: 1
From: west 'burbs of Chicago
+1 on the "alternate DoS intake install method"
 for blitzed310 -- his method works great; I installed my DoS intake today in about 2.5 hours, without a hole-saw.
The "compass and a Dremel-tool" cutting method works well. Once you've drawn the circle, a Dremel 9901 cutting-bit ($6, and looks like a carbide milling-bit to you machinists) does the job very neatly.
I suggest you sit down on a stool outside; the cutting throws off LOTS of plastic crumbs. Put the panel in your lap, drill a starter-hole inside the circle, and use the bit from there to trace just-inside the circle (using the side of the bit, not the tip) and milling-out the scrap plastic just up to the edge of your circle. Once the circle is out, you can use the same bit to remove the rear ribs. If you take your time, it'll take you twenty minutes, tops.
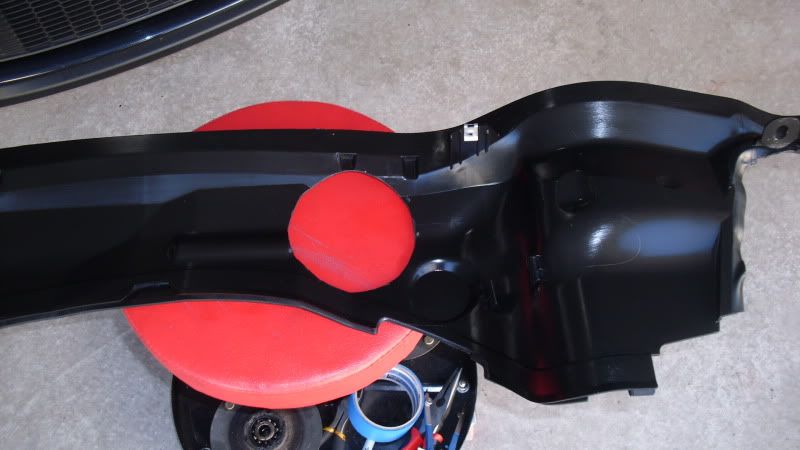
Photo 1 below is my pencil-circle; photo 2 is after I've gone all the way around with the cutter (but the scrap is still hanging there because of the ribs on the back still holding it); photo 3 is the back of the panel with the ribs cleaned off and the scrap popped out.
Last edited by basil49; Oct 25, 2010 at 04:11 PM. Reason: added photos
Thread Starter
|
2nd Gear
Joined: Aug 2010
Posts: 134
Likes: 0
From: SoCal
Thanks. How you describe it is exactly what I did.
It helps to "clear" the bit since it gets gooped up with melted plastic. All you need to do is sink the bit in the waste plastic and it will remove the pieces stuck on the bit.
It helps to "clear" the bit since it gets gooped up with melted plastic. All you need to do is sink the bit in the waste plastic and it will remove the pieces stuck on the bit.

2nd Gear
Joined: Jul 2009
Posts: 127
Likes: 1
In retrospect, I really should have purchased the pre-drilled bulkhead from Clint. Not only does it save some work (trivial), but I would still have my original bulkhead for future purposes (selling, changing out CAI for passing inspection, etc).


6th Gear
Joined: Jul 2008
Posts: 1,174
Likes: 13
From: Ohio
Just got my DoS CAI installed an hour or so ago.
One thing to add; be careful when you tighten up those plastic nuts on the cowling…
(I really wasn't going that hard… I swear!)
One thing to add; be careful when you tighten up those plastic nuts on the cowling…
(I really wasn't going that hard… I swear!)

Just got my DoS CAI installed[/URL] an hour or so ago.

One thing to add; be careful when you tighten up those plastic nuts on the cowling…
(I really wasn't going that hard… I swear!)

I think that you can fix this. Depending upon the size of the hole that resulted, you might be able to put a rivet nut (or well nut) insert into the hole like McMaster-Carr part#93495A120
You can insert 6-32 threaded stud like this, thread it into the well nut with some permanent Loctite or a little epoxy, let it set-up and then put the well nut into the hole. Thread one of the plastic apron panel nuts onto the 6-32 threaded rod and it will tighten the well nut and hole the panel in place.

-OR-
In lieu of that, you could weld a new stud over the hole if your so inclined.

-OR-
Depending upon which stud pulled out, you can use a screw, nut, and some washers to replace the stud. The stud would just need to be in a location where you had access to both sides of the hole.
Sharp looking install. I hope that the info above proves helpful if you decide to replace that stud for the apron panel nuts.
-Clint
6th Gear
Joined: Jul 2008
Posts: 1,174
Likes: 13
From: Ohio
It was with a ratchet, but not any stronger than one could do with a nut driver. I was going one-handed and kept in mind that these were plastic nuts. I didn't expect the sheet metal to fail! 
After that happened, I went around and loosened the other three I had already done by about a quarter turn.
I'm not too worried about it right now (put some sticky foam weather stripping between the plastic and the metal so it wouldn't rattle), but those are a few good ideas that I'll probably look into in the next week or so.
I should add that I think the piece that broke off was already damaged (from the factory?), as the threads would catch on the hole when I was monkeying with the bulkhead earlier in the install. Like it wasn't perfectly perpendicular to the sheet metal as it should be.
-------
Retrieved the piece that broke off:
https://i.imgur.com/jdGk2.jpg
https://i.imgur.com/PE3PV.jpg
Last edited by fishbert; Nov 15, 2010 at 12:22 AM.

It's the remnants of a press-fit stud that got pulled through the sheet metal.
That stud could have been installed badly at the factory if its mating hole was punched poorly and was too big for the stud. That would make it easy for this to happen.
Thanks for sharing this. It's a weird thing to happen for sure, but it's cool that you documented it.
-Clint
6th Gear
Joined: Jul 2008
Posts: 1,174
Likes: 13
From: Ohio
Now that it's been installed for a couple weeks, I find myself liking my DoS intake… because I'm not a big fan of the sound.
Sure, it's nifty if I'm flogging it; but I don't do that all that often. And in normal city driving I find it to be a minor annoyance that I do my best to avoid. So, installing the intake has had a rather pleasant, if unexpected, effect.
Sure, it's nifty if I'm flogging it; but I don't do that all that often. And in normal city driving I find it to be a minor annoyance that I do my best to avoid. So, installing the intake has had a rather pleasant, if unexpected, effect.
6th Gear
Joined: Feb 2011
Posts: 1,785
Likes: 0
From: Fairfax, VA
Now that it's been installed for a couple weeks, I find myself liking my DoS intake� because I'm not a big fan of the sound.
Sure, it's nifty if I'm flogging it; but I don't do that all that often. And in normal city driving I find it to be a minor annoyance that I do my best to avoid. So, installing the intake has had a rather pleasant, if unexpected, effect.
Sure, it's nifty if I'm flogging it; but I don't do that all that often. And in normal city driving I find it to be a minor annoyance that I do my best to avoid. So, installing the intake has had a rather pleasant, if unexpected, effect.

6th Gear
Joined: Jul 2008
Posts: 1,174
Likes: 13
From: Ohio
indeed.
http://appcubby.com/gas/index.html
I take it this is permission to open my yap about it�
But I need to hit the sack, so for now I'll just cut/paste what I said yesterday so others can hear:
http://appcubby.com/gas/index.html
I take it this is permission to open my yap about it�
But I need to hit the sack, so for now I'll just cut/paste what I said yesterday so others can hear:
Originally Posted by fishbert
Got the cap a week ago, and only just found time to install it earlier today (sunday). I'd gotten used to the sound of the open CAI, so it was a bit surprising to be reminded of what the car used to sound like without that hissing (� and maybe the noisemaker delete enhanced that difference a bit, too). But after the first day of light driving (no highways, < 50 miles, and spritely-but-not-flogging-it driving behavior), I rather like hearing the engine again. I'm getting the benefits of the added under-bonnet space for catch can mounting, with sound levels in the cabin that are bluetooth phone call friendly.
I was also rather impressed with the build quality of the cap � looks rather rugged and more heavy-duty than I was expecting (I had been picturing it being made of thin, lightweight metal, similar to the butterfly valve). Seating the cap in the intake was easy (I took out the intake, aligned the cap, then pushed the intake down on the cap against a bench in the garage� popped right in and didn't go any further than it was supposed to). Removing the cap wasn't as easy, but it was still doable without resorting to tools. This is probably a good thing� I'd rather have it want to stay put than come out with a light tug.
Just one day and some first impressions; I'm interested to see how it fares after a week or two and with heavier driving (luckily, I already had a road trip coming up next weekend� and I intend to stress it some more around town, too). But so far I like what I see.

3rd Gear
Joined: Aug 2008
Posts: 177
Likes: 3
Had my DOS over a year and still enjoy the high pitch whine it gives when the butterfly opens at full throttle. However it took me a while to realize the snapping sound I would hear when running the twisties with my fellow miniacs is actually the butterfly closing when letting off the gas quickly preparing for the next curve. Not annoying or loud, just thought something in the glove box was loose. Gotta love it!!!!!
