
Electrical RGB Ambient Mood Lighting Additions Mod

RGB Ambient Mood Lighting Additions Mod
I've seen a few people asking how they can put RGB LEDs in the footwell and other places that will change color with the ambient lighting already installed in our MINIs.
In 2011 MINI changed the LEDs to a RGB type that is capable of making the entire spectrum of colors instead of the old orange to blue.
I took apart my B pillar and poked around with a multimeter. There is one ground and 3 positives going to the RGB LED, one positive for each of the colors and one common ground. The one LED seemed to be receiving plenty of amperage to drive a few more RGB LEDs.
My plan is to add a 6" RGB LED strip to each of the front footwells and maybe one SMB RGB LED to the space behind the cupholders.
Here are my parts:
(2) 9.5" RGB LED Strip
I may need one of these amps if the OEM LED is not receiving enough power to drive additional bulbs.
(1) RGB LED Amplifier
I've ordered the parts and will hopefully receive them early next week. Then on to the install!
Last edited by calforhelp; Sep 10, 2012 at 09:42 AM.
So what I originally bought won't work since those strips share a common positive and the MINI is wired with a common ground. Meaning we need a strip with one ground and 3 positives (one for each RGB color).
So I changed my order to these and had to remove the prewired SMB since it was also wired with a common positive.
http://www.oznium.com/led-flex-strips
Order ships today, I already have the wire run so it should be a peel, stick, plugin situation once they arrive.
So I changed my order to these and had to remove the prewired SMB since it was also wired with a common positive.
http://www.oznium.com/led-flex-strips
Order ships today, I already have the wire run so it should be a peel, stick, plugin situation once they arrive.
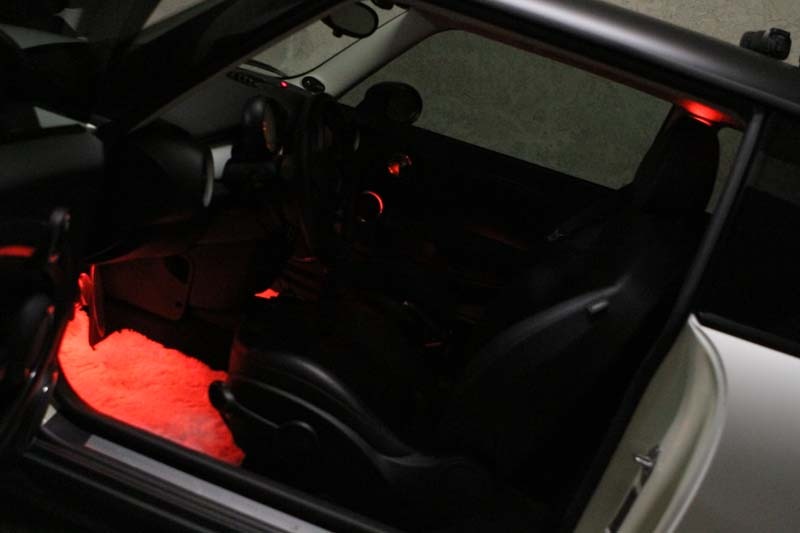
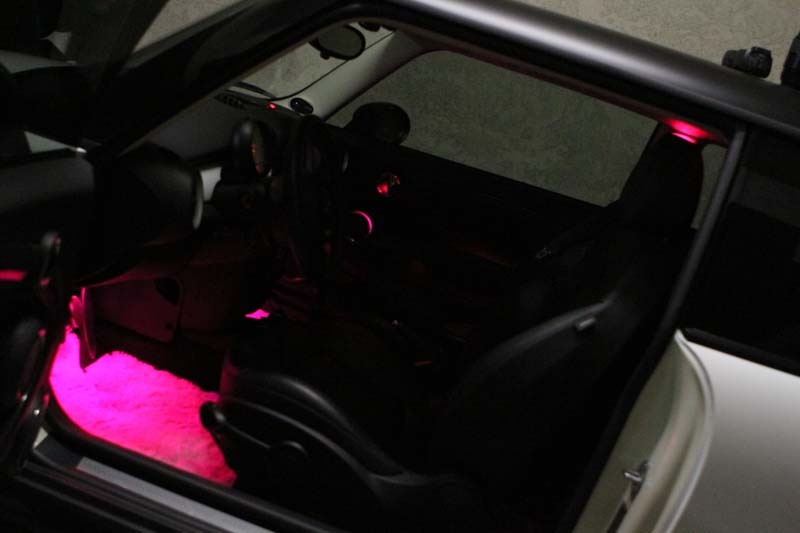
So the mod worked perfectly. I just ran a thin cable that consisted of 4 sleeved wires from the driver side B pillar to the driver footwell. I attached the two LED strips to the panel with the stock footwell light with two zipties. The lights are just as bright as the other interior mood lights in relation to their size. The color blending and the light spread are great. Here are a few pics of the final product!

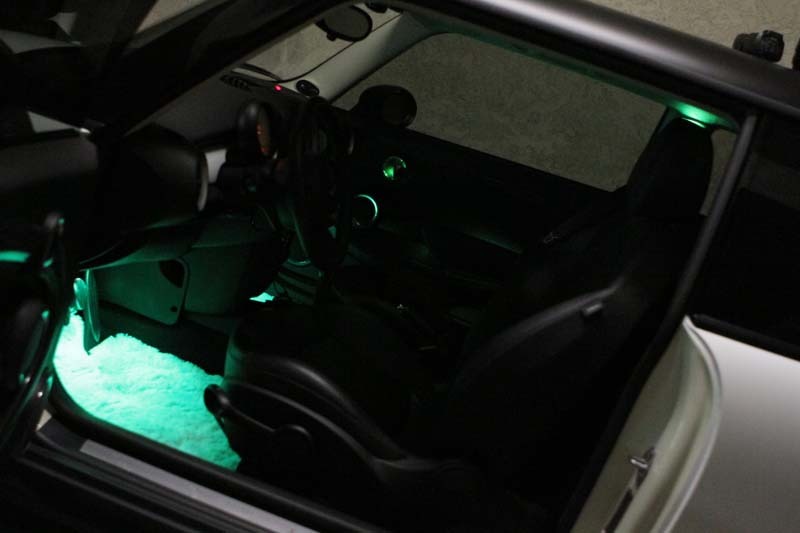
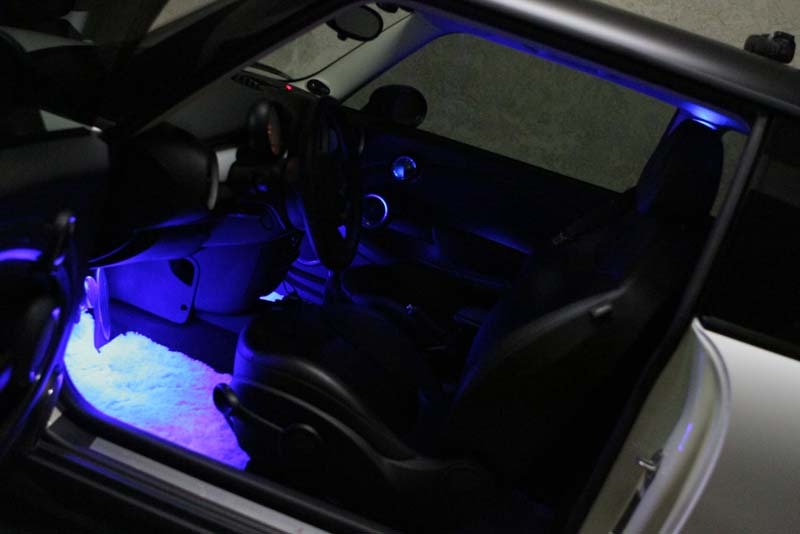
Some of the colors, I have it set to auto cycle so it's like a disco in my car lol. The colors aren't all exact in my pictures, I just tried to quickly grab the picture at the right time to catch the pure color.
Red:
Yellow:
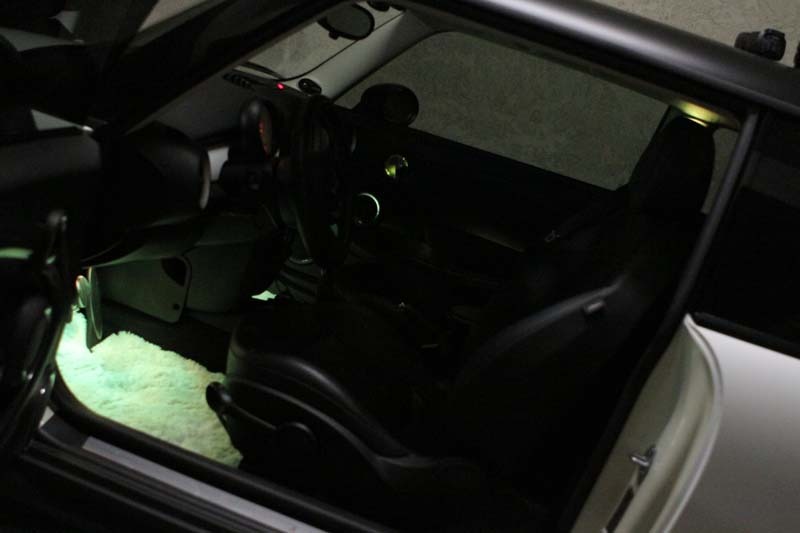
Green:
Blue:
Purple:

Pink:
Some of the colors, I have it set to auto cycle so it's like a disco in my car lol. The colors aren't all exact in my pictures, I just tried to quickly grab the picture at the right time to catch the pure color.
Red:
Yellow:
Green:
Blue:
Purple:
Pink:
Thanks! The parts I used are in the first post. You only need the LED strips, the line amplifier was not necessary.
I'll work on taking a couple pictures today and uploading them to show a little more detail of how I did it. It honestly took me about 1/2 hour from start to finish, very easy mod.
I'll work on taking a couple pictures today and uploading them to show a little more detail of how I did it. It honestly took me about 1/2 hour from start to finish, very easy mod.
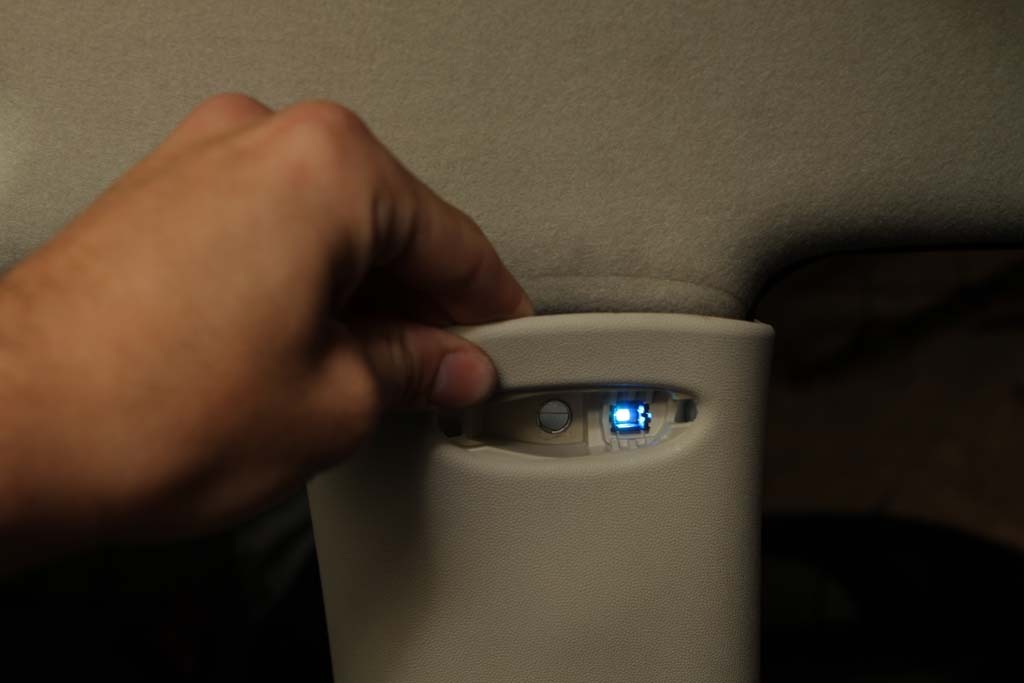
Pry out the "Airbag" insert of the B pillar. It pops out really easily. Behind that there is a torx-20 screw.
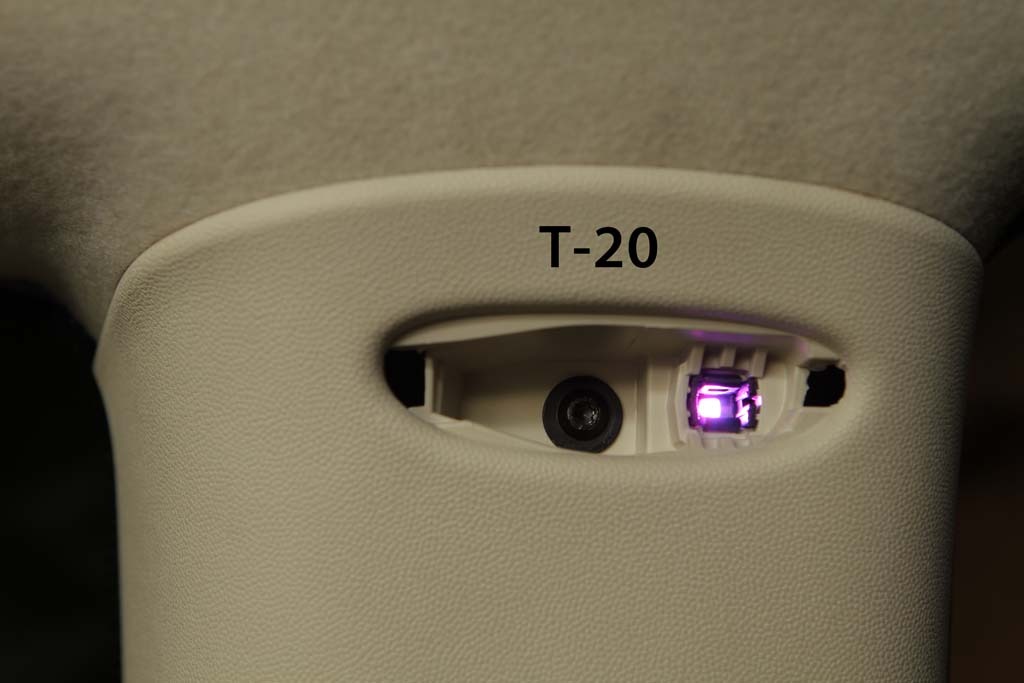
Remove the screw and pull the panel towards you from the top.
You'll see this wiring harness behind attached to the rear of the panel. Pull away the soft sleeving to expose the wires. Mine looks a little different because I already have the new wires tapped into the harness.

There are 4 wires in this harness. They correspond with the following colors:
Brown: Ground
Yellow: Red
White with Yellow stripe: Blue
White: Green
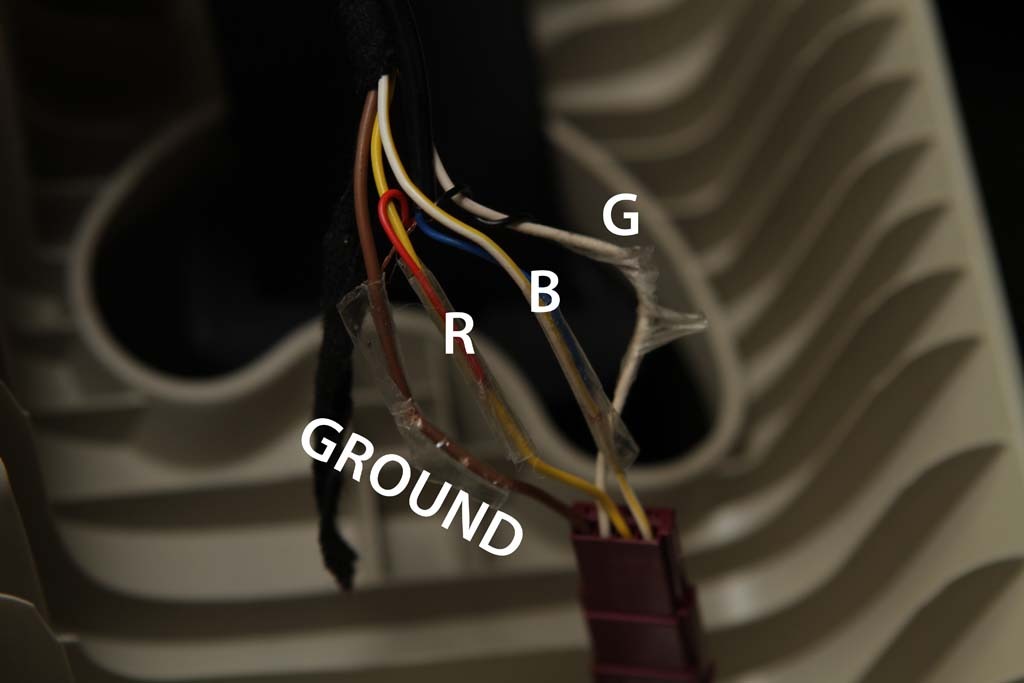
I used some cable from an old USB device. It already has 4 wires inside the cable so it's a nice and clean install. The wires are plenty large enough to carry the power for the two additional strips. Use a wire splicer or some sort to separate the MINI's sleeving then wrap your new wires around the MINI's wiring. I soldered them in place. After you have your new wires attached, tape each one individually then tape them all together to prevent any rattles.
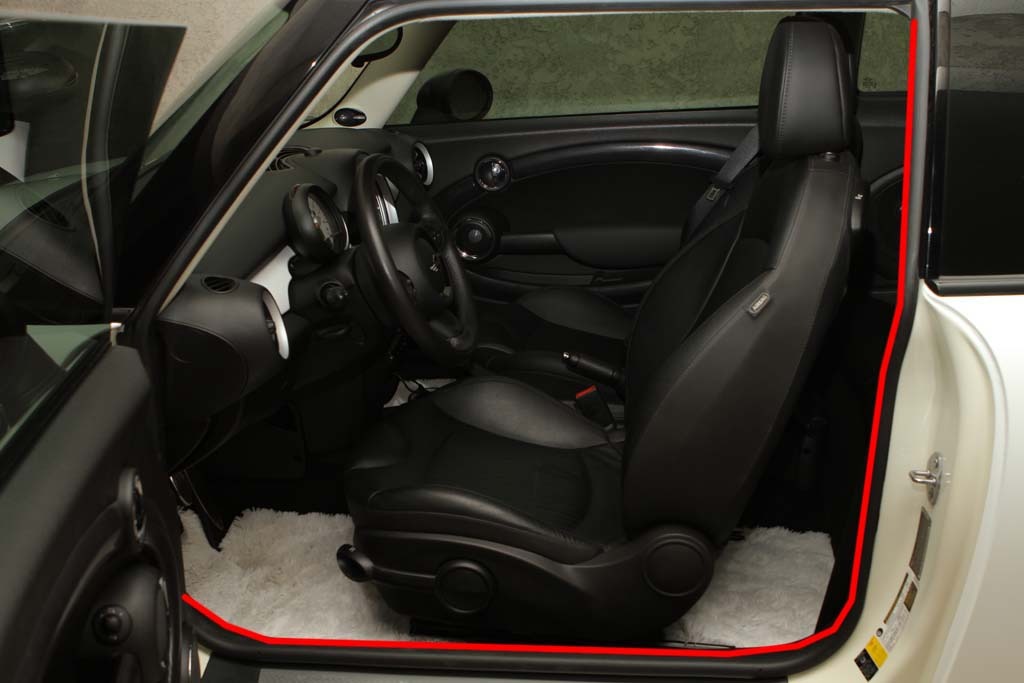
I ran the wire behind the weather striping in the door frame. It roughly follows the red line in this picture:
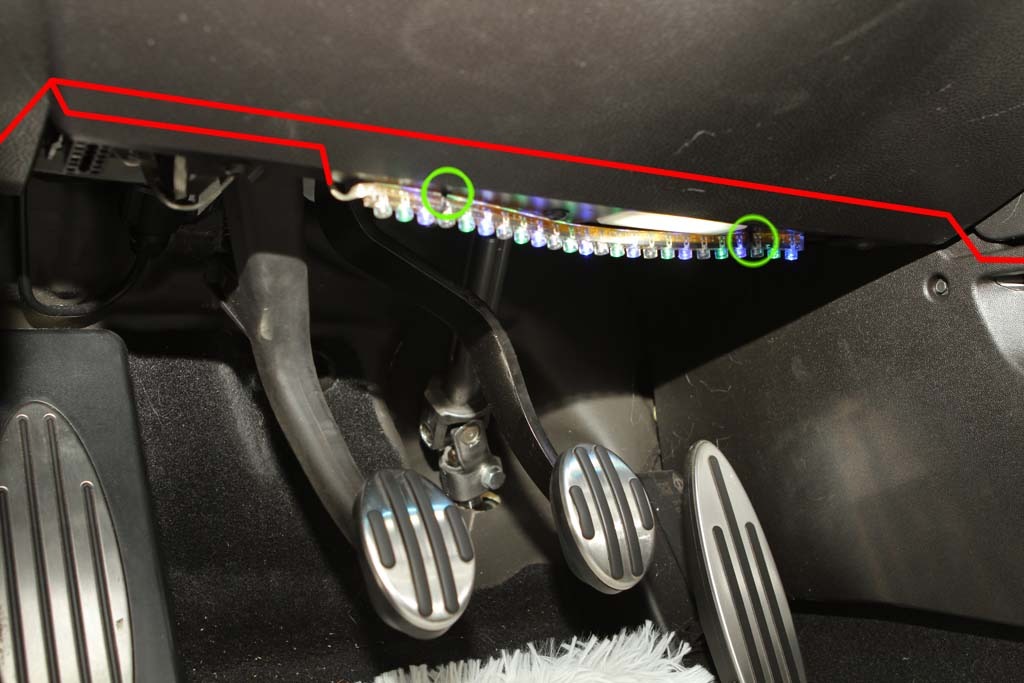
It will come out near the OBD2. Remove the three torx-20 screws so you can fit the wiring for the passenger side LED strip behind the dash panel. I screwed two holes in this panel to make room for a couple zip ties to hold the LED strip in place. The wiring for the passenger side roughly follows the red line. It easily fits through the middle of the center console and is easy to hide in the passenger footwell.
So yeah, it's a very easy install and any directions I gave that don't make sense will make total sense if you're out there doing it yourself and looking at it. Again, THESE are the RGB LED strips I bought. Buy them in the 9.5" length, nothing longer or it will be way too bright. I usually prefer their SMB strips but they are wired incorrectly so the strips in the link above are the only strips I've found that will work for our cars.
Remove the screw and pull the panel towards you from the top.
You'll see this wiring harness behind attached to the rear of the panel. Pull away the soft sleeving to expose the wires. Mine looks a little different because I already have the new wires tapped into the harness.
There are 4 wires in this harness. They correspond with the following colors:
Brown: Ground
Yellow: Red
White with Yellow stripe: Blue
White: Green
I used some cable from an old USB device. It already has 4 wires inside the cable so it's a nice and clean install. The wires are plenty large enough to carry the power for the two additional strips. Use a wire splicer or some sort to separate the MINI's sleeving then wrap your new wires around the MINI's wiring. I soldered them in place. After you have your new wires attached, tape each one individually then tape them all together to prevent any rattles.
I ran the wire behind the weather striping in the door frame. It roughly follows the red line in this picture:
It will come out near the OBD2. Remove the three torx-20 screws so you can fit the wiring for the passenger side LED strip behind the dash panel. I screwed two holes in this panel to make room for a couple zip ties to hold the LED strip in place. The wiring for the passenger side roughly follows the red line. It easily fits through the middle of the center console and is easy to hide in the passenger footwell.
So yeah, it's a very easy install and any directions I gave that don't make sense will make total sense if you're out there doing it yourself and looking at it. Again, THESE are the RGB LED strips I bought. Buy them in the 9.5" length, nothing longer or it will be way too bright. I usually prefer their SMB strips but they are wired incorrectly so the strips in the link above are the only strips I've found that will work for our cars.
Trending Topics

Thanks for the compliments. I might even suggest getting the 4.7" strips. The 9.5" that I have are a tad bright for me. At night time in the country I'm finding myself dimming all of the lights to their minimum setting.
The 9.5" is honestly bright enough to see while driving around in the day. However I do have the bright white floormats so if you have the black ones, 9.5" might not be too bright.
The 9.5" is honestly bright enough to see while driving around in the day. However I do have the bright white floormats so if you have the black ones, 9.5" might not be too bright.
Yep, buy the million color version. It does come with a little controller about the size of a half dollar. It rotates the color at about the same speed as the MINI's OEM lights will rotate. Once you get the lights, just cut off the controller and the little 4 pin connector on the end of the LED strip, you don't use either in this application.
You can also use two lengths of 22 gauge speaker wire. I just used USB since it had the number of wires I needed and were nicely color coded.
Make sure to post up some pics when you get it done!
Make sure to post up some pics when you get it done!
The strips' wires aren't colored as you've found out. Strip the plastic off and separate each of the wires a little. The single wire that is a different color than the other 3 is your ground. Use a 9v battery and touch that wire to the negative side. Then one-by-one touch the three other wires to the positive side. Whatever color lights up is what wire that corresponds to.
I believe the order is ground RGB but I'm not 100% sure.
Does that make sense?
I believe the order is ground RGB but I'm not 100% sure.
Does that make sense?

5th Gear
Joined: Oct 2010
Posts: 1,053
Likes: 5
From: Bx, NY
Yes it does. After I posted that last statement I took a motorcycle batt to the wires. I actually spliced both of the leads from each led strip to one which I will connect to the wires going to the cars wiring.
It's funny cuz it was GROUNDRGB on one and GROUNDBGR.
Thanks, hope to have this in by the weekend.
It's funny cuz it was GROUNDRGB on one and GROUNDBGR.
Thanks, hope to have this in by the weekend.

3rd Gear
Joined: Sep 2012
Posts: 175
Likes: 0
Very cool mod. Definitely going to do this when my MINI arrives two weeks from now. I did something similar in both my Passat and my Mazda3 hatchback. I found I didn't like the lights in the foot-wells that much. I found them too distracting. I want to do this mod and illuminate under the seats instead.
Great idea! I'd probably suggest getting the same 9.5" strips I did and putting them in the center of the seat pointing downwards. Since you probably have black carpet, you're going to want something pretty bright and that should illuminate both the front and back.
You might even want to try running them parallel to the car, that might bring a little more light to the front and back while still giving a pretty even spread of light.
You might even want to try running them parallel to the car, that might bring a little more light to the front and back while still giving a pretty even spread of light.
3rd Gear
Joined: Sep 2012
Posts: 175
Likes: 0
My thoughts exactly.
When I put them in my previous cars, I ran them to a dash mounted switch. I guess I could to that with this. In theory, I could do foot-wells and seats, and just run a separate switch for each. I could have both on, one or the other on, or none.
When I put them in my previous cars, I ran them to a dash mounted switch. I guess I could to that with this. In theory, I could do foot-wells and seats, and just run a separate switch for each. I could have both on, one or the other on, or none.


I just pulled the stock LED modules out to see what the options were for upgrading the LEDs they contain. I'm posting some notes here so that I don't forget (and if someone's eager, they're welcome to use this information as they see fit).
In each case (B pillar, door pull, overhead console) the LEDs are packaged similar to these Avago LEDs:
http://www.digikey.com/product-detai...8-1-ND/2428169
However, they must be different as the pinout is not the same (red and green are switched). The door and B pillar modules contain resistors limiting the current to each LED to 20mA, assuming 12V drive to the module. The overhead console is particularly oddly configured in that instead of one single resistor for each LED, there are four resistors in series, though with the same eventual effect (a limit of ~20mA per LED).
There aren't a lot of LED options in that package, unfortunately. For at least the door and B pillar modules, it should be possible to replace the LEDs with these Cree units:
http://www.digikey.com/product-detai...3CT-ND/2166014
which are about twice as bright, though the resistors and connector pins will need to be shuffled to keep the colours in sync with the overhead console. It's likely that they will also require some mechanical trimming of the module housing as the OE LEDs are a snug fit in the light pipe guide.
The PCB layout on the overhead console will mean that replacing the LEDs there will require some patch wire work. Getting it out is fairly straightforward; pull the cover straight down, remove the two recessed Torx screws, then pull the base assembly down at the rear, releasing the tabs around the sides. It will hinge at the front as it comes free. It helped to remove the microphone assembly from the cover (tab towards the front) before unplugging it.
Thanks for the additional info. I may want to make my B pillar leds brighter eventually. I'd say the overhead diodes are pretty much non-replaceable. They're pretty built-in but the other leds should be pretty easy to replace, especially the B pillars.
The overheads won't be much harder than the pillar/door mounts, really. The LEDs themselves are the same, so if you want to keep everything else stock and just replace the LED, you'll be removing and replacing an SMD LED assembly.
If you want to hack them in a more direct fashion, e.g. replace the entire setup with a completely different LED, then they're all about equally hackable. You could drill the back of the door/pillar assemblies to fit a 5mm round LED, and remove the lightpipe assemblies in the overheads to fit them directly to the ports in the cover.
= Mike

2nd Gear
Joined: Jan 2012
Posts: 54
Likes: 0
Any suggestions for those of us with only the blue/orange?
Instinctively I'm guessing two strips (one of each colour) hooked to a common ground, but I've not actually popped it open to have a look yet - stumbled onto this thread at work. It also doesn't sound like the most elegant solution.
Instinctively I'm guessing two strips (one of each colour) hooked to a common ground, but I've not actually popped it open to have a look yet - stumbled onto this thread at work. It also doesn't sound like the most elegant solution.