
Electrical OEM driving lights - center console switch position

OEM driving lights - center console switch position
Hey everyone,
I recently had the OEM driving lights installed on my R53. As part of the planning for the install, I talked with the tech at the dealer about the location of the switch to turn them on and off.
The standard installation instructions call for cutting a hole in the knee bolster under the steering column, and putting the switch in there. However, I had two concerns about that:
Well, it turns out that there is such a harness, but it isn't very well known - the tech had to dig through many old dealer bulletins for a long time before he found it.
And with that lead up, I bring you the info, typed in verbatim for the benefit of the MINI community... so that anyone else who wants that trick switch location can get it without having to hunt for the info like we did!
-------------------------------
Date: 03/06
Bulletin # M 63 02 06
-------------------------------
ACCESSORIES & MOTORINGGEAR
MINI DEALER BULLETIN
SUBJECT: NEW DRIVING LIGHT SWITCH POSITION
After a proposal from Prestige MINI, we have developed a wiring harness, which enables you to install the light switch for the driving lights into the already existing knock-out on the center console, next to the driver seat. The new switch position eliminates the work of cutting the dashboard to create the hole for the driving light switch.
The wiring harness is an optional item and not included in the driving light kit. It needs to be ordered separately. The new installation instructions on ASAP show the possible installation in both locations; dash board or center console, based on the customer's preference.
For the installation of the switch in the center console on a car produced prior to 07/04 a new E-Brake console is required.
Parts Information:
ITEM PART NUMBER M.S.R.P.
Wiring Harness 61 12 0 412 968 $ 13.30
Driving Lights 63 12 0 144 132 $400.00
Additional parts required for cars produced prior to 07/04:
ITEM PART NUMBER M.S.R.P.
E-Brake Console 51 16 6 958 571 $ 30.00
Best regards,
Alan E. Harris
Vice President
Aftersales
Greg Marks
Manager
Aftersales Business Development & Marketing
-------------------------------
I recently had the OEM driving lights installed on my R53. As part of the planning for the install, I talked with the tech at the dealer about the location of the switch to turn them on and off.
The standard installation instructions call for cutting a hole in the knee bolster under the steering column, and putting the switch in there. However, I had two concerns about that:
- I have the OEM Euro Parcel Shelf (EPS), not the plain-jane USA knee bolster
- The small punch out in my EPS was already used for my DPSM switch.
Well, it turns out that there is such a harness, but it isn't very well known - the tech had to dig through many old dealer bulletins for a long time before he found it.
And with that lead up, I bring you the info, typed in verbatim for the benefit of the MINI community... so that anyone else who wants that trick switch location can get it without having to hunt for the info like we did!
-------------------------------
Date: 03/06
Bulletin # M 63 02 06
-------------------------------
ACCESSORIES & MOTORINGGEAR
MINI DEALER BULLETIN
SUBJECT: NEW DRIVING LIGHT SWITCH POSITION
After a proposal from Prestige MINI, we have developed a wiring harness, which enables you to install the light switch for the driving lights into the already existing knock-out on the center console, next to the driver seat. The new switch position eliminates the work of cutting the dashboard to create the hole for the driving light switch.
The wiring harness is an optional item and not included in the driving light kit. It needs to be ordered separately. The new installation instructions on ASAP show the possible installation in both locations; dash board or center console, based on the customer's preference.
For the installation of the switch in the center console on a car produced prior to 07/04 a new E-Brake console is required.
Parts Information:
ITEM PART NUMBER M.S.R.P.
Wiring Harness 61 12 0 412 968 $ 13.30
Driving Lights 63 12 0 144 132 $400.00
Additional parts required for cars produced prior to 07/04:
ITEM PART NUMBER M.S.R.P.
E-Brake Console 51 16 6 958 571 $ 30.00
Best regards,
Alan E. Harris
Vice President
Aftersales
Greg Marks
Manager
Aftersales Business Development & Marketing
-------------------------------


Good info, Edge! I have my power mirror switch in the EPS hole, so my driving light switch is homeless, and just lays in the EPS. 
Not bad pricing, even! Bummer that I have to get a new console, but it's only a tank of gas...
Not bad pricing, even! Bummer that I have to get a new console, but it's only a tank of gas...

OVERDRIVE


Joined: Aug 2006
Posts: 7,201
Likes: 8
From: Norfolk, VA
Great post! I have my driving light switch in the EPS knockout, but that harness would come in handy if I wanted a factory-style switch for something and wanted to mount it in the unused knockout by the brake.
Just out of curiosity, what function does the DPSM switch serve?
Just out of curiosity, what function does the DPSM switch serve?
Originally Posted by DPSM User's Guide
The MINI Digital POWER SoundModul includes an interior sound switch in the instrument panel of your MINI, in the stowage compartment next to the steering wheel.
Activating the switch has the effect of a virtual enlargement of the interior space. When it is activated, bass tones and the sound pressure level may be reduced slightly (depending on the source of music / sound). The system prevents a "hard" switchover by delaying the response by approx. 2 seconds.
Activating the switch has the effect of a virtual enlargement of the interior space. When it is activated, bass tones and the sound pressure level may be reduced slightly (depending on the source of music / sound). The system prevents a "hard" switchover by delaying the response by approx. 2 seconds.

Also, what do you mean by SPST?
I'm guessing he's talking about the console knockout. I'd love to see an installed pic if you can snap one.
SPST - Single Pole Single Throw
I'm not sure how the OEM switch is designated, as it is electronic, so it will only turn on when the car is on, and defaults to off with engine off.
SPST - Single Pole Single Throw
I'm not sure how the OEM switch is designated, as it is electronic, so it will only turn on when the car is on, and defaults to off with engine off.
Trending Topics
Yep, that's the location, but that's not the OEM switch.
I'll be happy to take a pic and post it as soon as I get my MINI back... it's in the body shop right now, fixing up a problem that wasn't done right the first time.
I'll be happy to take a pic and post it as soon as I get my MINI back... it's in the body shop right now, fixing up a problem that wasn't done right the first time.

1st Gear
Joined: Jan 2008
Posts: 21
Likes: 0
From: Mascouche, Quebec, Canada
Edge, if you're still watching this, does this refer to the new style console with the small tray in the center and the TPMS reset on the right of the console (vs. the older model with the TPMS in the middle beneath the Ebrake)?

OVERDRIVE
Joined: May 2005
Posts: 8,233
Likes: 128
From: San Francisco


4th Gear
Joined: Dec 2008
Posts: 373
Likes: 1
From: Pensacola, FL
Edge, where's that pic? I want to see what this new switch near the ebrake looks like.
Thanks!

Thanks!

For those who have asked - my MINI is not in my possession right now (went back to the body shop again after MOTD to fix the matte black aero kit paint) but it will be very soon! I'll try to remember to take and post the pic. Sorry for the wait.

Wanderer
Joined: Jul 2007
Posts: 426
Likes: 0
From: St. Louis, Missouri
Good Info! I had planned to move my driving light switch to the E-Brake Console after installing a parcel shelf, in which the knock-out was substantially larger than the switch. Athough I figured I could have rewired myself, a harness would've been helpful, and when I inquired I was told no such harness existed. This was all possible only because I swapped for an '05 E-Brake console (mine's an '04, June) when I got the ARC armrest. Ultimately I ditched the stock driving lights when I swapped for an aero grill.
In the end I got an Alta bar and recently built this for my switch needs. Forgive me, I'm proud of it.
In the end I got an Alta bar and recently built this for my switch needs. Forgive me, I'm proud of it.
Good timing!  Sorry that the close-up is a bit blurred... be warned, the full-size ones are very big!


Sorry that the close-up is a bit blurred... be warned, the full-size ones are very big!

Ok, so it took a while, but I finally got this done!
Some notes for those swapping from the early console to the 05/06 console:
- To remove the console:
- Squeeze sides of ebrake boot together and wiggle it out (tougher than it sounds)
- Remove screw from just behind ebrake
- Pull console up, the rest is held by four clips (the 05/06 has a screw in the cupholder
- You can use the new console with the old bracket, but not vice-versa. The older bracket is elongated and has two extra holes that the old console fits into.
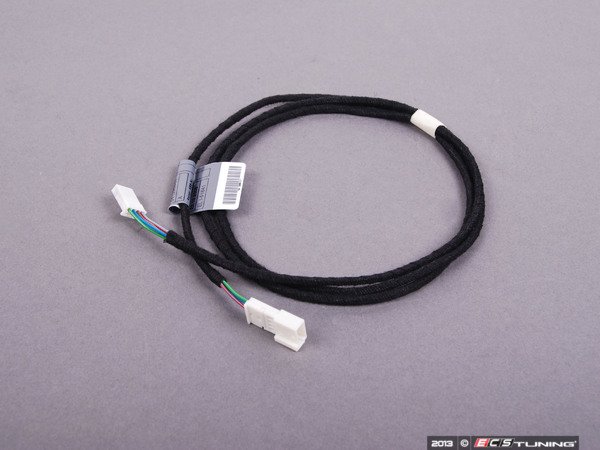
This thread refers only to the OEM extension cable.
For wiring the lights, I just used the OEM instructions. That puts everything over on the left side. From there, just ran the wires across the dash, then under the radio stack.
For wiring the lights, I just used the OEM instructions. That puts everything over on the left side. From there, just ran the wires across the dash, then under the radio stack.

More info here about that extra extension wire to the center console.
https://www.northamericanmotoring.co...em-switch.html
Thanks
https://www.northamericanmotoring.co...em-switch.html
Thanks
__________________

MINI Guru/ MINI Owner Since 2004 | NEW Lifetime Part Replacement | Local Pickup
Milltek | Genuine MINI | Forge Motorsport | NM Engineering | ECS Performance | M7 Speed
Customer Service Hours: 8am-8pm EST|Sales Team Hours: 8am-11pm | SAT 10am-7pm 800.924.5172
MINI Guru/ MINI Owner Since 2004 | NEW Lifetime Part Replacement | Local Pickup
Milltek | Genuine MINI | Forge Motorsport | NM Engineering | ECS Performance | M7 Speed
Customer Service Hours: 8am-8pm EST|Sales Team Hours: 8am-11pm | SAT 10am-7pm 800.924.5172

Thread
Thread Starter
Forum
Replies
Last Post
igzekyativ
MINIs & Minis for Sale
34
Jul 16, 2020 12:54 PM
Wohnson89
R50/R53 :: Hatch Talk (2002-2006)
4
Jun 10, 2020 04:53 AM
ryGuyMCS
MINI Parts for Sale
2
Oct 20, 2015 02:24 PM
PelicanParts.com
Vendor Announcements
0
Aug 4, 2015 02:45 PM