When you click on links to various merchants on this site and make a purchase, this can result in this site earning a commission. Affiliate programs and affiliations include, but are not limited to, the eBay Partner Network.
Desire is so pampered. She is accustomed to white glove services. I used the pretext to go for a drive to replenish the supply at HF.
we are getting to like these cotton gloves for certain tasks, like changing wheels, brakes, and doing the tie down straps on the trailer
Just a few more miles with the OMP lower front end brace and we are quite sure the difference is perceptible driving on public roads. The front end feels tighter and more solid. It is another incremental step in a more composed ride going over any less than perfect pavements, and I am not referring to handling in turns. Just the ride and steering feedback going down the road. I know that any incremental different is most felt at the instance of the change. In time a driver will just take it for granted, so for us this strong causality is significant. Also we are making one change at at time.
The focus shifted to Desire's mothership USS Enterprise and the trailer. Just a few preventive maintenance - check the brakes and lubricate the trailer bearings. Shockingly the 4 tons Sprinter motorhome has less rotor than Desire's front brakes, both in diameter and thickness . What is most interesting is the drop links for the front sway bar. They have the same construction as the OE ones on Desire. They consists of steel cups with molded plastic ball cups on both ends. Just a little bigger in scale for a much heavier vehicle.
note the same kind of sway bar drop link as the Mini - looks to be the same OEM product; notice also my racy red Koni damper
The front right rotor and pads are hardly worn so I called it good for the rest of the corners. The motorhome has close to 80k miles and still have the original brakes. I guess I am not driving it hard and aggressive enough.
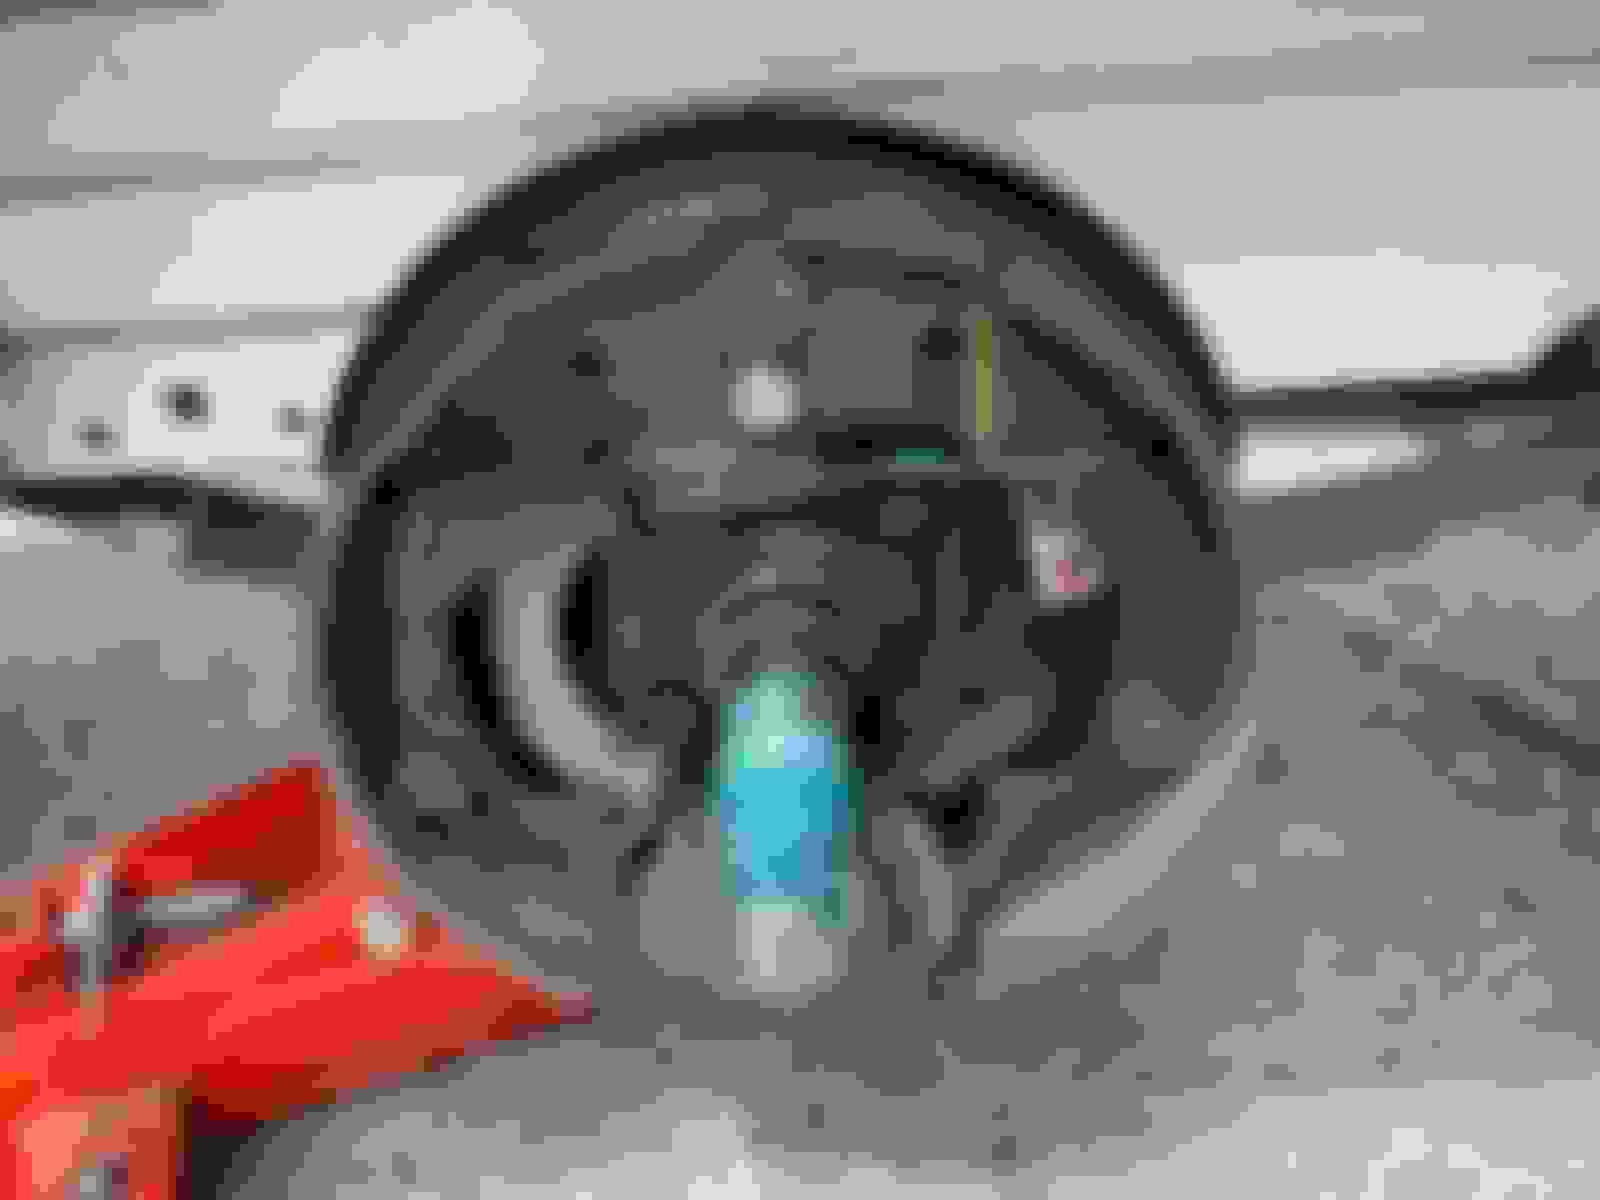
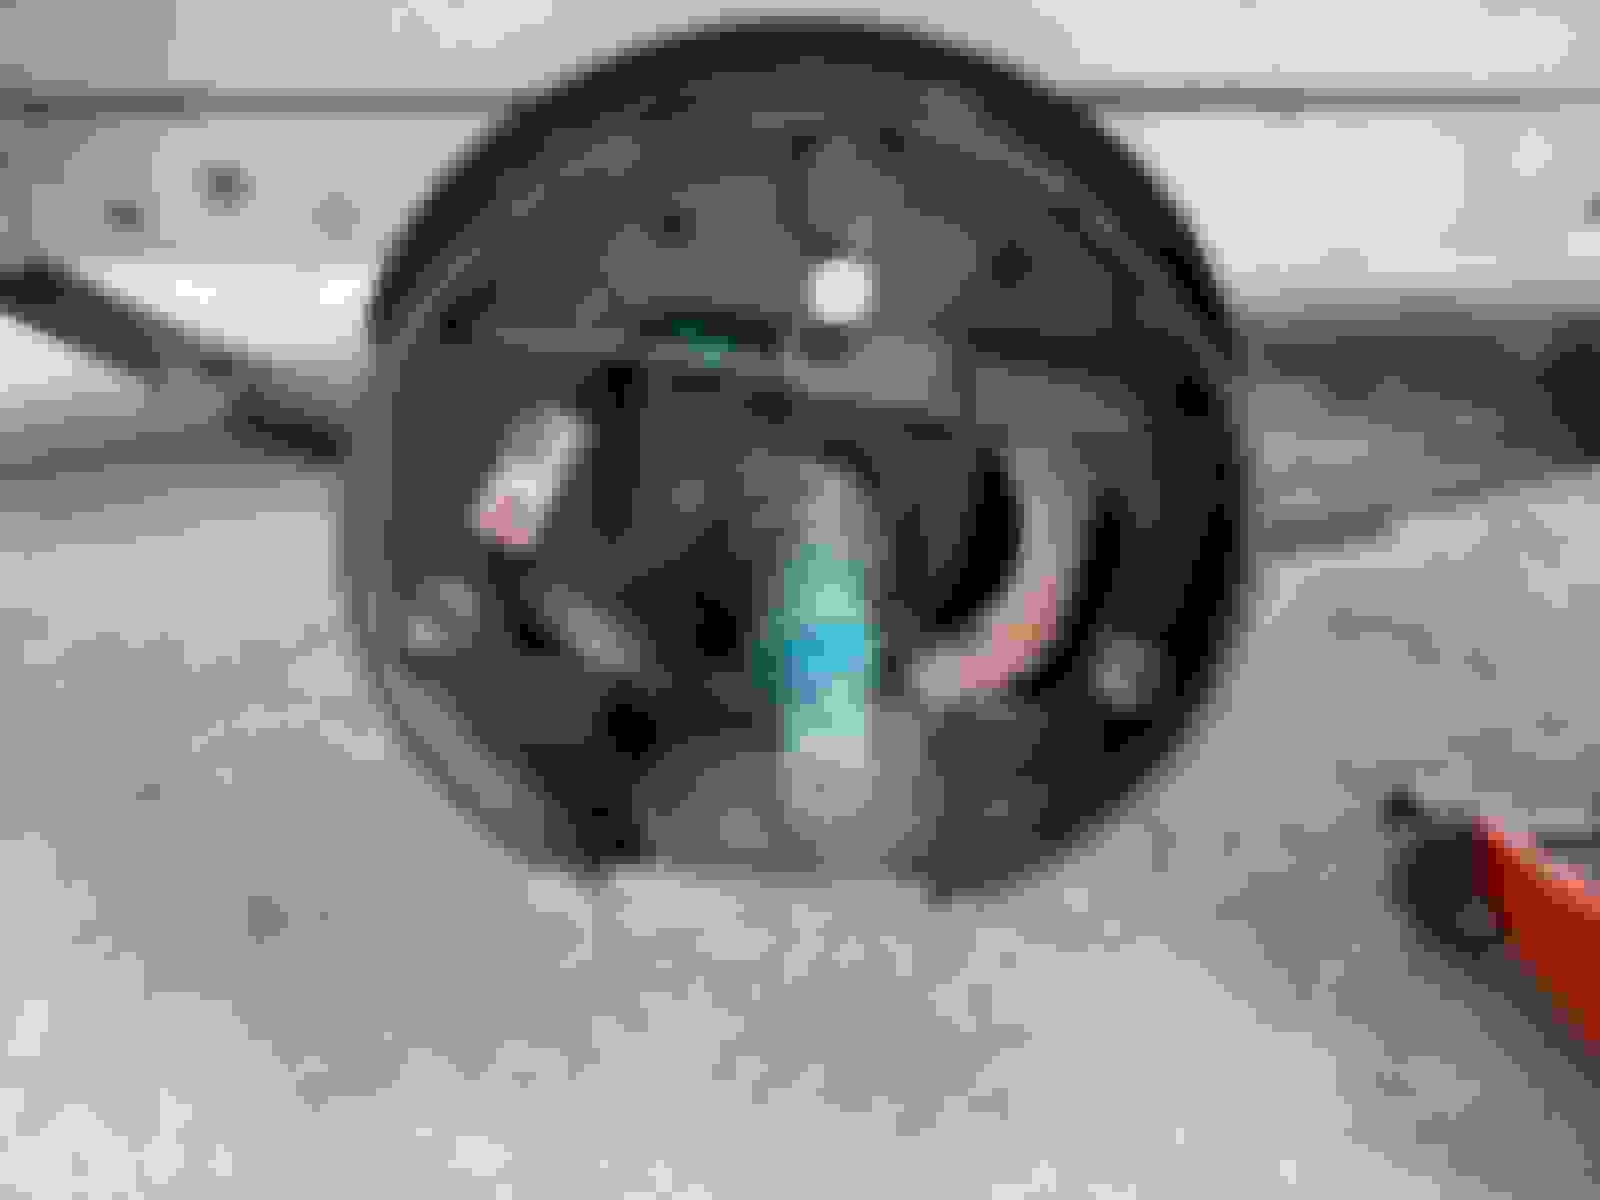
I did a bit of research on the speed sensors on our Gen 1 Mini. It is amazing that with millions of posts I cannot find a good dissected photo of the tone ring that is a part of the hub assembly, nor could I find a dissected photo of the Hall sensor assembly. I do not have wheel speed sensor problem. I am just interested to find out how it work and here is what I found.
The wheel speed sensor has only two conductors, which we all know. What is interesting is it is actually a Hall effect sensor, meaning it is an active semiconductor device rather than a passive one like an inductive magnetic pickup.
Being a Hall effect sensor it would require power, ground, and signal so there where be three wires. However that is what engineers are for. It requires only two wire that provide the circa 8V power to the Hall effect sensor IC. The same hot (+ve) wire also carries the AC wheel speed signal that is superpositioned on top of the ~8V DC power.
The what I call tone ring is an integral part of the hub bearing assembly. Rather than a tooth like construction it is a ring with magnets with alternating poles WRT the neighboring ones. It is manufacturing into the inner side of the seal wheel bearing and functions as a bearing seal also.
As I cannot find a good photo of the one on our Mini's here is one generic depiction, thanks to Brake and Frontend.
the one on the Mini's hub evidently looks like this that also function as the sealed bearing seal
One elusive speed sensor intermittent failure or outright warning problem is due to ferrous particles got picked up by the magnets in the magneto resistive tone ring. Once someone pointed it out, it should be very apparent why this can be a problem, so here you have it. I recommend reading the two articles on the above site.
One of my cars came from DC so there is surface rust on the hubs. The sensor ring had little rust ridges on the magnets, kind of like the toy Woody *****, you could see the ring magnets easily.
When I was replacing the left axle recently I did have a peek of the sensor and the "tone ring". Stupid of me I didn't take a good photo of them as I was so preoccupied with getting the DIY rebuilt axle back in right.
I can see living in the snow belt the rust particles can be attracted to the magnets and the bigger ones can cause erratic skip pulses. Few professional mechanics are capable of diagnose this kind of problem except just shotgun the parts.
I was told by Trailex that I should repack the wheel bearing when I get home from Ohio. I thought that is odd, with a brand new trailer you would think there would be thousands of miles before you need to worry about them. I have been rather unease and when I talked to Red Baron I would soon suspect the axle manufacturer must do a inadequate job of lubricating the bearings during production. I have meant to check the bearings for a while and I finally get around to it before getting stranded on the interstate highway in the middle of nowhere with the Porsche in tow.
I dislike packing bearing the old school way with your palms. My plan of attack is to use a grease gun fitted with a needle tip. There is no reason to remove the original grease if they are not contaminated or overheated. My goal is to make sure the inner and outer bearings are not starve of grease, and to fill the axle cavities with as much grease as possible.
the main reason that I only got around to this task is the hassles in bringing out the trailer to work on it
there is not much grease in the axle and drum bearing cavity
I squirted as much moly grease into the inner bearing as well as the cavity there as possible
one wheel done and the rest should be much quicker that I figured out the best know method (BKM) with my primal hunter gatherer instinct
this plastic baggy keep the bearing parts form contaminated by particles
as I packed a lot of grease into it they ooze out when I install the axle nut so I scrap off the oozing grease into the bearing cap
all that hold on the axle nut is this sheet metal clip that prevent the nut from unscrewing so you are screwed
trailer's electric brake is very interesting and there is next to no good article on the web on how it work; it is essentially a electromechanical force amplifier; very ingenious design
notice the shinny face of the drum where the electric brake solenoid rubs against
it's been so long that I deal with drum brakes and I remember not to freak out to see some area of the fiction material wears out more than others
the grease gun with the needle tip I used for this job
So that is the maintenance of Desire's docking station at USS Enterprise.
One of my cars came from DC so there is surface rust on the hubs. The sensor ring had little rust ridges on the magnets, kind of like the toy Woody *****, you could see the ring magnets easily.
The photo didn't come thru until now. I see it is indeed with tiny magnets and lots of them embedded in the bearing seal.
When I had strong suspicion that one of the outer CV joint of the two axles were causing the at speed vibration and worsening steering wheel shakes I decided to replace both axles with Chinese made ones. I didn't want to waste time diagnose down to the responsible axle owning to the track event schedule and the very low cost of the replacement axles. It would turn out the grease boots of these axle are NFG, at least if you regularly drive the Mini at triple digit speed.
I just replace the left axle with the original OE one after I replace the outer CV with GNK replacement kit. I saved the outer CV to inspect so I would know if it was the cause of the original problem. It is a 50/50 chance it is this axle, or the opposite side. It is a messy work as you have to clean off the abundance of moly grease as well as disassemble the CV joint. I have done CV joints servicing but never a non-plunging type as the outer CV in the Mini. I wasn't sure if it is even possible to disassemble it. The only way is to just do it to find out. I believe the one on the Chinese made CSS axle cannot be disassembled as I noted a welded ring.
Disassemble the CV joint full of grease is a bit tricky as the grease obscure how the joint is assembled, but I managed to figure it out.
I use paper towels to remove most of the grease and then cleaned the parts with leftover diesel form the EPA approved can that you cannot pour into a vehicle.
the outer CV housing, center yoke, bearing cage, and bearing *****
there are only superficial wear spots on the outer CV housing's 6 bearing races; note also the selective hardening of the housing you can tell from the color gradience
the bearing cage also has minimal wears
likewise the races on the center yoke have superficial wears
none of the bearing ***** show sign of excessive heat or else they will take on a gold tint color
Desire only has 50k miles when one of the axle developed vibration and I thought we just been dealt a lousy set of cards like the supercharger. With this exercise I am quite certain now the bad axle was the right side one. It could even be the carrier bearing. The visual inspection of the outer CV on the left side shows no sign of premature wear.
When I find time I will examine the right side OE axle carefully. I purchased the outer CV replacement kit for that too so I have an axle ready should the NFG grease boots on that side decide to fail.
What separate men from boys is men don't always able to put the thing that they took apart back together. Boys on the other hand is driven by curiosity and tend to do better.
CV joints is one of the mechanical engineering wonders. Reassemble one back together once you have taken it apart is always challenging as there is only one way you can put it back together, and typically you can only do it without grease.
I managed to assemble it back together; do mind the correct orientation of the center yoke because of the spring clip groove
it feels notchy at places when articulated with this scewdriver though its working range but I know this generally means nothing
I crabbed the new CV joint and it is really notchy as well as much tighter overall; so tight and notchy that one inclines to think it would cause vibration and CV binding but again this may just how it feel playing with our feeble hands
I am unable to judge if this CV joint is bad thought I incline to think it is still good for many (as in 10s x1000 ) miles. I would have to examine the one on the right axle to better able to make a call.
When I was replacing the left axle recently I did have a peek of the sensor and the "tone ring". Stupid of me I didn't take a good photo of them as I was so preoccupied with getting the DIY rebuilt axle back in right.
I can see living in the snow belt the rust particles can be attracted to the magnets and the bigger ones can cause erratic skip pulses. Few professional mechanics are capable of diagnose this kind of problem except just shotgun the parts.
My memory is failing me. Why I know. I did a screwedgle search on R53 tone ring and click the image. There is this unmistakably image of my foto from my thread with a phase that I know only I could have written it. Yet clicking the link only take me to the most recent post of yesterday. I know screwedgle all too well I managed to find my post on the subject by searching localling. So much for big data . I did indeed took a good foto of the "tone ring" and the sensor so my mental faculty was intact at the moment . For all I know it could have falling since driving at high G on earth @ high elevation .
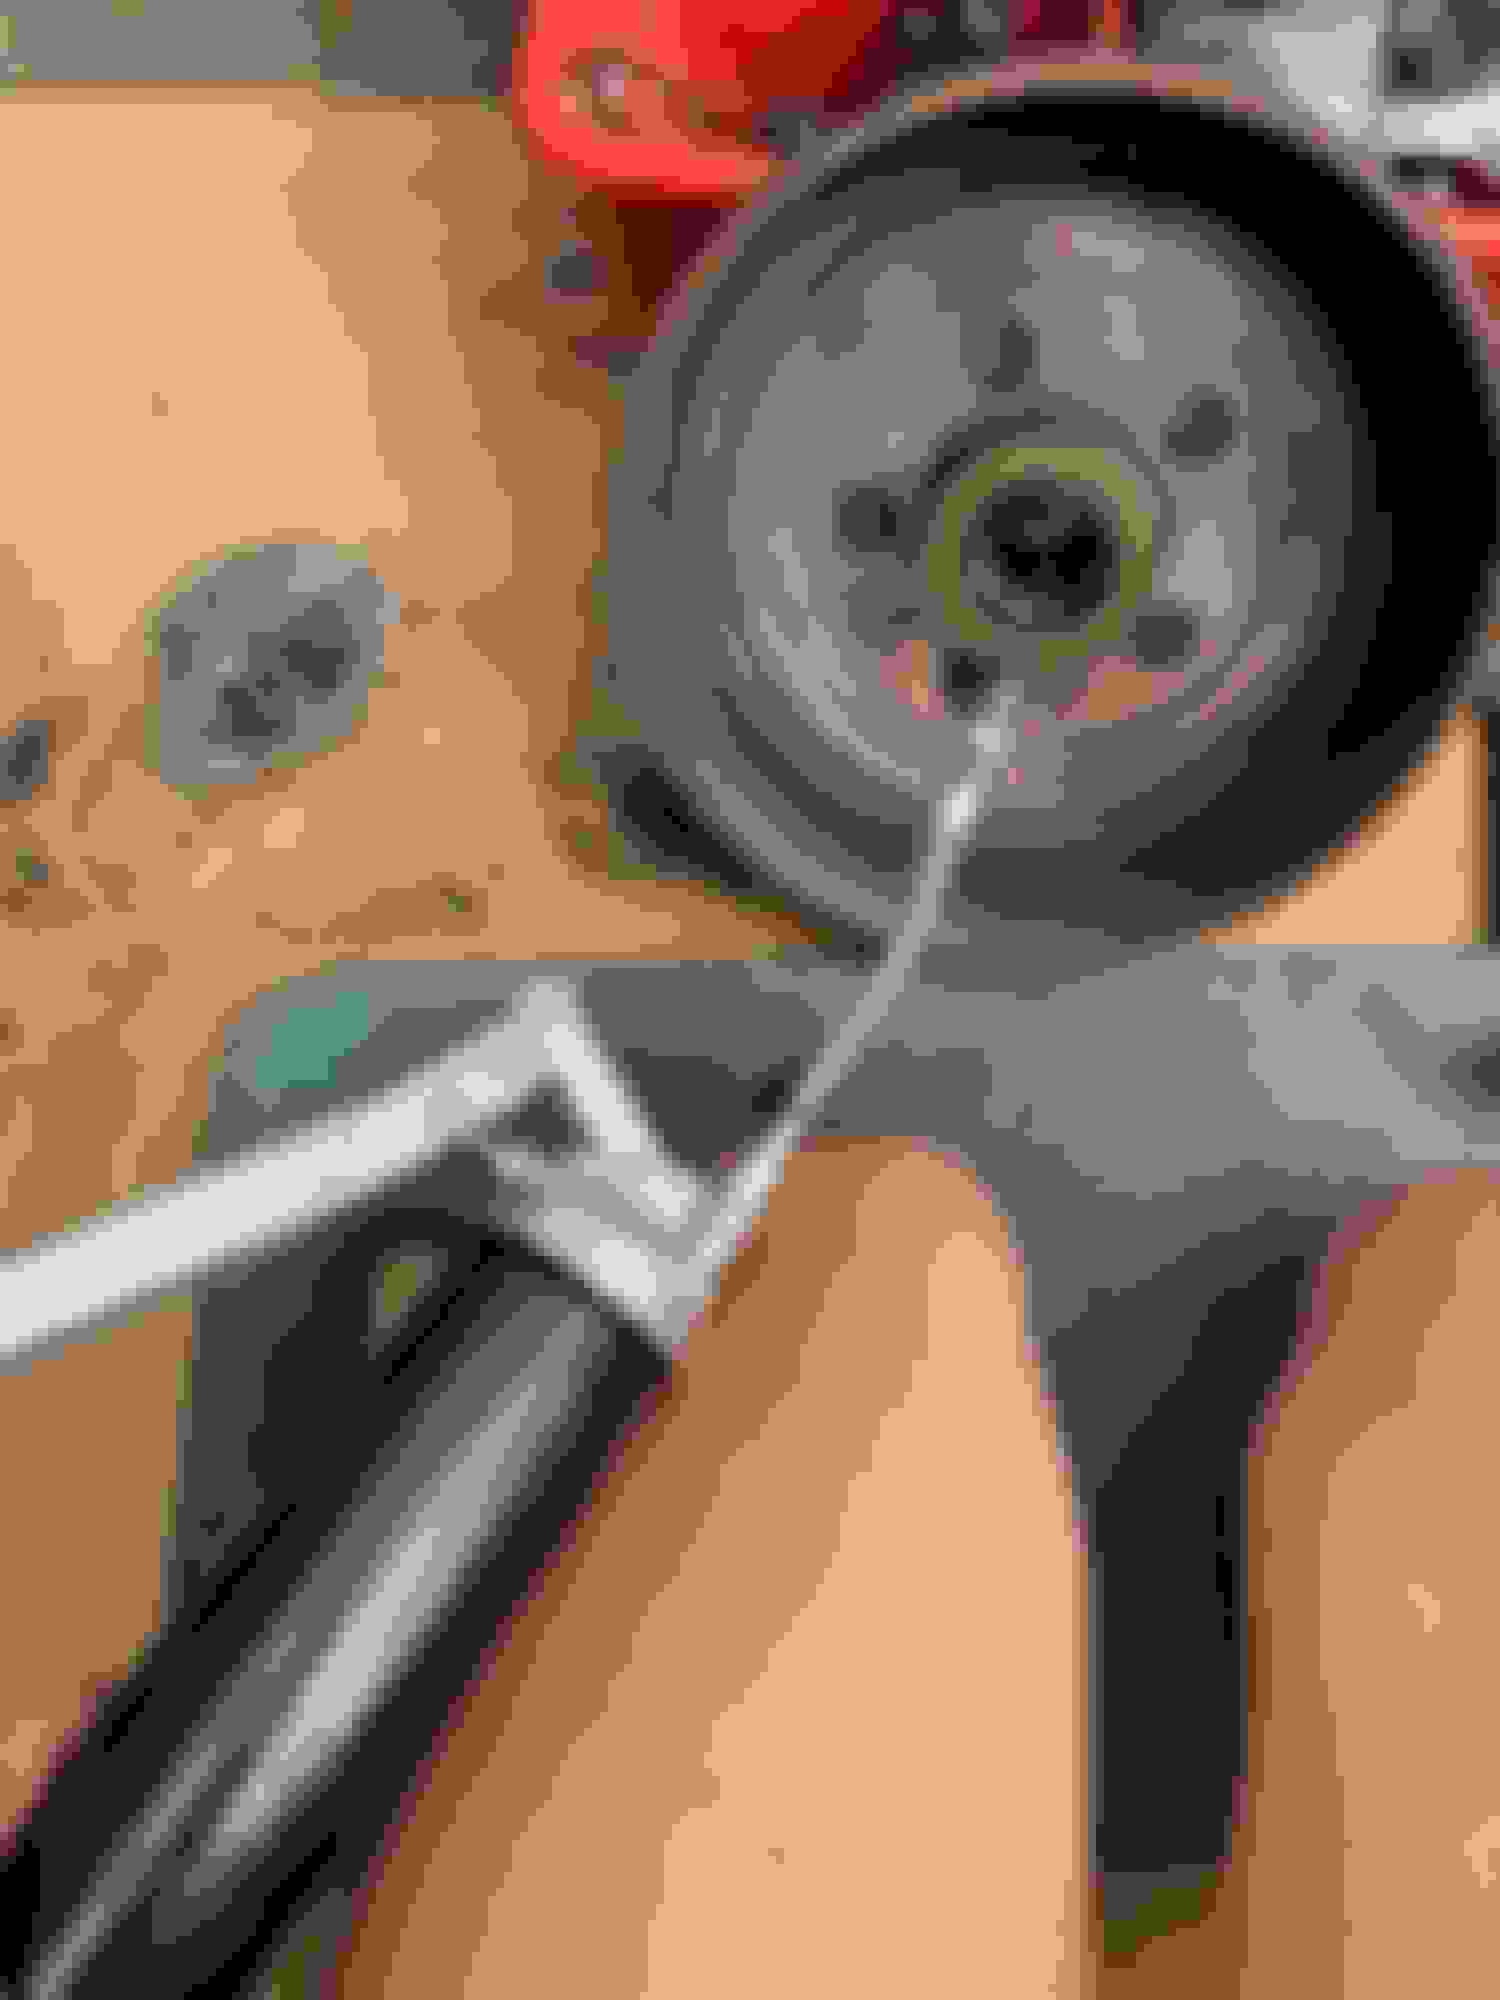
So without further ado here is my foto of the said speed sensor components that I took precisely on Apr 25 2019 14:44:21 hour that I posted here.
and man, look at those rusty FeO particles that are stuck to the tiny magnets ; also interesting to see the Hall pickup is at right angle to the magneto ring that is a part of the inner bearing seal
I now notice the rust particles on the ring even though Desire is on a low sodium diet here in PNW. I would have cleaned them knowing what I know now. You cannot get to it unless you remove the axle. Too late!
I made a new resolution of a task to be completed before the track season ends. I learnt to not set goals that is unreachable and realistic. Well this one certainly is. To wired up both Desire and the Porsche for used with the AiM Solo 2 DL and the SmartyCam HD. Instead of getting the hit and miss, we'd get there when we get there "best effort" parameters from the OBD connector, the data would be tapped from the CAN bus, almost like AT&T's massive data tap for the government in San Francisco. We want quality data real time just like the government.
Quality work needs planning and one of key parts is finding compact 4-pin connectors so the harness may be used on both track weapons without buying the spendy AiM's. We also sourced some felt tape to keep the wiring harness neat and tidy like from the German factory. Oh, and more RAM Mount component.
I spent a lot of time searching for compact connector and found these which are perfect for the job; each car would have a pig tail connector wired discretely
For Desire the CAN bus would be tapped from the tachometer harness. There would also be power and ground to support the data logger and the camera. And be rest assured there would be no ground faults. One thing that requires some attention is the data tap. Like the government or criminal you don't want to do a crap job only to have it come back and bite you in your ****. CAN bus's signal integrity can be compromised by the tap the data thief adding the wire stubs and in my case the AiM's long cable plus the $0.25 pigtail connectors.
You are not alone! There are others just like you, at least when it comes to what we love and enjoy. So too if you are a nut job with crooked world views that denies science, nature, physics and subscribes to the most extreme believes that moon landing 50 years ago was a hoax. There are lots of you as you discovered in FB and the like, so you all can boldly come out of the closets.
Owning a very rare motorhome is almost like that, but in a healthier way. Desire's USS Enterprise is spending the weekend meeting other oddball alikes at a farm to share some German motorhome love. There are two from Europe, and others from all over US including some from Hawaii.
Desire is not here as I didn't want to risk her well being in dicy Friday and Sunday return home traffic.
circle the wagons; USS Enterprise is the right most one and scored the best spot considering staying cool with respect to the clocking of the sun as the weekend is hot
Oh, I thought this was going to be an Area 51 story...
I was on a boat in the middle of the St Lawrence river, watching the moon landing on a portable TV. I remember someone saying that if you had told me ten years prior that I would be on a boat, in the middle of a river watching a TV of a moon landing, I would have said that person was crazy. It was awesome and hard to believe at the same time. TV was barely over 10 years old at that time. But now the world is flat again and if we were to try that again we will fall off the edge before getting there...
Enjoy the party and stay comfortable...
Last edited by Eddie07S; Jul 28, 2019 at 08:22 AM.
Reason: Fix typo
Oh, I thought this was going to be an Area 51 story...
I was on a boat in the middle of the St Lawrence river, watching the moon landing on a portable TV. I remember someone saying that if you had told me ten years prior that I would be on a boat, in the middle of a river watching a TV of a moon landing, I would have said that person was crazy. It was awesome and hard to believe at the same time. TV was barely over 10 years old at that time. But now the world is flat again and if we were to try that again we will fall off the edge before getting there...
Enjoy the party and stay comfortable...
Thanks. We had a great gathering. USS Enterprise received the most inquiries on many think-out-of-the-box innovative ideas of enhancements that I made.
This forum is so dead, dead, and dead, so I thought I would post a few highly relevant photos to stimulate the traffic.
I made myself this breakfast with 2 farm fresh eggs our hosts gave me
these ladies are some of the happiest hans on the planet with their shared mansion; note that they are smarter than a lot of humans that they stay in the shade
seeing how I enjoyed the two eggs, the hosts gave me a dozen to bring home with
I normally like making French omelette but it would be a shame to not showing off the bright orange yokes of these delicious eggs
And those girls love eating ticks, which we have an abundance of around here.
Breakfast... My favorite meal. There are so many fun things that you do with making it.
BTW - I just bought my 3rd HF 1-1/2 T, “aluminum”, race floor jack, with a super coupon. I have an older version of that jack that is mostly aluminum and easily a third less weight than these new ones. That one is my “take to the track” jack as it is so light. Now with 4 floor jacks I the poor man’s version of your rapid lifts... Still need to get some stands for going under the car.
Seeing those happy ladies, I would not have the heart to eat them when they bring you the bounties of delicious eggs.
HF used to sell the similar jack but with more AL parts. Now they cheap out and has only bare amount of AL. I bought mine for $49 last year when it had the rare low price plus using the 20% coupon. It fits inside the trailer's tool box despite being a bit on the heavy side.
Speaking of HF, I tried use the air pump at PIR in last track day. It wouldn't start due to back pressure. I was too lazy and I toggled the switch on and off a couple of time. It stop worky and I thought to myself the 12V plug must be loose. It turned out the surge current took out the 15A fuse for the "cigarette" lighters. Thankfully MINI has a spare 15A in the fuse holder. I remembered to replenish the spare 15A fuse when I got home.
Yes, I have had that starting issue when just trying it off a car battery. If the car is running, with the voltage 1 to 1.5v higher than the battery alone, I have never had that issue. What I do if I am going to use it off the battery I thread the head onto the valve stem but not all the way (just before it starts to leak air), start the pump and then screw the head on the rest of the way. That is the only downside I have come up with for that pump. The pump needs a bleed valve like the good tire pressure gage have.
I love the pump and I accepted that the starting is a part of compromise that I want the lightest pump that work possible. I recommend this pump to all my friends and neighbors and specifically tell them to only buy the cheaper of the two at HF. I was just being sloppy at PIR and I deserve the trouble of taking out the fuse. My expectation is cigarette lighter fuse usually has very high amperage like 30A, but I guess few now smokes so we now have the lame cigarette lighters in the Mini.
Also what got me was when it didn't work up front I tried the one in the boot and that too didn't work. It turned out both are on the same fuse. I got to the bottom of the cause because I needed the outlets to keep the iPhone charged so I can use dirty Harry's Lap Timer.
I have a similar one that is USA made Campbell Hausfeld that I paid too much long before these 12V pumps become this good and at these incredible bargain. My tank is simple too heavy to manhandled even from the garage out onto the driveway for me.
What I want to be able to do is to plug that HF pump into one of my 20v Dewalt batteries and have it run. I hate cords and hoses... They always get tangled on me in the worst ways....
What I want to be able to do is to plug that HF pump into one of my 20v Dewalt batteries and have it run. I hate cords and hoses... They always get tangled on me in the worst ways....
Won't you need to have a DC-DC inverter to use with Dewalt 20V batteries? The HF pump is for 12V only.
I don't find the cord being cumbersome to use. It is very flexible unlike the 1st gen pumps. Some pumps have short power cord but long air hose and I would not want them. I roll down both windows at the track. For pumping the left hand tires I reach in through the window and plug into the center console outlet. Once I am done with that side, I unplug it and walk over the other side and reach in through the open window again. No stress and no acrobat agility needed.
If you buy the 150 PSI HF pump, you would need to make a production to use it as you have to connect the power via battery clamps.
The HF pump runs really well at 13.5v to 14v, which is what the cigarette lighter voltage is when the engine is running. The “20v” Dewalt battery is actually 18v when being used. So, I would be looking at only a 4v difference. I figure it would just run all that much faster...
You are right about the HF cord being a “good” cord, but I have gotten spoiled by my Dewalt tools with the battery attached. It is one or 2 steps less to use a tool. With a battery powered pump, I would not have to plug the cord in, turn the ignition on, shuffle the pump through the car to get to the other side, etc. Ryobi makes a tire pump that I understand is good, but I have nothing by them, so no point in going down that route.
But, conversing with you about this has gotten me thinking of an idea that might just work... Hmmmm.
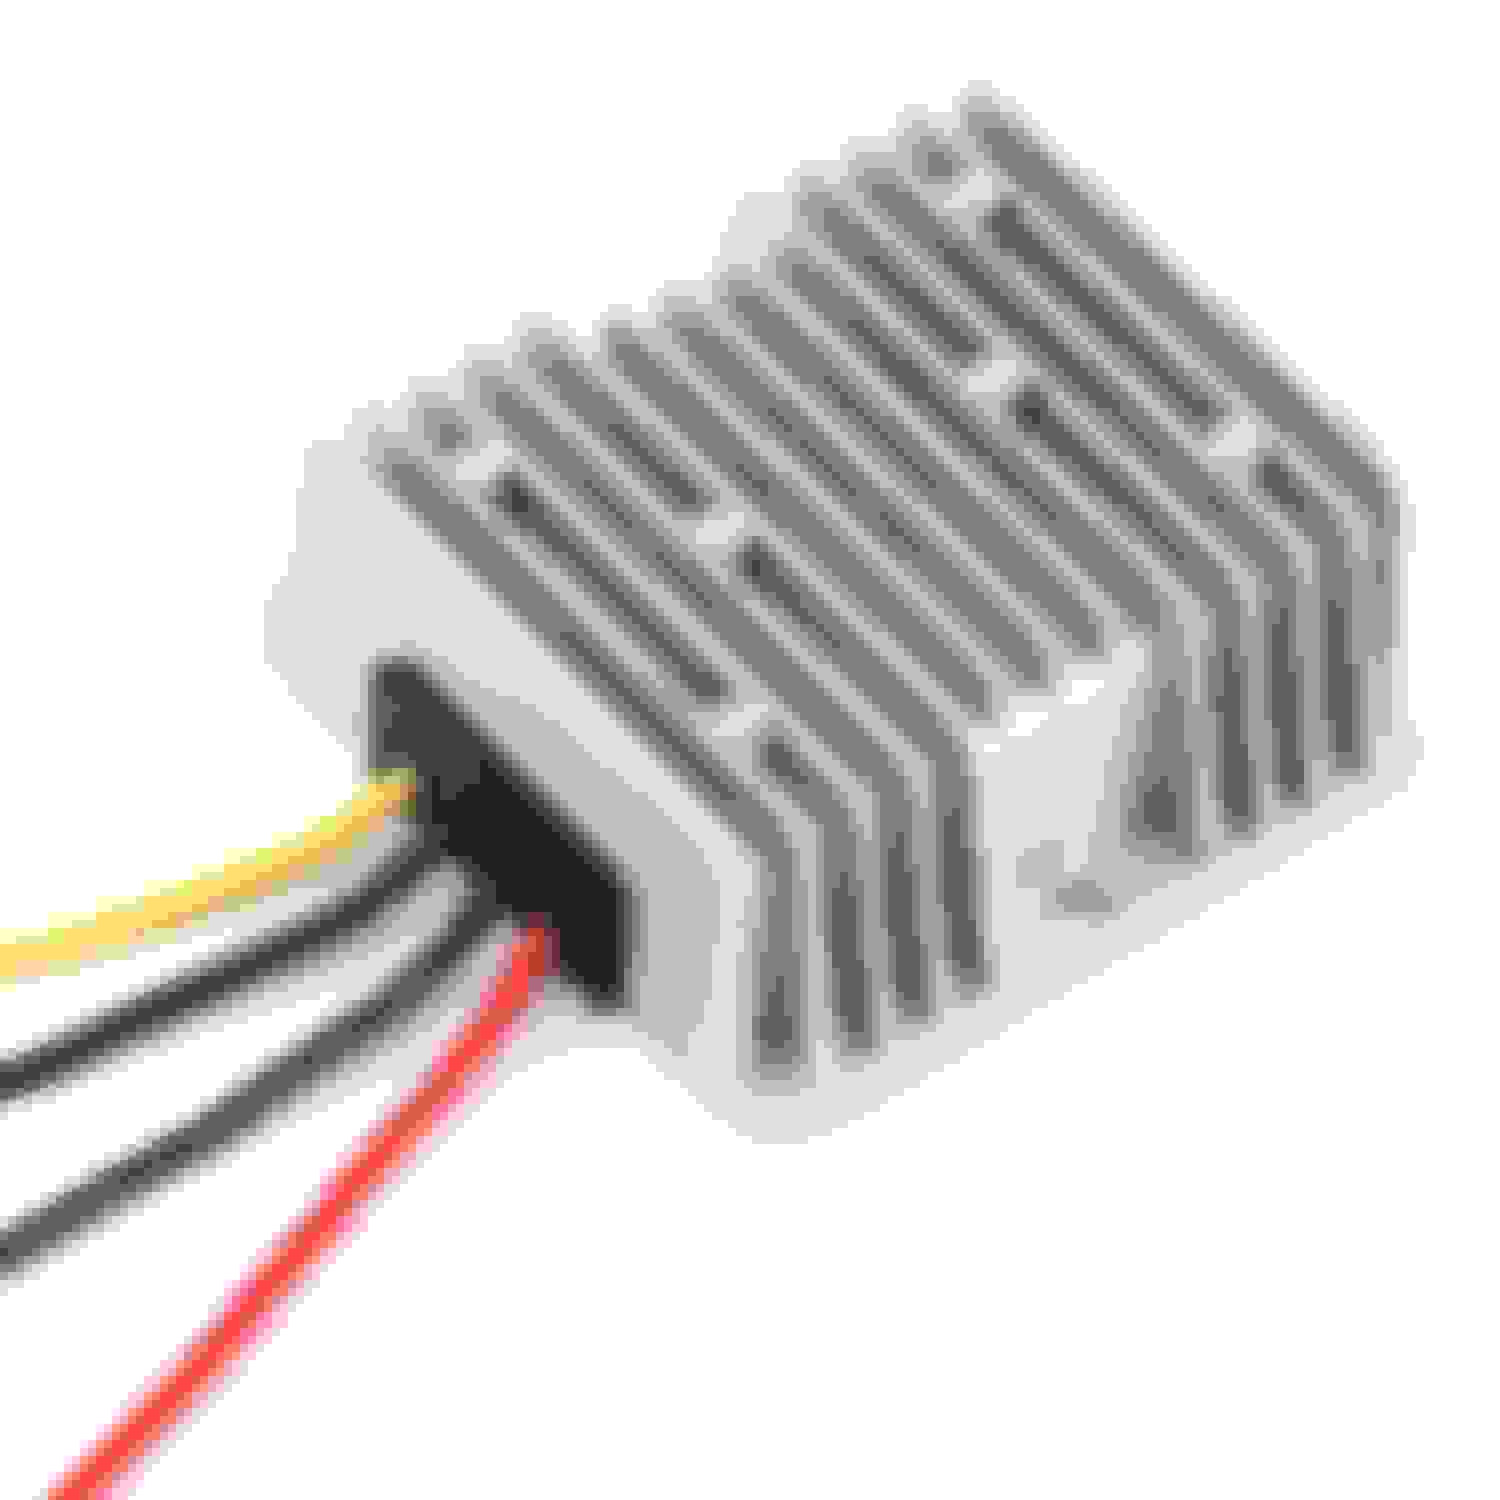
All "12V" equipment designed for automotive application should withstand up to circa 14.5V and I would expect the same with cheapo HF products. However another 4V is a bit much for a dumb brushed DC motor. If you are lucky it would just get hotter and pump the tires up in a jiffy.
I got in the habit of leaving the key in the cars at the track and leave the ignition at accessory all day because it keep the "cigarette" sockets powered and the cameras and phone charging. It does not hurt anything except some drug addict can drive off with my car (i.e. kidnaps Desire ). Yes, it is a risk at PIR as I have seen a lot of homeless walking through the parking lot and sometime even crossing the restricted areas.
OK I have a capital 'K' Kludge suggestion for using tool packs - high voltage diodes! A couple of them in series will drop 5-6V at 20A or whatever the pump runs at, just make sure to bolt them to a suitable chunk of metal.


 . What is most interesting is the drop links for the front sway bar. They have the same construction as the OE ones on Desire. They consists of steel cups with molded plastic ball cups on both ends. Just a little bigger in scale for a much heavier vehicle.


 ) miles. I would have to examine the one on the right axle to better able to make a call.


 . I did indeed took a good foto of the "tone ring" and the sensor so my mental faculty was intact at the moment
  . For all I know it could have falling since driving at high G on earth @ high elevation
 ; also interesting to see the Hall pickup is at right angle to the magneto ring that is a part of the inner bearing seal


 Still need to get some stands for going under the car.