
Drivetrain Another legitimate Oil Catch Can question...


Neutral
Joined: Mar 2013
Posts: 9
Likes: 0
From: Toronto, Canada
after watching this video:
I decided to google the best available options to deal with this issue and ended up here.
In Europe some users are only using the blanking caps as a method to solve it (http://www.etuners.gr/en/index.php?s=12&t=299) but some have complained about white smoke coming out of the vehicle.
The oil catch can is also debatable as some here have said, there are no empirical results showing the benefits of such install.
Here in this forum is the first time I hear people talking about throwing the gases straight to the atmosphere. I might as well try that instead of worrying about carbon building up lol

Thread Starter
|
2nd Gear
Joined: Jan 2013
Posts: 72
Likes: 0
From: Cincinnati, OH
OK, so I guess I should follow up here.
I asked this question to a very reputable tuner / race car builder in the area. I asked about draft tubes and vent to atmosphere, and his answer is as follows:
Personally, I'm planning on cleaning the valves and intake regardless in the spring, and then not modifying the system at all. Check again after 2 oil changes and 2 seafoam treatments, clean valves, record findings. Add catch can setup where both PCV ports go to one can, with one line going to intake port. Check again in 10K, report findings. I think this is really the only way to attack this.
I asked this question to a very reputable tuner / race car builder in the area. I asked about draft tubes and vent to atmosphere, and his answer is as follows:
You definitely need a vacuum to be drawn on the crankcase, but just having a line hanging out under the car will not be enough to do this. You will hav eto use one of the exhaust venturis which don't work that well or route it back to the intake. I would use a proper AOS to capture the vented goodness then return the air to the intake. Easy enough and with a high quality can you won't have as many problems with getting crap stuck to the valves.

5th Gear
Joined: Apr 2011
Posts: 668
Likes: 4
OK, so I guess I should follow up here.
I asked this question to a very reputable tuner / race car builder in the area. I asked about draft tubes and vent to atmosphere, and his answer is as follows:
Personally, I'm planning on cleaning the valves and intake regardless in the spring, and then not modifying the system at all. Check again after 2 oil changes and 2 seafoam treatments, clean valves, record findings. Add catch can setup where both PCV ports go to one can, with one line going to intake port. Check again in 10K, report findings. I think this is really the only way to attack this.
I asked this question to a very reputable tuner / race car builder in the area. I asked about draft tubes and vent to atmosphere, and his answer is as follows:
Personally, I'm planning on cleaning the valves and intake regardless in the spring, and then not modifying the system at all. Check again after 2 oil changes and 2 seafoam treatments, clean valves, record findings. Add catch can setup where both PCV ports go to one can, with one line going to intake port. Check again in 10K, report findings. I think this is really the only way to attack this.

2nd Gear
Joined: Aug 2009
Posts: 87
Likes: 0
From: Annapolis Maryland
OK, so I guess I should follow up here.
I asked this question to a very reputable tuner / race car builder in the area. I asked about draft tubes and vent to atmosphere, and his answer is as follows:
Personally, I'm planning on cleaning the valves and intake regardless in the spring, and then not modifying the system at all. Check again after 2 oil changes and 2 seafoam treatments, clean valves, record findings. Add catch can setup where both PCV ports go to one can, with one line going to intake port. Check again in 10K, report findings. I think this is really the only way to attack this.
I asked this question to a very reputable tuner / race car builder in the area. I asked about draft tubes and vent to atmosphere, and his answer is as follows:
Personally, I'm planning on cleaning the valves and intake regardless in the spring, and then not modifying the system at all. Check again after 2 oil changes and 2 seafoam treatments, clean valves, record findings. Add catch can setup where both PCV ports go to one can, with one line going to intake port. Check again in 10K, report findings. I think this is really the only way to attack this.
As for what is the proper setup, here is my .2 cents.
1. Block off the intake manifold side pcv line. get that **** out of there. It is the single greatest cause of your carbon build up. Weather you want to run a catch can or not just block it off. If you can't find those Peugeot caps then JB weld the closest thing you can find to it. Just get rid of it. There is ZERO negative effect on eliminating that port, and will have no repercussions on the other PCV line regardless of weather or not you leave the other line stock, or put a can on it.
2. The positive crank pressure line is an interesting topic of conversation. We are generally concerned as to what our engine breathes with out a can on that line but I'm curious as to what the engine actually does with that line not connected. The general school of thought is that we are eliminating "harmful gunk/oil/vapor" from the engine, but is that really true.
I severely doubt any of the solids that leave the valve cover actually make it to the engine. That would be a monumental trip for anything other than a gas. I mean think about it..... through the intake, into the turbo past the intake baffle, through the intercooler, up the cold side pipe back down the other side, through the throttle body, up the intake manifold. It would be like the Oregon trail for oil.
With that understanding than what is it that actually get's into the engine and what is the engine doing with it?
Here is what I can gather, and is almost to my knowledge never discussed. Assume that you have two engines where one is breathing straight oxygen (pcv line no longer active) and one engine is breathing oxygen and crank vapor (PCV line attached). Typically you would assume that the engine breathing straight oxygen has an advantage over the other engine because it simply has more potential energy per breath. However I'm not so sure this is true.
When I disconnected my PCV from my engine and vented it I noticed only one serious difference. Through out the rev range and at idle I had lost some of the smoothness of my engine. It performed like a champ under WOT but would buck a bit and carry on like it was on a rough tune. It wasn't severe, but it was noticeable and was certainly not an improvement over the driveabilty before the modification. After mulling it over I can only really come to one conclusion as to what is going on.
The engine is designed to run the way it does when it rolls off the factory line. While new age engines can mask unbelievable amounts of modification and damage, the engineers dial the engine's fuel/spark map with the emissions equipment fully in tact. Even if you allow more air into an engine, the fact of the matter is that unless you map the fuel and spark to work with it your hurting your performance. It's no differnt than disconnecting your EGR on the cars of old. Yeah the car wouldn't get that disgusting exhaust gas in it, but when the ECU would command the opening of the port it compensated for it by adjusting the fuel mixture. It's a box with wires, it had no idea that you got rid of the incoming exhaust gas. it's going to adjust the fuel anyway and drop your AF through the floor causing the car to perform like horse ****.
So with this in mind even though we are keeping the muck out of our engines we are truly doing our driveability a disservice. However keep in mind though that knowing this I still personally choose to vent to atmosphere. 1 because I see what comes out of those ports and don't care weather or not it makes it to the the engine. But 2 because I have an AP and can have the car tuned at COBB to compensate for the new parameter.
3. Another interesting tidbit I would like to bring up is has anyone questioned why some engines are puking oil and some aren't? My catch Can is bone dry all the time. I don't have any oil or milkshake in it. I'm curious as to weather this is a broader look into the state of the engine. does a loose bottom end cause more blow by thus creating more oil in the can? I'd personally be worried if my can was filling up every couple of months. Just a thought nothing to back it up really...
MINIPWR....
I'm not sure if you're aware but the test you just performed was actually called a manometer test. We use it to test for faulty rings and there is actually a spec. unfortunately it's not something you can do with a boost gauge in that it requires a very sensitive gauge. But you got the premise spot on. +1 on that, and if you want I can see if I can track it down. you should be able to rent the tool if you look around hard enough.
Sorry for the long post let's me shut my mind off at night

Neutral
Joined: Mar 2013
Posts: 9
Likes: 0
From: Toronto, Canada
Step, So you did block the passenger side PCV and had the stock line on the driver's side? Have you had your oil consumption increase? or smoke ou of the exhaust? that's the complaints I've read from people that did that. But they never mentioned as whether they had de-cat or not.
Where are you venting it out to? through the bottom of the engine or what?
Where are you venting it out to? through the bottom of the engine or what?
2nd Gear
Joined: Aug 2009
Posts: 87
Likes: 0
From: Annapolis Maryland
I honestly can't remember if I ever ran the drivers side pressure port hooked up since I made the switch. with it unhooked and venting to a can, The only ill effect I noticed was that for a couple of cold cycles I had smoke venting out of the can at idle. this happened about 5 or 6 times than dissapated exponetially until completly gone. I have no theroys as to what it was. however I monitored my levels closely and have had no signs of ill effect.
I honestly think the oil consumption is a good point to bring up. I change my oil every 5k and at 45k it will go a full interval without loosing a drop.
I only ran my car with out a cat for about a month and put the cat back on. I don't belive it had any effect on my performance.
I honestly think the oil consumption is a good point to bring up. I change my oil every 5k and at 45k it will go a full interval without loosing a drop.
I only ran my car with out a cat for about a month and put the cat back on. I don't belive it had any effect on my performance.
5th Gear
Joined: Apr 2011
Posts: 668
Likes: 4
I was unaware what that test was called. I did realize my boost gauge was not sensitive enough. When summer comes around and I get the new Head I plan to do it again with a better gauge. Ill look into the thing you mentioned.

Neutral
Joined: Jan 2014
Posts: 1
Likes: 0
I come from the Mustang community, but my GF just bought a Mini Countryman. I have to say, Mini has a really fun culture, I like it.
Anyway, if you're worried about emissions or warranty, they're usually a 5 minute job to remove a the lines and reinstall the OEM line.
Venting to the air will create a little hot oil smell.
As for the efficiency of catch cans, this site is the best I've seen (though nothing will beat a previous post about running an OCC and checking the valves after a few thousand miles).
PCV systems usually have an 'in' side and an 'out' side to allow the crankcase to breathe. Not sure I'd want to eliminate that. If you go with the breather setup, put a breather on the valve cover (or wherever the air comes in/out of the engine) and a rubber plug on the intake port where the line used to go.
Also, supposedly Cadillac's DI engines have found a way around the carbon build up issue by redesigning the heads. Haven't researched it past that.
Anyway, I hope I've helped at least a little, and I look forward to learning more about Mini's culture of fun.

4th Gear
Joined: Apr 2007
Posts: 380
Likes: 3
Interesting. A couple of relavant links:
http://www.mc2magazine.com/MC2_Oil_C...n.cfm?sc1=10,8
https://www.northamericanmotoring.co...s-reviews.html
Not sure if anyone's tried this one yet. The popular one amongst Mini owners seems to be the BSH.
http://www.mc2magazine.com/MC2_Oil_C...n.cfm?sc1=10,8
https://www.northamericanmotoring.co...s-reviews.html
Not sure if anyone's tried this one yet. The popular one amongst Mini owners seems to be the BSH.

2nd Gear
Joined: Jan 2015
Posts: 105
Likes: 3
From: Florida
Hi all, first post as I was asked to join and share some info most are over looking.
Step, good info except there are several critical functions the PCV system serves that if you defeat it as described, and the results are a much accelerated slow death of the engine.
Beercules is closer to understanding.
Let's start at the basics of the PCV system, how they work, and what all the functions are. Then let's move on to the unique issues of direct injection and how to combat these for a long life of enjoyment.
So, we are into our second generation of automotive techs that are NOT taught how each system works, how to dissasemble and repair. Techs today are trained to read diagnostic codes and replace parts (aside from that "old timer" that is still at most dealers that actually DOES understand most all) so this knowledge is fast disapearing, and most performance shops that may be excellent at making power, doing quality builds, etc. do not understand all of this.
This video is one of the few training videos that goes over a standard PCV system and it's functions, so pay close attention to what it removes, and what happens if you defeat the evacuation function and allow these damaging combustion by-products to remain in, and accumulate in the crankcase:
This is a basic PCV system for a naturally aspirated engine, I will cover the unique challenges of proper crankcase evacuation for turbo charged, or centrifugal supercharged shortly.
Every engine has a certain amount of "blow-by". This blow-by contains compounds from the combustion process that are harmful and damaging to the engine if they are not immediately evacuated or removed from the crankcase before they can settle and accumulate in the crankcase contaminating the engine oil and also allowing corrosion to form as well. Just adding a breather, or a "catchcan" with a breather/vent ONLY relieves pressure, it results in almost all the damaging "gunk" remaining int he crankcase, and a simple BlackStone oil analysis will show what is happening for any of you that have implemented an incorrect solution.....if that does not scare you, then you don't care about your engines life.
These compounds consist mainly of the following:
Water vapor. Water is released from the air charge in the extreme pressure and heat of combustion, and while most exits the exhaust, some enters the crankcase as blow-by. Water and oil and metal parts don't mix.
Un-burnt fuel. Cold start enrichment and just the fact that gasoline does not burn completely means a good amount is also expelled with the exhaust, but what gets past the rings dilutes the oil and also is a contaminate.
Sulfuric acid. Very corrosive and this is formed when the water and other compounds mix during combustion and in the blow-by process. Damage is seen on rocker arms and other valve train components as rust, and discoloration of aluminum parts. Further, examining bearings and journals shows the splotches, or "worm tracks" of the acid etching and attacking the surfaces.
Abrasive soot and carbon. Very abrasive, and the smaller particles are a micron size that oil filters don't trap so this is constantly circulating in the oil and accelerating wear. Just look at diesel oil that produces many times what a gasoline engine does to see, and of course the oil analysis for those that are running a breathed system.
These are the main make-up of the damaging compounds, and this is what they look like when trapped before ingestion or as this video, shows what was accumulating in a turbo engine over time and the proper system is now evacuating from the crankcase:
I'll stop here for now due to length...but will stop back tomorrow to address the differences between port injection of past, and direct injection of today and why the coking occurs.
Ask questions and I'll do my best to answer all.
I am not the average "keyboard warrior"...I have worked as an Automotive Engineer for over 40 years, and develop and design PCV and crankcase evacuation systems for OEM and aftermarket with a long list of certifications and experience if any need them.
Cheers!!
TB
2nd Gear
Joined: Jan 2015
Posts: 105
Likes: 3
From: Florida
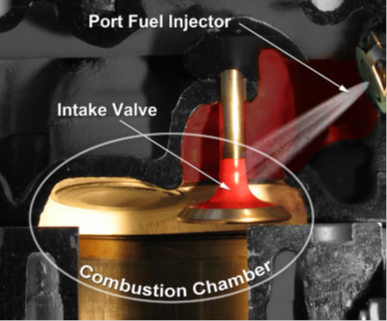
Back for a overview on direct injection, and what causes the intake valve coking issue and the related damage and symptoms. First I'll back up to the carb'd engines of the 60's & 80's and this include the throttle body injection of the 80's. Back then, fuel and air were mixed at the carburetor or TB injection body where this mix of air and fuel was drawn down the intake manifold runners before entering the combustion chamber during the intake stroke. Valve coking was an issue that would wear valve guides by 50-75k miles on average, and it was common to have to do a "valve job" which involved removing the cylinder heads and manually cleaning the valves and then cutting the sealing edge and replacing guides and seals before re-assembly. The coking occurred due to the oil and other compounds present in the PCV vapors baking onto the valves forming these deposits. As there was fuel entering, and the detergents present in the fuel this was not a serious issue until a good amount of miles were on the engine. Now enter port injection of the 90's. The fuel injectors were one per cylinder now, and they were moved to the very bottom of the intake runners where they could spray a stream of fuel directly onto the back sides of the valves and this eliminated coking completely as this cut away shows:
This constant shower of detergent fuel (top tier fuels having the most detergent content) kept the valves looking like new for several hundred thousand miles, and prematurely worn valve guides, and the valves themselves from the instability as the guides wore disappeared! So for the past 20 plus years, we have not had to do valve jobs (unless a material defect caused a failure) and this generation of automotive techs have not been exposed to the issue...until direct injection. The advantages of DI are many, with fuel now introduced directly into the combustion chamber at 2-3,000 RPM, injectors are not clogging any longer. Fuel never touches the back sides of the valves, and since it is not introduced until the final 10% or so of the compression stroke, it is only present in the combustion chamber for milliseconds so detonation common in port inject as the fuel enters during the intake stroke and is present far longer so a glowing carbon spark can cause pre-ignition, etc. This reduction in detonation now allows the DI engine to run with 11.5:1 CR and still 87 octane in NA cases, where a port injection engine would need 93 octane just to run and 10.5:1. The fuel is entering at such a high pressure that injectors no longer clog with residue so fuel supplements are a waste of $. This also allows smaller displacement engines to make more power and combust the fuel more efficiently for more power, better fuel economy, less emissions from smaller displacement engines. The problem that was NOT anticipated is, with no fuel touching the valves any longer, the compounds present in the PCV vapors now quickly bake onto the back sides of the valves and the stems as only the air charge now passes the intake valves:

And in as little as 5-10k miles, this is what your valves are looking like:
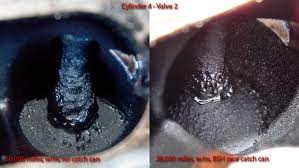
And worse. The link below is of images from every auto maker in the world (no, BMW is not alone with this issue...it affects EVERY auto maker, and GM and Ford have no solution either:
https://www.google.com/search?q=inta...ed=0CAYQ_AUoAQ
The only way to prevent this is to stop all of this "gunk" from entering the intake air charge, and 99% of the "catchcans" out there only trap at most, 15-30% of it....it is not what is trapped, but what gets pulled right past and still enters. You CANNOT delete the PCV system as I covered in the first segment as then the engine is subject to greatly increased wear from all of this "gunk" left to accumulate in the crankcase. Venting to the atmosphere also defeats the evacuation of this gunk, and is illegal in every state & Canada.
So, it is critical to implement a solution that does trap and remove all of this, and as turbo charging makes this more difficult, you need a system specifically designed to provide proper crankcase evacuation during all modes of operation. There is one that exists, but we will continue with the issue.
Let's look at the services currently available for cleaning these deposits:
Solvent based upper induction cleaning such as BG, CRC, SeaFoam, and all dealers have a branded product as well.
These work by the deposits absorbing the solvent as it is introduced, and it causes them to break loose and most will be expelled out the exhaust. Biggest issues are they do not get all the deposits to break loose, and 2 things happen to what does. As I stated, most is expelled out the exhaust, but this can damage catalytic converters, any larger chunks will make contact with the hot side turbine blade, and this damages the leading edge of the turbo blades. Also, a very large chunk can get trapped between the valve and seat as it passes, and that will cause a valve to remain open and piston to valve damage may occur, and finally as this is performed while the engine is running at a very high idle, smaller particles are forced (with some of the solvent) between the pistons and cylinder walls cause scouring (scratches) that are not what you want to see. NO turbo engine should ever have a solvent based cleaning performed on it.
Then there is the simple stainless brush method as this video goes through:
Note the build up already at 5500 miles on this brand new Stingray DI engine and how you see the deposits scrapped into a ball on the stem...this is what wears the valve guides now so quickly. Every cycle the valve stem is pulling this abrasive coating into the guide:
Or, the crushed walnut shell media blasting service:
Whichever is performed, it is critical that the ports are all tapped off except the one your cleaning, and that one MOST be at TDC to ensure both valves are closed so no debris can enter the cylinder. Those that have had these performed know the drastic restoration of power and fuel economy, smooth idle, etc., but preventing this is much simpler.
Again, NO auto maker admits to this issue, and ALL experience it.
Lets go a bit further and show a test done over app. 2 years as the coking progresses. This owner dynoed at the same dyno, near same conditions, every 6 months or so and then performed a manual cleaning service. Note, the car already had some miles on it before he began the dyno documentation, but it shows a clear story where most do not notice as it is a gradual degradation, not a sudden loss of power:

If you research, you will find many attempts at reducing this occurrence with everything from multiple valve events to Audi and the addition of small port injectors back into the ports...but to date, only minor slowing of the formation has been accomplished.....NO automaker has a solution.
I'll stop here and next will be how and why the Mini has these issues, and how to correct the cause and prevent this while maintaining a emissions compliant closed system.
As always, ask questions and I'll do my best to answer them.
TB
This constant shower of detergent fuel (top tier fuels having the most detergent content) kept the valves looking like new for several hundred thousand miles, and prematurely worn valve guides, and the valves themselves from the instability as the guides wore disappeared! So for the past 20 plus years, we have not had to do valve jobs (unless a material defect caused a failure) and this generation of automotive techs have not been exposed to the issue...until direct injection. The advantages of DI are many, with fuel now introduced directly into the combustion chamber at 2-3,000 RPM, injectors are not clogging any longer. Fuel never touches the back sides of the valves, and since it is not introduced until the final 10% or so of the compression stroke, it is only present in the combustion chamber for milliseconds so detonation common in port inject as the fuel enters during the intake stroke and is present far longer so a glowing carbon spark can cause pre-ignition, etc. This reduction in detonation now allows the DI engine to run with 11.5:1 CR and still 87 octane in NA cases, where a port injection engine would need 93 octane just to run and 10.5:1. The fuel is entering at such a high pressure that injectors no longer clog with residue so fuel supplements are a waste of $. This also allows smaller displacement engines to make more power and combust the fuel more efficiently for more power, better fuel economy, less emissions from smaller displacement engines. The problem that was NOT anticipated is, with no fuel touching the valves any longer, the compounds present in the PCV vapors now quickly bake onto the back sides of the valves and the stems as only the air charge now passes the intake valves:
And in as little as 5-10k miles, this is what your valves are looking like:
And worse. The link below is of images from every auto maker in the world (no, BMW is not alone with this issue...it affects EVERY auto maker, and GM and Ford have no solution either:
https://www.google.com/search?q=inta...ed=0CAYQ_AUoAQ
The only way to prevent this is to stop all of this "gunk" from entering the intake air charge, and 99% of the "catchcans" out there only trap at most, 15-30% of it....it is not what is trapped, but what gets pulled right past and still enters. You CANNOT delete the PCV system as I covered in the first segment as then the engine is subject to greatly increased wear from all of this "gunk" left to accumulate in the crankcase. Venting to the atmosphere also defeats the evacuation of this gunk, and is illegal in every state & Canada.
So, it is critical to implement a solution that does trap and remove all of this, and as turbo charging makes this more difficult, you need a system specifically designed to provide proper crankcase evacuation during all modes of operation. There is one that exists, but we will continue with the issue.
Let's look at the services currently available for cleaning these deposits:
Solvent based upper induction cleaning such as BG, CRC, SeaFoam, and all dealers have a branded product as well.
These work by the deposits absorbing the solvent as it is introduced, and it causes them to break loose and most will be expelled out the exhaust. Biggest issues are they do not get all the deposits to break loose, and 2 things happen to what does. As I stated, most is expelled out the exhaust, but this can damage catalytic converters, any larger chunks will make contact with the hot side turbine blade, and this damages the leading edge of the turbo blades. Also, a very large chunk can get trapped between the valve and seat as it passes, and that will cause a valve to remain open and piston to valve damage may occur, and finally as this is performed while the engine is running at a very high idle, smaller particles are forced (with some of the solvent) between the pistons and cylinder walls cause scouring (scratches) that are not what you want to see. NO turbo engine should ever have a solvent based cleaning performed on it.
Then there is the simple stainless brush method as this video goes through:
Note the build up already at 5500 miles on this brand new Stingray DI engine and how you see the deposits scrapped into a ball on the stem...this is what wears the valve guides now so quickly. Every cycle the valve stem is pulling this abrasive coating into the guide:
Or, the crushed walnut shell media blasting service:
Whichever is performed, it is critical that the ports are all tapped off except the one your cleaning, and that one MOST be at TDC to ensure both valves are closed so no debris can enter the cylinder. Those that have had these performed know the drastic restoration of power and fuel economy, smooth idle, etc., but preventing this is much simpler.
Again, NO auto maker admits to this issue, and ALL experience it.
Lets go a bit further and show a test done over app. 2 years as the coking progresses. This owner dynoed at the same dyno, near same conditions, every 6 months or so and then performed a manual cleaning service. Note, the car already had some miles on it before he began the dyno documentation, but it shows a clear story where most do not notice as it is a gradual degradation, not a sudden loss of power:
If you research, you will find many attempts at reducing this occurrence with everything from multiple valve events to Audi and the addition of small port injectors back into the ports...but to date, only minor slowing of the formation has been accomplished.....NO automaker has a solution.
I'll stop here and next will be how and why the Mini has these issues, and how to correct the cause and prevent this while maintaining a emissions compliant closed system.
As always, ask questions and I'll do my best to answer them.
TB
Last edited by Tuner Boost; Jan 10, 2015 at 08:25 AM.

All this information and really interesting and refreshing to see. Its nice to see facts and the videos with the information is nice too. I look forward to your next post, however I can't quite shake the feeling I'm getting set up for a sales pitch for a new product, tool, ect. Please prove my gut feeling wrong.

3rd Gear

Joined: Oct 2009
Posts: 154
Likes: 3
From: West Columbia, SC
All this information and really interesting and refreshing to see. Its nice to see facts and the videos with the information is nice too. I look forward to your next post, however I can't quite shake the feeling I'm getting set up for a sales pitch for a new product, tool, ect. Please prove my gut feeling wrong.


3rd Gear
Joined: Nov 2014
Posts: 241
Likes: 2
From: Seattle, WA
Tuner Boost, fantastic posts! I haven't seen quality posts like this in a long while, but those posts are EXACTLY why I bother with online forums. Thank you for sharing your knowledge and experience.
and you guys, he said he works for a company and develops PCV and Crankcase evacuation systems... and he said that 99% of the catch cans on the market only "catch" 15-30% of what I'll refer to as gunk. In my eyes that basically means that they are all very ineffective. Would you drive a vehicle that only burned 15-30% of fuel?
I'm very interested in that 1% that is apparently more effective than 30% gunk removal, especially because I JUST did a soda blast on my intake valves and would like not to have to do that again anytime soon...

After a long hiatus, it's good to see people are finding the truth about direct injection! Great performance and emissions, but lots of money to be had on the service side of the business! You can take my port-injected engine from my cold dead hands
2nd Gear
Joined: Jan 2015
Posts: 105
Likes: 3
From: Florida
No sales pitch, but it can be hard to not post actual results w/out it appearing to be....if anyone wants a proper solution I am sure there are some supporting vendors here that can source an effective system for you. I will post here first an example of how ineffective most are. This is an independent test done by a Ford owner following the only true process to evaluate any cans efficiency. I will list several (all competitors of each other) that come in at at least 80% plus effective:
SMC (Saiku Micchi) does not have a dual valve system for turbo applications, but in testing comes in at app 80% effective.
Elite Engineering's E2 can (not the original small one) is just over 80% effective and does have dual valve capability and they have a cleanside separator as well (needed for a proper turbo system).
Apex, a copy of the Elite E2...very good as well.
RX, the most effective on the market to date as the test below shows. 95-98% effective depending on the application.
From there a belt driven vacuum pump will be the best possible under $1000 USD, but they wont last longer then 5k miles or so before the vanes, bearings, seals and shaft needs to be replaced...they are designed for track use.
Then the ultimate is the centrifuge style units that also purify so the oil can be separated and returned to the crankcase. You NEVER want to return the oil the the crankcase that is caught in a standard can as it is a concentration of damaging combustion by-products. Centrifuge style systems start at app. $8k and go up to several hundred thousand and are primarily used on ocean going freighters, locomotives, and large industrial engines.
So read this independent test done by a UPR can user (same as Moroso, Billet tech, Billet prototypes, diablosport, etc......app 40 brands use this same can. I helped guide and provided support for the person testing so that they did it all properly and were fair to both can's being tested:
5.0 UPR vs RX Catch Can Effectiveness Test
I’ve had a UPR catch can on my 5.0 since last summer. It catches a lot, especially in the cold months. But I’ll get right to my test. I added an RX can inline after my UPR can to see if the UPR was missing anything. And if it was allowing some to pass through, was it enough for the RX to catch anything? I don’t drive a lot of miles regularly since my F150 is not a daily driver, so my results will take some time. This thread is to document how I set it up and what I catch over time.
I installed the RX can just as the directions explained, but I routed the hoses differently. I left my UPR can right where it’s been for months, but rerouted one hose. I left the hose from the passenger side of the engine to the inlet of the UPR can. Then a new hose from UPR can outlet, routed to the inlet of the RX can. The RX outlet hose goes back to the engine. The PCV exhaust now flows from the engine, through the UPR, then through the RX, and finally back up to the engine intake.
Before installing everything for the test, I cleaned the UPR can thoroughly. The bottom of the can (inside) was covered with a thin layer of stiff sludge that I could only clean out using gas. I’m glad that was caught, along with the ounces of oil, water, etc, over the months I’ve been emptying it. But I was surprised at the outlet hose from the UPR can. It was wet with oil. Obviously some was getting through the can and back to my intake. I’ve never let the can get close to half full before emptying it. Nearly every time I’ve emptied it, there was 1/4“ or less in the bottom. I’m noting this in case someone thinks I left the UPR get overfilled and it flowed through. Nevertheless, I started this test after cleaning everything for a fresh start.
I plan to leave this setup on for a thousand miles or so, and report my findings from each can.
1st picture: UPR*can as it was originally installed.
2nd:*CleanUPR can.
3rd: RX can installed. The hose in the top center of the can is the inlet. The outlet hose on the right has a check valve.
4th:*Engine outlet to UPR inlet on left of can. UPR outlet on right side of can routed around (smaller hose) to the RX inlet. You can also see the other smaller hose coming back up from the RX can and ending at the intake on the engine.
Report 2:
I thought I'd add a post to keep this thread alive since it is taking me awhile to get enough miles on the truck for valid results. Now that spring weather is finally arriving, I haven't been putting as many miles on it since I'm busy. But I have around 600 miles on the test set up so far. I emptied the cans recently and recorded the volumes to date. I'd like to wait until I get to 1000 miles before posting the results from the test, but I'll give some preliminary feedback.
- Emptying process -*
First the UPR. I'm used to emptying the UPR can regularly, so it's not a big deal to unscrew, guide the can out from between the hoses, pour it out, guide it back in between the hoses, get it lined up carefully (so I don't cross thread the soft aluminum) and screw it back up snug. All that takes less than a few minutes so it's rather easy.
Now the RX can. Raise the hood, hold an empty water bottle under the drain tube, open the valve, close the valve, close the hood. I kid you not, it takes no more time than it took to read those steps. I knew it would be easy to empty, but it is ridiculously easy.
_ The weather so far -*
During the first week of the test we had winter weather, with some snow. Since then we have had mild weather. Temperatures are in the 50's and 60's most days.
- What they caught so far -
I won't share the amounts yet, but I'll give some info. The UPR can has caught a 'mostly oil with a bit of water' mixture so far. The RX can (in line after the UPR) has had just the opposite. It's collected mostly water or fuel, with some oil mixed in.
I emptied the UPR first, and I would estimate it has collected the normal amount compared to what it usually does I empty it. I was pleased that my set up with 2 cans didn't seem to change the normal flow and collection I was used to seeing with just the UPR can. When I was about the turn the valve to empty the RX, I paused to a few seconds wondering if anything would come out. After all it was a new can that would need to get some oil/water coated on the inside before there would be enough to drip to the bottom (The UPR can had been in use for many months and although I cleaned the can I did not rinse off the filter material). Plus I wondered if the valve of the RX can protruded up into the can, and if it required some liquid to collect before there was enough to spill over that valve nipple and exit the can. Then I opened the valve and I had to smile when I had some liquid drain out. I thought all along that if it caught more than 10% of what the UPR was collecting, I would be surprised. It's still early in the test, and I would like to redo the test after reversing the order of the cans later, but I am surprised so far. I'm hoping to get more miles on the truck soon so I can wrap up this phase of the test.
Report 3:
1000 Miles of Testing Results
- The Weather*has been warmer lately. So the test began with sub freezing temperatures, and gradually increased through the 70's and topped off in the mid 80's yesterday. I couldn't have asked for a better range of temperatures for this test.
- What they caught*was astounding to me. UPR was first in line, with the RX after it to catch anything the UPR might miss.
The UPR stayed on track with what it has been accumulating for many months. Each time I emptied them, it had about the same amount. It's contents were mostly oil which smelled like used oil. It caught 17cc total which is just under 3 1/2 tsp.
The RX had more than the UPR each time I emptied them. It's contents were an oil/fuel/water type mix that had a much stronger odor. Not a fuel smell, but a sharper chemical smell compared to the odor of used oil. It caught a total of 67cc which is just over 13 1/2 tsp.
- Final totals:
UPR - 17cc
RX - 67cc
The RX can caught 4 times the amount the UPR can caught,*after*the UPR can removed what it could. I said from the beginning I would be surprised if the RX can could pull 10% of what the UPR caught, since it was second in line. If someone told me it would catch an equal amount I would have said BS. For it to catch 4 times what the UPR can caught is unreal.
Report 4:
The routing of cans has been reversed*so the second phase of the test is underway. I cleaned the cans and hoses so neither has an advantage. I also checked the inside of the hoses as I disassembled everything. The exit hose from the UPR was dripping with oil and it made a mess as I took it apart. The exit hose from the UPR was clean and dry. It still looked new. That is what prompted me to clean all the hoses before starting this phase. Is the double can routing helping the second can*that*much, or is one can that much better. Time will tell again.
Report 5:
And now back to our regularly scheduled programming…
Phase 2 is almost complete now, thanks to some extra mileage for work. I'll report on that soon and begin phase 3.
As I said above, UPR shipped parts for me to do phase 3 of the test. I bought my UPR can in June, and they changed the can slightly since then. The new diffuser/extension will only fit cans made after that, so they shipped a full new kit to test. Thank you UPR for helping with this, and for your input in this thread.*
After shipping the kit, Joe@UPR asked me to remove the mesh from the exit side of my existing can for the remainder of phase 2, and to remove the mesh from the exit side of the new can before starting phase 3. I removed it from both (phase 2 was half way done when I removed it from the existing can). When I was removing the mesh from the short side of the new can (in preparation for phase 3), I realized the diffuser was assembled backwards. For our 5.0 F150's the long side of the diffuser must be on the passenger side of the can when installed. I disassembled, removed the mesh packed up in the can top on the exit/passenger side, and reassembled the can with diffuser. For anyone who might have received their cans assembled by UPR, you should check to see if it was assembled correctly before installing. (EDIT: Joe notes below they assemble the cans for shipping, and all cans should be assembled for your own installation needs) I also had a small piece of the stainless steel mesh (1/8") drop out when I was doing that. I wasn't thrilled with that so I unrolled, and lightly tapped the mesh in case there were any other loose pieces, but there weren't. A quick note on the UPR kit... it is much improved since I bought mine. The hoses are pre cut to the proper lengths, the elbow fittings are nickel rather than plastic, and they include Ford OEM snap on valve cover and intake fittings.
More to come soon!
Report 6:
Test Results
-*I'll summarize*the test to date. The first phase was to test the UPR vs the RX catch cans on a 5.0, both base models, with the UPR first in line and RX installed to catch anything the UPR missed. Those first phase results were: UPR - 17cc, RX - 67cc. The 'first in line' UPR caught 20% of the total volume. See post 37 in this thread for more details. The cans were cleaned and reinstalled in reverse order for phase 2, RX first and then UPR.
Phase 2 Test Results
- The Weather*has been average northern Ohio spring weather. Some rain, fog, cool nights, warm and hot days.
-*Driving*has been about the same through both phases. I good mix of rural roads, some small towns, highways, and approximately 40% of the miles on interstates at 65 - 80mph. Mostly average style driving, with a few very heavy accelerations mixed in. A little heavy hauling, and no towing.
- What they caught*this time might have been predicted by some (after the results of phase 1). RX was first in line, with the UPR after it to catch anything the RX might miss.
The combined volume of gunk was half of that caught in the first phase. The first phase had some cold weather which accounted for more water in the mix and the higher volume.
The contents from the RX can was mostly oil/fuel, and had a strong chemical/solvent smell again. It caught 35.5cc total which is approximately 7 1/8 tsp.
The UPR can caught about the same mix of oil/fuel, but didn't smell quite as strong. Halfway through this phase, Joe@UPR asked me to remove the mesh on the exit side of the UPR can. I did that, but noticed no difference in what it was catching. But since it was second in line, and there was little to catch, that's understandable. The UPR can caught 1.75cc total which is approximately 1/3 tsp. With so little collecting this time, I monitored the contents of the UPR can but didn't empty it until the end of the test.
- Phase 2 Totals:
RX - 35.5cc
UPR - 1.75cc*
-*Other tidbits*include the 'first in line' RX can caught 95% of the total volume. The exit hoses were very clean from both cans. The last few tanks of gas have produced slightly higher than my normal MPGs, but it's too early to tell on that (more to follow after phase 3).
-Phase 3,*using the UPR can extension and diffuser, is underway. Details will follow.
Final Test Results
-*I'll summarize*the test phases. The first phase was to test the UPR vs the RX catch cans on a 5.0, both base models, with the UPR first in line and RX installed to catch anything the UPR missed. Those first phase results were: UPR - 17cc, RX - 67cc. The 'first in line' UPR caught 20% of the total volume. See post 37 in this thread for more details on phase 1. The cans were cleaned and reinstalled in reverse order for phase 2, RX first and then UPR. The second phase results were: RX - 35.50cc, UPR - 1.75cc. The 'first in line' RX caught 95% of the total volume. See post 143 for more details on phase 2.
Phase 3 Test Results
- This time the UPR can*was first in line as in phase 1, but it had the new can extension and diffuser added. It also had the mesh material removed from the exit side of the can.
- The Weather*has been average northern Ohio early summer weather. Some rain with warm and hot days.
-*Driving*has been a good mix of rural roads, some small towns, highways, and approximately 60% of the miles on interstates at 65 - 80mph. Mostly average style driving, some steep hill climbs, and some very heavy accelerations mixed in. A little heavy hauling again, and no towing. I'll add some more thoughts on driving and MPGs below.*
- What they caught*was a mixed bag. UPR was first in line, with the RX after it to catch anything the extended UPR might miss.
The combined volume of gunk was down from the last phase, again. I assume it is due to the warmer weather and maybe my engine is using less oil with more miles? Either way, my test looks at the percent each can catches, compared to the total caught for that phase, so the volume isn't critical.
The contents from the extended UPR can was mostly oil, and had a used oil smell. The UPR caught 14.75cc which is approximately 3 tsp.
The RX can caught a fuel/water/oil mix. It smelled much more harsh again. The RX can caught 16.00cc which is approximately 3 1/4 tsp.
- Phase 3 Totals:
UPR - 14.75cc (48%)
RX - 16.00cc (52%)
-*Other thoughts*on the results. The contents of each phase showed me the RX does a better job of removing more than oil. It always contained more water/fuel type liquids, while the UPR contained mostly oil. I don't know if it is due to the can design, the 'out front' mounting style of the RX, or both.
For anyone buying or thinking of upgrading their UPR can, I strongly recommend figuring out how to mount it out front, and would definitely add the valve that Joe@UPR is offering. I really think the 'out front' cooling effect will help it catch even more, and the valve would be worth the price for ease of emptying it. Having the RX can to compare to when emptying, the front mount and valve are no brainers.
As I said at the end of phase 2, my MPGs have increased slightly. I have done nothing different to my truck over the past year, other than adding the RX can to the UPR for this test. My driving style is very similar from tank to tank, I fill up at the same stations, etc. But since having both cans in series, and essentially removing 95% or more of the PCV byproducts, my MPGs have increased. Up to that point my lifetime MPGs were 17.5. Nearly every tank for the past year gave me the same results, 17.5. I would have some trips that would net 20 MPG, but the other short trips would always pull it back down for the same tank average - close to 17.5. My recent tank averages have all been over 18 MPG, with a few over 19, and as high as 19.5. My last tank included hauling approximately 1000 lbs of payload, through some long hills/mountains of PA, and I got 18.8 MPG. It could be the summer fuel mix combined with an engine that is broken in, but the timing is peculiar. Whatever the reason, I like it!
I will try and post Mini specific details next later today.
Good reply's here all, this is what I want to see....and questions, ask any questions that I may not be addressing so all are understanding each point and understand all of this. We have transitioned in the past 40-50 years from educated car/truck owners that could maintain and service their own vehicles to "dumbed-down" buyers that are conditioned to buy a car, and unless a dash prompt tells us to visit a dealer, aside from putting fuel in never even open the hood to check oil!!! Not even the factory trained service techs are taught how and why each component works, but to diagnose with a scanner and swap parts....so learning is the only way to understand your vehicle.
3rd Gear
Joined: Nov 2014
Posts: 241
Likes: 2
From: Seattle, WA
I don't understand your statement "don't open the hood to check oil." How then am I to ensure I have proper amount of oil in my car? The last time I waited for the car to tell me I was low on oil I was down 1.5L !! That's a bit too little oil for me to be comfortable driving my car.
I'm pretty impressed with what you posted, the RX would appear to be 95.1% effective at removing contaminants from the PVC over the UPC. I'm curious though, how much is getting past BOTH? Clearly the UPC is not very efficient and if it's getting anything at all after the RX has "filtered" the line then obviously there is a relatively significant amount still getting through. Or so it would seem to my mind.
To continue this train of thought, in the first example the UPR is only 25% effective. So if the RX 35.5cc in the second example and at 25% efficiency the UPR got 1.75cc then 5.25cc still got to the combustion chamber. That would be 14% of the total amount caught, and if my theory/math is correct then 5.25 added to the sum of the oil caught is 8% of the theorized quantity of contaminants still being combusted...
alright. I just did more math than I typically do in a year, so I could be wrong, but in the end after having done the math and if it's all correct then I'm actually fairly impressed that the two OCC's catch 92% of what's being sent back to our intakes.
BUT I don't want to buy two OCC's, but definitely want greater than 90% of the contaminants "caught" before hitting the tops of my intake valves. What do I do?
2nd Gear
Joined: Jan 2015
Posts: 105
Likes: 3
From: Florida
I don't understand your statement "don't open the hood to check oil." How then am I to ensure I have proper amount of oil in my car? The last time I waited for the car to tell me I was low on oil I was down 1.5L !! That's a bit too little oil for me to be comfortable driving my car.
Excellent post! And by that time, engine damage may occur. Auto maker want even simple steps like checking oil to be done at the dealer....but your proof waiting that long can be far too late.
I'm pretty impressed with what you posted, the RX would appear to be 95.1% effective at removing contaminants from the PVC over the UPC. I'm curious though, how much is getting past BOTH? Clearly the UPC is not very efficient and if it's getting anything at all after the RX has "filtered" the line then obviously there is a relatively significant amount still getting through. Or so it would seem to my mind.
The onlt standard for testing is with the current most effective, and that is imperfect as you correctly point out. Another way used earlier was to install a air compressor separator in-line, but they are not very effective either. That is why the reverse test is needed to judge. The University of Maine's engineering dept developed a test chamber a few years back that would emulate a PCV system, but again, final measurements when it gets to the very minute amounts getting past the RX are difficult. No can can get 100% unless moving to a centrifuge style, but the RX has a side by side example at 68,000 miles of 2 brand new DI engines, one w/out a can and one with the RX system installed new...and coking is almost nil on the equipped car vs 30% plus blockage of the non-equipped car, so that show's a pretty good long term result....but it is not 100%. What it does show is that for app. 100,000 miles no cleaning should be needed, and then the amount of deposits are very minimal. Going further, and some here should be able to confirm, by as little as 5-10k miles the mini and most other DI engines already have a 6-8% plus degradation in volumetric efficiency due to the disruption of flow from the coking, and the hot side of the turbos show coking as well throwing off balance that can wear prematurly on the bearings/shafts and seals.
To continue this train of thought, in the first example the UPR is only 25% effective. So if the RX 35.5cc in the second example and at 25% efficiency the UPR got 1.75cc then 5.25cc still got to the combustion chamber. That would be 14% of the total amount caught, and if my theory/math is correct then 5.25 added to the sum of the oil caught is 8% of the theorized quantity of contaminants still being combusted...
Again, great understanding. The second phase of that test UPR had sent a new internals and an extension to double the capacity (opened their eye's as they had been selling the base can for years as "the best" until this test....so they did improve design and effectiveness.
alright. I just did more math than I typically do in a year, so I could be wrong, but in the end after having done the math and if it's all correct then I'm actually fairly impressed that the two OCC's catch 92% of what's being sent back to our intakes.
BUT I don't want to buy two OCC's, but definitely want greater than 90% of the contaminants "caught" before hitting the tops of my intake valves. What do I do?
The most effective system for the mini is 1 can and 1 cleanside separator. That test was done with the base single valve RX system, the dual valve is the correct one for a turbo application. You are a great asset to this forum...you are thinking and questioning with the right questions instead of like far to often someone just wanting drama. Keep the questions coming!!
Now, on to the N14 engine and how you would correct the issues.
Before I go into it though I want to share how the oil ingestion causes residue in the ringlands of the pistons gumming up the rings so they cannot move freely, and this results in even greater oil consumption over time. Combine that with the fact that most break-in the new car gently, and that brief window of proper ring seating passes without the rings abrading fully into the shape of the cylinder walls for the best possible seal.
Here are illustrations of what happens when an engine is driven easy the first few hundred miles with todays superior oils making ring seating difficult:
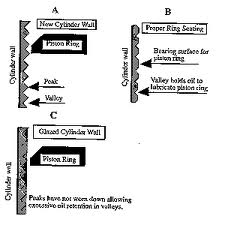
The rings have only 300-500 miles max to seat properly before that hard glaze (any fellow engine builders know what I am referring to) sets in on the cylinder walls and that window has passed. You want proper ring seating, and that requires loading the rings properly during both acceleration and deceleration. After app 30 miles of heat cycling, in 2nd or 3rd gear do 2 full throttle pulls to 5K rpms and let the engine brake back down. Twice is all it takes to properly seat rings.
Anyway, on to the N14:
(I used several images from this forum to make it easier):
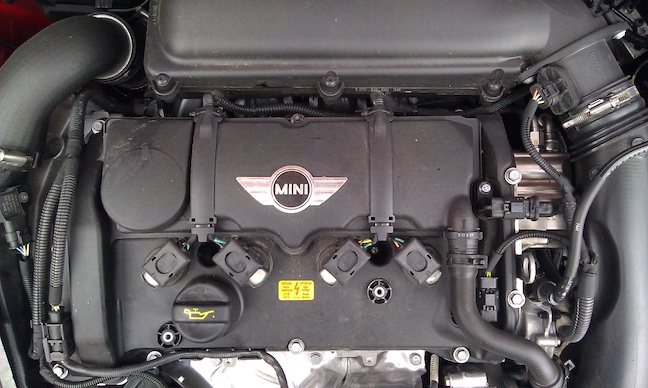
Above, note the right side of the cam cover (valve cover) has a larger diameter tube running from the cover to the air intake for the turbo. This is referred to as the "fresh" or "clean-side" of the PCV system. This is where the clean, filtered air enters the crankcase to make up for the foul vapors that are evacuated from the opposite end on the left rear corner. The fresh incoming air also provides a "flushing" of the damaging combustion by-products from the crankcase. Think of the crankcase as a room filled with smoke....and in the center of the room a vent is filling it with more smoke. If you open a window on one end of the room, some smoke will exit with the pressure exiting the window, but until you open one on the opposite side, and add a fan to suck out the smoke, the crankcase will never evacuate.
So, the intake manifold vacuum is pulling these damaging deposit causing vapors out that end of the crankcase (passenger side rear corner) and the fresh make up air is entering the front drivers side:
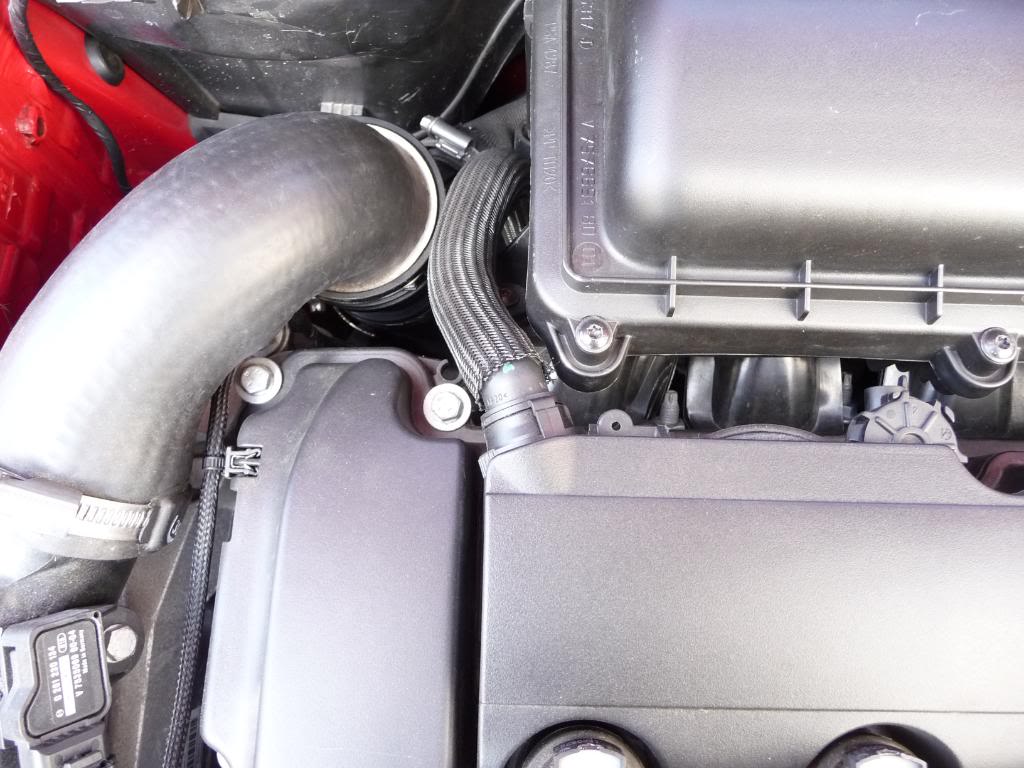
This works fine when no boost is present, but we all know that these small turbo's spool up quickly and except at idle, deceleration, and very light throttle, there is boost present and no intake manifold vacuum so evacuation cannot occur as the PCV system comes from the factory. What happens then is crankcase pressure builds, and as it seeks the path of least resistance, it back-flows "out the in" or backwards out the fresh, or cleanside into that turbo inlet pipe. This carries with it the concentrated oil and other "gunk" directly into the turbo inlet where it is then pushed into the intercooler, and from there into the intake manifold and the combustion chambers. This wet, oily vapor hits the hot intake valves and "bakes" onto them resulting in the coking we all deal with.
To correct this, the hose on the drivers side is removed....the crankcase side is then connected with a "T: to the passenger side line, and the oil fill cap is swapped for this coalescing clean side separator:
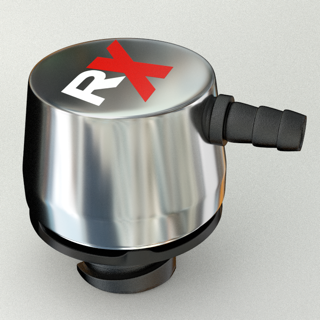
This has a 2 stage coalescing media inside to trap any oil during the brief period as the cans checkvalves switch when transitioning between boost to non boost and vice versa. This traps any oil from entering the main air inlet. Connect the barb from the cleanside separator to the filtered side of the air box. Add barb (1/2" or -8) to the filtered side of the airbox...or if a CAI to the end, or base of the cone filter.
Then, the 2 lines that were "T"'d together then run to the center of the separating can where most all of the vapors travel and are separated and captured. The primary outlet, with checkvalve flowing away from the can then connects to the intake manifold vacuum barb providing evacuation when in non-boost operation, and the secondary outlet from the can with checkvalve flowing away from the can will be connected to a barb you add as close to the turbo inlet as possible. The OEM barb can work, or this is how several turbo companies configure the cold side of the turbo for a RX or similar system:
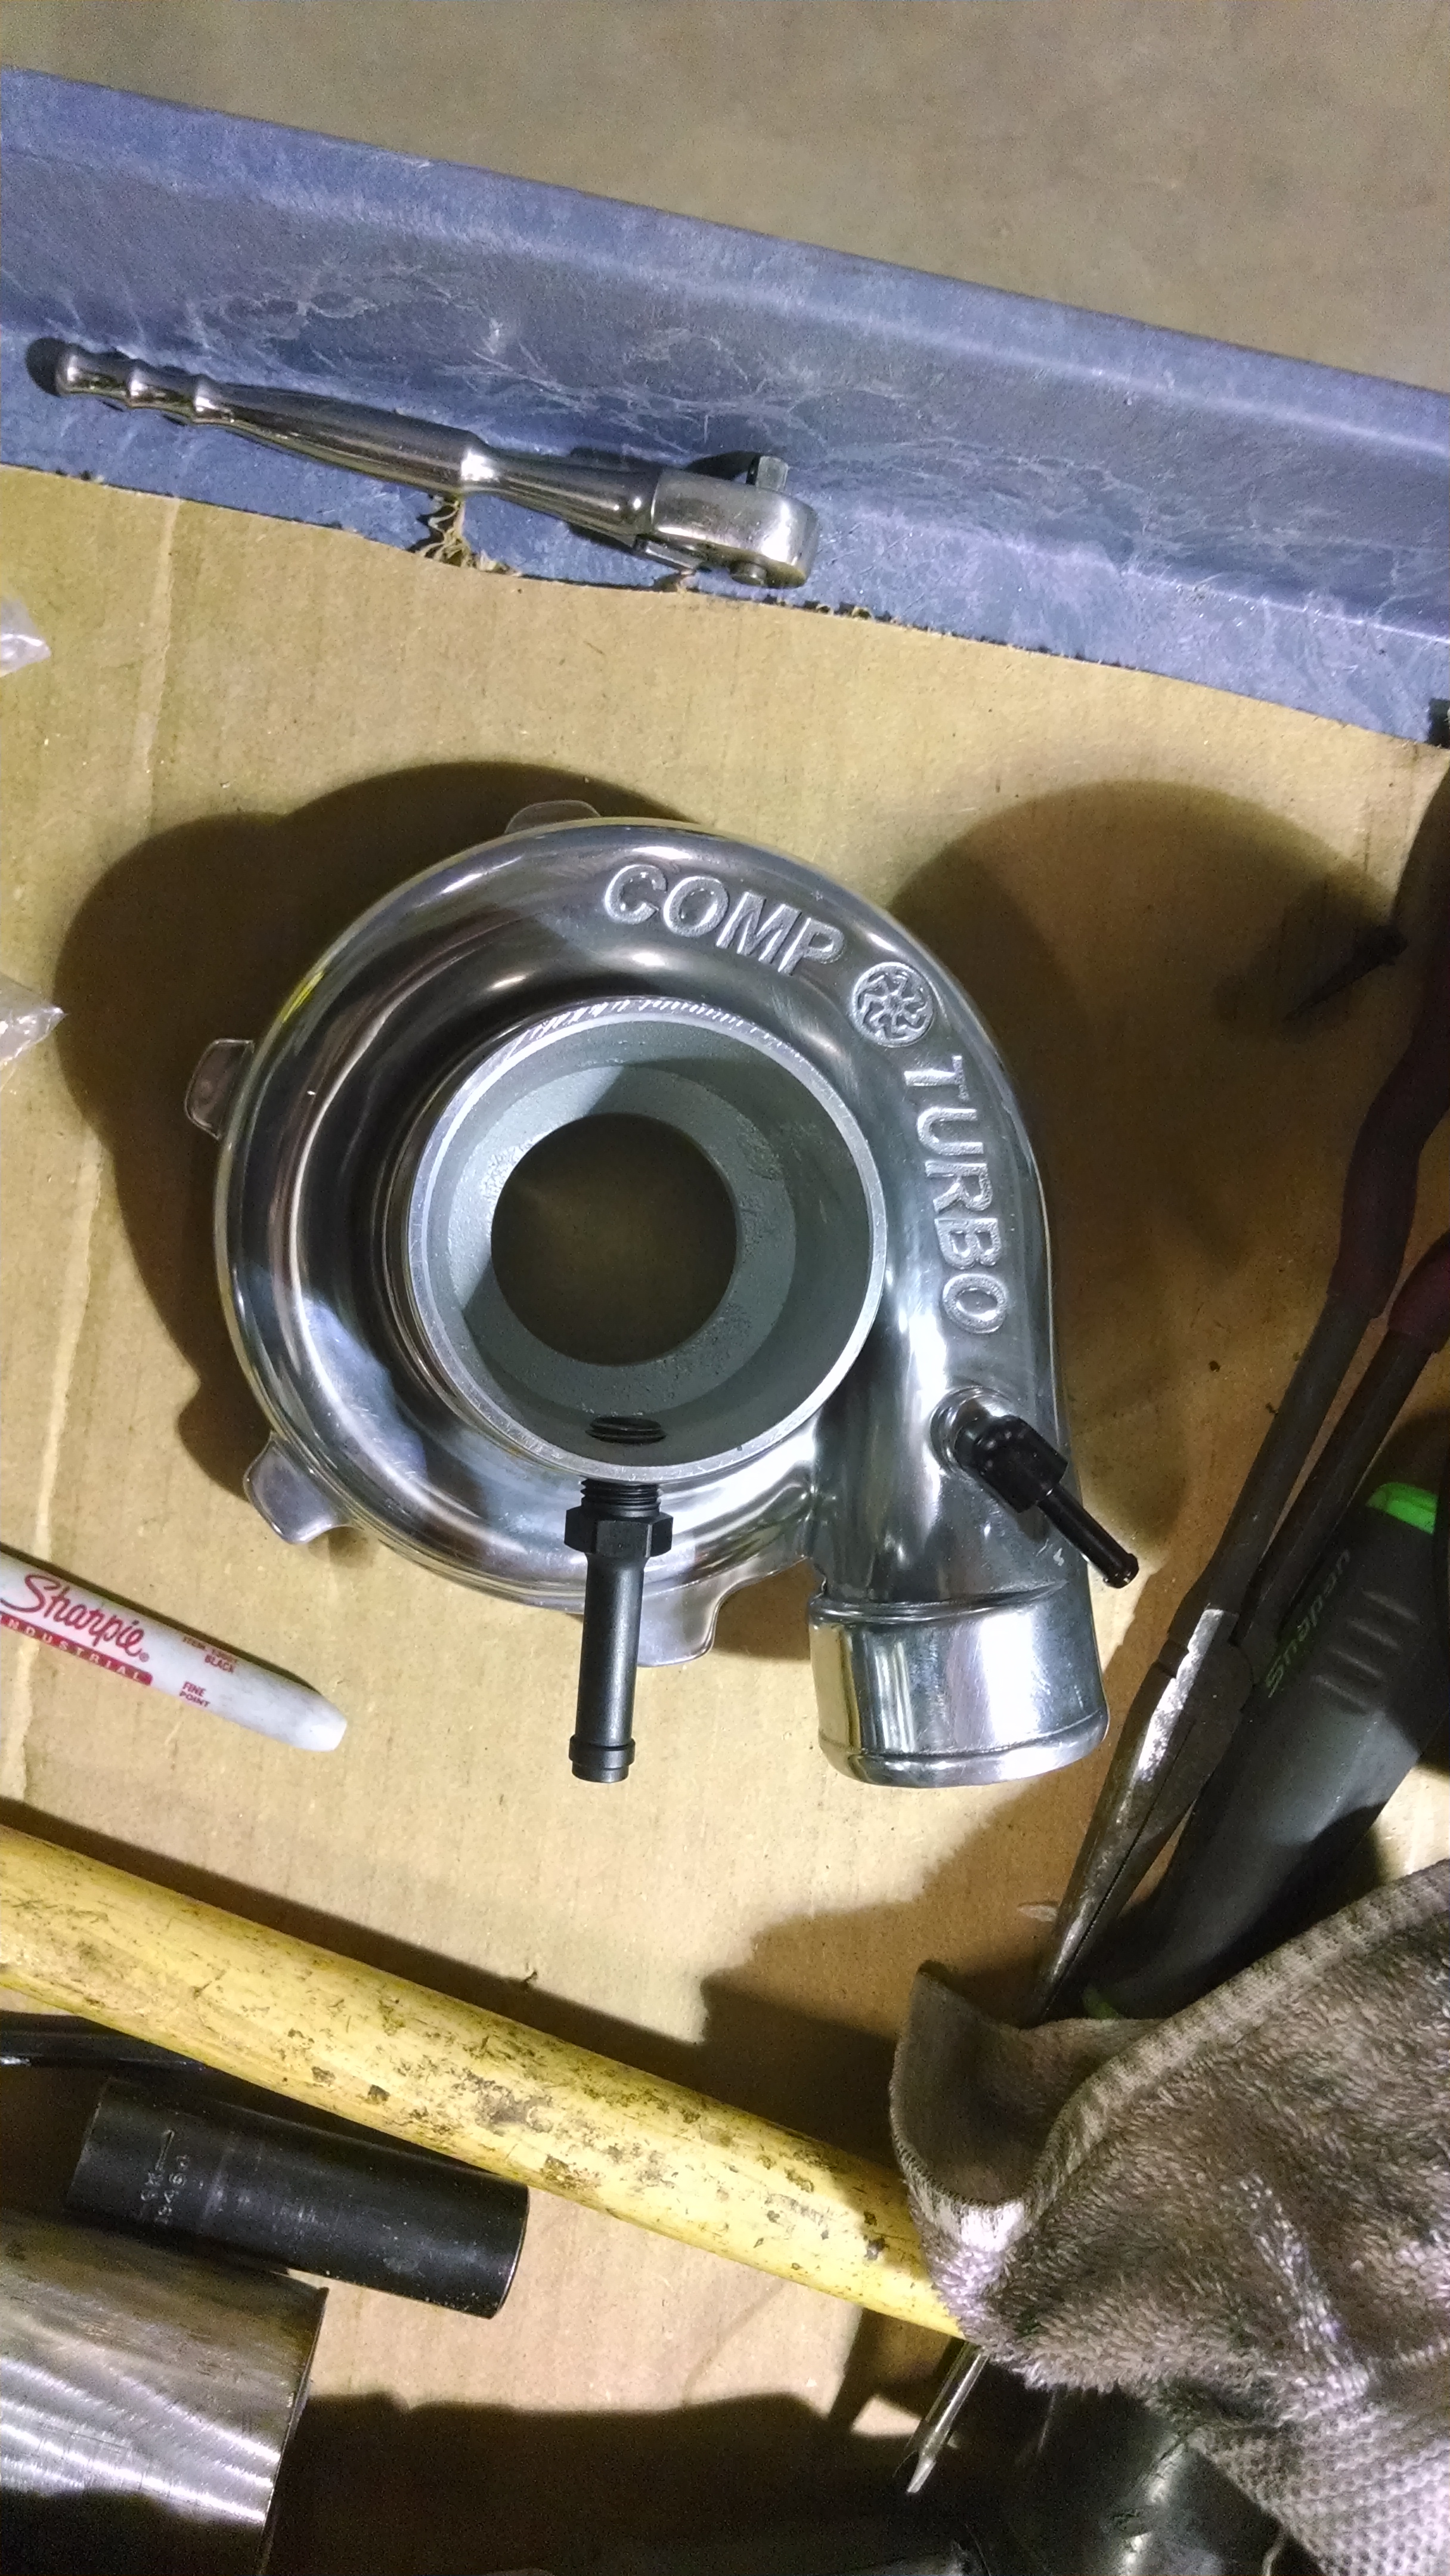
This provides evacuation suction when in boost. It is critical to keep the clean, and dirty sides separate, and the suction is far greater right at the turbo inlet than it is at the filter end where suction is dispersed.
So, what this does is uses the main air filter for clean fresh make-up air, and the intake manifold vacuum for evacuation when in non-boost. The checkvalves will hold 40# plus boost pressure so no boost can escape into the crankcase (the OEM "flap" is subject to failure allowing boost to pressurize the crankcase), and when boost is detected, the primary valve closes and the secondary valve opens (whichever provides the greatest suction is how the valves open and close) using the turbo inlet suction for evacuation. So no matter what mode the engine is in, boost or non-boost, there is always constant evacuation and flushing occurring and crankcase pressure should be little to none. The clean fresh air is separate from the foul/dirty vapors so no mixing, and the separator (assuming the RX is used) collects and traps most of the water/acid/oil/un-burnt fuel, and other abrasive compounds to be drained later.
Note:
This is a complete evacuation system for forced induction....others only vent through a can and collect mainly water leaving most of the harmful compounds to remain and accumulate in the crankcase.
Other than having to drain the can every oil change and dispose of as any drain oil, this maintains 49 State emissions compliance as a closed system, (CA CARB cert is needed for planet of California, but most still pass it), and eliminates most all the ingestion and intake valve coking. A benefit that is also realized is slightly more power and 1-3 MPG improvement as the combustion chamber is only getting fuel and air in it for a more complete burn. Any contamination of oil or other compounds (a small amount of water can pass through w/out issue) results in a less complete burn, disrupted flame front and less energy released per explosive event. Any oil also results in detonation and knock retard, so timing is pulled. This is also eliminated for the most part.
Hope this helped, I am searching the N18 system to see how it differs (it appears they deleted the intake manifold vacuum portion...which is critical to proper evacuation) in an attempt to slow the coking, but at the sacrifice of engine life. I'll check back with that info next.
And keep good questions coming like wrenchmonkey has been.....good so I don;t overlook anything and all is clear.

Now, I think I have absorbed most of everything you have graciously bestowed upon us here with these posts. Thank you very much for what you have shared so far. I am struggling however, to picture how this should be set up. Do you plan on creating any sort of diagram, or picture? With either of those, I can take all the information and visually recreate how everything flow and works, including the RX system added on. Also, tapping into my turbo makes me pretty nervous. Not only from an ownership perspective but also from a resale perspective. Anyone I may sell my car to in the future (that is if I ever sell it) may not like the idea that the turbo has been 'fiddled with'.
Also one more question for you, and you may or may not have much input on this end, what is your feeling about using an oil additive such as LiquiMoly to help fend off bad oil deposits and consumption along w/a proper Catch Can set up?
2nd Gear
Joined: Jan 2015
Posts: 105
Likes: 3
From: Florida
Now, I think I have absorbed most of everything you have graciously bestowed upon us here with these posts. Thank you very much for what you have shared so far. I am struggling however, to picture how this should be set up. Do you plan on creating any sort of diagram, or picture? With either of those, I can take all the information and visually recreate how everything flow and works, including the RX system added on. Also, tapping into my turbo makes me pretty nervous. Not only from an ownership perspective but also from a resale perspective. Anyone I may sell my car to in the future (that is if I ever sell it) may not like the idea that the turbo has been 'fiddled with'.
I am going to do a diagram for all with just what your asking, good request!
The testing done over the 68,000 was using Mobil1 full synthetic. A premium like Amsoil, etc, may have resulted in even better results, but using a system like the RX resulted in nearly no deposits after 68,000 miles vs no can.

Wow... As someone with a minimal understanding of how these things work, this has been enlightening...
But I'm still a bit confused here. If we try to explain like I'm five ,as the saying goes:
My setup, which is common to a number of users on here, employs a BSH OCC and a boost tap on the passenger side. I understand that the can may not be very effective at what it does, relative to better can and system designs out there. But it's not *detrimental*, compared to going back to stock, is it?
2nd Gear
Joined: Jan 2015
Posts: 105
Likes: 3
From: Florida
Wow... As someone with a minimal understanding of how these things work, this has been enlightening...
But I'm still a bit confused here. If we try to explain like I'm five ,as the saying goes:
My setup, which is common to a number of users on here, employs a BSH OCC and a boost tap on the passenger side. I understand that the can may not be very effective at what it does, relative to better can and system designs out there. But it's not *detrimental*, compared to going back to stock, is it?
But I'm still a bit confused here. If we try to explain like I'm five ,as the saying goes:
My setup, which is common to a number of users on here, employs a BSH OCC and a boost tap on the passenger side. I understand that the can may not be very effective at what it does, relative to better can and system designs out there. But it's not *detrimental*, compared to going back to stock, is it?
The only negative is that by the diagrams and pictures I see they are deleting the intake manifold vacuum part as the primary evacuation suction source (your may be different) and that allows the damaging combustion byproducts to accumulate in the crankcase diluting and contaminating the engine oil. Change it every 500 or so mile and your OK, but I would not go a full change interval. You want to have constant evacuation so these compounds are removed (evacuated) as soon as they enter and are still in a suspended state, and the pictures I have seen it takes both clean and dirty sides of the cam cover and routed them to a can with a breather on it...and that will defeat any evacuation, just relieve pressure. But correct me if I am mistaken on routing.
I'll try to do an installation diagram and more in the next few days.
 Link to thread here.
I have the boost tap going into the top left of the valve cover, which is the passenger side PCV port (? up and to the left of the MINI logo on the valve cover. Wish I spent enough time learning the proper terms.)

Moderator


Joined: May 2012
Posts: 1,792
Likes: 349
From: San Francisco Bay Area
The single best document I have found on the topic is here: https://www.shophemi.com/images/medi..._ccv_bible.pdf
Samteezy, I think the way you described your installation is better for the N14. Blocking off the rear (passenger side) vent as in the picture seems to lead to oil consumption problems in the N14, which is explained by the doc I linked above.
I have the N18, when I installed my new FMIC last weekend there wasn't a trace of oil in the hot side pipe so it looks like the redesigned PCV system in the N18 is doing what it should.