R50/53 Meet Dr. Watson (Build Thread)


Evasive's Build Thread
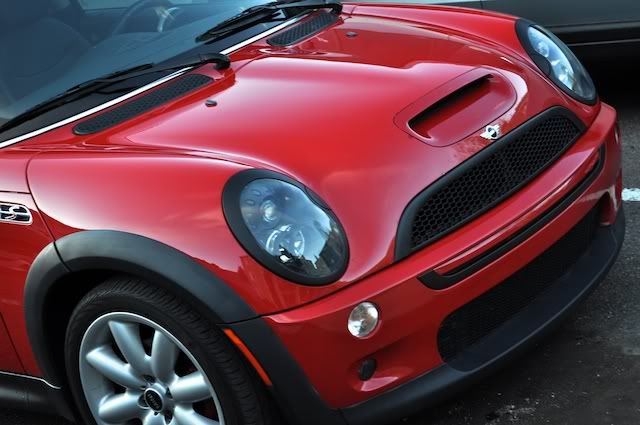
Just want to officially introduce my car to the community. I purchased him on March 5th and have been getting to know this British side kick of mine ever since. He's a Chili Red 2006 MINI Cooper S with 76k miles on the clock. Excellent condition body wise but I've been discovering the quirky things about him, mostly attributed to his high mileage. In keeping with British tradition, I named him Dr. Watson.
I've ordered a few parts for him already but installing will be a slow one. I'll keep the thread updated.
Excuse the iPhone photos. I'll pull out the proper camera once he's in a much more presentable state.
Dealer advertisement photos...


Morning after purchasing the car, I discovered this nice surprise. Oil filter leak and coolant thermostat leak.

Day after, I took Dr. Watson for a tint job.
I didn't care much for its original bonnet stripe so I removed it a few days ago and installed the headlight vinyl compliments of N2MINI.

15% Cravenspeed pulley came in yesterday sitting next to my rolls of vinyl.

I was able to secure my friend's garage while they're out of town for the week so I put Dr. Watson up on a ramp to perform a more thorough inspection. Apart from the 2 leaks I discovered previously, I found this nice oil gasket leak as well. There was a much thicker layer of oil and dirt on this before I took the pic. It literally covered the front end side of the oil pan.

Another thing I found interesting... Not sure if the pan was previously cracked and repaired or if this is normal. It sure looked odd though. Thoughts?

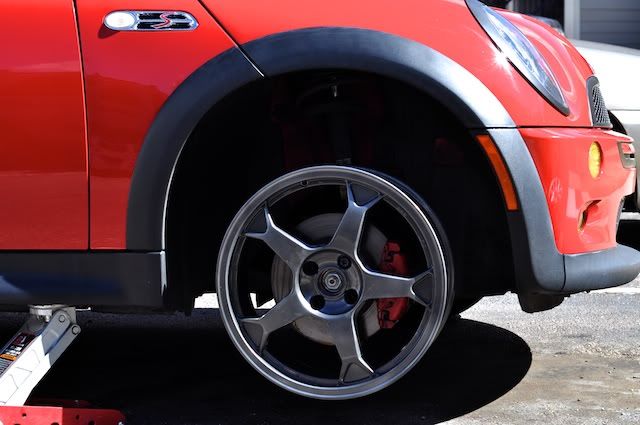
After discovering what I know I have to tackle the next few months, I set out to do what I really wanted to accomplish today. Vinyl and paint my poor stock calipers.

Had a blast getting to know Dr. Watson today and looking forward to more great times. Many thanks to my wife for helping me out today
I've ordered a few parts for him already but installing will be a slow one. I'll keep the thread updated.
Excuse the iPhone photos. I'll pull out the proper camera once he's in a much more presentable state.
Dealer advertisement photos...
Morning after purchasing the car, I discovered this nice surprise. Oil filter leak and coolant thermostat leak.
Day after, I took Dr. Watson for a tint job.
I didn't care much for its original bonnet stripe so I removed it a few days ago and installed the headlight vinyl compliments of N2MINI.
15% Cravenspeed pulley came in yesterday sitting next to my rolls of vinyl.
I was able to secure my friend's garage while they're out of town for the week so I put Dr. Watson up on a ramp to perform a more thorough inspection. Apart from the 2 leaks I discovered previously, I found this nice oil gasket leak as well. There was a much thicker layer of oil and dirt on this before I took the pic. It literally covered the front end side of the oil pan.
Another thing I found interesting... Not sure if the pan was previously cracked and repaired or if this is normal. It sure looked odd though. Thoughts?
After discovering what I know I have to tackle the next few months, I set out to do what I really wanted to accomplish today. Vinyl and paint my poor stock calipers.
Had a blast getting to know Dr. Watson today and looking forward to more great times. Many thanks to my wife for helping me out today
Last edited by Evasive; Jun 3, 2011 at 10:58 PM.
Nuthin quite like jumpin in with both feet ! Nice work, the Doc is shapin up quite nicely
BTW - While various failing gaskets and O-rings on these beauties are commonplace, that oil pan does look bit odd....
BTW - While various failing gaskets and O-rings on these beauties are commonplace, that oil pan does look bit odd....
Sure does!  Threw me off when I was looking at it earlier. I guess it's a good excuse for a baffled oil pan upgrade!
Threw me off when I was looking at it earlier. I guess it's a good excuse for a baffled oil pan upgrade!

3rd Gear
Joined: May 2003
Posts: 252
Likes: 0
From: Seattle, USA
check your crank sensor and valve cover gasket as well.. any rubber lets go over time\heat cycles. While you are in there (have the radiator assembly off - could do that when you do the pulley) pull the supercharger and refresh the fluid - pulley and waterpump side (waterpump has a o-ring seal at the connection to the block)
how are your control arm bushings (more rubber)?
welcome to all the fun
phil.
how are your control arm bushings (more rubber)?
welcome to all the fun
phil.
 Good thing is my car will purely be a weekend car so I don't anticipate adding a whole lot of miles on him.

2nd Gear
Joined: Jul 2005
Posts: 100
Likes: 0
From: on the North Coast
Congrads on your purchase, and wow! What a transformation from the original purchase date. Sorry to hear you have had a couple of bloody noses so to say, At least it did not leave you on the road side stranded.
Again, congrads, and we all will be looking for more pics of the Doctor!
Once you get settled in your new home, then you can start on the garage! LOL Opps that is another thread...
Cheers!
At least it did not leave you on the road side stranded. Again, congrads, and we all will be looking for more pics of the Doctor!
Once you get settled in your new home, then you can start on the garage! LOL Opps that is another thread...
Cheers!

5th Gear
Joined: May 2010
Posts: 668
Likes: 0
From: South Florida
welcome and congrats. Love the stripes! And yes, the garage is another thread . . . we just finished a 2 month makeover of mine to match my Clubbie!
good luck!
good luck!
Trending Topics
More parts compliments of our friends at Outmotoring.com
Aero Grill
Oil Filter
Replacement Oil Bolt
Cold Iridium Spark plugs
Aux Input
Cravenspeed Pulley Tool
New Serpentine belt
Just placed an order for the tensioner tool and DDM CAI last night. Looking forward to installing the parts!
[IMG] [/IMG]
Aero Grill
Oil Filter
Replacement Oil Bolt
Cold Iridium Spark plugs
Aux Input
Cravenspeed Pulley Tool
New Serpentine belt
Just placed an order for the tensioner tool and DDM CAI last night. Looking forward to installing the parts!
[IMG]
[/IMG]

2nd Gear
Joined: Jan 2011
Posts: 70
Likes: 5
From: MI
Looks like you're well on your way -- have fun!
I just put an Aux Input in my new-to-me 2005 MCS on Friday using these instructions: http://www.mini2.com/forum/faq.php?f..._faq_aux_input
Even though the panel under the toggles in bigger in 05-06, it's still flexible enough to get out if you rotate it 90-deg back.
It sure is nice to be able to plug in the I-pod
I used to think you guys were nuts when talking about installing the oil filter and now I know exactly what all the fuss is all about!
 Got it on after a few tries though and fixed the leak that I had
 I also installed the upper Aero grill but opted not to install the bottom piece. I really like the way the stripes flow on the bottom grill so I kept it there and just put vinyl on the bottom lip to match.


Car looks good.
Don't worry about the way the oil pan looks like it has cracks, it's not cracked it's from the casting.
When you do the oil pan gasket spend the couple extra bucks and definetly do the crank sensor oring, it's easy to do with the pan and cheap. It's a very common leak.
Don't worry about the way the oil pan looks like it has cracks, it's not cracked it's from the casting.
When you do the oil pan gasket spend the couple extra bucks and definetly do the crank sensor oring, it's easy to do with the pan and cheap. It's a very common leak.
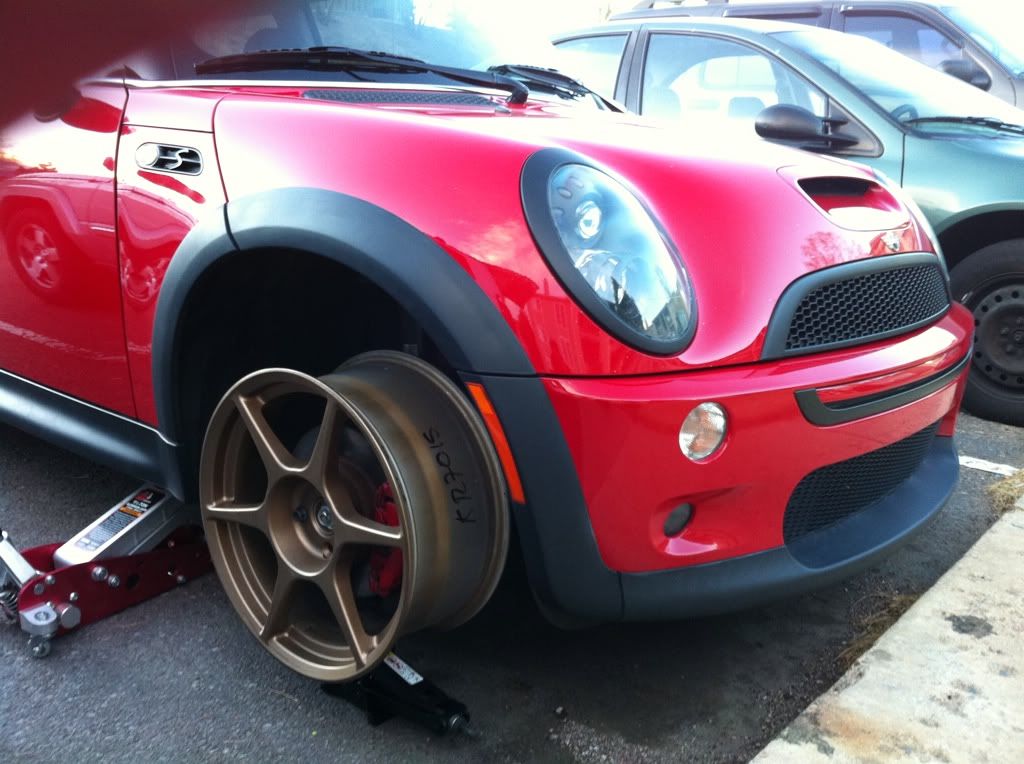
Quick update. I had planned to work on my thermostat and DDM CAI yesterday but unfortunately the intake was delayed and will not be here until Monday. Instead I opted to do my thermostat and SC pulley. Thermostat install went on without a hitch but I was forced to abandon the SC pulley install after battling with the stock SC pulley for about an hour. I have the Cravenspeed deluxe pulley tool but the stock pulley would not budge at all. I didn't want to force it too much and risk the possibility of breaking the stock pulley or hurting the shaft so I decided to let it go. I've decided to install it this summer once we move to a house with a garage. I really didn't want to keep my car at my friend's garage too long this week. I'll keep soaking it with PB blaster until this summer so hopefully that loosens it up a bit. Also, is it easier to pull the pulley with an impact wrench?

Latest update...MODS MODS MODS...MORE MODS!
Skidplate, stubby antenna, license plate holder, and clear headlight/foglight protectors.


I'm tempted to take my car to a shop for the pulley install but I'm going to go with the satisfaction of doing it myself, I may or may not regret it in the end. Not to mention that I already spent about $150 for the tools!
Last edited by Evasive; Mar 19, 2011 at 09:22 AM.


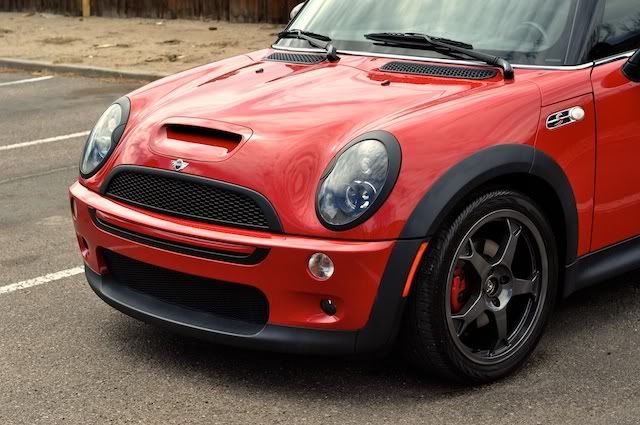
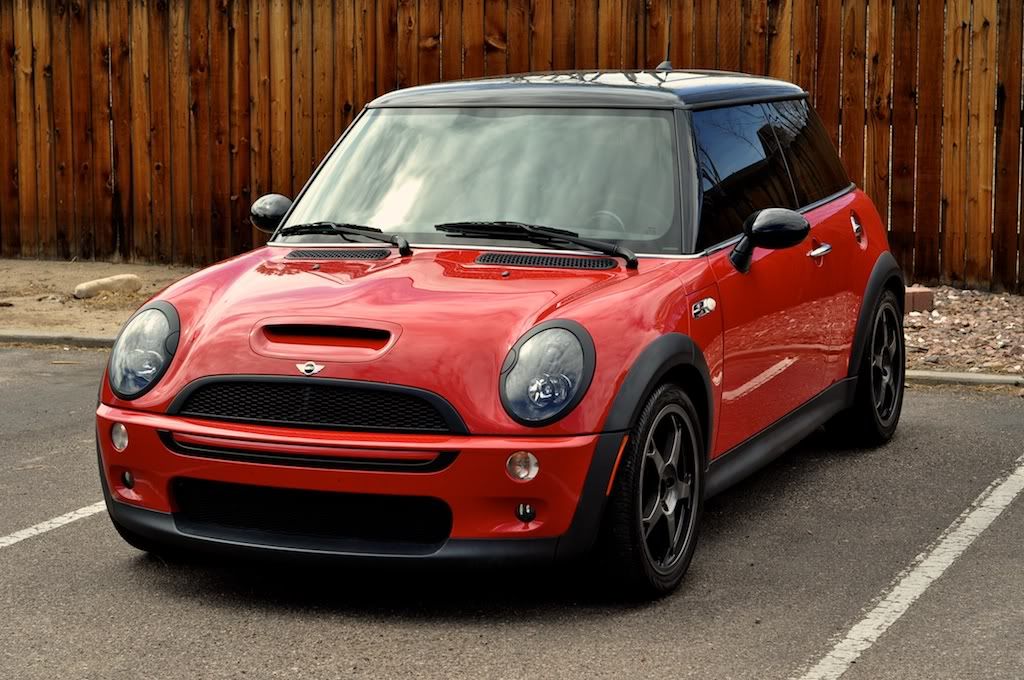
Haven't done much to the car since my last update although I have been shopping for more parts. Quite a few parts actually... Unfortunately, I won't be able to install most of them since I'll be away on business for a week. I did however decide to change my look again. I ditched the stripes and decided to simplify the look a bit at the same time joey modded my headlights. I'll update the thread once the goodies start to come in

Last edited by Evasive; Apr 5, 2011 at 06:37 PM.
Thanks. I've been watching your thread as well and dig your Dinan parts. Noticed that you're getting new wheels. I bought two sets of light weight wheels and will post pics when they come in.
Bung! These things are super light! I'm not sure if I'm keeping them though. I've got another set of light weight wheels that I'm picking up this weekend and debating which one I should keep. Then again, I may just keep both! Posted these on the marketplace for those potentially interested.