
F56 Oil Change Procedures


5th Gear


Joined: Aug 2017
Posts: 1,056
Likes: 383
https://www.northamericanmotoring.co...rocedures.html first post.
"UPDATE: The amount of oil used in the F56 MCS is actually 5L (5.3 quarts)"
"UPDATE: The amount of oil used in the F56 MCS is actually 5L (5.3 quarts)"
FYI

3/2020+ design 51755A01569 landed and we just had a 2022+ JCW in the shop for a scan an its belly pan was soaked with oil and saggy from a bad oil change.
https://www.ecstuning.com/b-bremmen-...755a01569~brp/ Are currently on sale.
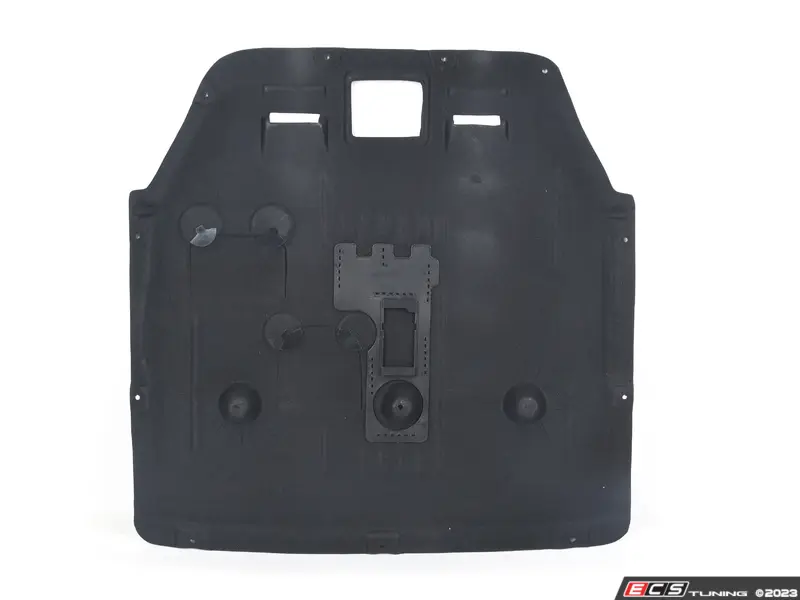
They tend to sag right in the middle towards the front.
https://www.ecstuning.com/b-bremmen-...755a01569~brp/ Are currently on sale.
They tend to sag right in the middle towards the front.
__________________

MINI Guru/ MINI Owner Since 2004 | NEW Lifetime Part Replacement | Local Pickup
Milltek | Genuine MINI | Forge Motorsport | NM Engineering | ECS Performance | M7 Speed
Customer Service Hours: 8am-8pm EST|Sales Team Hours: 8am-11pm | SAT 10am-7pm 800.924.5172
MINI Guru/ MINI Owner Since 2004 | NEW Lifetime Part Replacement | Local Pickup
Milltek | Genuine MINI | Forge Motorsport | NM Engineering | ECS Performance | M7 Speed
Customer Service Hours: 8am-8pm EST|Sales Team Hours: 8am-11pm | SAT 10am-7pm 800.924.5172

Neutral
Joined: Jun 2025
Posts: 1
Likes: 0
This was posted originally by another forum member. I thought it would be a good addition to FAQ.
F56 Oil Change Procedures
This weekend, I got under the car and changed the oil. From day one, I was never going to just follow only the Boot to Bonnet No Cost Maintenance schedule, as to me, every 10K miles is crazy! If you think spending $60 bucks and an hour or so of your time, to protect your engine in between the manufacturer's recommended change schedule, is excessive, then rock on. I will certainly take advantage of the Mini service that I've paid for in the cost of my vehicle, but I will also change the oil in between their schedule. I personally feel that frequent oil changes (every 4K - 5K) is a cheap and easy method to ensuring a longer life for your engine. In the end, you'll choose the interval you're comfortable with, or wait for the computer/calendar to tell you.
So, for those that want to change their own oil but haven't yet - here are the steps. It's extremely easy and a way to stay in touch with your Mini and feel good about yourself at the same time.
I noticed that some drivers on this Forum remove the entire undercarriage cover to get greater access to oil drain and filter housing. I went with trying to change the oil just using the two access panels to see how easy or not it is.
Ensure the engine has been run and is warmed to operating temperature.
Either jack up the car and place on jack stands or drive the front of the wheels onto a pair of ramps or if available use a lift. For my F56 I will simply use the ramps. It's quick and easy.
Open the hood and then open the oil fill cap to allow the old oil to drain easier.
Getting access to the oil drain plug and the oil filter housing is as simple as turning the plastic housing retainers and then flipping the access panels open. The access panels are located towards the passenger side of the engine (see the first photo). From underneath, you can't miss the outline of the panels. The retainers holding them closed can be turned by hand, no coins or tools needed.
The oil drain plug takes a 17 mm hex socket. Place a good sized oil pan under the rear access panel, remove the plug with your 17mm socket, and drain the oil. Take caution, the oil will be hot. Let this drain completely and then replace the drain plug so you can move the oil catch pan to under the oil filter housing.
The filter element canister has a separate drain plug. Don't skip this step!!!! There is quite a bit of oil still in the filter canister and simply removing the canister will ensure you get hot oil all over the place. Use a 13 mm socket with an extender to open this plug and drain the oil out of the canister. You can replace the plug when complete to stop any further oil dripping while you remove the canister itself.
Using a 32 mm hex socket, I found that I needed not only a socket extender but also an angle attachment (see the second photo). Remove the oil filter canister.
I ordered the Oil Filter Kit w/ O-ring from ECS Tuning plus 5 quarts of the Mini Synthetic 5W-30. The kit and oil are affordable, shipped quickly, and had all the right parts (including the larger sized oil filter element - part no. 11 42 8 570 590).
Take off the old gasket from the canister, apply some oil to the new gasket and replace it onto the filter canister. I also replaced the drain plug in the bottom of the canister housing (since the kit came with a new one, not sure if all new kits have this or not). Then installed the new filter element into the housing. When putting the canister back into the access panel, you will need to use a bit of force to get the oil filter onto the oil flow tube on the engine. The hole in the top of the filter itself will fit snugly onto the tube/pipe. It will sort of "pop on" the first time. At this point, then you can begin to screw the bottom of the filter canister back onto the engine. I didn't bother with torquing it to a certain spec, but made sure it was on snug. At this time, also ensure the smaller drain plug that you previously replaced on the canister is also on snug and firm but not over tightened.
With the new filter element replaced and that part of the job finished, open the oil drain plug again after placing the used catch oil container back underneath. You will have more oil that will drain out! Let this complete, and then replace the old o-ring with the new o-ring from the kit (it may still be in place on the oil pan or it may have fallen into the used oil container; mine was still on the oil pan). Replace the plug, tighten, and clean any residue on the pan with a rag. Again, I don't torque this, personal preference. I go by feel.
Restore the access panels and close the retainers. I was impressed that I got little to no used oil splatters on the panels.
Now fill you car with the 5 quarts of Mini oil. I initially added 4.5 quarts and later checked the oil level with Mini's handy electronic oil level process (I miss the dip stick!!!). It required another half a quart so I added the rest and it's all good. This amount matches the used amount of oil that I removed (5 quarts). Close the oil fill cap and wipe down any dirt, debris, and oil drips.
UPDATE: The amount of oil used in the F56 MCS is actually 5L (5.3 quarts) - Unfortunately quantities of liquids are not documented anywhere in the Owner's Manual (appalling actually). I have driven over 500 miles since this oil change and the 5 quarts I put into the car never got the electronic oil level gauge up to the full mark. I then decide to add 1/3 of a more quart of oil which would then equate to 5 liters and bingo, I'm at the full mark on the electronic "dipstick" (ah yes, a dipstick would have been much more effective throughout this whole process). Actually, just put the fluid quantity in the Owner's Manual and I would never have to put so much effort into this very basic vehicle maintenance job.
The next day, to confirm I performed everything correctly, I checked both access panels for signs of oil drips; no drips and all looks good.
Good luck to all. I recommend you get in there and change your oil in between the Boot to Bonnet No Cost Maintenance schedule. Your Mini will love it!
Plus, the next time I perform this oil change service, it will go even faster.
F#$& that updated 55mm torx plug. Stripped out while tightening it🤬
We have a metal cap coming out soon with metal plug. 
__________________
MINI Guru/ MINI Owner Since 2004 | NEW Lifetime Part Replacement | Local Pickup
Milltek | Genuine MINI | Forge Motorsport | NM Engineering | ECS Performance | M7 Speed
Customer Service Hours: 8am-8pm EST|Sales Team Hours: 8am-11pm | SAT 10am-7pm 800.924.5172
MINI Guru/ MINI Owner Since 2004 | NEW Lifetime Part Replacement | Local Pickup
Milltek | Genuine MINI | Forge Motorsport | NM Engineering | ECS Performance | M7 Speed
Customer Service Hours: 8am-8pm EST|Sales Team Hours: 8am-11pm | SAT 10am-7pm 800.924.5172


Thread
Thread Starter
Forum
Replies
Last Post
r56mini
R56 :: Hatch Talk (2007+)
3
Aug 30, 2007 02:07 PM