Interior/Exterior Show off your gauges here! Pics here!
#26
 04-14-2005, 04:31 PM


#27
04-14-2005, 04:33 PM

6th Gear
Join Date: Apr 2004
Location: Santa Clara, CA
Posts: 1,580
Likes: 0
Received 0 Likes
on
0 Posts
Originally Posted by Eric_Rowland
Not to flaunt safety, but I would assume the 'fluffy pillow' from the steering wheel would hit you before the gauges. The head airbag attaches up in the front, but any force should push the gauges toward the center of the car, not the back. Let's hope he never finds the answer.

#28
04-14-2005, 04:37 PM

Join Date: Oct 2004
Location: Miami, FL
Posts: 317
Likes: 0
Received 0 Likes
on
0 Posts
#29
04-14-2005, 04:48 PM

Former Vendor
Join Date: Sep 2002
Location: Los Angeles
Posts: 1,174
Likes: 0
Received 0 Likes
on
0 Posts
#31
04-14-2005, 05:08 PM
Join Date: Oct 2004
Location: Miami, FL
Posts: 317
Likes: 0
Received 0 Likes
on
0 Posts
#32
04-14-2005, 05:21 PM

4th Gear
Join Date: Jan 2003
Location: Santa Clara, CA
Posts: 381
Likes: 0
Received 0 Likes
on
0 Posts
thanks. its all home fab'd. well the bracket at any rate. I originally got the gauge kit from promini but thought it was still a little spare aesthetically. So I bought 2 more autometer gauges (I really would not recommend a/f ratio, its fun but basically useless), bought 2 more mounting cups from promini. Filed all of the cups down by 1/4 inch. mounted the back of each cup to an aluminium bracket (basically a horizontal bar with 2 wings that slope down and out (since I did a reasonably good job, you cant see it  )). for the wiring, I added into the promini harness.
After that I found that it rattled a bit so I then attached the cups together on their sides and now its solid.
)). for the wiring, I added into the promini harness.After that I found that it rattled a bit so I then attached the cups together on their sides and now its solid.
#33
04-14-2005, 07:28 PM
Join Date: Oct 2004
Location: Miami, FL
Posts: 317
Likes: 0
Received 0 Likes
on
0 Posts
Originally Posted by cdconsor
thanks. its all home fab'd. well the bracket at any rate. I originally got the gauge kit from promini but thought it was still a little spare aesthetically. So I bought 2 more autometer gauges (I really would not recommend a/f ratio, its fun but basically useless), bought 2 more mounting cups from promini. Filed all of the cups down by 1/4 inch. mounted the back of each cup to an aluminium bracket (basically a horizontal bar with 2 wings that slope down and out (since I did a reasonably good job, you cant see it )). for the wiring, I added into the promini harness.
After that I found that it rattled a bit so I then attached the cups together on their sides and now its solid.
)). for the wiring, I added into the promini harness.After that I found that it rattled a bit so I then attached the cups together on their sides and now its solid.
i should post pictures when im donecarlos
#34
04-14-2005, 07:47 PM

3rd Gear
Join Date: Nov 2003
Location: Indianapolis, IN US
Posts: 216
Likes: 0
Received 0 Likes
on
0 Posts
Originally Posted by JCampos
Yeah, this is a great setup til that airbag deploys.... then you get smacked in the face with 4 gauges.... honestly, if those hit you when the airbag deployed it would probably kill you.


#36
04-14-2005, 08:03 PM

2nd Gear
Join Date: Feb 2005
Location: Scottsdale, AZ
Posts: 58
Likes: 0
Received 0 Likes
on
0 Posts
#37
04-14-2005, 08:19 PM

1st Gear
Join Date: Jun 2003
Location: Louisiana
Posts: 35
Likes: 0
Received 0 Likes
on
0 Posts
My Dials
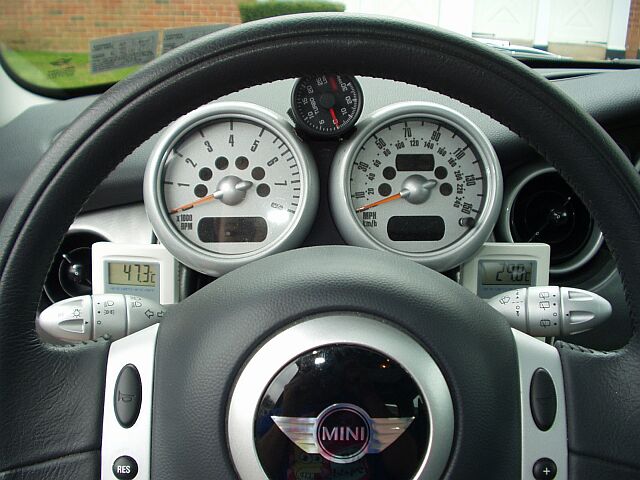
Thanks For the responese ...at least some of them .I appreciate the concern of the gauges becoming a hazard .Has anyone taken the pilller down .If you did you would realize the one ,its teathered to the car and two the air bag is a curtain that come down from the roof and is just anchored at the piller .The piller moves just enough for the nylon strap to free its self.
The questions about where to get the mount is ...I built it . It has a a/f ,oil pressure,volt meterand boost gague. They are autometer ultra lite gagues with red lights, i have a night time pic to but it didnt post for some reason.
Well that,s about it . Thanks Again
The questions about where to get the mount is ...I built it . It has a a/f ,oil pressure,volt meterand boost gague. They are autometer ultra lite gagues with red lights, i have a night time pic to but it didnt post for some reason.
Well that,s about it . Thanks Again
#38
04-14-2005, 09:05 PM
4th Gear
Join Date: Jan 2003
Location: Santa Clara, CA
Posts: 381
Likes: 0
Received 0 Likes
on
0 Posts
#39
04-15-2005, 01:49 AM
4th Gear
Join Date: Oct 2003
Location: Southern California
Posts: 399
Likes: 0
Received 0 Likes
on
0 Posts
Defi
Originally Posted by VoiD
.....Also does anyone have Defi gauges? show them off!
Recently, I replaced the Autometer gauges, except IAT, with the Defi Link System. The gauges are 52mm, with a red pointer, white faces, and awesome nightime green illumination. Each gauge has a warning light that can be set by the Defi Control System. I have been very pleased with the Defi products and encourage you to consider them. One need not get the Defi Link System; but individual gauges that are slightly different from mine are available in the D-Gauge series. For some neat photos and specs, check out www.defi-shop.com
Picture One
Left
top - Autometer IAT
next down - Water temp
far left - Oil temp
bottom - Oil pressure
Right
top - G-Tech Pro Competition meter
next down - EGT
far right - Fuel pressure
bottom - Boost
Picture Two
Close-up of the Boost gauge
On the dash by the windshield is a Defi VSD Basis --- heads-up display for speed, rpm's and shift light. Future plans include the Innovate Stand Alone wide-band O2 sensor and digital gauge.
#40
04-15-2005, 04:59 AM

4th Gear
Join Date: Dec 2004
Location: Royal Oak, Michigan
Posts: 373
Likes: 0
Received 0 Likes
on
0 Posts
Originally Posted by minionrails
Thanks For the responese ...at least some of them .I appreciate the concern of the gauges becoming a hazard .Has anyone taken the pilller down .If you did you would realize the one ,its teathered to the car and two the air bag is a curtain that come down from the roof and is just anchored at the piller .The piller moves just enough for the nylon strap to free its self.
The questions about where to get the mount is ...I built it . It has a a/f ,oil pressure,volt meterand boost gague. They are autometer ultra lite gagues with red lights, i have a night time pic to but it didnt post for some reason.
Well that,s about it . Thanks Again
The questions about where to get the mount is ...I built it . It has a a/f ,oil pressure,volt meterand boost gague. They are autometer ultra lite gagues with red lights, i have a night time pic to but it didnt post for some reason.
Well that,s about it . Thanks Again
Makes me want to see the rest of your MINI. :smile:
#41
04-15-2005, 06:16 AM

6th Gear
#42
04-15-2005, 09:56 AM
4th Gear
Join Date: Oct 2003
Location: Southern California
Posts: 399
Likes: 0
Received 0 Likes
on
0 Posts
Originally Posted by andy@ross-tech.com
RECOOP,
Speaking as someone who has too many gauges ... you have too many gauges.
Speaking as someone who has too many gauges ... you have too many gauges.
I don't know about you, but if I can't beat 'em on the track, I can out gauge 'em Cheers,
#43
04-18-2005, 09:30 PM
Migrating Radio
Cooper S IRE:
Your install is what I have been considering but I was wondering how difficult it was to move the radio down. The other option I considered was to move the switch panel down and insert the radio between the heater / AC controls and the lowered switch panel.
Did you need to fabricate some form of bracket and do you have photos of the removals and re-installation?
K. F. Duke
#44
04-19-2005, 12:29 AM

hi Redworf,
no its not to difficult you just remove the panel in front of the center speedo
and remove the two down tubes and cut a slot in each one the width of your radio cage at an angle so the radio points up
also you will need to remove the panel underneath the switches it is so the radio cables can come out for the new position
sorry i dont have any pics but if you need any more info feel free to ask
i will post a pic of the finished job soon
also if you do this you will realise it is quite difficult to move the switches as the cables for them are not that long and the switches are held in place by the center console so to put the radio there you would have to remove a lot of plastic
hope this helps
#45
04-19-2005, 12:41 PM
Join Date: Oct 2004
Location: Miami, FL
Posts: 317
Likes: 0
Received 0 Likes
on
0 Posts
Originally Posted by RECOOP
Attached are two pics of the gauges on my '03 MCS. Originally, I had seven Autometer UltraLite Gauges (52mm): Boost, Exhaust gas temp (EGT), Intake air temp (IAT-single channel), Oil pressure, Oil temp, Water temp, and A/F (narrow band). The A/F gauge was essentially worthless, so it was removed. A friend make a custom bracket for the six gauges, with three on each side of the tach. BTW, the gauges were housed in VDO cups. I also had a G-Tech Pro Competition meter on top of the dash.
Recently, I replaced the Autometer gauges, except IAT, with the Defi Link System. The gauges are 52mm, with a red pointer, white faces, and awesome nightime green illumination. Each gauge has a warning light that can be set by the Defi Control System. I have been very pleased with the Defi products and encourage you to consider them. One need not get the Defi Link System; but individual gauges that are slightly different from mine are available in the D-Gauge series. For some neat photos and specs, check out www.defi-shop.com
Picture One
Left
top - Autometer IAT
next down - Water temp
far left - Oil temp
bottom - Oil pressure
Right
top - G-Tech Pro Competition meter
next down - EGT
far right - Fuel pressure
bottom - Boost
Picture Two
Close-up of the Boost gauge
On the dash by the windshield is a Defi VSD Basis --- heads-up display for speed, rpm's and shift light. Future plans include the Innovate Stand Alone wide-band O2 sensor and digital gauge.
 nice!
nice!
#46
05-26-2005, 10:23 PM


#48
05-28-2005, 01:30 AM

2nd Gear
Join Date: May 2005
Location: Phoenix, AZ
Posts: 72
Likes: 0
Received 0 Likes
on
0 Posts
sleeperblack i dont know for sure, but i believe its just like anyother temp gauge; i.e. its got an electronic temp sensor attatched the the guage, they are pretty simply designed with just a reference voltage, a temp transistor, and op amp and a couple resistors, just dump it in the oil tank/resivior/whateverthingy and attatch it a guage. of course a pre made one would be much more slick looking but i imagine it would work the same way.
#50
07-30-2005, 03:43 PM

Join Date: Feb 2005
Location: Miami, Florida
Posts: 3,291
Likes: 0
Received 0 Likes
on
0 Posts


