Mini Cooper 2001-2006: How to Replace Control Arm Bushings
The rubber bushings found on the front control arms of the Mini Cooper are prone to premature failure. While a slightly worn bushing may not be immediately noticeable, a failed or deteriorated bushing will cause the car to lose its handling precision. If your bushings are toast and in need of replacement, it may be worthwhile to upgrade to a set of polyurethane bushings for improved performance and increased longevity.
This article applies to the Mini Cooper and Cooper S (2001-2006).
The first generation Mini Cooper uses a combination of ball joints and rubber bushings in the front suspension control arms. While the ball joints are designed to allow for a relatively large range of motion, and free up and down movements of the control arms, the control arm bushing are in place to provide a firm resistance to the fore and aft movements of the control arms while the vehicle is in operation. These rubber bushing are fluid-filled from the factory to isolate noise, vibration, and harshness from inside of the cab while offering a decent resistance to distortion and deflection for improved cornering control. Unfortunately, these bushings can take a beating during normal vehicle operation and begin to deteriorate or leak, thus causing excessive control arm movement and decreased cornering performance.
The first gen Mini's have seen a high bushing failure rate with components deteriorating as early as 25,000 miles. On a positive note, this has persuaded many aftermarket companies to offer new and improved bushings to not only replace the stock units, but also offer increased longevity and improved handling characteristics. So, if your 2001 to 2006 Mini Cooper (or Cooper S) has suffered from the dreaded control arm bushing failure, this article will outline the steps involved in replacing them with a new and improved set to make you fall in love with your car's handling all over again.
Materials Needed
Floor jack and jack stands
Metric wrench and socket set
1/4, 3/8", and 1/2" drive ratchets and extensions
1/2" drive breaker bar
Ball joint separator
Phillips and flat head screwdrivers
Torque wrench
Hammer
Silicone spray lubricant
Shop press or bushing installation tool
Pry bar
Jawed puller
Bench vise
Step 1 – Lift vehicle and remove front wheels
To begin, lift the vehicle at the specified jacking points and support the front of the car with jack stands before removing the front wheels. Replacing the control arm bushings requires removing the subframe assembly from the underside of car, so it is important to lift the car high enough to provide adequate ground clearance for working under the vehicle.
(Related Article: How to Jack Up Your Car - NorthAmericanMotoring.com)
Figure 1. Lifting car with floor jack.
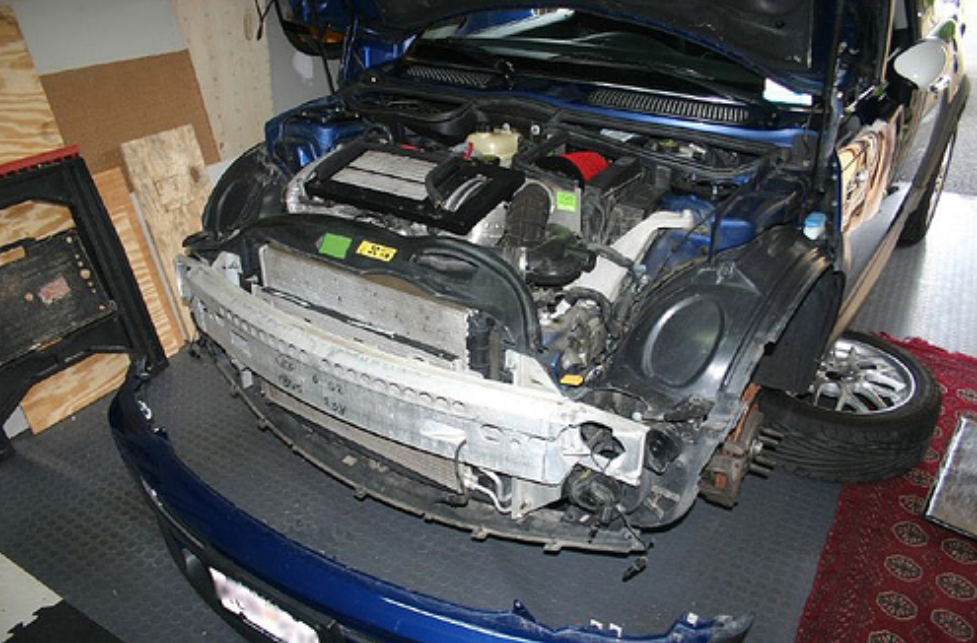
Step 2 – Remove bumper cover
To fully access all removal points of the subframe assembly, the front bumper cover, inner fender liners, and crush tubes first need to be removed. For a guide on removing these components, see Front Bumper Removal.
Figure 2. Bumper cover removed from vehicle.Related Video: Front End Service Mode for 2001-2006 Mini How-to
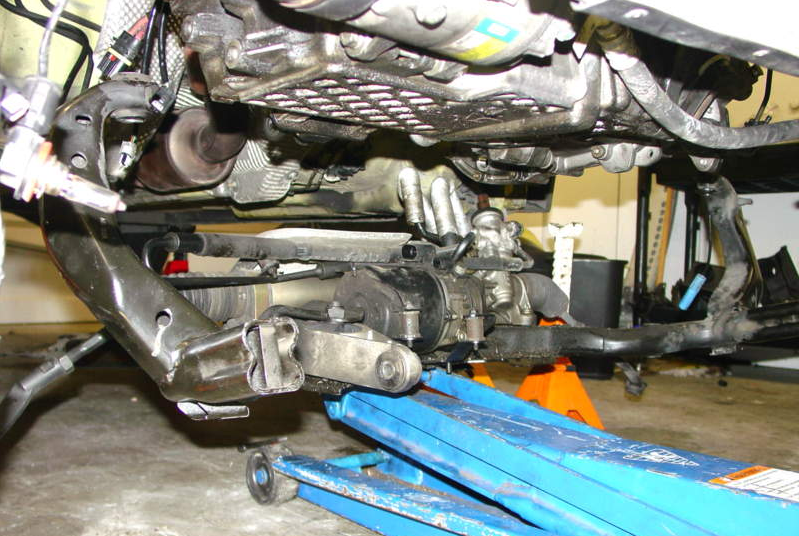
Step 3 – Remove subframe assembly
The subframe assembly provides various mounting points for steering and suspension components, but must often be removed for a number of repair and maintenance procedures. To access and replace the rubber bushing in each control arm, the subframe assembly must be unbolted and lowered out from under the vehicle and the control arms separated from the subframe. This requires disconnecting the anti-roll bar end links, tie rods, outer ball joints, power steering fan and pump, lower engine support, and various subframe support brackets. For a detailed guide on subframe removal, see Subframe Removal.
Figure 3. Lowering subframe assembly out from under the car.
Step 4 – Control arm bushing replacement
Now that the subframe assembly is free from the vehicle, you may proceed with replacing the control arm bushings.
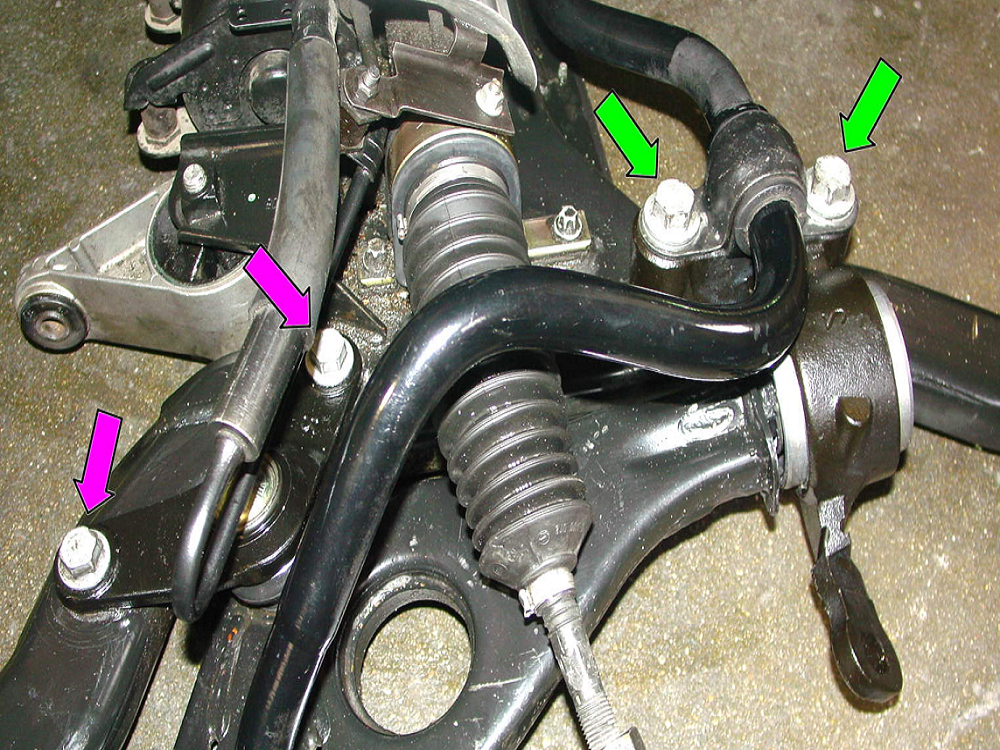
Remove the (2) control arm bushing bracket bolts.
Remove the inner ball joint bolts holding the ball joint to the subframe support bar and separate the control arm from the subframe.
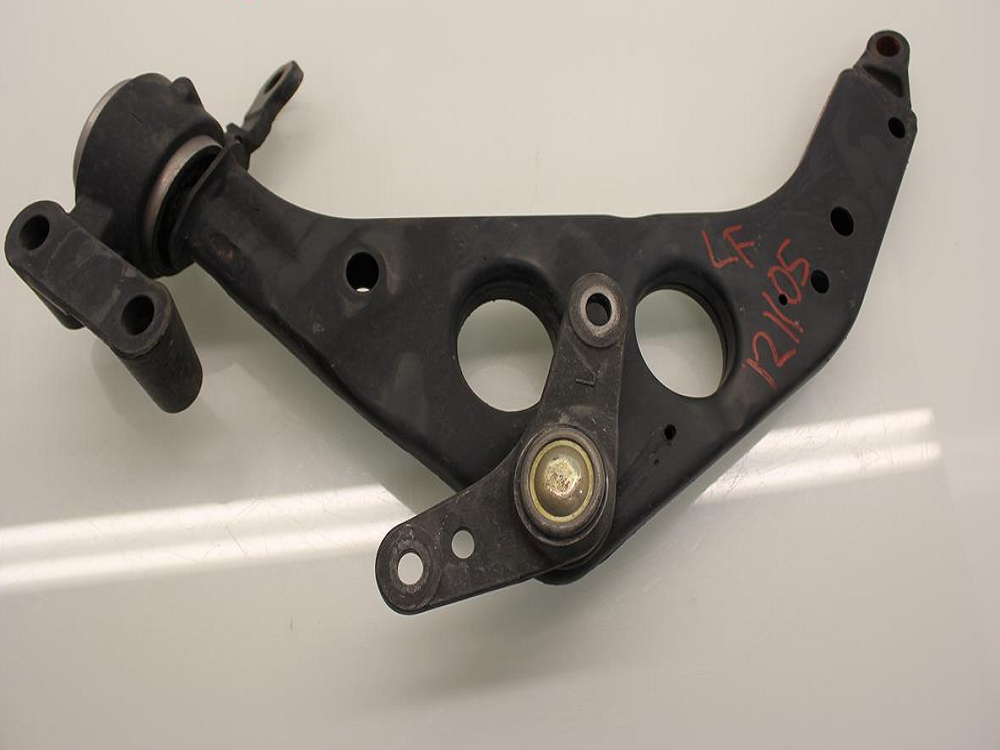
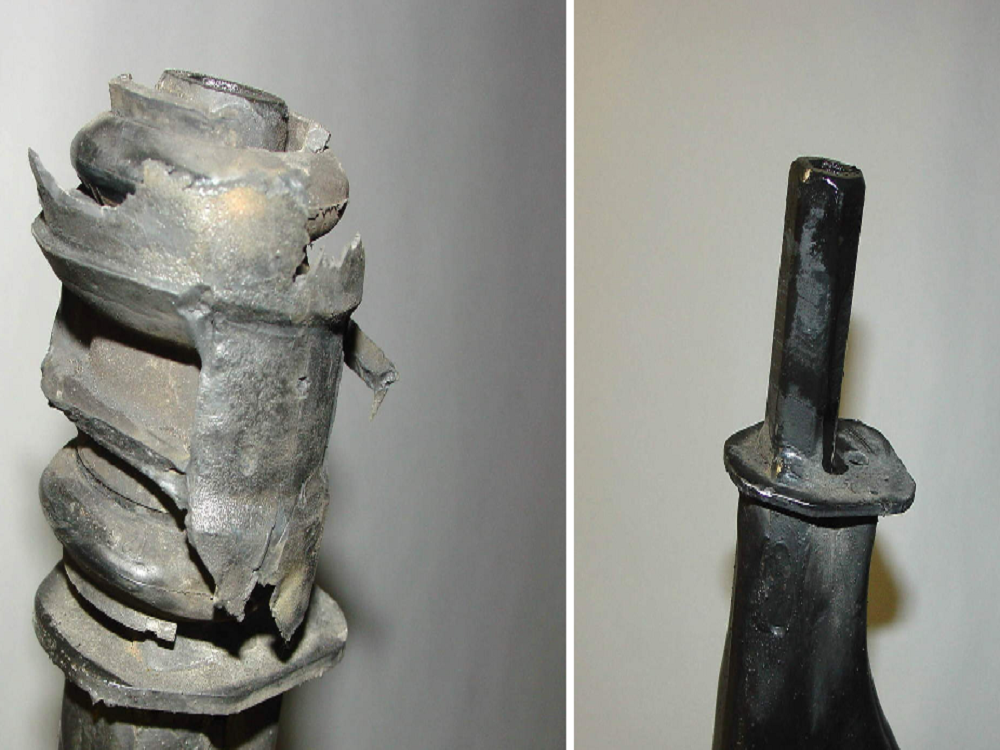
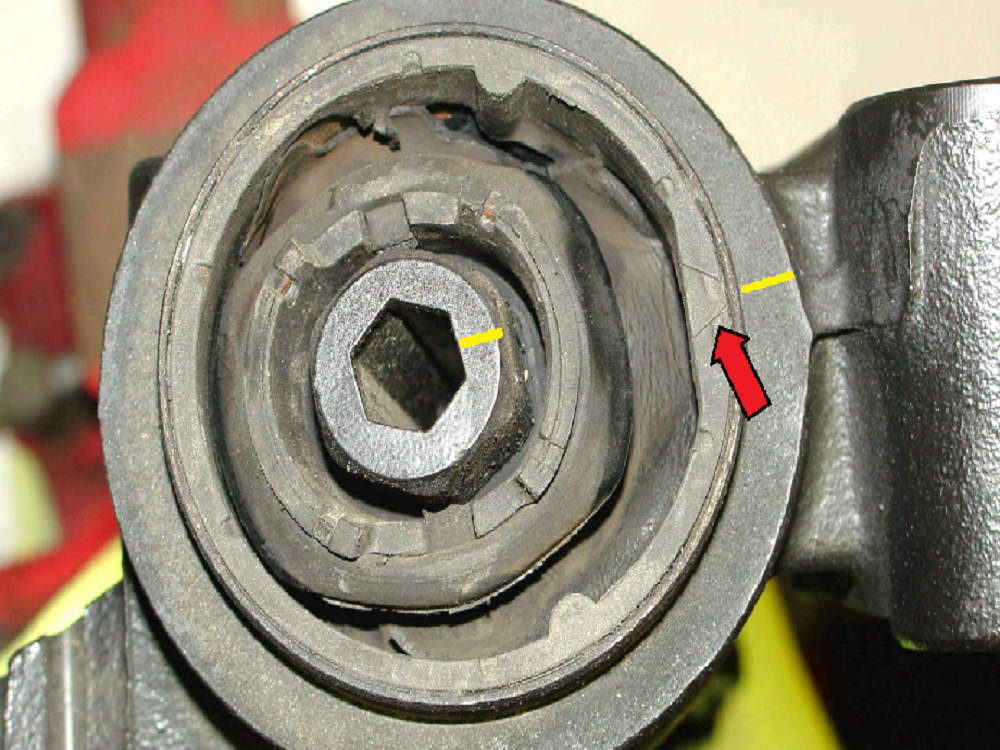
Place the control arm in a vise and remove the bushing bracket/bushing from the control arm. Depending on how worn the bushings are, they may separate from the control arm relatively easy using a small pry bar or screwdriver and a liberal application of silicone spray lubricant. In other cases, a 3-jaw puller or similar tool can be used to apply greater force to the bushing for removal. Also, note the direction of the bushing indexing arrow, as the new bushing will need to face in the same direction.
Figure 6. Removing bushing from control arm.
Figure 7. Bushing orientation.
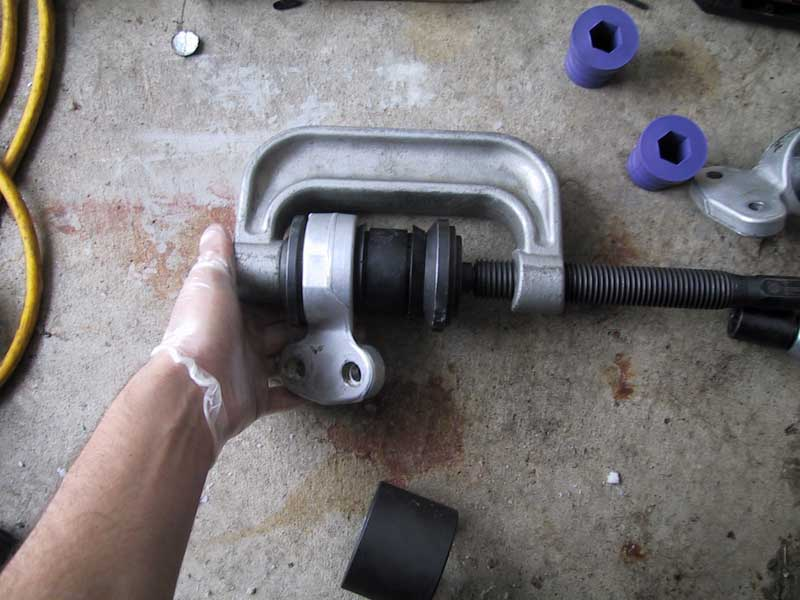
Depending on which type of bushing you are installing, they may not come pre-installed in a new bushing bracket and require a press fit into the bracket prior to installation. If necessary, use a shop press or bushing installation tool to force the new bushing into the bushing bracket. If applicable, align the orientation marks to ensure that the bushing is properly installed into the bracket.
Figure 8. One of the many methods of pressing bushing into bushing bracket.
Place the new bushing/bushing bracket onto the control arm. Depending on the type of bushing, these may simply slide onto the control arm by applying a bit of grease or silicone spray lubricant. If installation proves difficult, a dead blow hammer can be used to drive the bushing onto the control arm.
Figure 9. New bushing and bushing bracket installed on control arm.
With the new bushing in place, install the control arm back onto the subframe assembly and torque the bushing bracket bolts to 122 ft/lbs. Similarly, torque the inner ball joint bolts to 74 ft/lbs.
Repeat procedure for the other control arm bushing.
After installing both control arm bushings, reinstall the subframe assembly, bumper cover and wheels. Lower the vehicle off of jack stands and enjoy the improved handling of your Mini Cooper.
Pro Tip
It is a good idea to work the control arm through a range of motion prior to installing the anti-roll bar and tightening the bushing bracket.
Mini Cooper 2001-2006 Replacing Ball Joints
How to Replace Ball Joints
Have you lost that whip-tastic handling? Experiencing a popping or cracking sound in the front suspension? Check those ball joints...
This ...
Mini Cooper 2014-Present Suspension Modifications
Suspension Modifications
Improve the handling of your Mini with supporting modifications.
This article applies to the Mini Cooper/Cooper S (2014-Present).
Your ...
Mini Cooper 2014 to Present Suspension Diagnostic Guide
Suspension Diagnostic Guide
Whether it's something you feel, something you see, or even something you smell, busted suspension is never a good thing.
This ...
Mini Cooper 2007-2013 Suspension Modifications
Suspension Modifications
Looking for suspension upgrades? Check these options out.
This article applies to the Mini Cooper (2007-2013).
You've seen track monsters, ...
Mini Cooper 2001 to 2006 Suspension Modifications
Suspension Modifications
Are you looking to make your 1st Gen MINI run on rails?
This article applies to the 1st Gen Mini Cooper (2001-2006).
Are you looking for ...
Mini Cooper 2007-2013 Installing Lowering Springs
How to Install Lowering Springs
Mini Mania
Looking to go lower?
This article applies to the Mini Cooper (2007-2013).
Mini Coopers have always been the ...