
Interior/Exterior Calling Joey Mod!! (AKA blacked out Xenons)


Thread Starter
|
6th Gear
Joined: Aug 2005
Posts: 1,335
Likes: 0
From: Tucson, AZ
Calling Joey Mod!! (AKA blacked out Xenons)
Famous last exchange:
"We pretty much have this done"
-Joel to John
"There is still an oven involved"
-John to Joel
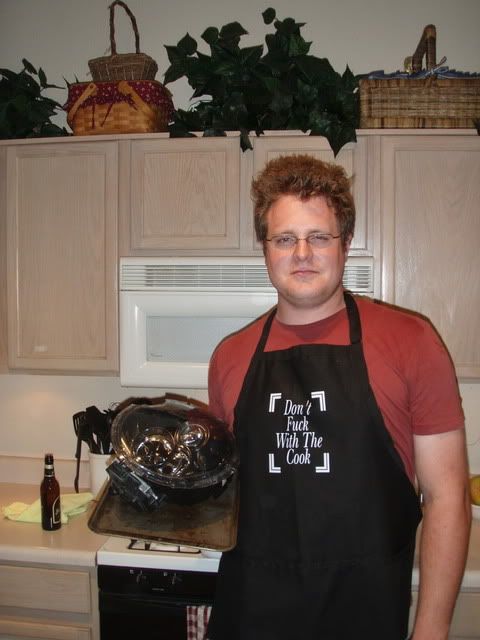
Thanks to all who participated in the disassembly and reassembly of the $1200 each MINI Xenon's today. Figured if I was going to do a turbo conversion in 2 weeks, I should have the nuts to tackle this project with my eyes closed. Other than having to double bake the driver's side assembly 'cause we didn't have the internal projector cover on right the first time, it went off without a hitch.
Here's a short run down:
The guilty parties:
Diesel(heed the advice):
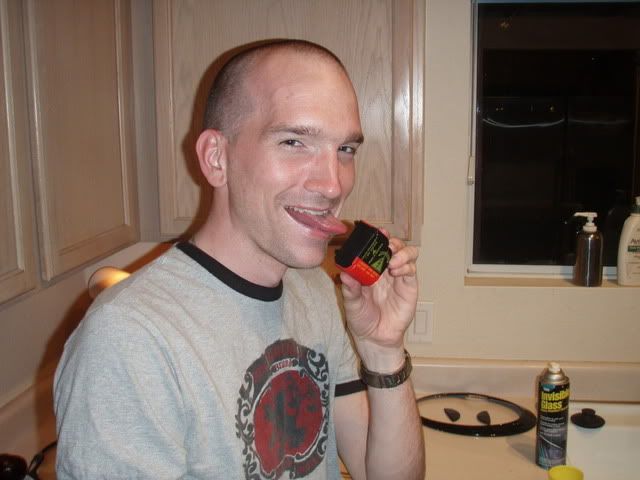
Moi'(30kV charge in those things, it is not your daddy's 12v):
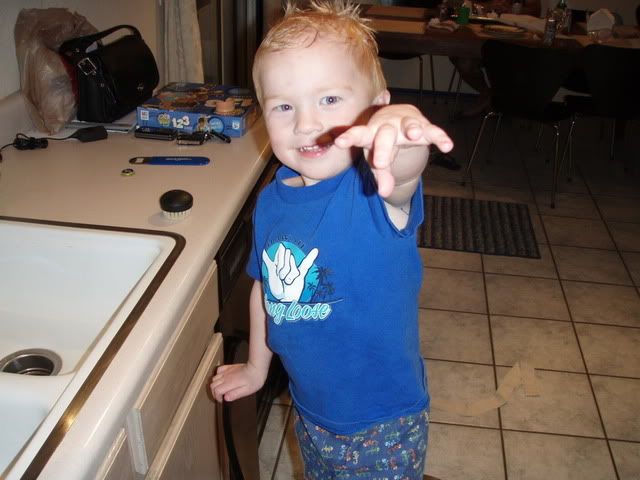
"Shazzam! Your light's are done"-Liam
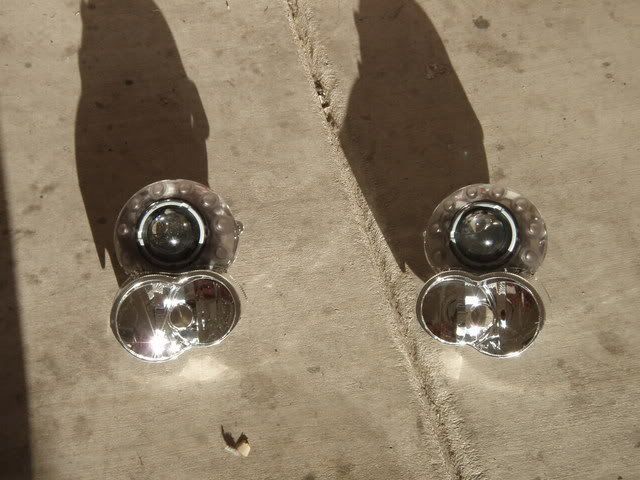
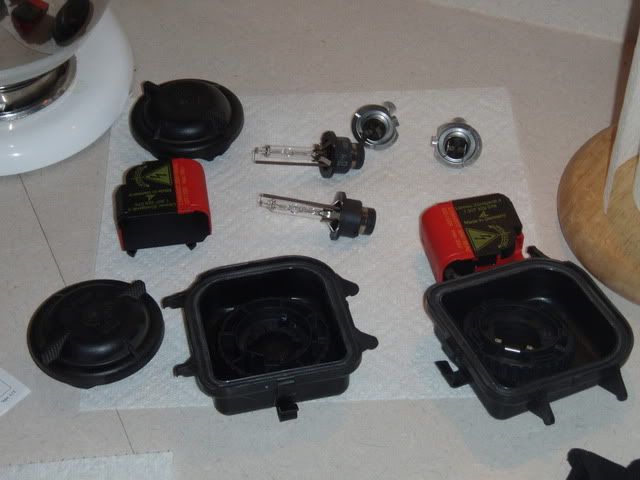
Projectors:
Pain in the butt covers. Friendly tip: interior chrome and Invisible Glass do NOT mix:
Various Xenon parts(only $300 bulbs!!):
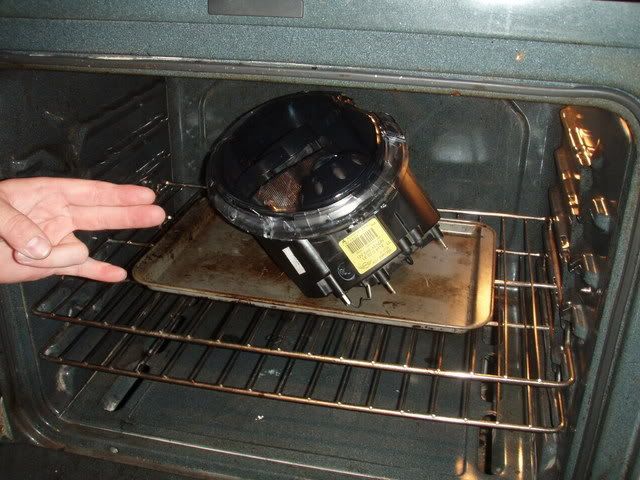
Remember, for light and fluffy projectors, bake at 230 degrees for 6 minutes
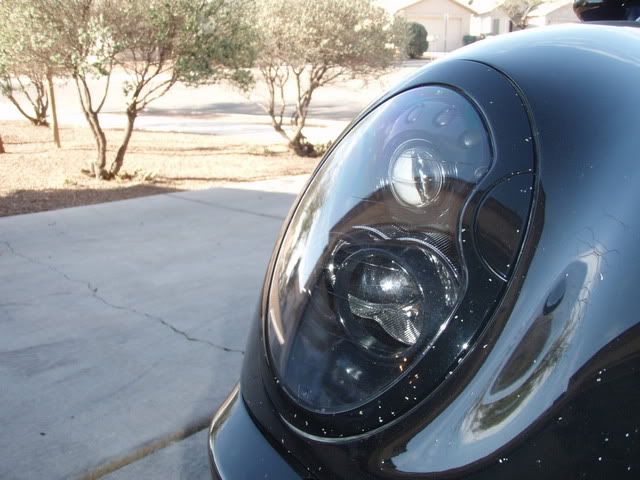
Will post up some pictures when it is light outside so you all can seen how nice they turned out.
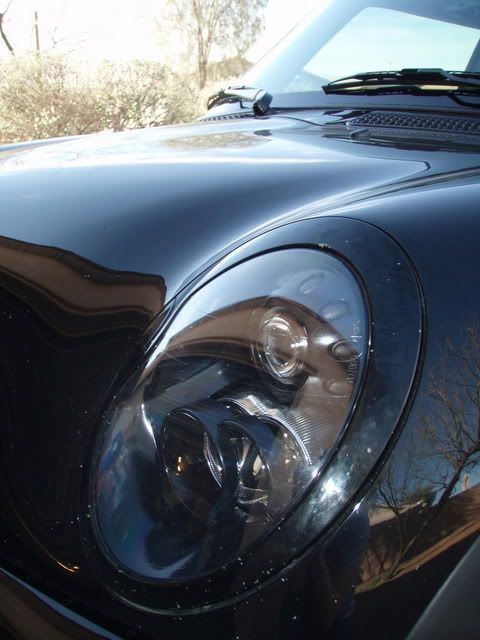
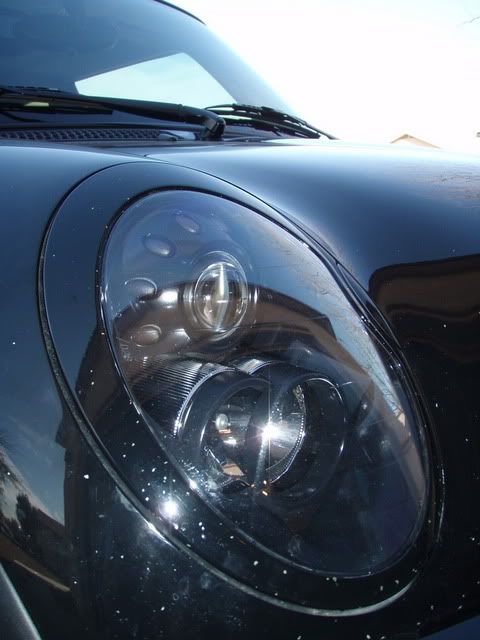
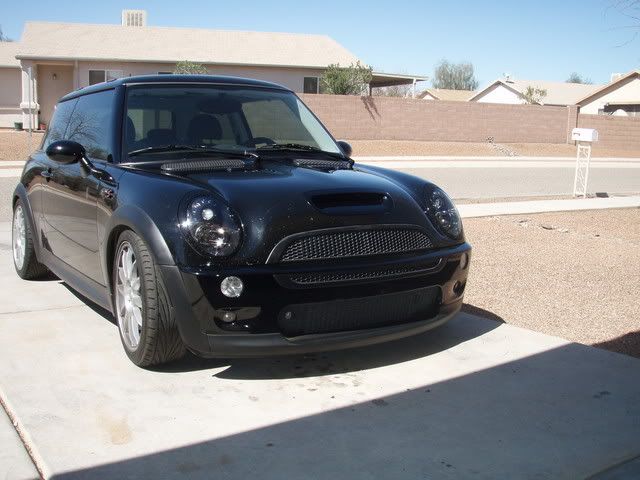
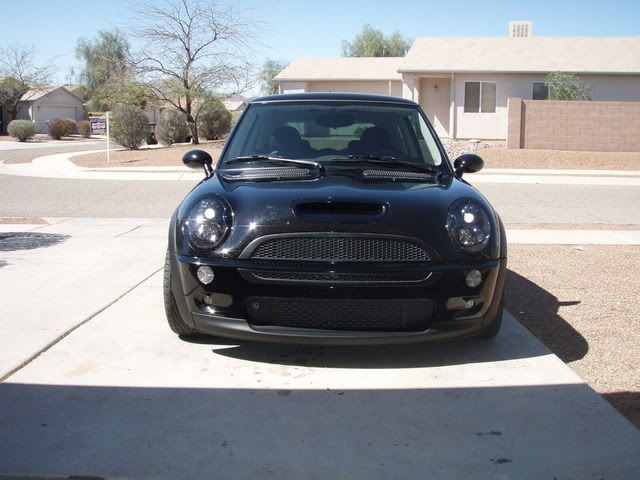
Here are a couple. Yeah I know my paint is chipped bad:
"We pretty much have this done"
-Joel to John
"There is still an oven involved"
-John to Joel
Thanks to all who participated in the disassembly and reassembly of the $1200 each MINI Xenon's today. Figured if I was going to do a turbo conversion in 2 weeks, I should have the nuts to tackle this project with my eyes closed. Other than having to double bake the driver's side assembly 'cause we didn't have the internal projector cover on right the first time, it went off without a hitch.
Here's a short run down:
The guilty parties:
Diesel(heed the advice):
Moi'(30kV charge in those things, it is not your daddy's 12v):
"Shazzam! Your light's are done"-Liam
Projectors:
Pain in the butt covers. Friendly tip: interior chrome and Invisible Glass do NOT mix:
Various Xenon parts(only $300 bulbs!!):
Remember, for light and fluffy projectors, bake at 230 degrees for 6 minutes
Will post up some pictures when it is light outside so you all can seen how nice they turned out.
Here are a couple. Yeah I know my paint is chipped bad:

I was here for this little adventure and wow, it was intense. Totally worth it...wait till everyone see's the final shots of the headlights...they are insane...truly one of the most unique mods available for our little cars...beautiful...wish I had HID's to do this to....and the best part...Liam's addition to the front yard...lol


 .
.
Nice turnout. Did you have to deal with any bolts holding the lens cover onto the headlight housing? I really want to do this on my '02 without projectors but am afraid about the bolts cracking the lense.
Thread Starter
|
6th Gear
Joined: Aug 2005
Posts: 1,335
Likes: 0
From: Tucson, AZ
No bolts. Car is an '05. Updated the pics too. ONce I get the car clean (yeah right), I will get some more perspective shots.
Trending Topics


Thread Starter
|
6th Gear
Joined: Aug 2005
Posts: 1,335
Likes: 0
From: Tucson, AZ
And yes I was worried about killing the lights. But in reality as long as you bake them slowly and for short intervals you can't do damage. I did like 3 minutes 2 times at 230 degrees, then 1 more minute and they came apart. You do have to pull on them a bit, but if you have pulled interior panels or done much work on your car it wasn't any more stresful than that. The scary part was figuring how to pull the chrome covers off of the Xenon parts. That took a bit of work to figure out on the first one, but once we had it, it only took like 2 minutes on the second one.
Any AZ folks who are interested I would be happy to help you do this. I isn't really too hard. Just gotta commit to doing it!


Why a paint shop, it's much harder to match Space Blue or PW or CR etc then it is black. I don't have those paint skills.


hm. yeah as rkw says. how would that black look on my white mini?
i was thinking about painting the inside the same white as my car..now that would look cool.
but im too scared to do it myself..dont wanna screw up my beautiful hids. xO
i was thinking about painting the inside the same white as my car..now that would look cool.
but im too scared to do it myself..dont wanna screw up my beautiful hids. xO
Thread Starter
|
6th Gear
Joined: Aug 2005
Posts: 1,335
Likes: 0
From: Tucson, AZ
I used Satin finish fusion. No sanding involve dor priming as that is the directions on the can. The key is to do 2-3 very light coats at first. This gets the surface tacky and will hold heavier finishing coats without drips/runs.
Don't be afraid minjae! That was my concern 6 months ago, but it kept eating at me until I just couldn't refuse doing it. As long as you work slowly and methodically you can do it.
Oh, and the reason for baking is to get the black silicone goop MINI uses to seal the lenses on the lights to soften up so you can pull the lens off.


6th Gear
Joined: Mar 2006
Posts: 1,737
Likes: 4
From: Los Angeles

On the old-style lights I prefer the body color look. However, on the projector lights I kinda prefer black to body color, dunno why...
Oh and question, did you reseal using the factory sealant or did you use new sealant? On a buddys E46 3-series that I put Angel Eyes on I used new high-temp silicone sealant and took off most of the old sealant. However, in retrospect, I don't think it was necessary.. What do you think?
Oh and question, did you reseal using the factory sealant or did you use new sealant? On a buddys E46 3-series that I put Angel Eyes on I used new high-temp silicone sealant and took off most of the old sealant. However, in retrospect, I don't think it was necessary.. What do you think?