
Suspension "Lifted Countryman"

Thread Starter
|
1st Gear
Joined: Mar 2014
Posts: 21
Likes: 0
From: Lubbock, Tx
"Lifted Countryman"
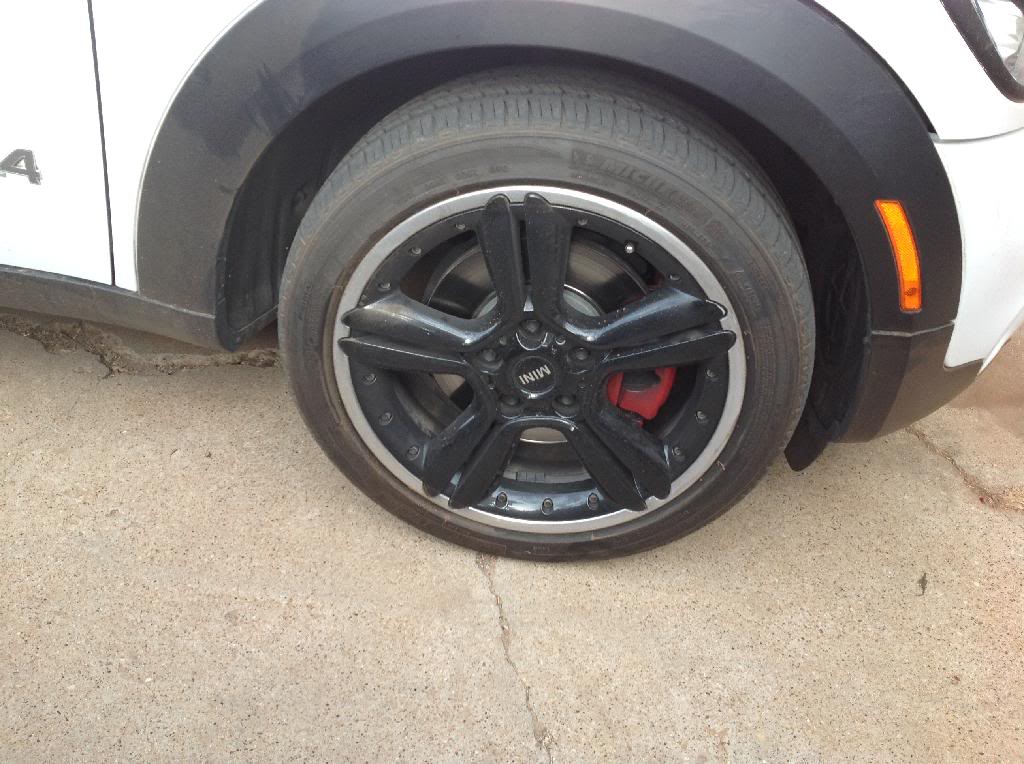
So I ordered the Detroit tuned countryman lift which is the cooper crap industries 2 in spacers. Long story short. The back was super easy but the front was a pain in the a$$. I've looked for forums for help but there was none. So I figure I will share my experience.
.......DISCLAIMER- only used for reference , I'm not responsible if any damage occurs to your vehicle.......
Before pictures.
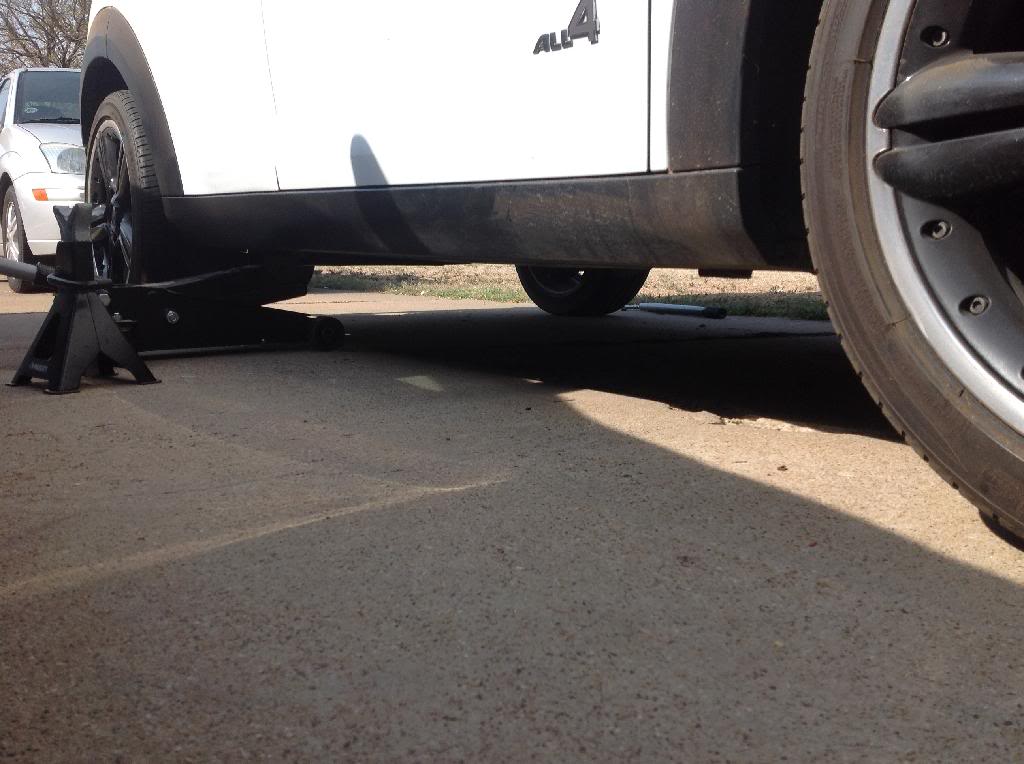
Stock 18in rims with 225/45-18 tires
To help with the install I followed the forum with the lowering springs.
https://www.northamericanmotoring.co...ountryman.html
With the rear you need to follow these steps.
1) Lift the rear of the car
2) Take off wheels
3) There's two bolts holding the top of the rear strut( I believe its a 13mm)
4) Then take off the one bolt holding the bottom of the strut to complete remove it. (Make sure to do this on both side , 21mm)
5) add spacer and use the extended bolts hand tighten to prevent cross threading.
6) Now you have to add the bottom bolt back. I found the easy way to line the holes was to use a jack to help compress the strut.
7) tighten everything up to specs and repeat for the other side.

-----note I was also adding a tow hitch from fini mini and you can see the difference from the front. But keep in mind the suspension needs to settle-----
Now the FRONT.
1) Lift the front and take the wheels off
2) Remove the sway bar links that connect to the strut. (Both sides)
3) Remove the strut pinch bolt. (Use a hex key as a strut spreader works great!)
4) Make sure nothing is connected to the strut ( brake lines and rotor sensor)
5) remove strut from the bottom knuckle. ( might need some wd40 and some luck)
6) once the bottom is free take the three nuts off under the hood to remove the top of the strut.
7) Attach spacers
8) Completely compress the springs with the head facing up.
9) Attach the top strut to the car with the spacer attached.
10) Hand tighten but not all the way for wiggle room.
11) compress the strut as far as you can to get the strut back into the knuckle ( might need some help and a lot of LUCK)
12) then reverse the process to connect everything back together.
Side note I used blue loctite for everything.
.......DISCLAIMER- only used for reference , I'm not responsible if any damage occurs to your vehicle.......
Before pictures.

Stock 18in rims with 225/45-18 tires

To help with the install I followed the forum with the lowering springs.
https://www.northamericanmotoring.co...ountryman.html
With the rear you need to follow these steps.
1) Lift the rear of the car
2) Take off wheels
3) There's two bolts holding the top of the rear strut( I believe its a 13mm)
4) Then take off the one bolt holding the bottom of the strut to complete remove it. (Make sure to do this on both side , 21mm)
5) add spacer and use the extended bolts hand tighten to prevent cross threading.
6) Now you have to add the bottom bolt back. I found the easy way to line the holes was to use a jack to help compress the strut.
7) tighten everything up to specs and repeat for the other side.

-----note I was also adding a tow hitch from fini mini and you can see the difference from the front. But keep in mind the suspension needs to settle-----
Now the FRONT.
1) Lift the front and take the wheels off
2) Remove the sway bar links that connect to the strut. (Both sides)
3) Remove the strut pinch bolt. (Use a hex key as a strut spreader works great!)
4) Make sure nothing is connected to the strut ( brake lines and rotor sensor)
5) remove strut from the bottom knuckle. ( might need some wd40 and some luck)
6) once the bottom is free take the three nuts off under the hood to remove the top of the strut.
7) Attach spacers
8) Completely compress the springs with the head facing up.
9) Attach the top strut to the car with the spacer attached.
10) Hand tighten but not all the way for wiggle room.
11) compress the strut as far as you can to get the strut back into the knuckle ( might need some help and a lot of LUCK)
12) then reverse the process to connect everything back together.
Side note I used blue loctite for everything.


Neutral
Joined: Oct 2012
Posts: 3
Likes: 0
Lift kit fail
Your pix and overview was incredibly generous. I got the same lift kit from Detroit Tuned and had a Mini specialist (in Brooklyn) install - but without any particular knowledge or guidelines. They said it took 5 hours to complete and was very "tight". I took that for difficult but the lift looked great so I was happy.
After a year with a pretty stiff ride in NYC, I noticed creaks and instability, brought my CM. Back to the shop which said the lift kit stressed everything out too much and several components were cracked. I had to remove the kit, make lots of expensive repairs.
I am now stuck with a look I don't love and tires & rims that are too big. I'm curious to know how long you've had your kit in, if you had any better success with the ride to consider if my installation was the issue. Also if you've ever spoken to Detroit tuned for the advice you posted.
Thanks
4th Gear
Joined: Dec 2009
Posts: 403
Likes: 3
From: Toronto, Ontario, Canada
^ Yikes !!
That's the sort of thing I've been concerned about with doing this lift. Although I've heard many others not having these issues and everything is running well.
I guess it all depends on a number of factors.
Do you drive your 2" lifted Mini up and over and through everything without abandon like a mad-man after the lift !?!?
Did you get a proper alignment?
Did you install the control arms that allow proper alignment adjustments?
@Quan, can you detail out exactly what damage had to be fixed ??
Thread Starter
|
1st Gear
Joined: Mar 2014
Posts: 21
Likes: 0
From: Lubbock, Tx
Your pix and overview was incredibly generous. I got the same lift kit from Detroit Tuned and had a Mini specialist (in Brooklyn) install - but without any particular knowledge or guidelines. They said it took 5 hours to complete and was very "tight". I took that for difficult but the lift looked great so I was happy.
After a year with a pretty stiff ride in NYC, I noticed creaks and instability, brought my CM. Back to the shop which said the lift kit stressed everything out too much and several components were cracked. I had to remove the kit, make lots of expensive repairs.
I am now stuck with a look I don't love and tires & rims that are too big. I'm curious to know how long you've had your kit in, if you had any better success with the ride to consider if my installation was the issue. Also if you've ever spoken to Detroit tuned for the advice you posted.
Thanks
After a year with a pretty stiff ride in NYC, I noticed creaks and instability, brought my CM. Back to the shop which said the lift kit stressed everything out too much and several components were cracked. I had to remove the kit, make lots of expensive repairs.
I am now stuck with a look I don't love and tires & rims that are too big. I'm curious to know how long you've had your kit in, if you had any better success with the ride to consider if my installation was the issue. Also if you've ever spoken to Detroit tuned for the advice you posted.
Thanks
Could you send pictures of the damage it caused or the part numbers so I can check my mini out.
Detroit Tuned is like the middle man since they will order the kit from cooper crap and send it directly to you, no instructions are included.

2nd Gear
Joined: Aug 2012
Posts: 75
Likes: 0
From: Minnesota
I will tell you this the back is easy but the front was difficult. Im concerned they might not installed it right in your case. Ive had the kit installed for about 6 months and no problems yet.
Could you send pictures of the damage it caused or the part numbers so I can check my mini out.
Detroit Tuned is like the middle man since they will order the kit from cooper crap and send it directly to you, no instructions are included.
Could you send pictures of the damage it caused or the part numbers so I can check my mini out.
Detroit Tuned is like the middle man since they will order the kit from cooper crap and send it directly to you, no instructions are included.

Thread
Thread Starter
Forum
Replies
Last Post
drrigg
R50/R53 :: Hatch Talk (2002-2006)
6
May 27, 2022 03:31 AM
M7Speed
1st Gen Countryman (R60) Talk (2010-2015)
3
Jul 10, 2018 09:26 AM