
Electrical Project Droid *build thread*


Thread Starter
|
1st Gear
Joined: Mar 2011
Posts: 42
Likes: 0
Project Droid *build thread* *NP 3-31*
So let me start off by saying thanks to this forum and all the help it has given me in advice and lessons via past threads.
That being said i work for a local car audio shop in Wilmington NC called GO Audio as a "Technology Integration Specialist" aka car stereo installer *although we do much more*. Being predisposed to "moding" cars and being new to the addiction known as mini madness it was only 2 days after buying my 02 MCS that i started tearing it apart, repainting, and adding modifications to my car that Ive named Maxx a'Million. Ive decided to keep record on this forum and hopefully learn some things and teach some things that ive found during my build. I will try to keep this post updated regularly and keep pictures of progress coming.
The Goal: Android powered audio/video/navigation/diagnostic integrated into the fun 200+HP
Pictures in my album can be seen at
http://sturm.imgur.com/
Here are a few of the highlights, there are more and im sorry i haven't cropped any of them yet either, if you have any questions or comments please let me know.
Here is Maxx just before i started this.

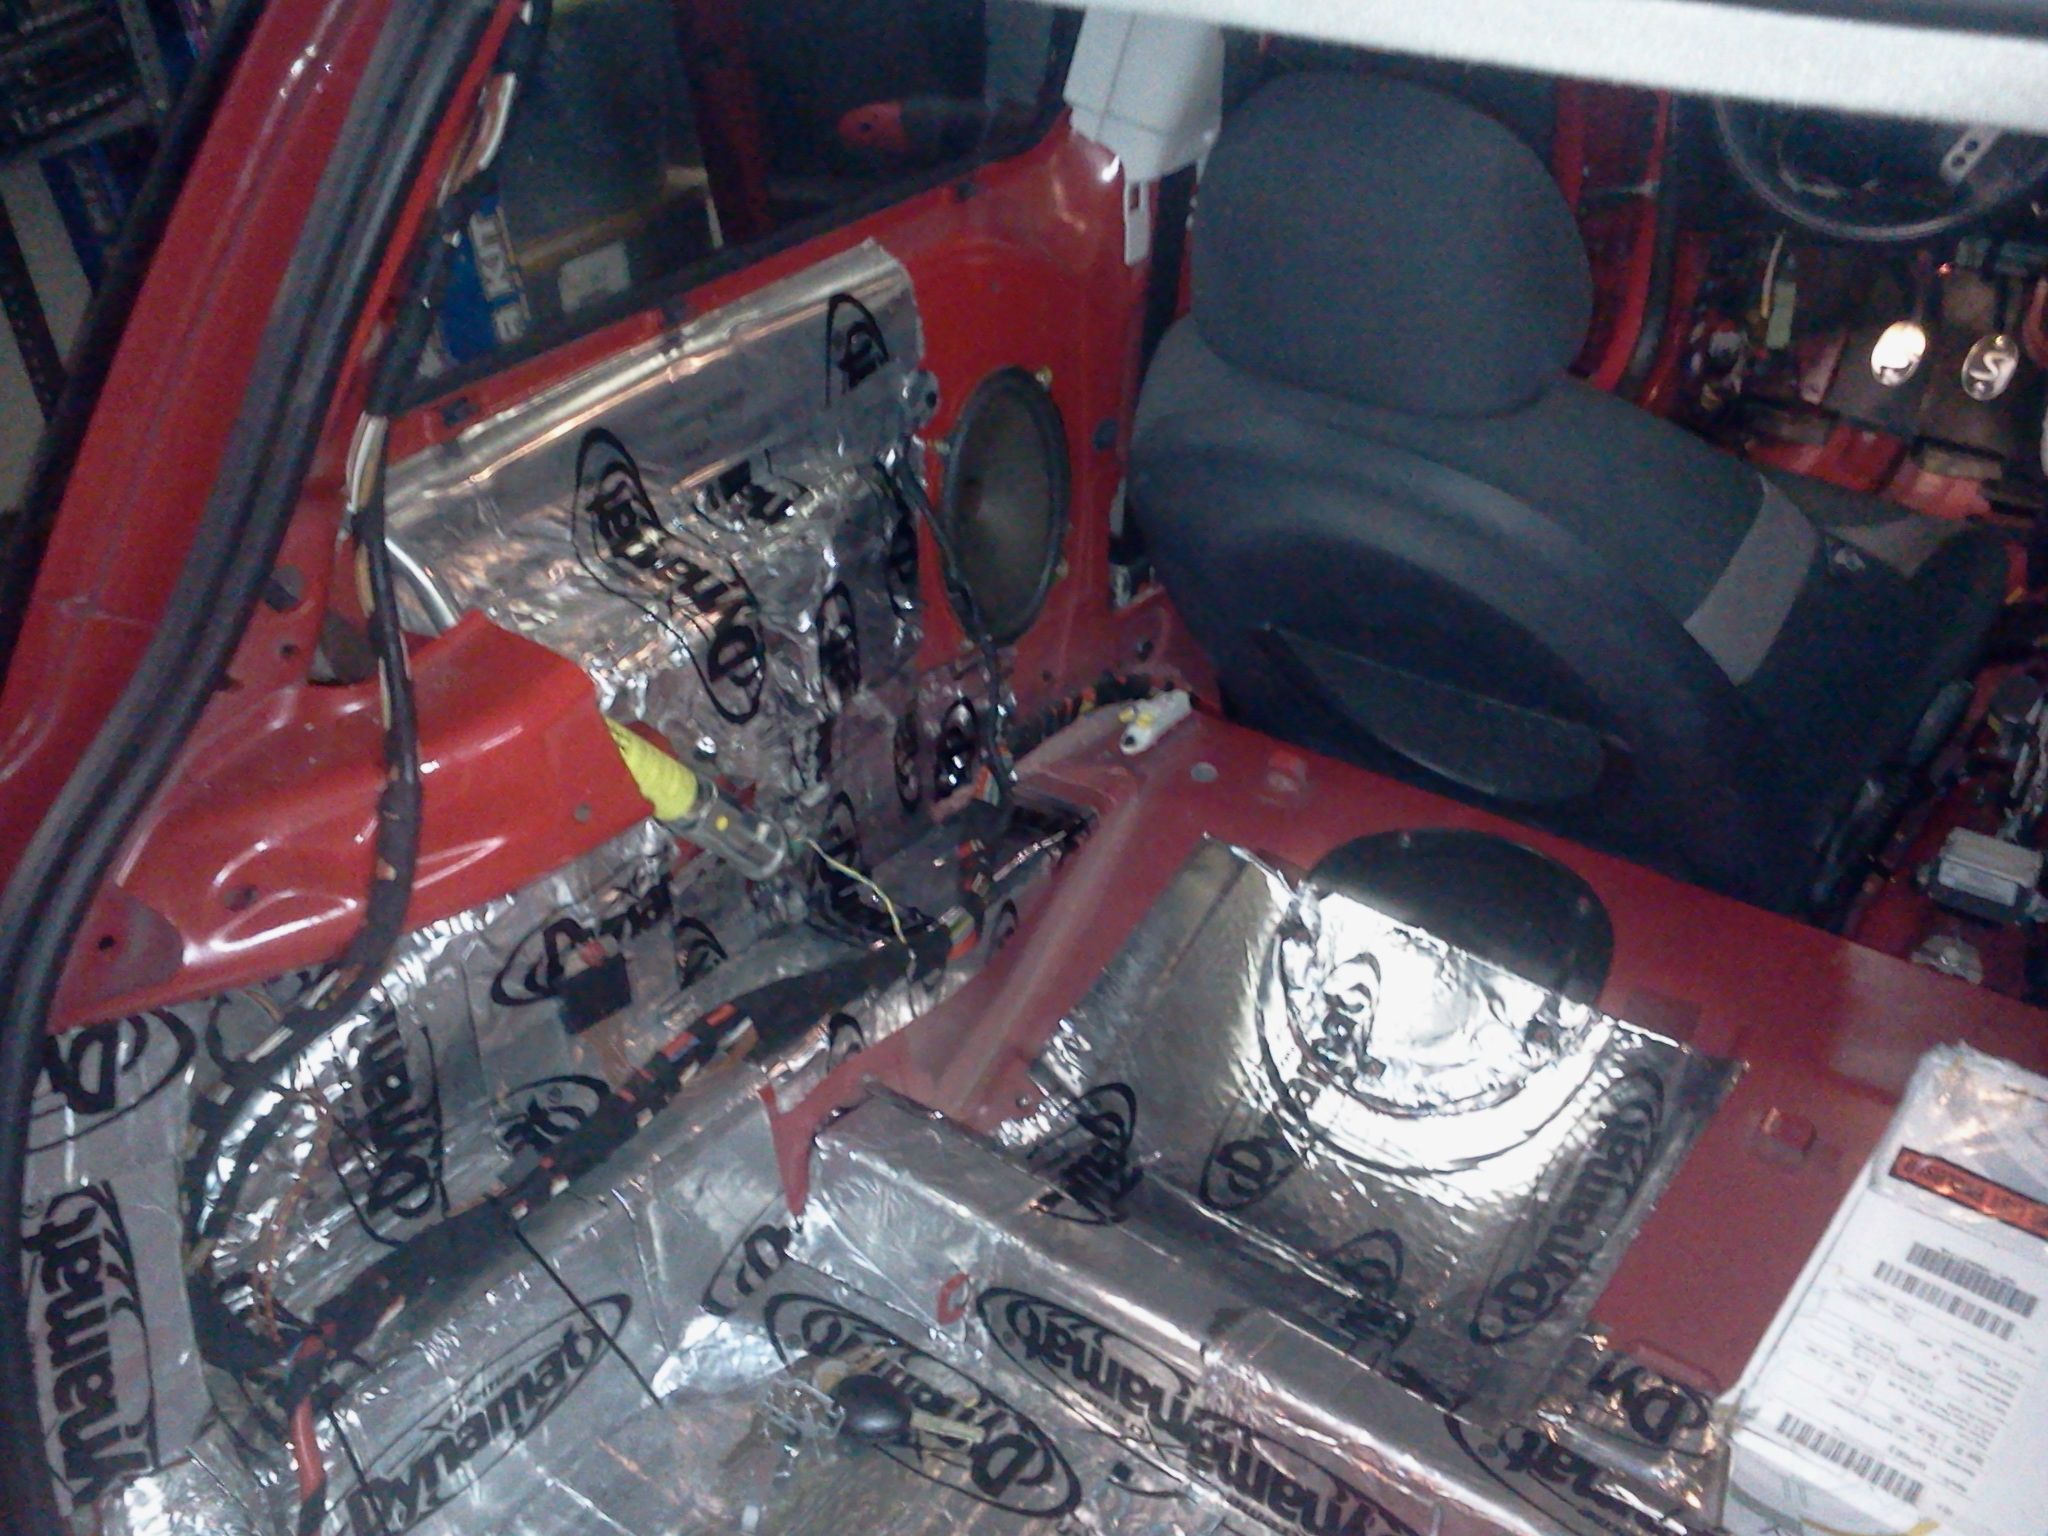
Dynamat starting to go on. Going to be a second skin on the entire interior all the way to firewall, i also and deleting the back seat to make way for a amp rack, sub, dual battary and some other electronics.

I didnt dynamat the battary compartment because i have other plans for that area and im not 100% on what sub(s) will be going in the back

This dash will never be the same again
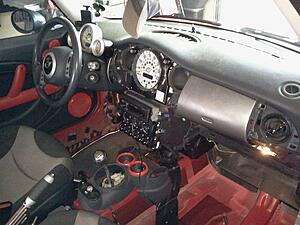
A sign of things to come
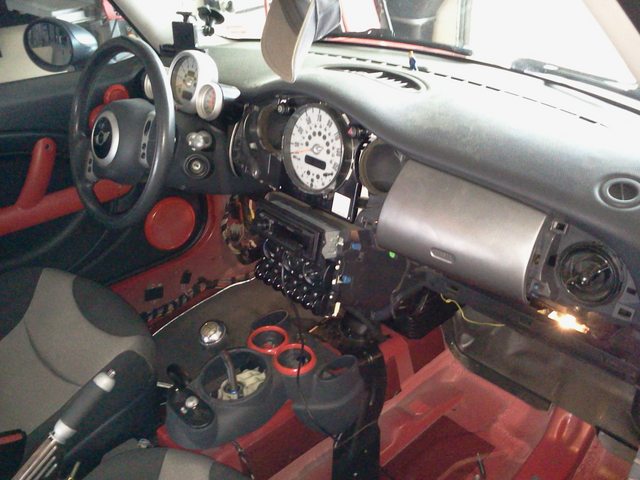
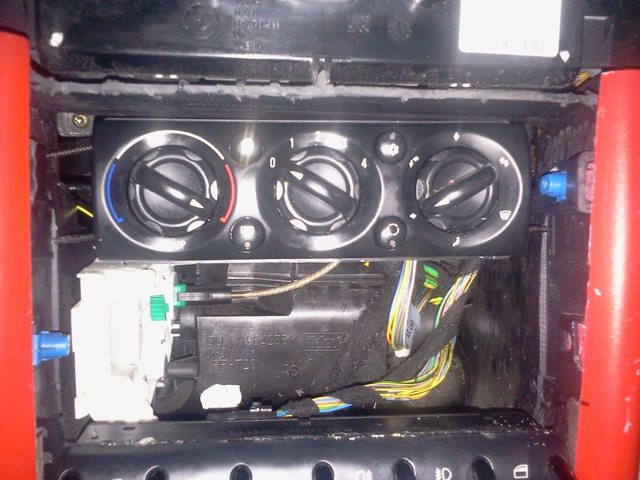
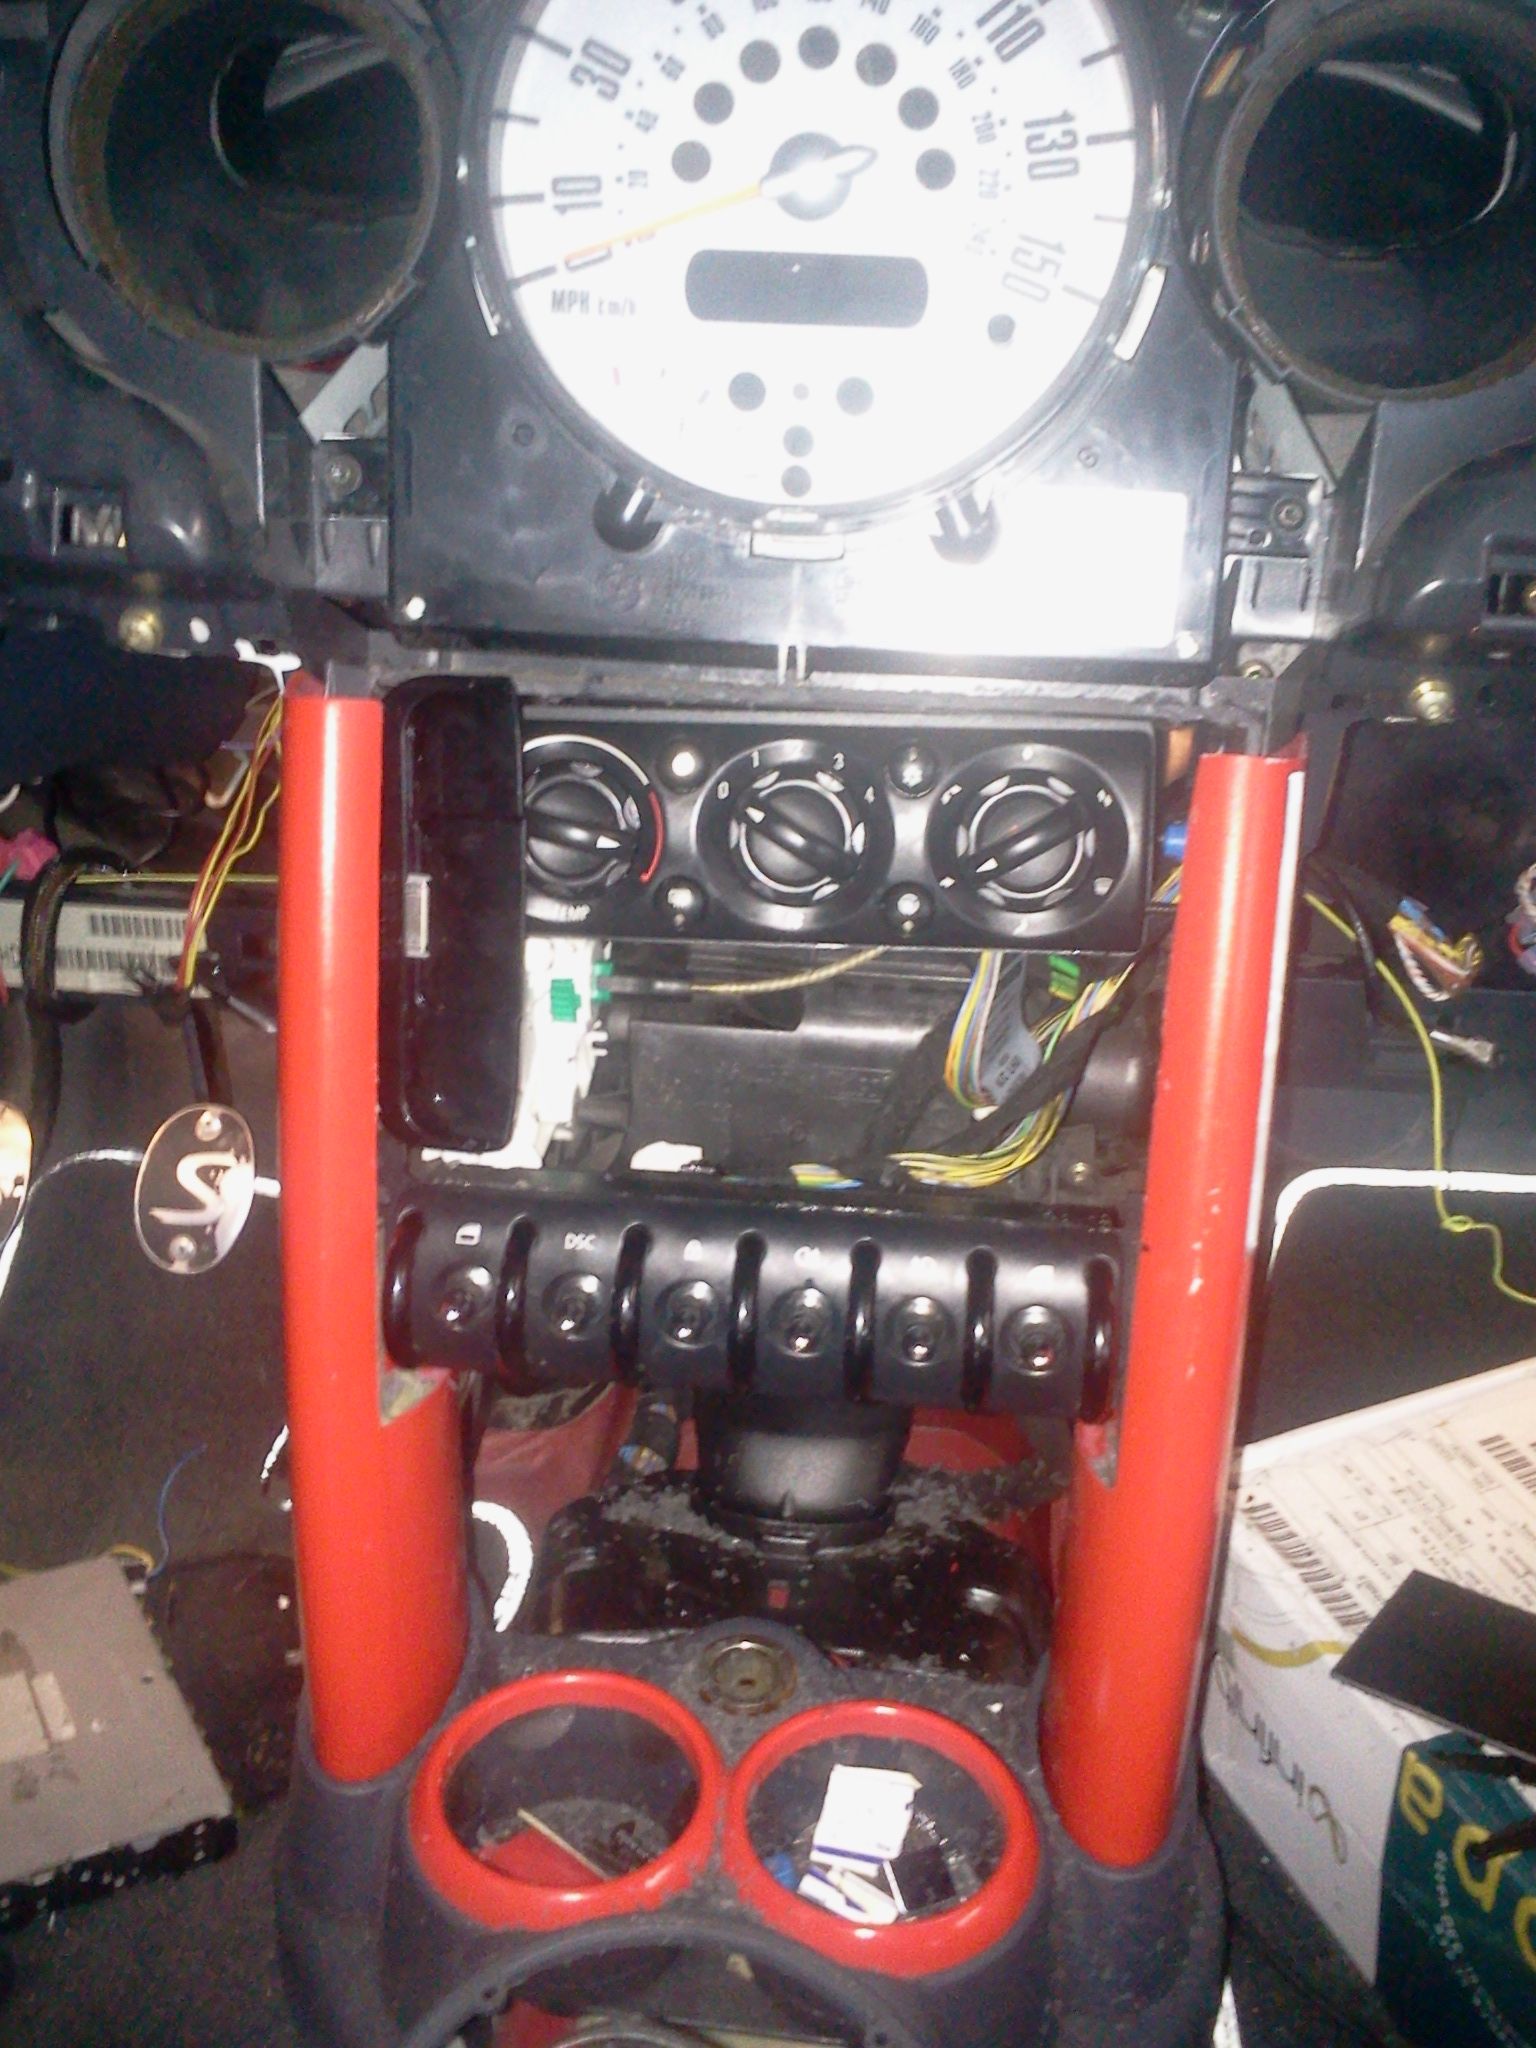
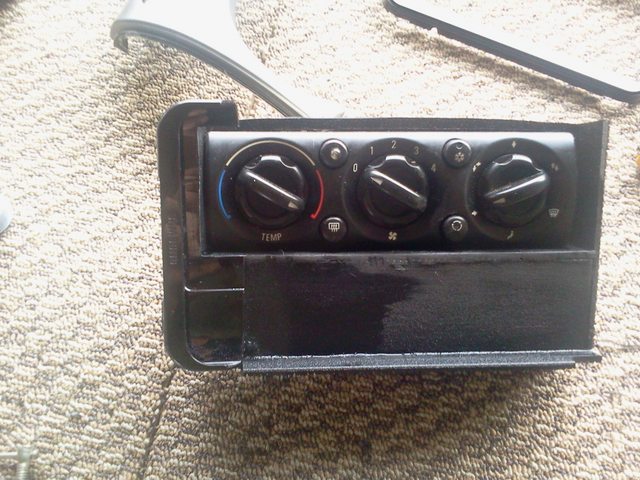
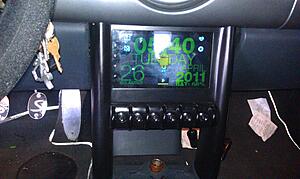
the new home of the ac controls are set back about 5 inches, just enough room to slide the new headunit from the side. i wanted to relocate them but unfortunately cable restrictions prevented that, it will end up being trimmed out in felt.

Got the mount for my galaxy tab in, started adding support brackets to keep things nice and stable. the ac controls are not secured but they do sit level with everything else.

Unfortunately all the pics were taken with the tab that is going to be mounted in the dash. i will be taking better pics as the days progress. my goal is to have it put back together and 90% done by late July.
That being said i work for a local car audio shop in Wilmington NC called GO Audio as a "Technology Integration Specialist" aka car stereo installer *although we do much more*. Being predisposed to "moding" cars and being new to the addiction known as mini madness it was only 2 days after buying my 02 MCS that i started tearing it apart, repainting, and adding modifications to my car that Ive named Maxx a'Million. Ive decided to keep record on this forum and hopefully learn some things and teach some things that ive found during my build. I will try to keep this post updated regularly and keep pictures of progress coming.
The Goal: Android powered audio/video/navigation/diagnostic integrated into the fun 200+HP
Pictures in my album can be seen at
http://sturm.imgur.com/
Here are a few of the highlights, there are more and im sorry i haven't cropped any of them yet either, if you have any questions or comments please let me know.
Here is Maxx just before i started this.

Dynamat starting to go on. Going to be a second skin on the entire interior all the way to firewall, i also and deleting the back seat to make way for a amp rack, sub, dual battary and some other electronics.

I didnt dynamat the battary compartment because i have other plans for that area and im not 100% on what sub(s) will be going in the back
This dash will never be the same again
A sign of things to come

the new home of the ac controls are set back about 5 inches, just enough room to slide the new headunit from the side. i wanted to relocate them but unfortunately cable restrictions prevented that, it will end up being trimmed out in felt.
Got the mount for my galaxy tab in, started adding support brackets to keep things nice and stable. the ac controls are not secured but they do sit level with everything else.
Unfortunately all the pics were taken with the tab that is going to be mounted in the dash. i will be taking better pics as the days progress. my goal is to have it put back together and 90% done by late July.
Last edited by djsturm; Mar 31, 2011 at 05:16 PM. Reason: pics added


Thread Starter
|
1st Gear
Joined: Mar 2011
Posts: 42
Likes: 0
I was originally planning on going to motd but just found out I'm going to need brakes and tires in the next two weeks or so. So unless I can come up with the extra cash I probably wont make it :-[
6th Gear
Joined: Aug 2005
Posts: 1,692
Likes: 2
ah, sorry to hear that. good luck!
Trending Topics
Thread Starter
|
1st Gear
Joined: Mar 2011
Posts: 42
Likes: 0
dash build
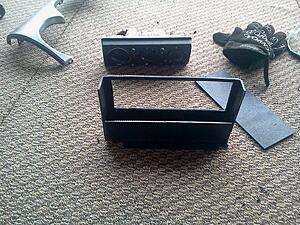
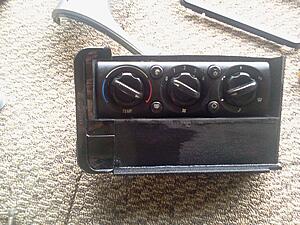
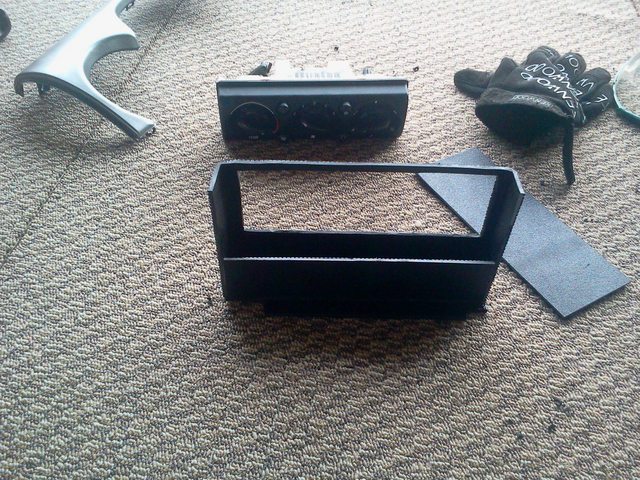
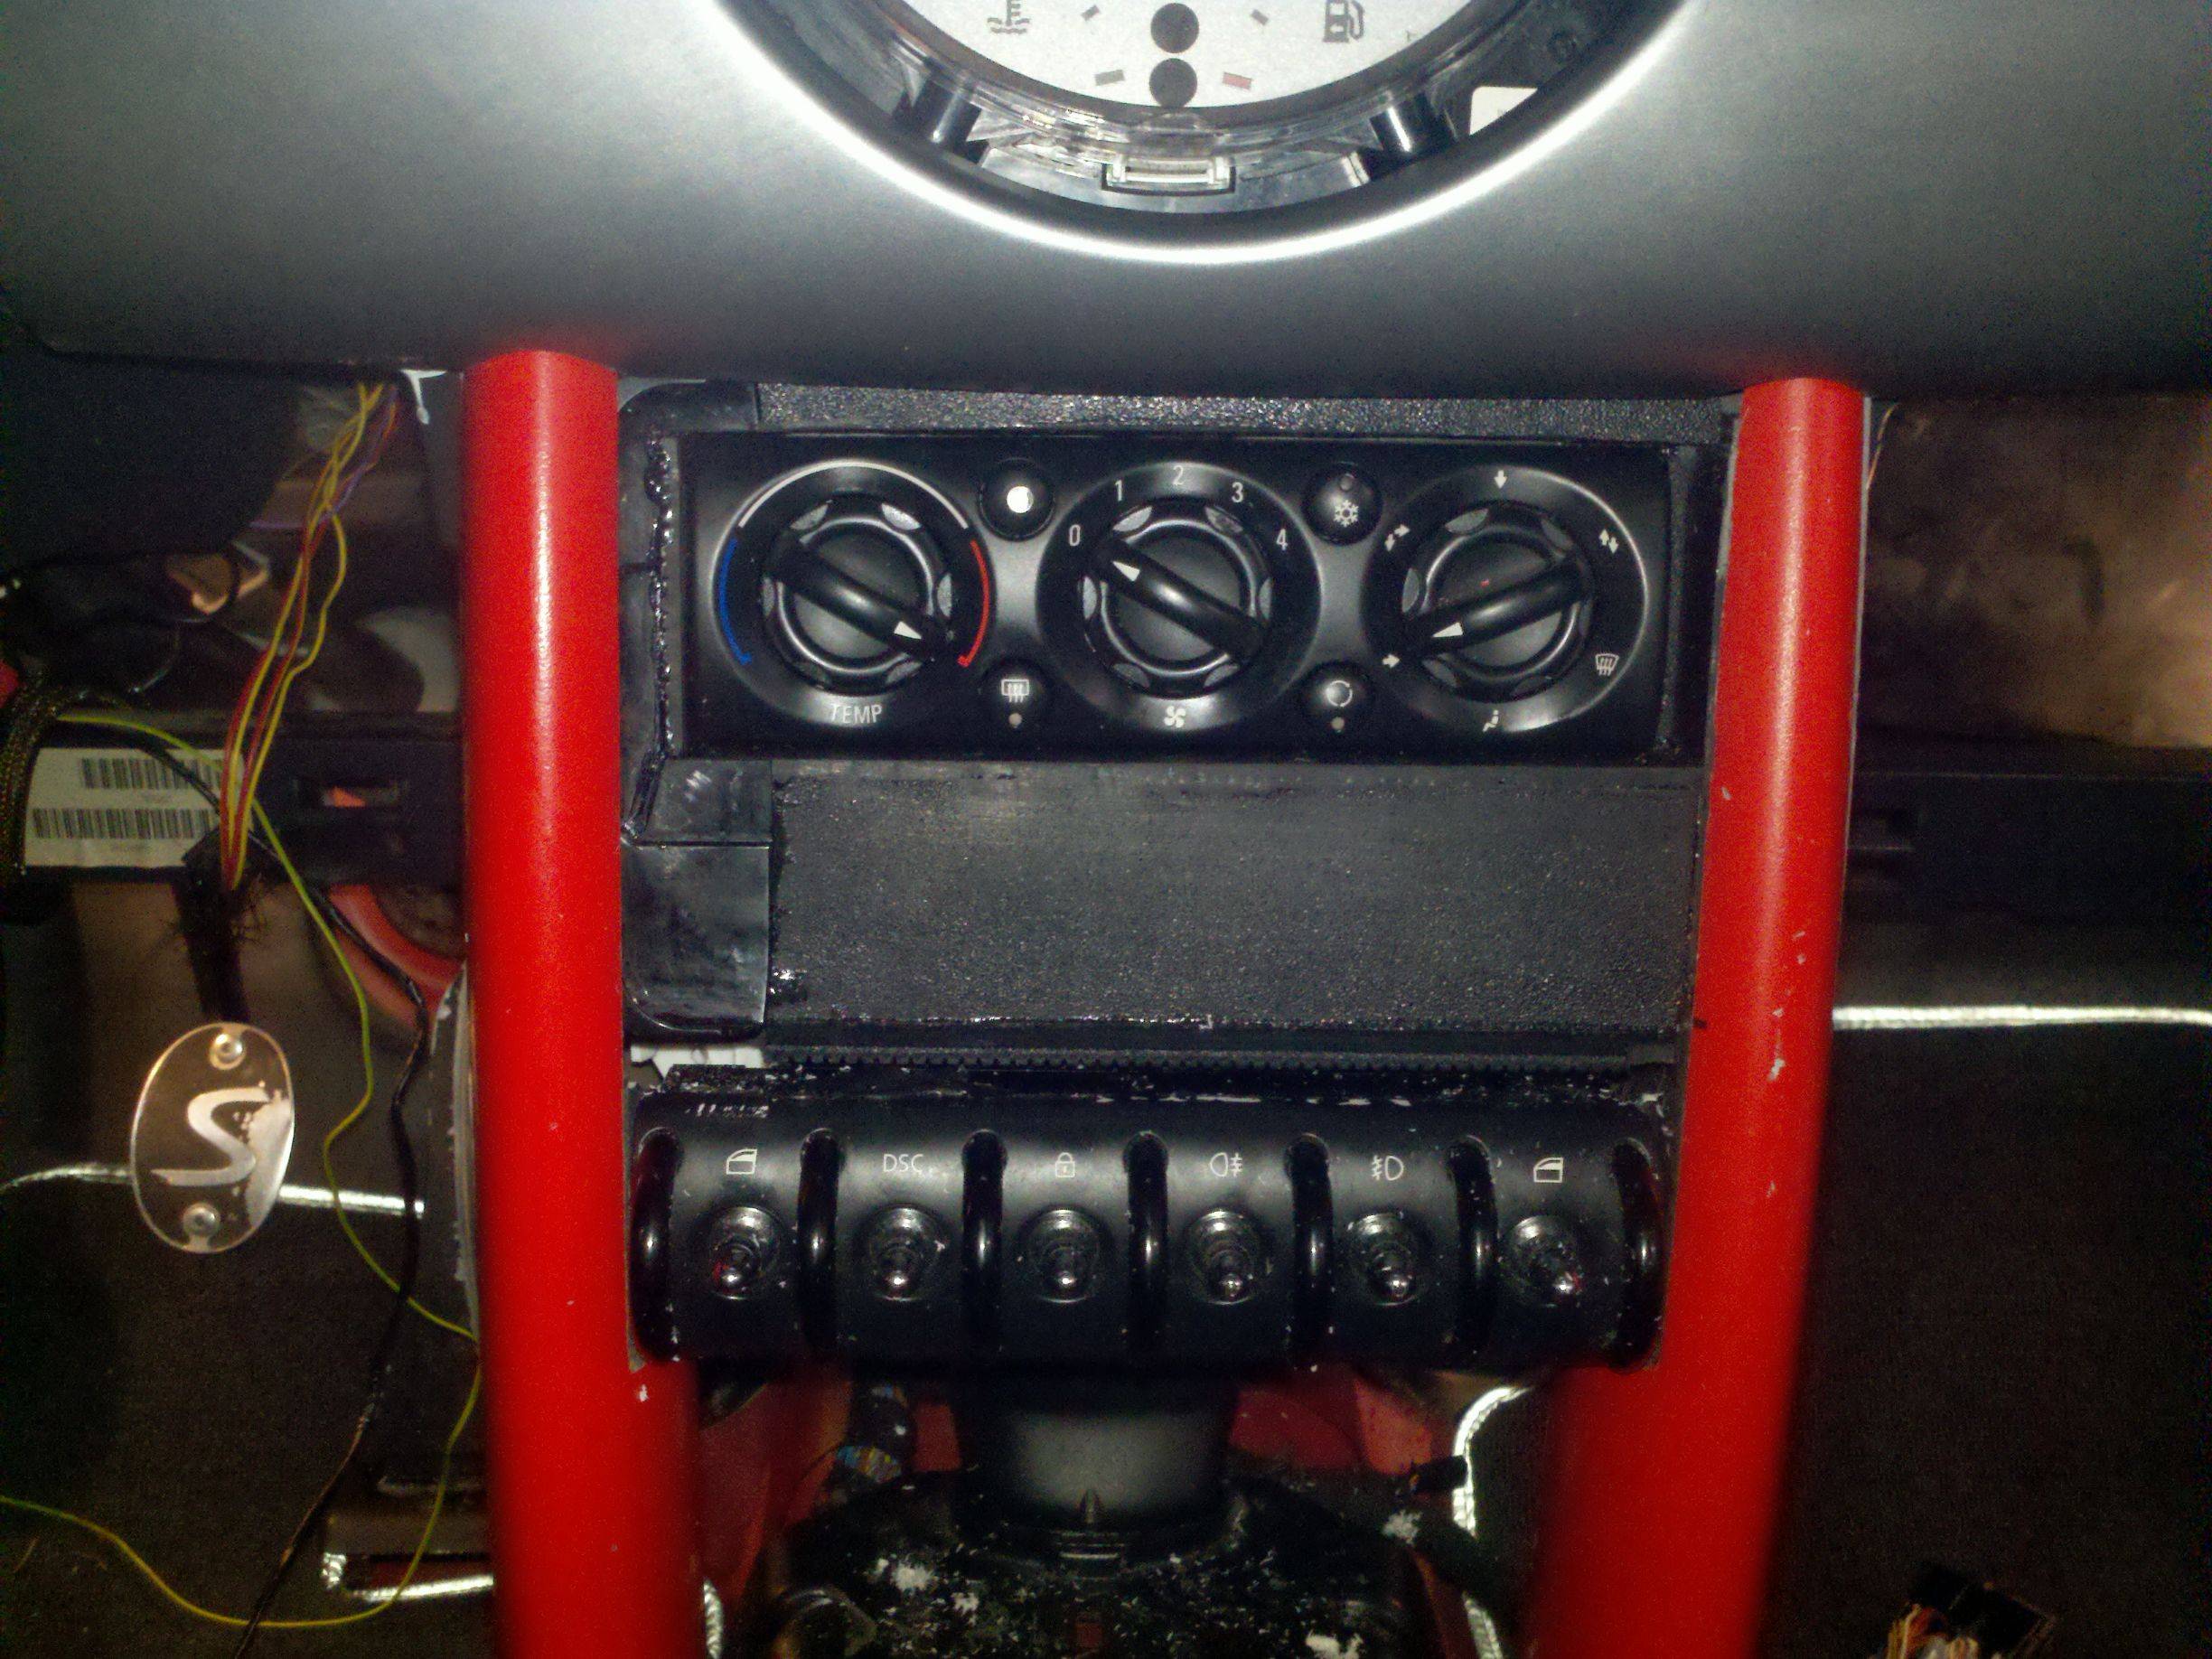
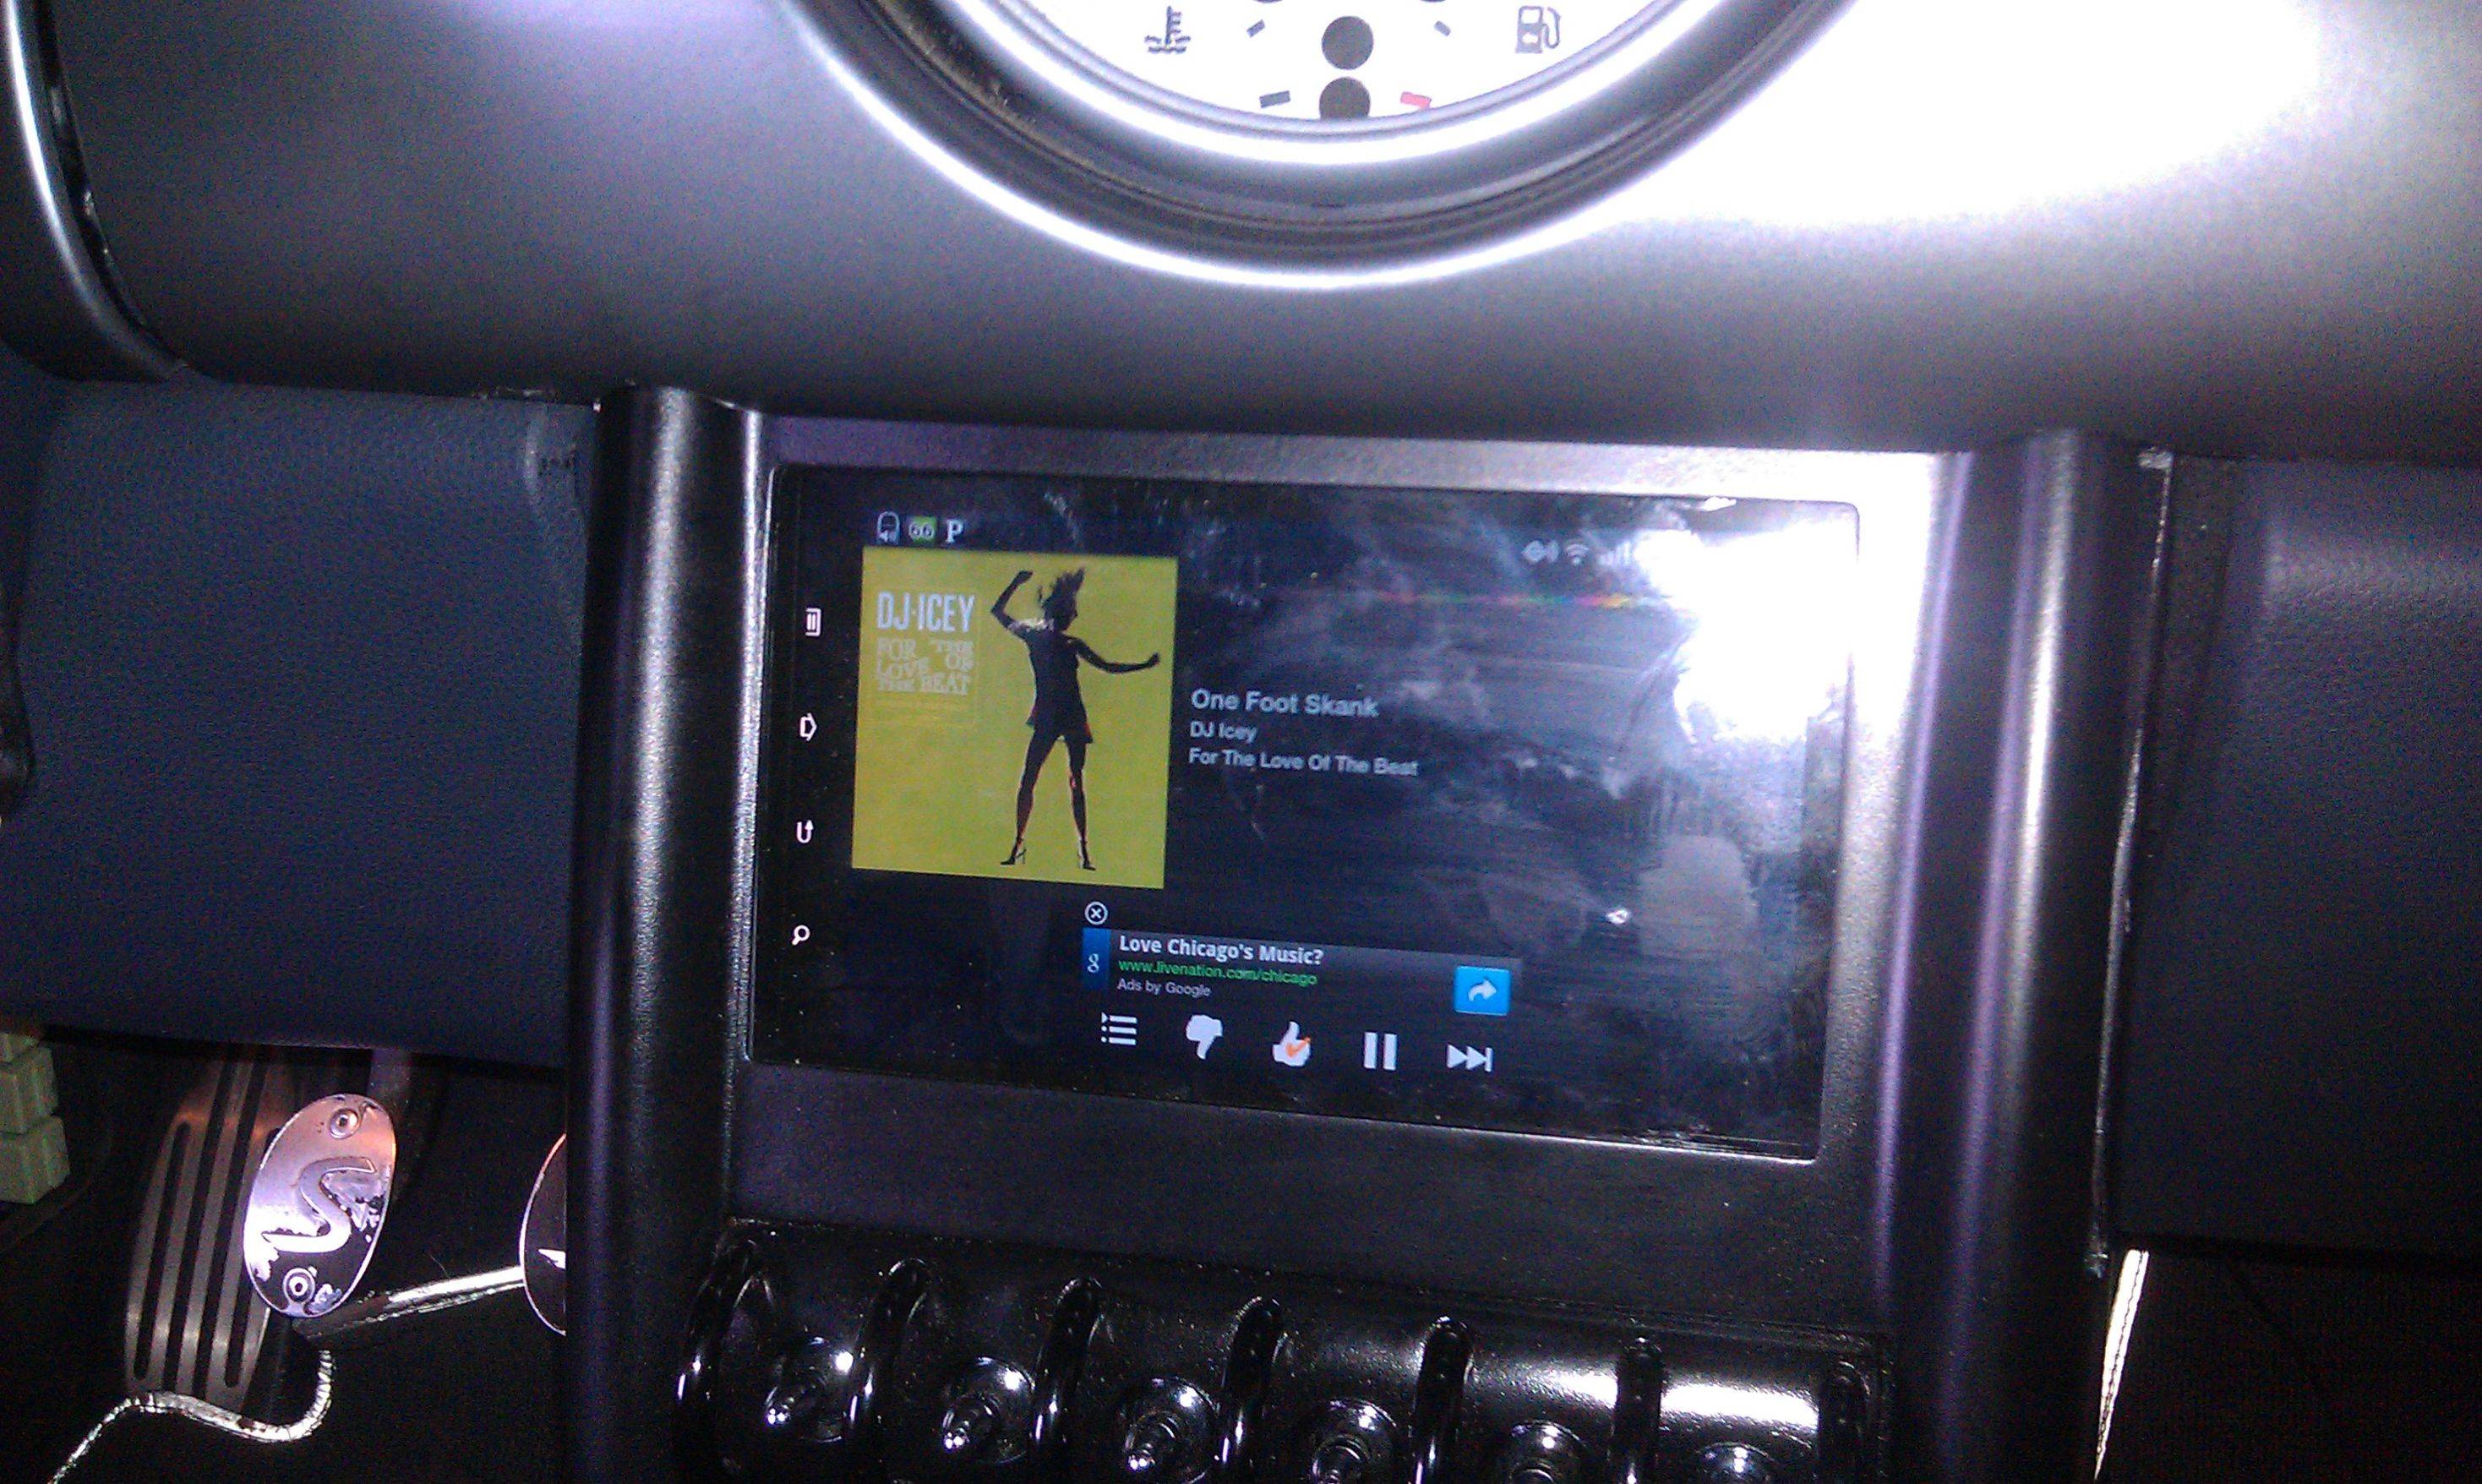
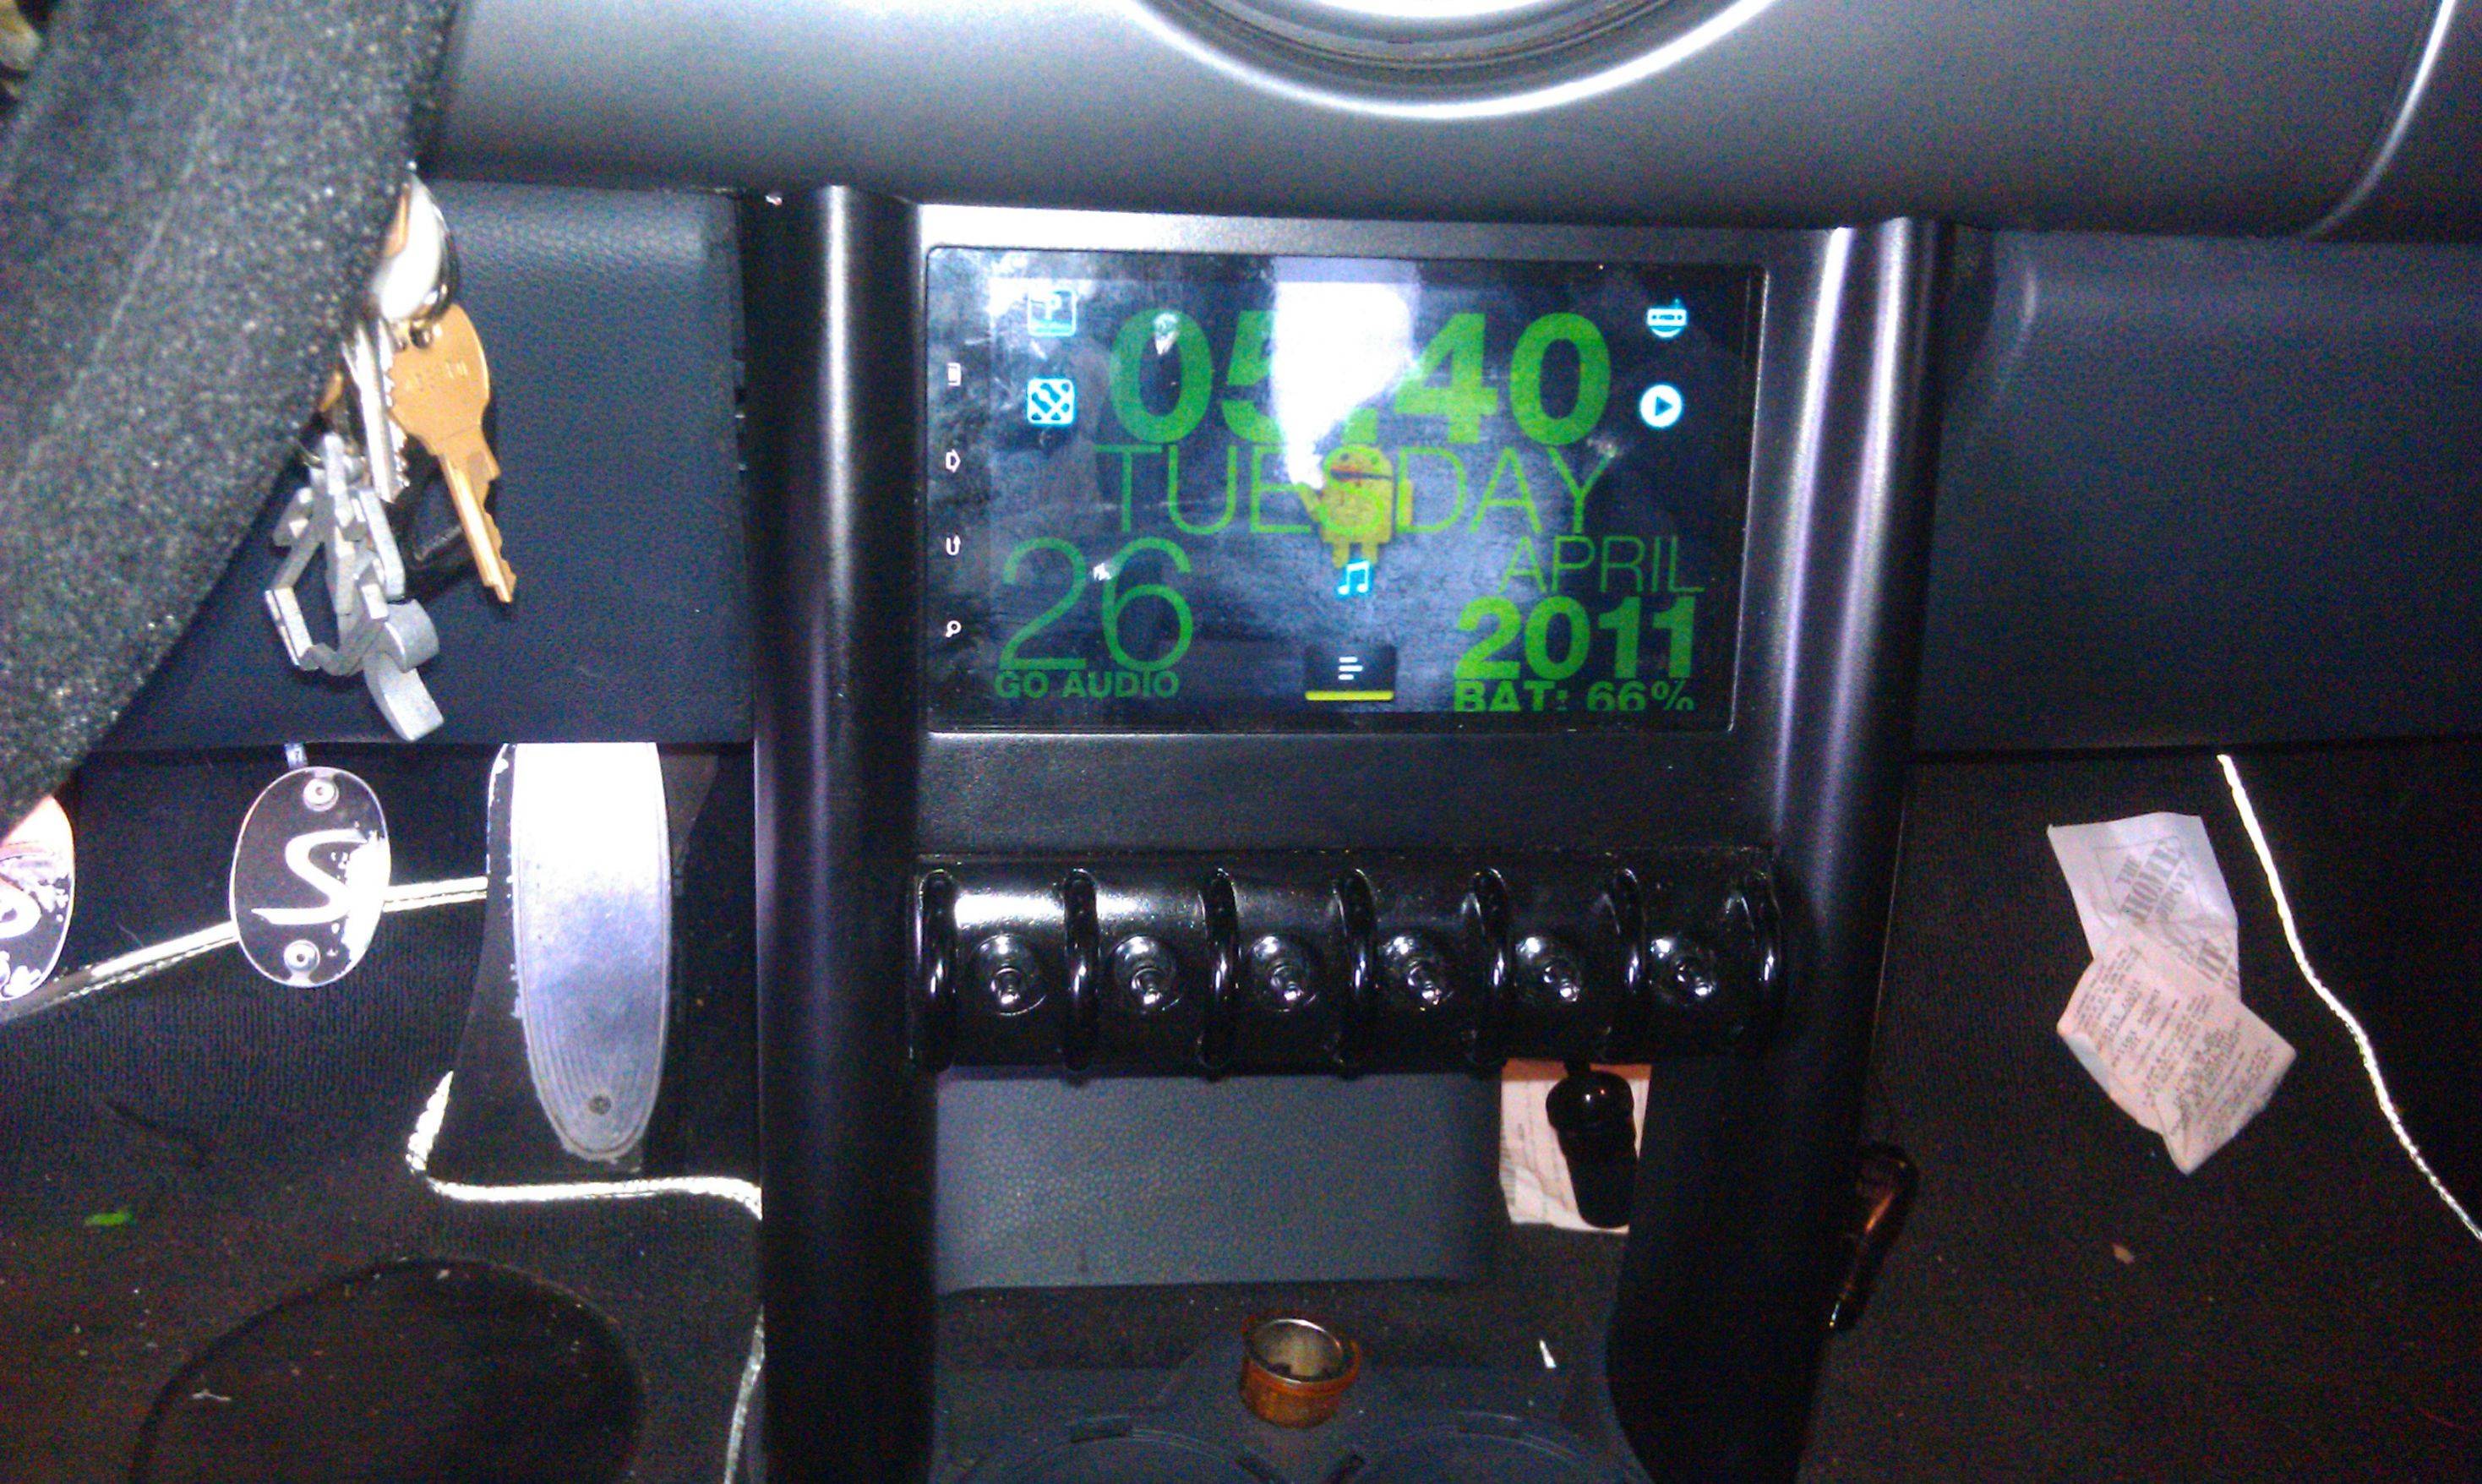
Ok so i have a few updated pictures they are all in the album linked at the top but here are a couple showing how i am building the new housing for the galaxy tab, and the ac controls. Ive basically boxed them in and trimed it out in abs, i also cut the samsung dock mount to allow for access to the controls when no tab is in there. next up is to do some fill work with some platic fill and than line the whole thing with felt so i dont scratch anything and also to look more "factory" this piece here has about 3-4 hours of work.
Started with this
After mounting the tab dock
and a picture of it in the dash, it isnt mounted so it looks a bit crooked.

On a side note i told myself i am going to go to MOTD so if i have to sleep in my car i will but i will be there, hope to have at least the audio portion of it working *not complete* by than cant wait to see you if you are going.
Started with this
After mounting the tab dock
and a picture of it in the dash, it isnt mounted so it looks a bit crooked.
On a side note i told myself i am going to go to MOTD so if i have to sleep in my car i will but i will be there, hope to have at least the audio portion of it working *not complete* by than cant wait to see you if you are going.


Thread Starter
|
1st Gear
Joined: Mar 2011
Posts: 42
Likes: 0
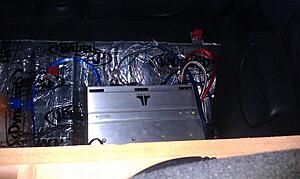
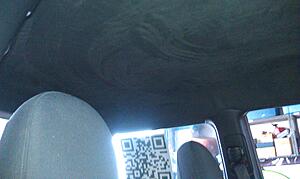
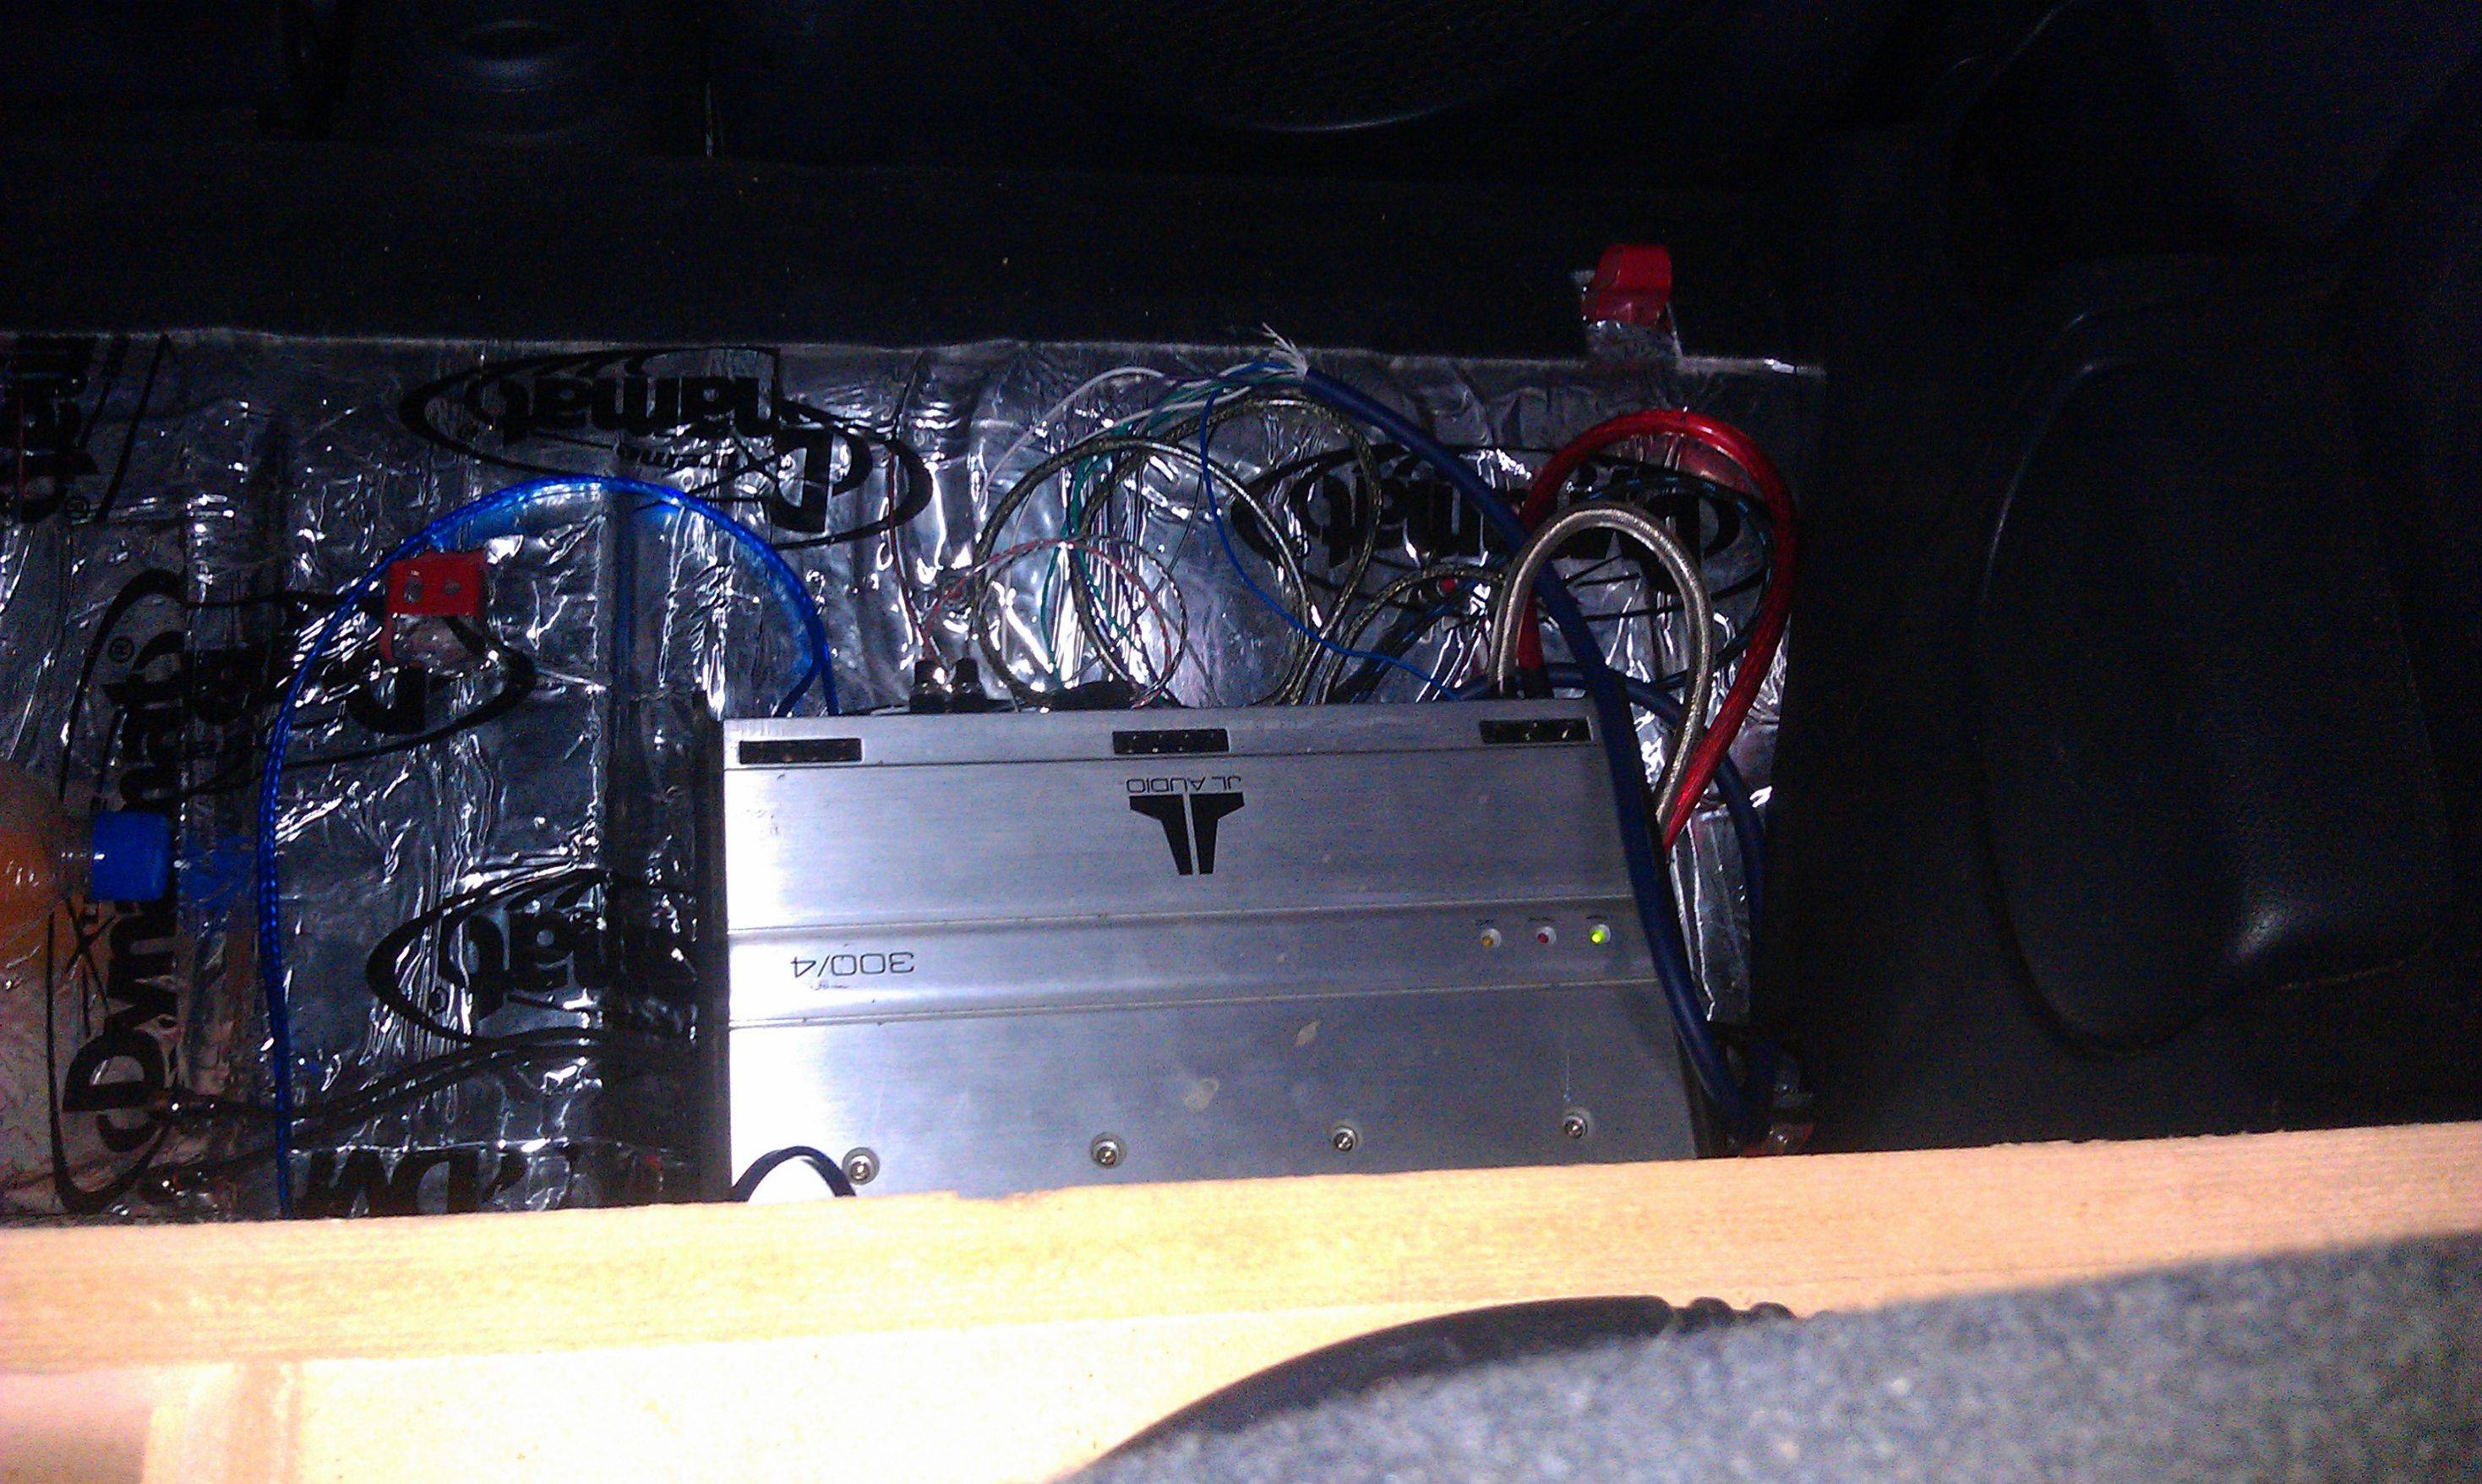
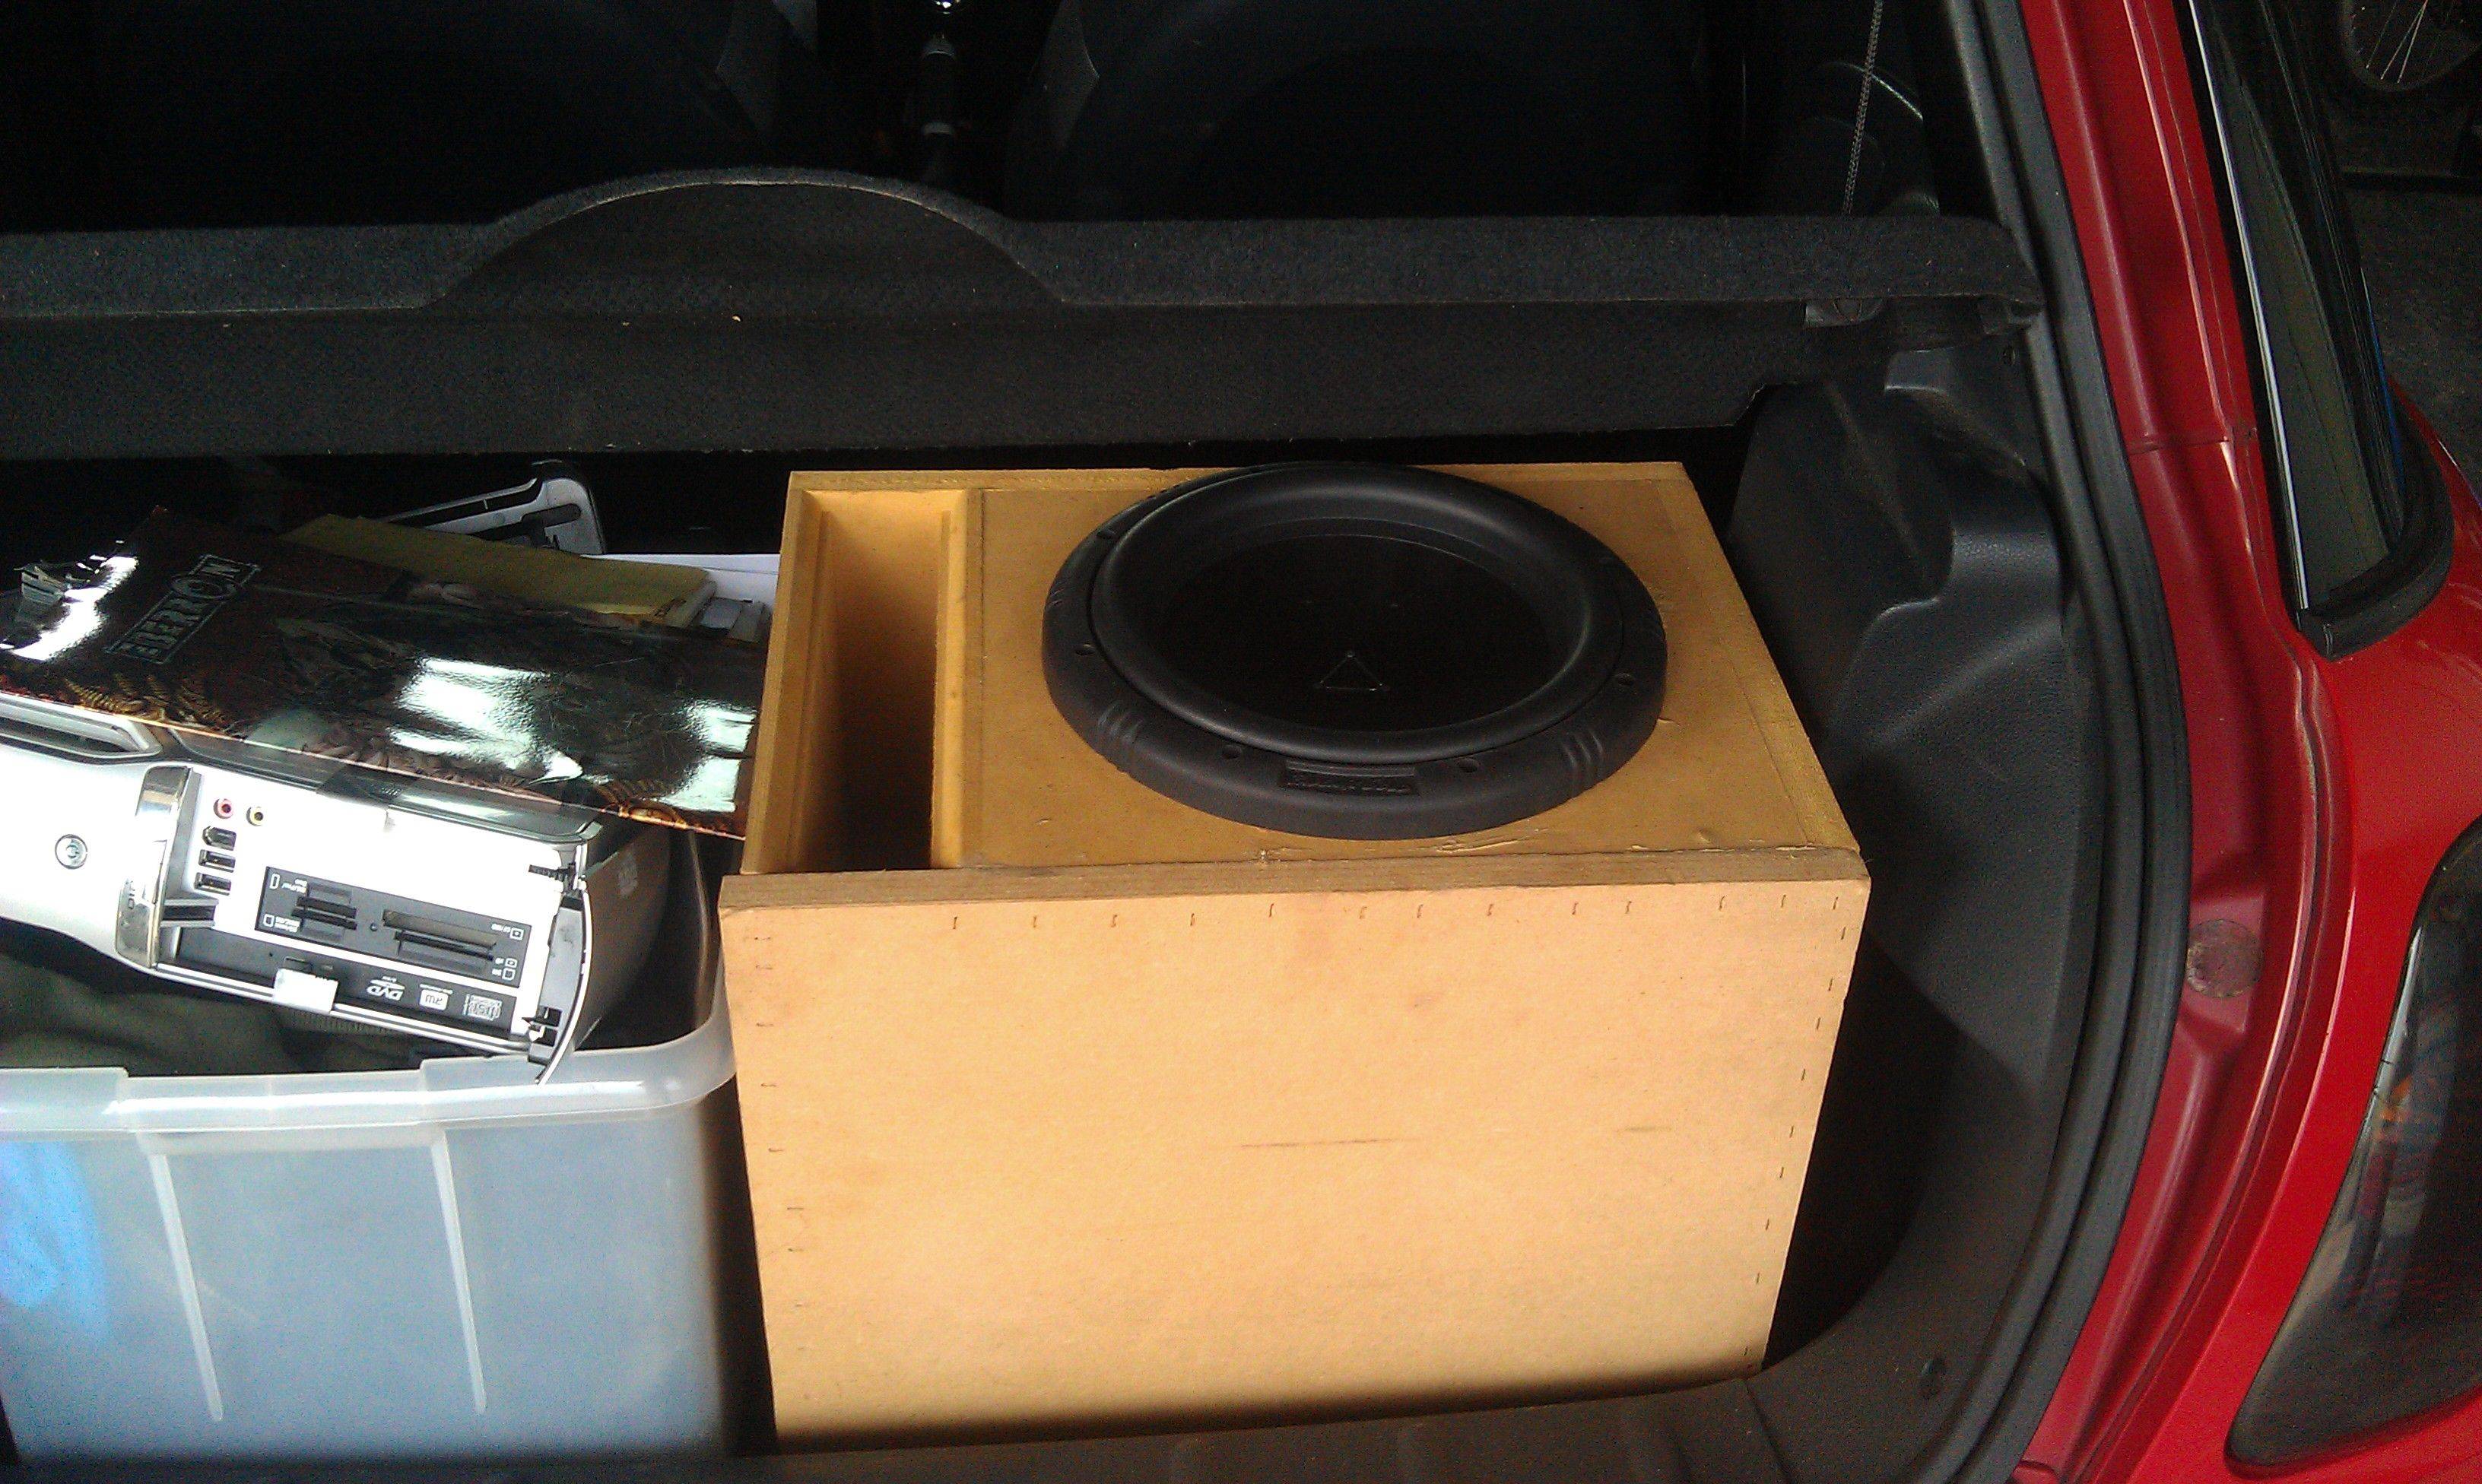
sorry about it being late, ive been gearing up for MOTD this week, i did finish 99% of the radio housing, still a little bit crooked but will fix that after i get back, also installed Infinity kappa 6x9's in the rear, will be putting in two pairs of kappa components in the front *awaiting parts*. i have the unit ran directly to a JL 300.4 amplifier at the moment *will be changing after amp rack is done*. also running a single 10" Pheonex gold Ti12 sub. also just finished my headliner *black suede* and died all my pillars black to match. finished putting over 800$ worth of dynamat from ceiling to floor back to front so needless to say maxx is much quieter on the inside. i will update with some pics tonight and i hope to see you guys at the dragon this weekend
Thread Starter
|
1st Gear
Joined: Mar 2011
Posts: 42
Likes: 0
ok well here is a couple i snapped with my phone at the end of work today.
It still has alot to be done to be what i want, after MOTD i hope to finish interior pieces, add my powerBASS line driver and eq and finish the amp rack.
All in all for only having my rears and a sub the dynamat helps so much with keeping road noise out and my music in, it is a complete night and day difference.
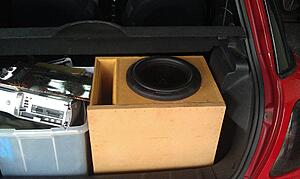
Amp not mounted but to show what im using amprack will be part of the rear seat delete
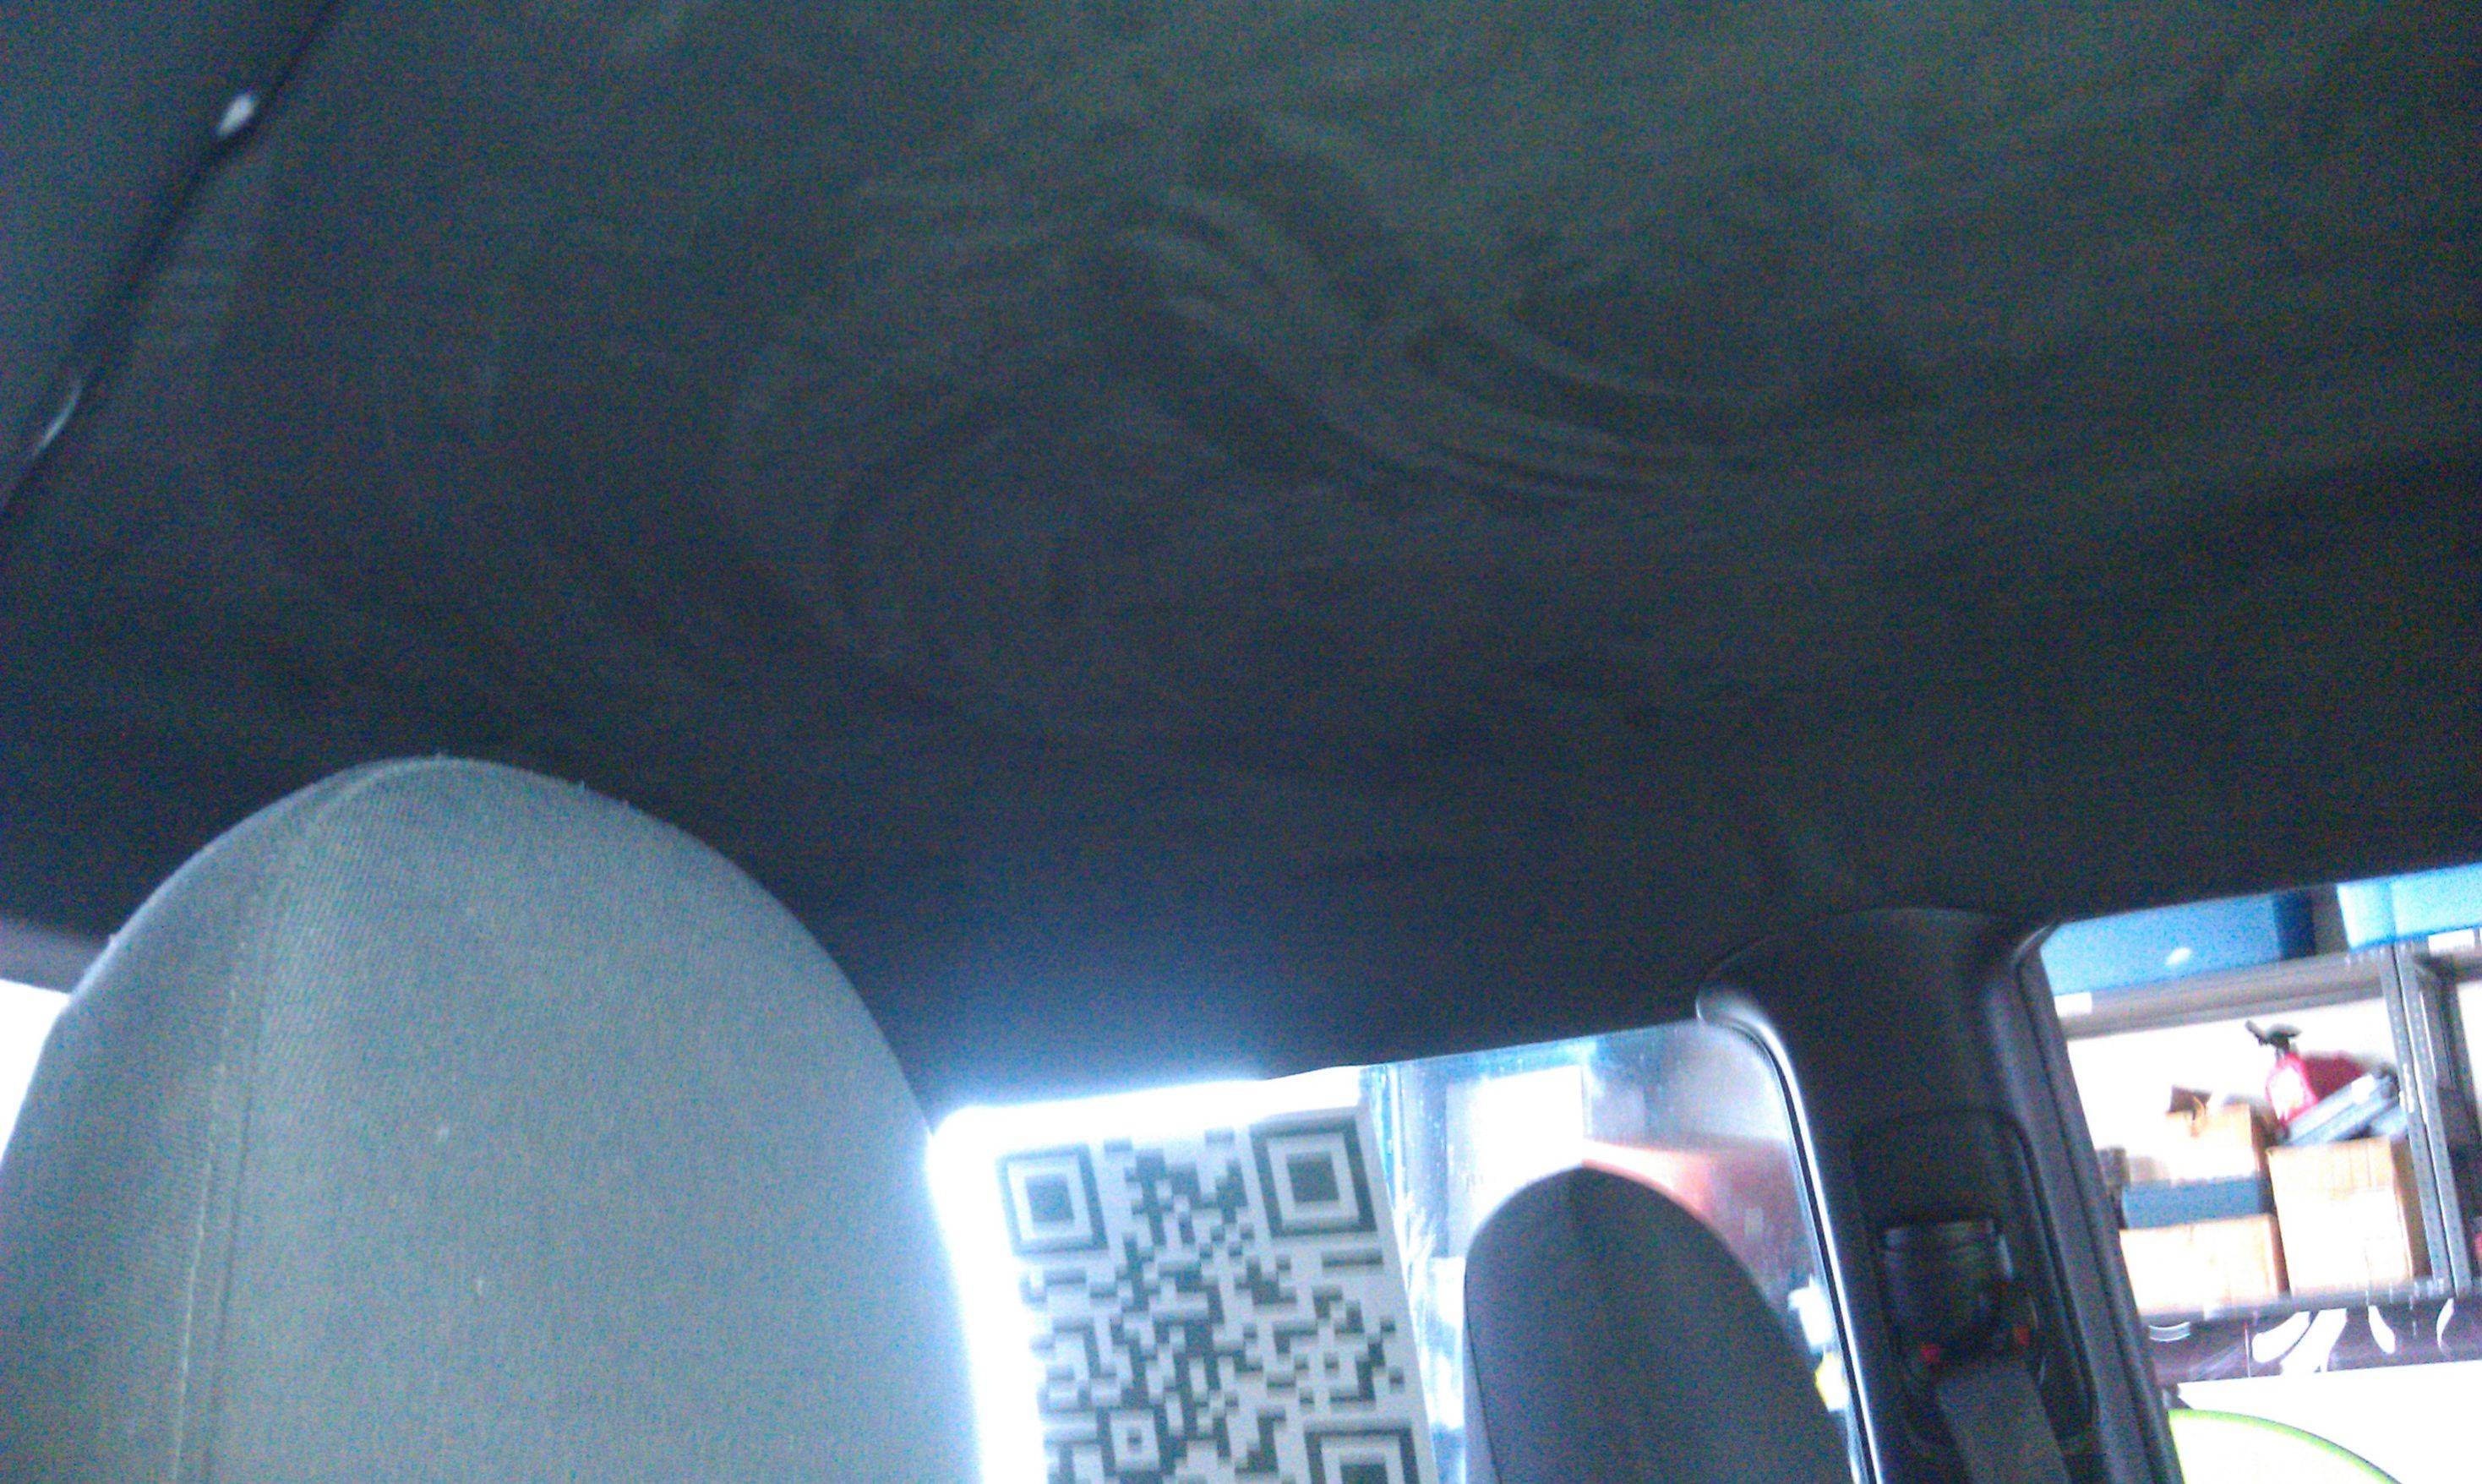
The headliner, kinda hard to capture black suede.

and an unfinsished box
It still has alot to be done to be what i want, after MOTD i hope to finish interior pieces, add my powerBASS line driver and eq and finish the amp rack.
All in all for only having my rears and a sub the dynamat helps so much with keeping road noise out and my music in, it is a complete night and day difference.
Amp not mounted but to show what im using amprack will be part of the rear seat delete
The headliner, kinda hard to capture black suede.


and an unfinsished box

2nd Gear
Joined: Feb 2010
Posts: 141
Likes: 0
*Sorry for the off topic*
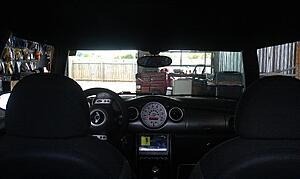
Are you sponsored by Google or an android based phone company? The QR code caught my eye.
Also what background are you using on your tablet? Do you think I could find it for the Droid 1?
*Sorry for the off topic*
The build looks great. Very clean and job well done. Surprisingly, I like the suede.
Did you paint the A,B, and C pillars or did you use another process?
Also how do you remove the tablet to get to the ac?
Last edited by MyMiniGidget; Apr 26, 2011 at 06:20 PM.
Thread Starter
|
1st Gear
Joined: Mar 2011
Posts: 42
Likes: 0
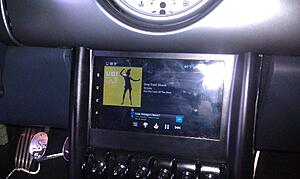
not off topic at all.... no im not sponsored by anyone except myself and my wallet. i work for GO Audio here in wilmington NC we do car stereo and other after market modifications like leather, headliners, carpet, lights, fiberglass, that type of thing.... The QR code actually links you to out Google page while our website is under reconstruction. im incredibly geeky and never saw a qr code on a car so i got busy with out vinyl cutter and made a qr code. so far ive had 3 people i know of stop me so they could scan it. i would love a sponsorship from google or android that would be to sweet. there is another guy who works at the shop that is flushing a ipad into his CTS-V, i personally cant stand apple products and wanted to showcase something new.... Its far from complete and im sure by the time im done it will be outdated but this is what i love doing and if i can make some change at it to why not  thanx and ill put more pictures up of how it slides in and out the side and show the new ac housing, turned out not so bad. as far as the backround here you go

thanx and ill put more pictures up of how it slides in and out the side and show the new ac housing, turned out not so bad. as far as the backround here you go
Thread Starter
|
1st Gear
Joined: Mar 2011
Posts: 42
Likes: 0
the a,b, and c pillars are died black. Basically you scrub the pillars as clean as possible give them a nice wet sanding with 800 grit, spray them with a plastic cleaner, than a very thin coat of Bulldog adhesion promoter, than several thin layers of SEM Dye and a satin clear coat. im going to need to go back over the b-pillars internal pieces where the seat belt comes through and adjusts but that wont be that bad and the rest of them look awesome. and as far as how the tablet is removed you actually open the glove-box and slide it out the side ill post pictures up tomorrow
2nd Gear
Joined: Feb 2010
Posts: 141
Likes: 0
Interesting. Is that done professionally? or would I be able to pick up some of this dye at a hardware store?
Also I have infinity Kappas and love them. 6x9 in the rear and they fit like a glove. I have the 6.5" components they were a pain to fit. We ended up having to cut the door panels and attach new speaker grills. Lots of unexpected work. But they sound great now.
Also I have infinity Kappas and love them. 6x9 in the rear and they fit like a glove. I have the 6.5" components they were a pain to fit. We ended up having to cut the door panels and attach new speaker grills. Lots of unexpected work. But they sound great now.
Thread Starter
|
1st Gear
Joined: Mar 2011
Posts: 42
Likes: 0
SEM paint can be picked up at any local automotive paint supply shop, the one i get mine from requires a tax id but it shouldn't be like that everywhere.
The screen is actually centered, because of the soft touch panel on the left hand side of the tab i had to leave more area on the right, i experimented with centering the tab as a whole and it looked even worse having the actual viewing screen off center. in the end the centered screen was a better solution than a centered tab.
The screen is actually centered, because of the soft touch panel on the left hand side of the tab i had to leave more area on the right, i experimented with centering the tab as a whole and it looked even worse having the actual viewing screen off center. in the end the centered screen was a better solution than a centered tab.
