
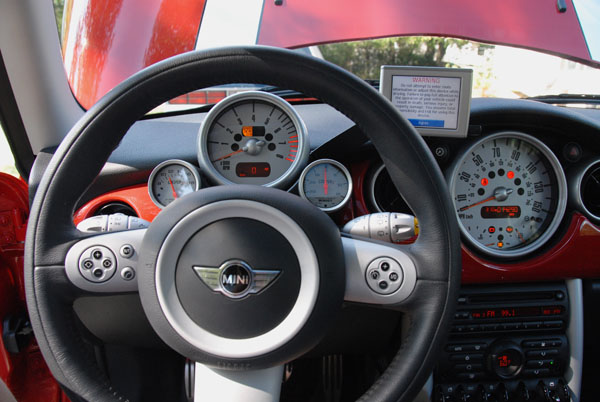
R50/53 Garmin Nuvi GPS bracket


Thread Starter
|
5th Gear
Joined: May 2004
Posts: 853
Likes: 0
From: Fort Lauderdale, FL
Thanx for the link but thats not it. This bracket attached to the tachometer pod and holds the nuvi 350.
Here it is:

Anyone?
Here it is:
Anyone?
Last edited by ninjamini; Jan 25, 2008 at 07:07 PM.

Stuck in Reverse
Joined: Nov 2004
Posts: 1,812
Likes: 0
From: 127.0.0.1
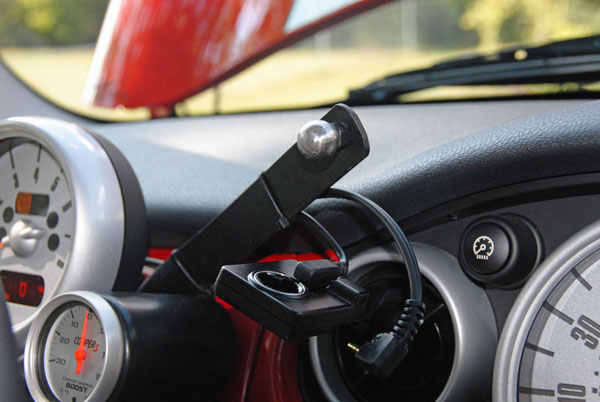
If you wanted to go a little more DIY route you could get the FlexPod adapter from Craven Speed and the Nuvi Adapter from ProClip USA and create your own holder that works similar to the factory one.


Craven Speed is currently prototyping a flexpod module, that will allow a variety of placement options aound the steering wheel, including above the wheel as requested, without any drilling or other dash modification. This module will work with all of our FlexPod Brackets, so it will fit all MINIs.
The billet aluminum module with be simple to keep cost low and thus will utilize the stock mounting clip, but not the suction cup. The elbow joint on the plastic standard bracket will pop into a ball on the craven speed module.
We expect a production version in March. PM me for further details.
The billet aluminum module with be simple to keep cost low and thus will utilize the stock mounting clip, but not the suction cup. The elbow joint on the plastic standard bracket will pop into a ball on the craven speed module.
We expect a production version in March. PM me for further details.
__________________

Trending Topics
I received a PM asking if our NUVI module would allow the installation of a gauge on the right with your NUVI on the left of the tach.
You would be able to accomplish this feat, without drilling, on any model of MINI (Chrono Pak too). You could also attach these on the opposite sides.
You would be able to accomplish this feat, without drilling, on any model of MINI (Chrono Pak too). You could also attach these on the opposite sides.
__________________

5th Gear
Joined: Oct 2005
Posts: 942
Likes: 4
I too had difficulty finding a place to mount my G nuvi 360. I wanted it high so I could see it without looking down and taking my eyes off the road, but I did not want it mounted to the windshield, so this was my solution. The metal arm is 1 x 1/8" aluminum, heated, twisted, bent and drilled to fit. The screws are longer versions of the originals. There are plastic spacers under the arm that the screws go through, they are about 1/2" tall.
The ball is a steel ball (started as 7/16") that I drilled, tapped and inserted a 1/4-20 thread. Unfortunately, the only steel ***** I could find were heat treated and I could not drill them, so I heated it to red hot, let it cool slowly, then it was easy to drill and tap. After I mounted the 1/4-20 screw, I mounted the ball with screw into a drill press spindle just to spin it and then used a hand drill with a sanding wheel on it and spun both so I could reduce the size evenly and smoothly so it would fit the socket on the stock Garmin holder. I hid the power and audio wires behind the arm. I also put a strip of the fuzzy side of velcro on the back and bent the arm so it had a little tension against the dash, so it would not vibrate. I tucked and hid all the wires and the power is hardwired, so there are no wires visible. It works great.
One thing I like is that it does not block anything and I can touch the screen while still holding the steering wheel. I just wish 'Australian Karen' could pronounce my local street names correctly, hehe.
If I ever take it out I'll get better pics. This is an easy one, so don't be afraid, just do it.
YD
Garmin Mount 1.jpg
Garmin mount 2.jpg
Garmin mount 3.jpg
Attached Thumbnails


Thread Starter
|
5th Gear
Joined: May 2004
Posts: 853
Likes: 0
From: Fort Lauderdale, FL
Kellen,
So if I have the crono pack what do I need? How does it install? What is the cost?
So if I have the crono pack what do I need? How does it install? What is the cost?
I received a PM asking if our NUVI module would allow the installation of a gauge on the right with your NUVI on the left of the tach.
You would be able to accomplish this feat, without drilling, on any model of MINI (Chrono Pak too). You could also attach these on the opposite sides.
You would be able to accomplish this feat, without drilling, on any model of MINI (Chrono Pak too). You could also attach these on the opposite sides.


Thread
Thread Starter
Forum
Replies
Last Post
Mini Mania
Interior/Exterior Products
0
Sep 4, 2015 02:34 PM