When you click on links to various merchants on this site and make a purchase, this can result in this site earning a commission. Affiliate programs and affiliations include, but are not limited to, the eBay Partner Network.
Good luck!
The install is pretty much straight forward.
The only issue I had was removing the screws holding the OEM headlights. They were very tight and the space around the headlights were very cramped.
Did you disconnect the battery?
Lamps are supposed to arrive today - will post results over the weekend.
That would be best practice -
Did yours have a separate HID Ballast?
Mine do
Also NIMI...not Mini - this bothers me but not enough to return.
Yes, the HID ballast are attached to the back of the headlights..
About the NIMI logo.. you will surely forget about it once you completed the conversion. No one would really notice it unless they take a closer look. :D
Instructions are in Chinese - am particularly concerned about the lower left illustration showing various wires with arrows to ?
Mini is not here - may make sense when I can actually look at the car.
Are installation instructions consistent with what you received? NIMI HID instructions
Instructions are in Chinese - am particularly concerned about the lower left illustration showing various wires with arrows to ?
Mini is not here - may make sense when I can actually look at the car.
Are installation instructions consistent with what you received?
NIMI HID instructions
yup.. got the same installation instructions you posted.
The wirings on the top right corner is connected to the battery. The one on the lower right corner goes to the halogen DRL on the bumper. It will be in a series connection with your halogen DRL connector.
Yes, the HID ballast are attached to the back of the headlights..
About the NIMI logo.. you will surely forget about it once you completed the conversion. No one would really notice it unless they take a closer look. :D
"...you will surely forget about it..."
Already have - It's a conversation starter if nothing else.
nice.. looking forward on your up coming headlight swap..
Really appreciate Xentar's trailblazing support. THANK YOU!.
Forums like this are really great - I have a couple of older Porsches which I mostly maintain myself with help from renntech.org.
Time to make a contribution to upkeep. Great support here.
A couple of questions and a minor warning.
I connected the black/red leads to the battery. In the process, I stripped the bolt/nut on the Negative Battery connector. It is only necessary to back the nut on the negative terminal off 2-3 turns. Fortunately, had tap/die available so I cleaned-up the threads but it took some time.
Questions: See pic below
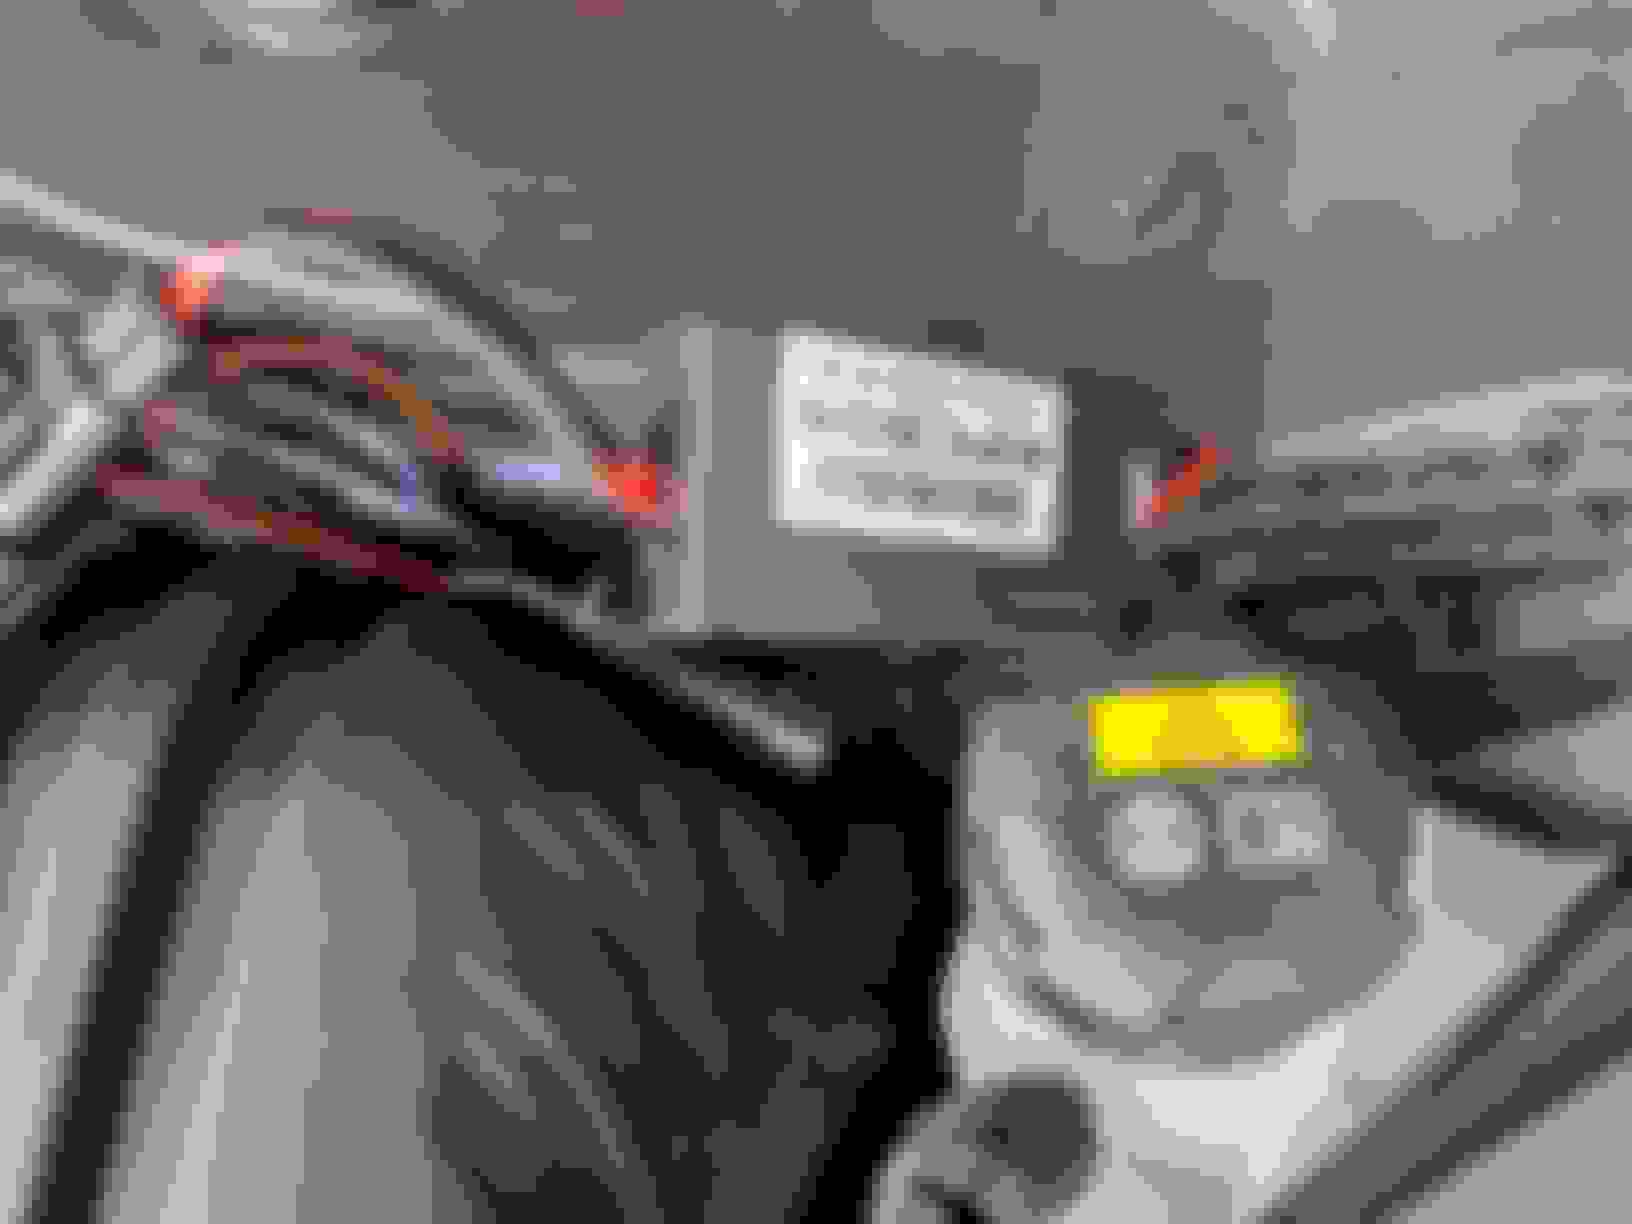
Where did you mount the junction box? double sided tape on the battery cover looks like it would work but is there a better location?
How/where did you route the wire that connects to the right side lamp?
Looks like there should be a way to route it under the Wiper/Drain cowling and through one of the existing grommets on the passenger side.
Thx Probably won't finish this up until Sunday -
A couple of questions and a minor warning.
I connected the black/red leads to the battery. In the process, I stripped the bolt/nut on the Negative Battery connector. It is only necessary to back the nut on the negative terminal off 2-3 turns. Fortunately, had tap/die available so I cleaned-up the threads but it took some time.
Questions: See pic below
Where did you mount the junction box? double sided tape on the battery cover looks like it would work but is there a better location?
How/where did you route the wire that connects to the right side lamp?
Looks like there should be a way to route it under the Wiper/Drain cowling and through one of the existing grommets on the passenger side.
Thx Probably won't finish this up until Sunday -
hmm... can't seem to remember that box. I need to check the connections in my car.
I wonder with the NIMI logo if I have an older version?
The box joins the leads from the battery to the harness and left and right DRLs etc.
I looked at the wirings in my car.. looks like I did the same thing you said. I hid the box inside the battery compartment and routed the wirings to the rubber cowling (wiper/drain) going to the passenger side headlight.
I looked at the wirings in my car.. looks like I did the same thing you said. I hid the box inside the battery compartment and routed the wirings to the rubber cowling (wiper/drain) going to the passenger side headlight.
It appears that I will install these in stages -
Today, when I closed the hood, I made the mistake of lowering the hood with my right hand on the driver's side headlamp trim ring. Trim ring came loose and 5 black plastic 'clamps' scattered over the garage floor.
Finding them and putting it back together took some time.
That said and not wanting to have another exploding trim ring or stripped bolt experience: How do you remove the headlights? Any links to more info?
The Torx screws seem to be mounted in an antivibration device. Do the Torx screws back all the way out of the vibration damper? Any other surprises to removing the headlights? I noticed that the rubber surround un-clips from the existing lamps.
I'll get back into this later.
I need to shoot a few POV shots with the headlights on so that when I'm finished, I can post a comparison..
I agree.. take it easy and hope you can complete the swap without any more hiccups.
About the headlight removal.. removing the screws was the hardest part of the whole process. (took me at least 5 hrs or more). Once I got them out, the install was quite easy.
I agree.. take it easy and hope you can complete the swap without any more hiccups.
About the headlight removal.. removing the screws was the hardest part of the whole process. (took me at least 5 hrs or more). Once I got them out, the install was quite easy.
Says not to reuse Alignment Elements What BMW calls the antivibration device.
Have you had any issues with aiming etc?
My guess is that the warning about reuse is more about CYA than function.
Says not to reuse Alignment Elements What BMW calls the antivibration device.
Have you had any issues with aiming etc?
My guess is that the warning about reuse is more about CYA than function.
Didn't know what those things are.. I thought they were only used to help the headlights sit properly and centered when you close the hood.
After installation, I made some adjustments on the headlight beam using the alignment ****/nut. Looks good so far and no complains from oncoming cars when driving.
Hello everyone who ordered these HID headlights. How are they holding up? Is the projected light beam much better than stock?
I'am asking because I ordered a set and they arrived with one headlight assembled incorrectly, incomplete wiring harness. The left headlight looks to be fine but is useless with out harness. I'am in the middle of swapping e-mails with seller to correct issue's.
I'am on the fence to send it all back or see how they will correct the problems.
Thanks for your input, Jeff