
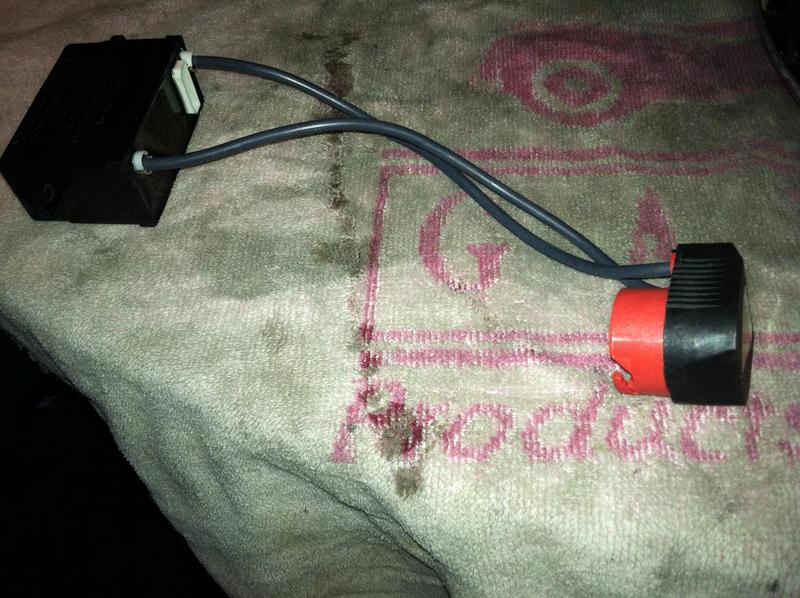
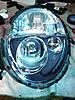
Electrical Xenon control unit


3rd Gear
Joined: Sep 2011
Posts: 193
Likes: 9
From: Seattle

Neutral
Joined: Mar 2012
Posts: 2
Likes: 0
From: Seattle
Hey I'm having the same issue with my 2004 Cooper S. the driver side headlight went out and went and got a new Xenon Bulb but even with the new bulb i didn't work. I put the new bulb into the passenger side headlight to make sure it wasn't the bulb and the headlight bulb was good. I checked the fuses and nothing seems to be blown. i read a couple posts about it being the xenon ignitor so i ordered some after market head lights (i figured if one broke the other is going to eventually and 1 stock headlight costs almost $600 so i got 2 instead)
http://www.carid.com/2004-mini-coope...ts-315564.html
will replacing the headlights fix the problem? or am i just wasting money and need to buy something else?
thanks.
http://www.carid.com/2004-mini-coope...ts-315564.html
will replacing the headlights fix the problem? or am i just wasting money and need to buy something else?
thanks.

Neutral
Joined: Mar 2012
Posts: 1
Likes: 0
Hey I'm having the same issue with my 2004 Cooper S. the driver side headlight went out and went and got a new Xenon Bulb but even with the new bulb i didn't work. I put the new bulb into the passenger side headlight to make sure it wasn't the bulb and the headlight bulb was good. I checked the fuses and nothing seems to be blown. i read a couple posts about it being the xenon ignitor so i ordered some after market head lights (i figured if one broke the other is going to eventually and 1 stock headlight costs almost $600 so i got 2 instead)
http://www.carid.com/2004-mini-coope...ts-315564.html
will replacing the headlights fix the problem? or am i just wasting money and need to buy something else? check for power on the white and green wire with the headlamp switch on, and make sure you have a good ground on the brown wire
thanks.
http://www.carid.com/2004-mini-coope...ts-315564.html
will replacing the headlights fix the problem? or am i just wasting money and need to buy something else? check for power on the white and green wire with the headlamp switch on, and make sure you have a good ground on the brown wire
thanks.
Last edited by stevegoy; Mar 20, 2012 at 10:41 AM. Reason: added picture

3rd Gear

Joined: Jun 2006
Posts: 171
Likes: 2
From: Chester VA
Thanks for the write-up SilentService703. I will be takling this within the week
 . The ignitor now costs $94 on ebay.
 P.S. Am I to assume you are/were on the USS Boston? I also was in the USN as a nuke MM onboard the "target" ship USS George Washington CVN-73
 .
.


1st Gear
Joined: Feb 2012
Posts: 26
Likes: 0
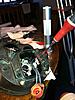
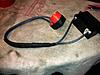
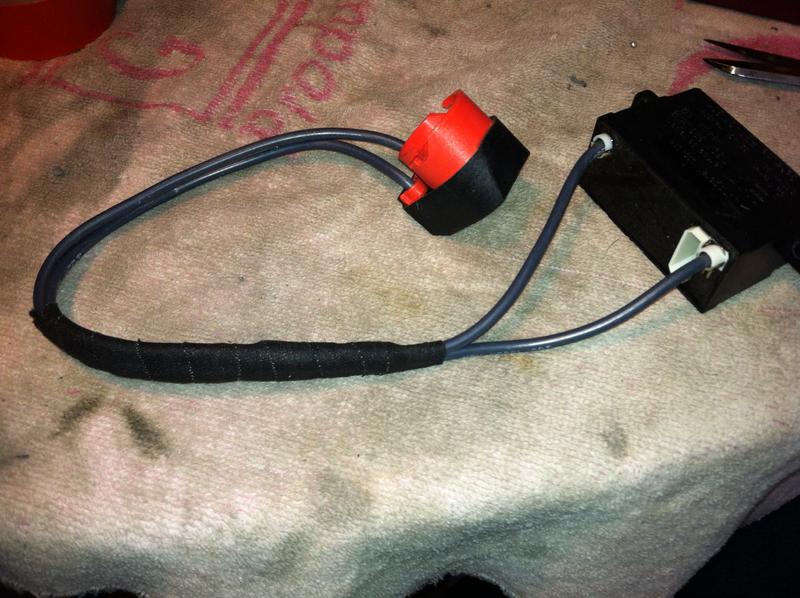
This project starts with the headlight removed from the bonnet/hood and an igniter purchased from the supplier of your choice. I used eBay and was satisfied until I found that the length of the wires was too short. I then improvised and cut the connector off the failed igniter and spliced it to the new igniter.
Last edited by silentservice703; Dec 5, 2012 at 05:18 AM. Reason: Added initial pictures

1st Gear
Joined: Feb 2012
Posts: 26
Likes: 0
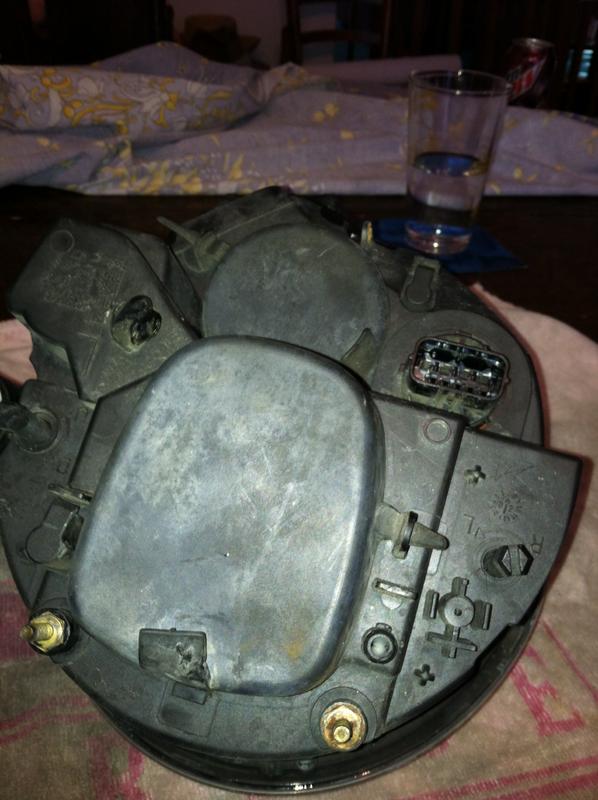
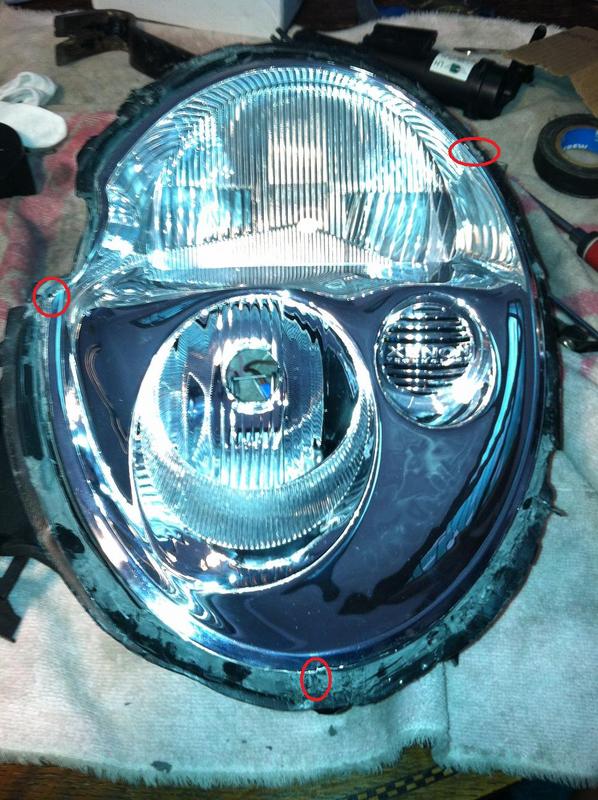
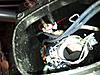
This is when you bake the unit at 200F and then ever so gently (use some force, but be careful not to warp the plastic) pry and pull the clear lens off the black plastic body of the headlight. There is a recessed channel around the clear lens and I used a paint can opener to hook under the clear lens. It is recessed deeply, so you must dig down. Be careful though, every shape you put into that surround will stay molded into the plastic and you have to deal with what you leave behind on reassembly.
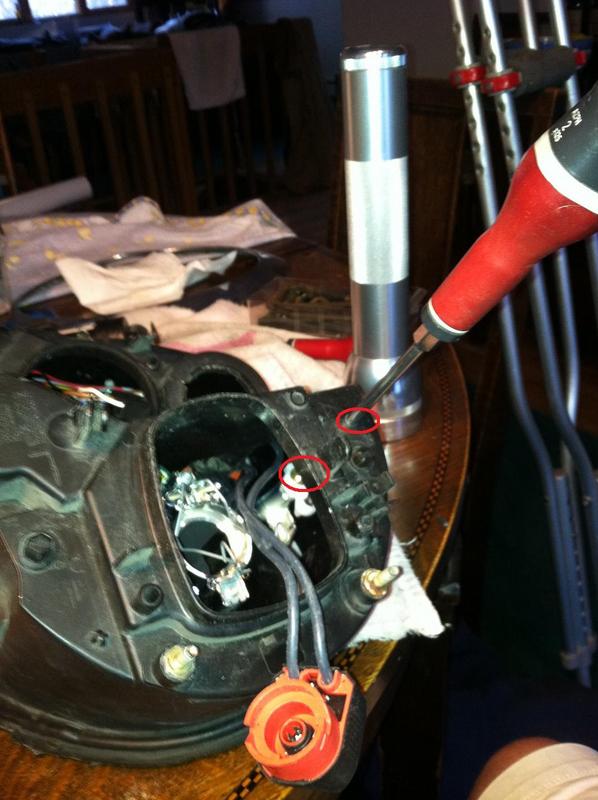
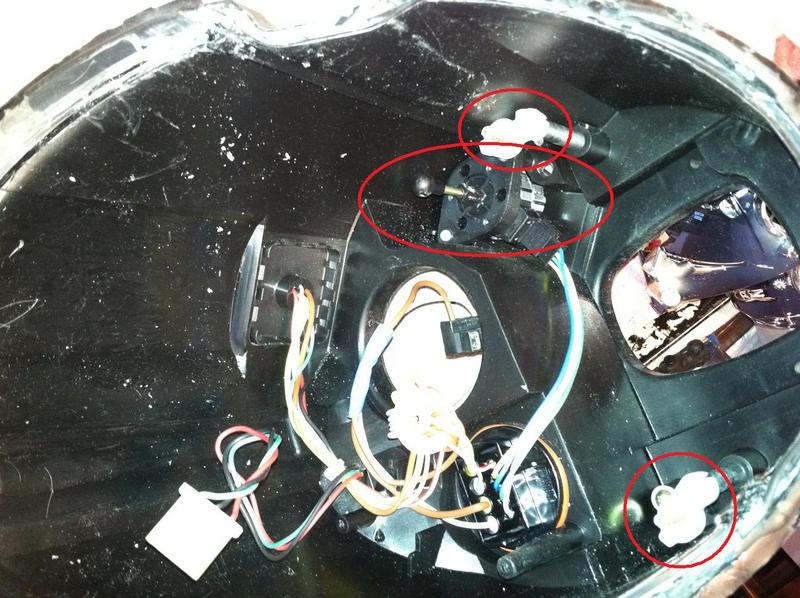
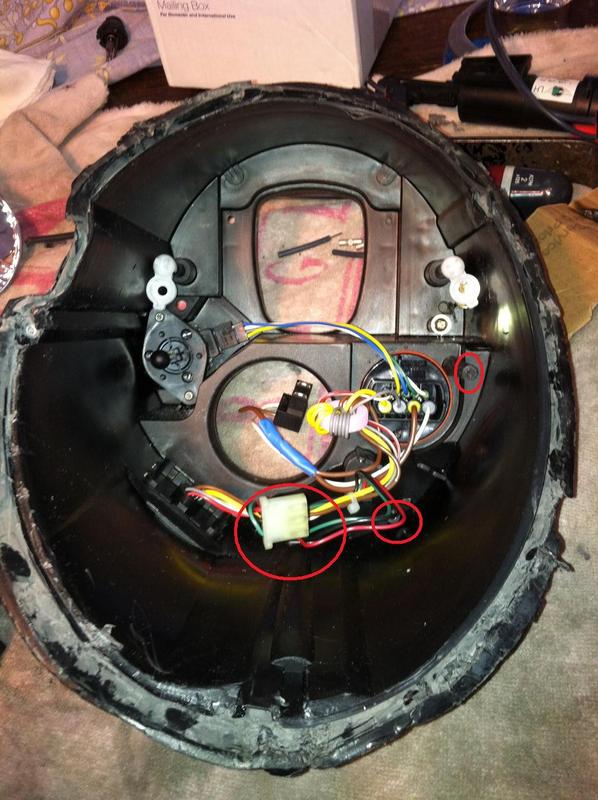
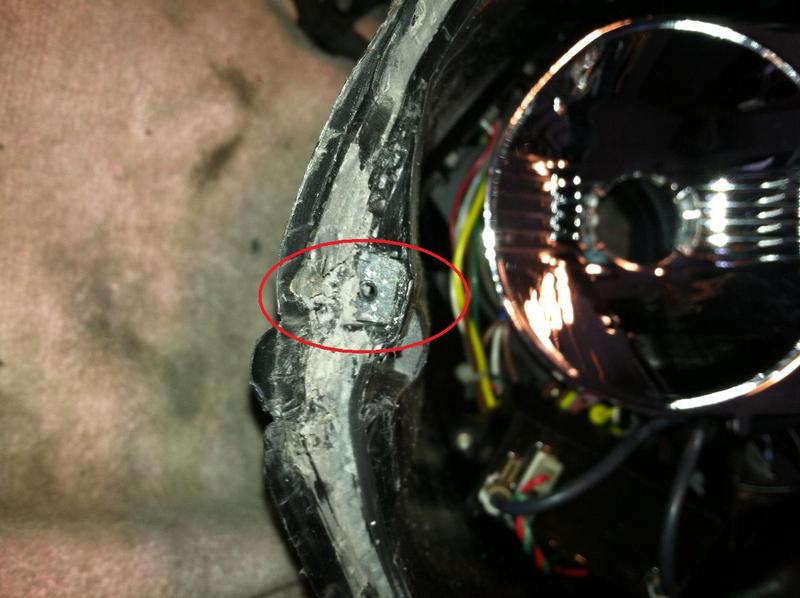
After the clear lens is removed, you should clean away the entire residue left behind. There are three screws, at the circled points, that need to be removed in order to remove the large reflector covering the internals. These screws are recessed and covered in silicone. Take your time and use a pick or other tool to remove the garbage covering the screws, remove the screws, then take off the reflector.
After the clear lens is removed, you should clean away the entire residue left behind. There are three screws, at the circled points, that need to be removed in order to remove the large reflector covering the internals. These screws are recessed and covered in silicone. Take your time and use a pick or other tool to remove the garbage covering the screws, remove the screws, then take off the reflector.
1st Gear
Joined: Feb 2012
Posts: 26
Likes: 0
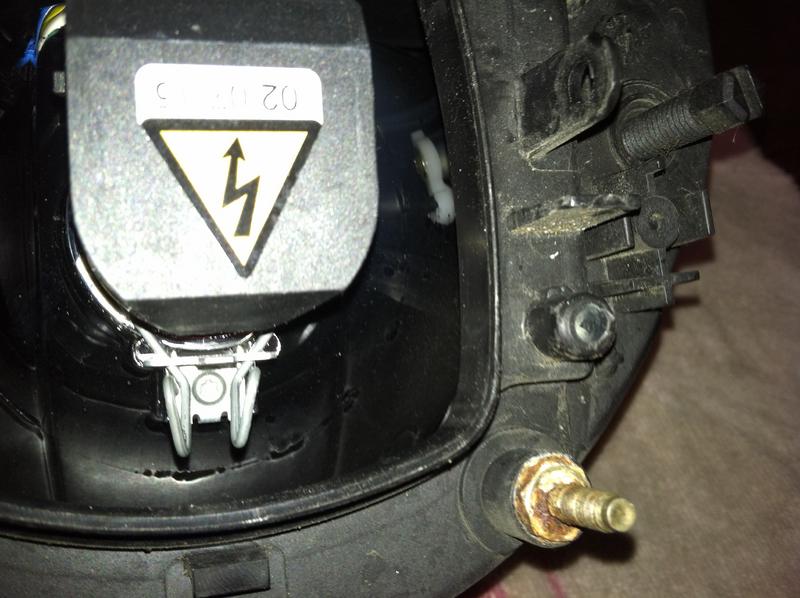
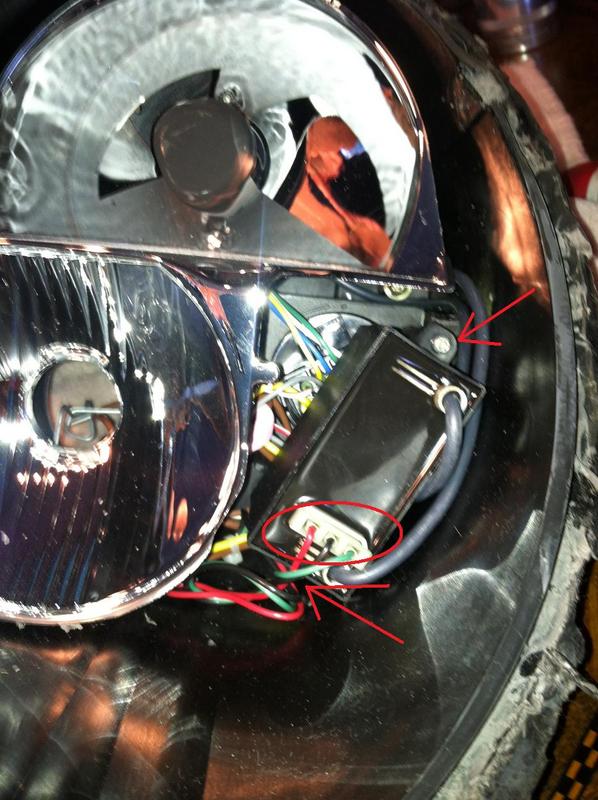
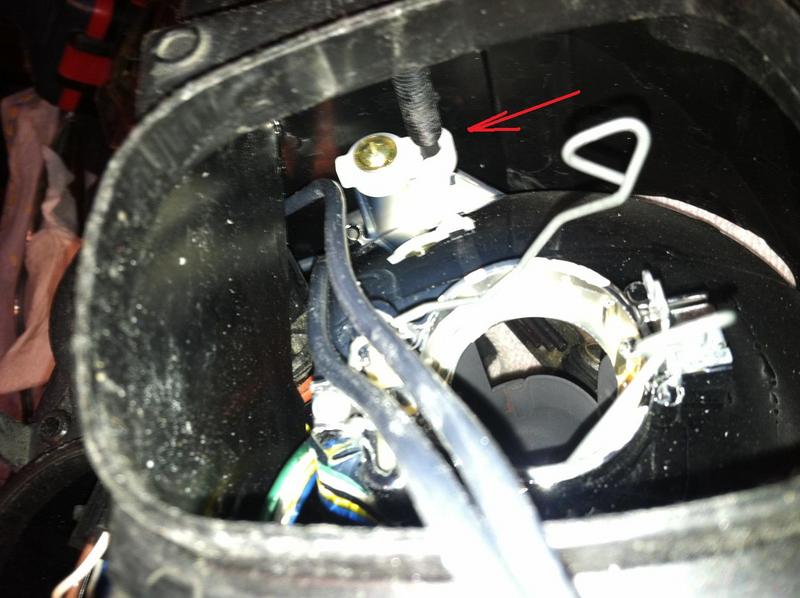
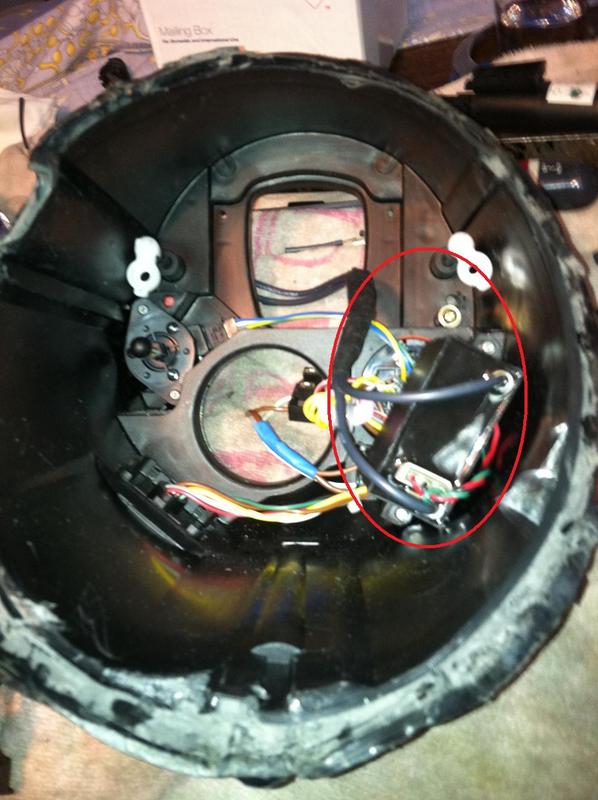
I realize at this point that the igniter will not make it past the reflector�I don�t realize, yet, that the igniter wiring on the new igniter is too short. Had I realized this, at this point, I would not have removed the reflector. I would simply have cut the igniter wiring and done the wiring extension in place, having fed the wires through the housing. But, I digress. Here I removed the reflector by drilling a hole directly opposite the mounting screw and inserting a screwdriver to remove the mount from the reflector. You will have to remove the reflector if your igniter comes with wires that are long enough.

1st Gear
Joined: Feb 2012
Posts: 26
Likes: 0
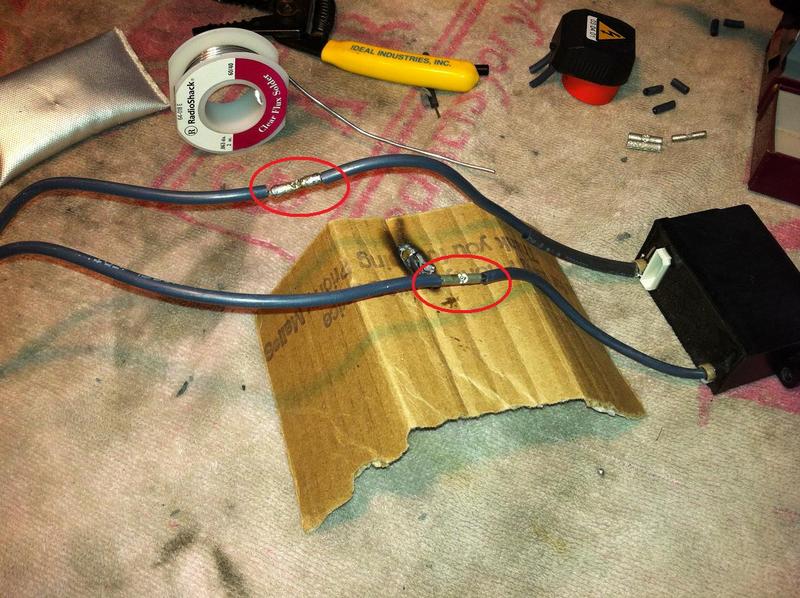
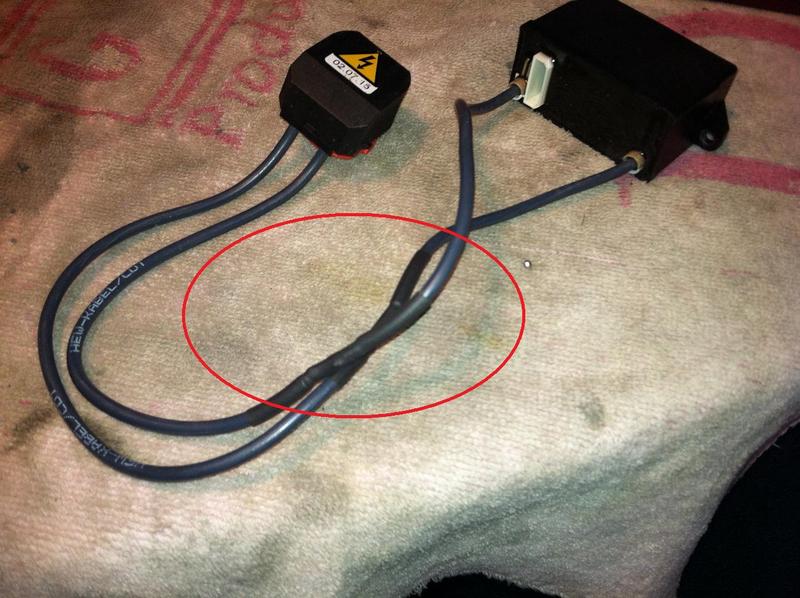
Butt-splice the old connection on if you need to lengthen your wires. Some igniters have the longer wires, so be sure to ask whomever you choose as your supplier. This can be done without removing the reflector and simply passing the wires through the housing prior to joining them with a butt splice.

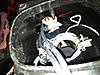
Shrink tube was placed on the wires prior to joining them. Then the shrink tube was slid into place over the splices and heated to shrink:

Electrical Friction Tape was used to protect the splice:
Shrink tube was placed on the wires prior to joining them. Then the shrink tube was slid into place over the splices and heated to shrink:
Electrical Friction Tape was used to protect the splice:


1st Gear
Joined: Feb 2012
Posts: 26
Likes: 0
Reassembly is, essentially, the reverse of dis-assembly.
Some things of note:
1. If you have distorted the housing or the lens in this process, do your best to restore the shape. It is a bear to make the light sit flush with the bonnet if you don't.
2. Use a quality clear silicone sealant around the perimeter of the housing and make sure the coverage is evenly applied around the entire perimeter with no gaps.
3. DO NOT OVER-APPLY the sealant!! When you push the lens into the channel, that goo will squeeze out and it will go where you don't want it by the application of Murphy's Law. You just want a good seal.
4. Be ready to clean up what squirts out...and be ready to remove the lens again when you realize you have too much sealant, or you have gaps, or....
5. DO NOT get sealant onto the portion of the lens where sealant shouldn't be.
All-in-all, it is an exercise in patience that will save you a ton of dough.
Good Luck!

Winner winner chicken dinner! Thanks for the great write up and photos. The picture of the screw locations was the most valuable. It sure was a bit of work but it works and it saved me hundreds!
Advice for others. The oven trick works well but it's also handy to have a heat gun with you.
Also, those buried screws do take some work digging out and they require a hex key. Like 1.5 or 2 millimeters - forgot which exactly.
Finally, make sure you really clean out all the old silicone. If the lens doesnt sit deep enough in the channel you will have issues when you reinstall the unit in the car. I made this mistake and had a small gap around the edge of the light. Fortunately the caulk wasn't totally dry and I was able to redo that part. To make sure I did it right the second time I wrapped the entire unit with a bungee to get it to dry tight. Worked great.

Neutral
Joined: Feb 2012
Posts: 2
Likes: 0
Yes! I did. The cheapest price I found was $163 at Amazon for part numbers #63 12 6 911 705 and #63 12 6 911 706. That was a few months ago, so check around if somebody else has them cheaper. That's $163 for a pair of complete halogen headlight assemblies, for those used to seeing prices of $400+ for one Xenon light.
They plug right in, no fuss. The hardest part, if you can call it hard, is getting the washers and control units and so on apart. I used a siphon pump to empty the washer tank and I left the washer hoses hanging. I might remove all that later. Or I might bite the bullet and install working Xenons if I sell the car. I know folks love em' but I've never seen actual data saying they're safer. If I saw proof that HIDs would decrease my chances of crashing I might go spend the $900. Not until then.
There is a lot of data on whether Xenons blind oncoming drivers at night (they don't, generally). But in the 1990s the Department of Transportation NHTSA was very worried about that, and put a lot of rules in place. The washers to keep them clean, so guck on the lens doesn't scatter the light and make grandpa coming the other way crash. And the requirement that the whole unit be non-serviceable, lest the lens get to scratched and pitted as the miles rack up. Make people buy a whole new lens every time any part of the thing breaks. And of course the self-leveling. Which was there to compensate for neglecting to have your headlights aimed, and having a heavy load tilt the car up and blind somebody.
By 2000 the NHTSA relented on these tough rules, realizing that worry over blinding drivers was overblown. But the early Minis were designed in the mid to late 90s, and so they started out with 1990s style sealed-all-in-one Xenons. But later they made it so you could replace the igniter and keep the rest of the light. I don't think washers and leverers were mandatory any more either, but they kept those around for some reason. Bling, I guess.
(Note that washer fluid is, in theory, flammable, and you don't want that spraying all over your engine while you're driving around. And you can't just decide to not activate the washers -- your car decides to wash your headlights whenever that little CPU whirrs along to a its happy place and says "it's washing time!" So do siphon out the washer tank and pull the fuse for your headlight washers so the pump doesn't run dry all the time.)