
Drivetrain N18 Carbon Fix


On another thread someone posted a link to Ford doing that (prototype). Dual injected, port injected for most driving and direct injection for super lean cruise. But they were also injecting Ethanol for the DI portion.

5th Gear


Joined: Jun 2012
Posts: 1,016
Likes: 44
this is not bleeding edge science. lexus has it in, at least, the gs350 and scion fr-s as far as google searching can tell me.

2nd Gear
Joined: Feb 2014
Posts: 76
Likes: 3
We're all* (*most of us in this one) on both the threads. Tigger posted that link and this thread is a genesis of his "reporting" on his fix.
:-)
and, yesti, can confirm the Scion has that, a buddy has one. They're wicked little RWD sports cars, btw. His top end is quite *strong*, I was impressed (his is bone stock).
Last edited by minniehaha; Apr 8, 2014 at 09:46 AM.
5th Gear
Joined: Jun 2012
Posts: 1,016
Likes: 44
Lol, :-)
We're all* (*most of us in this one) on both the threads. Tigger posted that link and this thread is a genesis of his "reporting" on his fix.
:-)
and, yesti, can confirm the Scion has that, a buddy has one. They're wicked little RWD sports cars, btw. Last drag I had with him the JB+ was only at 50% on 91octane and his top end came on *strong* to pull off a win, I was impressed (his is bone stock). I need to re-match him too, with the ethanol mix and JuiceBox dialed up ;-)
 . The prince engine has a poor top end with stock tune (even slightly 'juiced'
  ), it's made for midrange torque versus drag racing. The lexus IS 350 engine also has port injection (in addition to DI); seems like BMW cheaped out on the implementation to generate yet another revenue stream to walnut blasters of the world?
2nd Gear
Joined: Feb 2014
Posts: 76
Likes: 3
Gotta love that subbie engine . The prince engine has a poor top end with stock tune (even slightly 'juiced' ), it's made for midrange torque versus drag racing. The lexus IS 350 engine also has port injection (in addition to DI); seems like BMW cheaped out on the implementation to generate yet another revenue stream to walnut blasters of the world?
. The prince engine has a poor top end with stock tune (even slightly 'juiced' ), it's made for midrange torque versus drag racing. The lexus IS 350 engine also has port injection (in addition to DI); seems like BMW cheaped out on the implementation to generate yet another revenue stream to walnut blasters of the world?
5th Gear
Joined: Jun 2012
Posts: 1,016
Likes: 44
yesti, turns out the scheme is a bit more convuluted. Bavaria is thick with walnut trees, to the extent that the shells became a problem. All the little German kids & their Dachshunds were constantly getting their feet cut on the broken shells, so they came up with the *plan*. Let's make our engines buildup all this carbon on the intake valves. Then we'll sell all these damn walnut shells and clean up Bavaria!! I believe it was some chap named Fritz that had the idea, he's a local hero. Two new revenue streams created. Those Germans are industrious.

6th Gear
Joined: Mar 2013
Posts: 3,428
Likes: 37
From: Mission Viejo, CA
These Mini's are so damn sensitive to the smallest tweak, brother started my engine today without putting the dipstick back in, engine ran really rough and he was completely dumbfounded when I placed my finger over the oil dipstick tube when the engine started idling normally! He said that my car is weird, his face looked like  . I remember him saying something about overengineering, lol!
My valve cover was replaced almost a year ago and it's a bit different in that it has what looks like an over pressurization valve, my guess would be in case the PCV system failed on either port.
. I remember him saying something about overengineering, lol!My valve cover was replaced almost a year ago and it's a bit different in that it has what looks like an over pressurization valve, my guess would be in case the PCV system failed on either port.
Last edited by Systemlord; Apr 6, 2014 at 09:34 PM.
Joined: Jul 2013
Posts: 1,474
Likes: 248
From: Sunrise, FL
Systemlord is correct in our engines being sensitive to minor changes. Being a turbocharged high compression engine they already push the boundaries of horsepower per liter of displacement. Mine currently produces 128hp per liter. For reference this would be the equivalent of a Chevy 454 big block engine producing 960hp.
Last edited by Tigger2011; Apr 22, 2014 at 08:36 PM.
2nd Gear
Joined: Feb 2014
Posts: 76
Likes: 3
So, finally got around to doing it right. Tapped and plugged the ports this weekend, not a job for the weary. It is an intense procedure. And highly likely for mishap, be careful & patient if you do this.
Put my custom OCC on and looking forward to no more carbon crap on the intake valves. Will post a smutz update after a number of miles.
The 'plug' in the diaphragm port fiasco that I had turned out 'OK' in the end, phew!!
Back to happy motoring!
Put my custom OCC on and looking forward to no more carbon crap on the intake valves. Will post a smutz update after a number of miles.
The 'plug' in the diaphragm port fiasco that I had turned out 'OK' in the end, phew!!
Back to happy motoring!
6th Gear
Joined: Mar 2013
Posts: 3,428
Likes: 37
From: Mission Viejo, CA
So, finally got around to doing it right. Tapped and plugged the ports this weekend, not a job for the weary. It is an intense procedure. And highly likely for mishap, be careful & patient if you do this.
Put my custom OCC on and looking forward to no more carbon crap on the intake valves. Will post a smutz update after a number of miles.
The 'plug' in the diaphragm port fiasco that I had turned out 'OK' in the end, phew!!
Back to happy motoring!
Put my custom OCC on and looking forward to no more carbon crap on the intake valves. Will post a smutz update after a number of miles.
The 'plug' in the diaphragm port fiasco that I had turned out 'OK' in the end, phew!!
Back to happy motoring!
Joined: Jul 2013
Posts: 1,474
Likes: 248
From: Sunrise, FL
That is indeed awesome news. Glad everything worked out for Haha and yourself. Looking forward to your OCC results as well. Let us know if you notice any changes in oil consumption as well. Blocking the aft port increased oil consumption on a few of the N14's for some reason.
Update:
Currently 3000 miles post mod. Oil level is down approximately 1/32" on dip stick. Was slightly overfilled at last change so exactly at the full mark now. Pretty normal for Tigger as I've never had to add oil between 5K oil changes.
Update:
Currently 3000 miles post mod. Oil level is down approximately 1/32" on dip stick. Was slightly overfilled at last change so exactly at the full mark now. Pretty normal for Tigger as I've never had to add oil between 5K oil changes.
2nd Gear
Joined: Feb 2014
Posts: 76
Likes: 3
Systemlord & Tigger - thanks for all the encouragement!
Yeah, a bullet was 'dodged' it would seem.
Lesson: These little fireplugs are robust and powerful but very sensitive. Treat accordingly!!
After taking off the manifold and learning the removal procedure for it (boy what a task!) it will be pretty easy to get it back off for media blasting the valves; in a little while - time to drive and enjoy Haha now.
2nd Gear
Joined: Feb 2014
Posts: 76
Likes: 3
Unfortunately the view was very limited with the tools I had at the time, but they appeared to be in definite need of the 'blast,' the build-up was evident, but to what degree wasn't clear.
There's 49k miles on Haha, btw. So with that mileage and from what I was able to see - I'm putting it "on the list."
When I do do it I will have a 'scope' and get pics.
Also - idle is currently fine.
Before I did the port-plugs (the "right" way) and after my mis-adventure, I had had a tear in the orange diaphragm that I 'fixed' with RTV, my fix essentially had this valve stuck open, the intake vacuum wasn't working 'against' the spring (so to speak), as the diaphragm was 'fixed' to the top (via RTV). Anyway, Haha didn't like that and it messed-up the idle once it was warmed up, plus it didn't allow for the throttling the diaphragm was designed for, so a lot of smutz was going into the ports whenever the intake vacuum was 'high.' The diaphragm is still RTV-ed, it's a $300 part (it isn't separate from the valve cover).
But it doesn't really matter now, all the PCV is going through the OCC (which I have done custom in a coalescing design), and it's baffled (in the valve cover) extensively before the OCC too.
2nd Gear
Joined: Feb 2014
Posts: 76
Likes: 3
and the beat goes on
Took Haha out for a good test run this evening, did about a 35 mile (highway) loop after about 20 miles of running around for errands.
Towards the end of the 35 mile loop got in another top speed run, just under 2 straight miles of continuous WOT, sustained 130+(*)mph for the length, it is the longest WOT run I've done to date.
No issues.
* not a true topspeed run, JB+ at 41% and running 91 :-)
Conditions: strong head wind, temp 26c
Oh yeah, the point here is just to document the soundness/issues of the plug-in-port 'fix.'
Last edited by minniehaha; Apr 22, 2014 at 07:52 AM. Reason: additional info
6th Gear
Joined: Mar 2013
Posts: 3,428
Likes: 37
From: Mission Viejo, CA
Took Haha out for a good test run this evening, did about a 35 mile (highway) loop after about 20 miles of running around for errands.
Towards the end of the 35 mile loop got in another top speed run, just under 2 straight miles of WOT, sustained 130+(*), it is the longest WOT run I've done to date.
No issues.
Towards the end of the 35 mile loop got in another top speed run, just under 2 straight miles of WOT, sustained 130+(*), it is the longest WOT run I've done to date.
No issues.

2nd Gear
Joined: Feb 2014
Posts: 76
Likes: 3
As for metrics*, I am with you there ALL THE WAY; only the USA, Burma and Liberia are stuck in the ol' British Imperial System :-( not the best company, IMO.
Plus it's faster that way!, I had a sustained 209km/hr!
;-)
*(book & metric nerds recommendation: "The Measure of All Things," by Ken Alder, just finished it, an excellent telling of the quest to measure the earth and determine the meter. Newfound respect for the French after that read.)
http://www.kenalder.com/measure/excerpts.htm
Last edited by minniehaha; Apr 22, 2014 at 07:53 AM. Reason: clarity

2nd Gear
Joined: Feb 2014
Posts: 76
Likes: 3
How my experience went doing the plug-the-ports
Additional & Important notes about my experience - essentially a strong word of caution to anyone else that might go this route.
I was not as fastidious as Tigger had related and strongly emphasized in his post about this modification; it you don't think you're at his level of meticulousness - DO NOT TRY THIS.
Full Disclosure: I did the plugs as reported and everything is totally hunky-dory with Haha; I am confident in its full capabilities and will continue to mod and drive it hard, and report.
But - (and I relate this to 'warn' others) - the task of plugging the ports was demanding and fraught with multiple instances for substantial 'error.'
And I experienced some. I am not even going to chronicle the other miss-hap I encountered when I plugged the round port below the orange diaphragm valve, suffice it to say: DO NOT UNDER ANY CIRCUMSTANCES DO THAT.
So, this is how my plugging went down:
I used two shop vacuums, one at the respective intake port that was being modified. It has a flexible fitting that fully conformed to the intakes elongated oval shape and formed an excellent seal, this vacuum ran continuous during the threading operation. The other vacuum was placed alongside the tap as it cut it's way into the port. I didn't "seal" the combustion chambers in any other manner, I supposed that the vacuum was sufficient to collect all debris as the threads were cut. It was highly effective but not completely (more on this later).
After completing my first thread cutting (on cylinder #4, the furthest one to the right of the engine when standing in front of the car) successfully and without a hitch, I moved unto cylinder #2, with much confidence. A little too much. But first: as Tigger has related - the spring perch bolts must be removed, for access to the port at the right angle, and a 'handle' to turn the thread-cutter is necessary here, the typical "T" used in this type of operation will not fit. So, as I moved unto #2 I began to cut the threads and I proceeded at a rate that was not properly judicious, it was on the other hand a bit too overzealous and I ended up breaking the tap off. OMG! I was rather dejected, to say the least. I kept a positive outlook though and figured I'd just drill and tap it out. That didn't work. 1. because the doggone tap was so small, 2. because the metal is hardened for its purpose: to cut threads.... SO - if a thread-cutter breaks in your cylinder head and you are set on removing it, you WILL need to pull the head off. Well, I wasn't going to pull my head off for that, I mean I was plugging it, right? The tap was pretty much doing that now...
So, and I relate this with some trepidation, as it's not a practice I endorse. I removed a small bit of the tap that was still protruding above the port and moved onto cylinder #3. [This one (#3) and the port at #1 that followed were done with extreme caution and went fine. (Another word - if you've never tapped before this IS NOT the job to 'learn' it on, and if, like me, it's been a few years, TAKE YOUR TIME!!! Cut a very little, back it up, cut some more, do this over and over and keep it lubricated)] After finishing #3, with a proper threaded plug, and having the tap still broke off in #2, I applied this to the top of the joint port to complete the sealing:
http://www.jbweld.com/product/j-b-highheat/
I know, shame, shame, JB Weld, WTF!, is this grandpa's tractor?!?
Well - it was that or pull the head... and given the conditions: the ports were "plugged", the 'load' on the epoxy would be a negative pressure, mostly, (or a boost pressure otherwise) and those pressures would only reach the epoxy through the small 'openings' of the tap. And these small openings, plus the taps rough break surface, plus the port itself's rough finish made ideal conditions for the adherence of the epoxy. This epoxy is robust and tenacious, btw. And it has withstood a 'top speed' WOT run of more than 1.5 miles (that is essentially the most load the engine can or will experience) as documented earlier in this thread. I am confident in it.
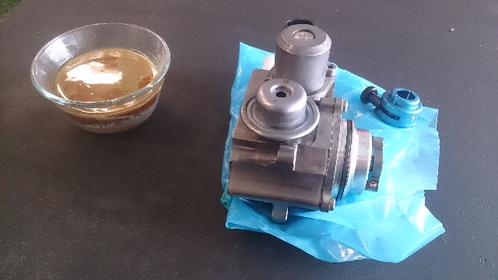
So, I encountered a broken tap, but soldiered on and finished up the job. I will post the crappiest photos ever (my phone sucks for photos, though it does make good calls, go figure, lol...) - the photos are horrible and the setting (in a garage with shoplighting) only exacerbated it's crappy quality, but I'll get them added for documentation.
Then what came next almost made me vomit. The start-up....
Gotta take a break, I will return to finish this up later, hopefully today.
Added the pix, of note they are "upside-down" so to speak, their view point is as if you were standing through the windshield. Also - #7605: that's the port for #4 or #1, they're pretty much the same and you can make out the threaded plug's inside hex top. #7606, that's the "pi�ce de r�sistance" the joint port, flushly filled with JB epoxy.
I was not as fastidious as Tigger had related and strongly emphasized in his post about this modification; it you don't think you're at his level of meticulousness - DO NOT TRY THIS.
Full Disclosure: I did the plugs as reported and everything is totally hunky-dory with Haha; I am confident in its full capabilities and will continue to mod and drive it hard, and report.
But - (and I relate this to 'warn' others) - the task of plugging the ports was demanding and fraught with multiple instances for substantial 'error.'
And I experienced some. I am not even going to chronicle the other miss-hap I encountered when I plugged the round port below the orange diaphragm valve, suffice it to say: DO NOT UNDER ANY CIRCUMSTANCES DO THAT.
So, this is how my plugging went down:
I used two shop vacuums, one at the respective intake port that was being modified. It has a flexible fitting that fully conformed to the intakes elongated oval shape and formed an excellent seal, this vacuum ran continuous during the threading operation. The other vacuum was placed alongside the tap as it cut it's way into the port. I didn't "seal" the combustion chambers in any other manner, I supposed that the vacuum was sufficient to collect all debris as the threads were cut. It was highly effective but not completely (more on this later).
After completing my first thread cutting (on cylinder #4, the furthest one to the right of the engine when standing in front of the car) successfully and without a hitch, I moved unto cylinder #2, with much confidence. A little too much. But first: as Tigger has related - the spring perch bolts must be removed, for access to the port at the right angle, and a 'handle' to turn the thread-cutter is necessary here, the typical "T" used in this type of operation will not fit. So, as I moved unto #2 I began to cut the threads and I proceeded at a rate that was not properly judicious, it was on the other hand a bit too overzealous and I ended up breaking the tap off.
OMG! I was rather dejected, to say the least. I kept a positive outlook though and figured I'd just drill and tap it out. That didn't work. 1. because the doggone tap was so small, 2. because the metal is hardened for its purpose: to cut threads.... SO - if a thread-cutter breaks in your cylinder head and you are set on removing it, you WILL need to pull the head off. Well, I wasn't going to pull my head off for that, I mean I was plugging it, right? The tap was pretty much doing that now...So, and I relate this with some trepidation, as it's not a practice I endorse. I removed a small bit of the tap that was still protruding above the port and moved onto cylinder #3. [This one (#3) and the port at #1 that followed were done with extreme caution and went fine. (Another word - if you've never tapped before this IS NOT the job to 'learn' it on, and if, like me, it's been a few years, TAKE YOUR TIME!!! Cut a very little, back it up, cut some more, do this over and over and keep it lubricated)] After finishing #3, with a proper threaded plug, and having the tap still broke off in #2, I applied this to the top of the joint port to complete the sealing:
http://www.jbweld.com/product/j-b-highheat/
I know, shame, shame, JB Weld, WTF!, is this grandpa's tractor?!?
Well - it was that or pull the head... and given the conditions: the ports were "plugged", the 'load' on the epoxy would be a negative pressure, mostly, (or a boost pressure otherwise) and those pressures would only reach the epoxy through the small 'openings' of the tap. And these small openings, plus the taps rough break surface, plus the port itself's rough finish made ideal conditions for the adherence of the epoxy. This epoxy is robust and tenacious, btw. And it has withstood a 'top speed' WOT run of more than 1.5 miles (that is essentially the most load the engine can or will experience) as documented earlier in this thread. I am confident in it.
So, I encountered a broken tap, but soldiered on and finished up the job. I will post the crappiest photos ever (my phone sucks for photos, though it does make good calls, go figure,
lol...) - the photos are horrible and the setting (in a garage with shoplighting) only exacerbated it's crappy quality, but I'll get them added for documentation.Then what came next almost made me vomit. The start-up....
Gotta take a break, I will return to finish this up later, hopefully today.
Added the pix, of note they are "upside-down" so to speak, their view point is as if you were standing through the windshield. Also - #7605: that's the port for #4 or #1, they're pretty much the same and you can make out the threaded plug's inside hex top. #7606, that's the "pi�ce de r�sistance" the joint port, flushly filled with JB epoxy.
Last edited by minniehaha; Apr 25, 2014 at 06:20 PM. Reason: grammar & adding pix & info
2nd Gear
Joined: Feb 2014
Posts: 76
Likes: 3
Lol, yeah that's the feeling... I went out had a sushi lunch with my kids and had a couple beers, thought about what to do, took a break until the evening and then wrapped it up, had it 'running' by 10:00pm, now for that part...