R50/53 Racing Turtel
#26
 05-13-2016, 07:04 PM


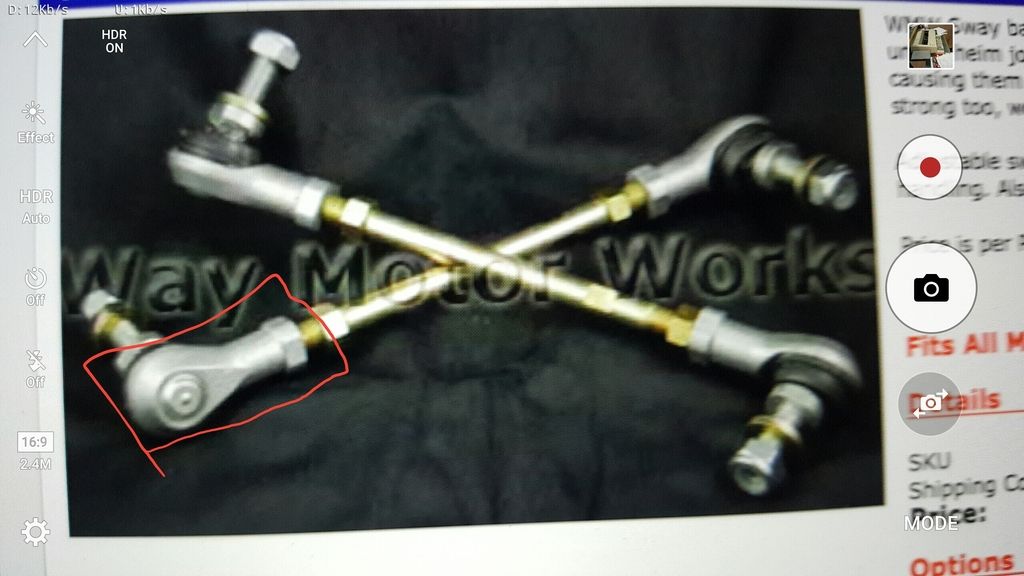
I went with the WMW links. They have a thin body:
http://www.waymotorworks.com/wmw-adj...-endlinks.html
But I also have an R56 and the clearance are different. Still, might work for you if you can't make yours work.
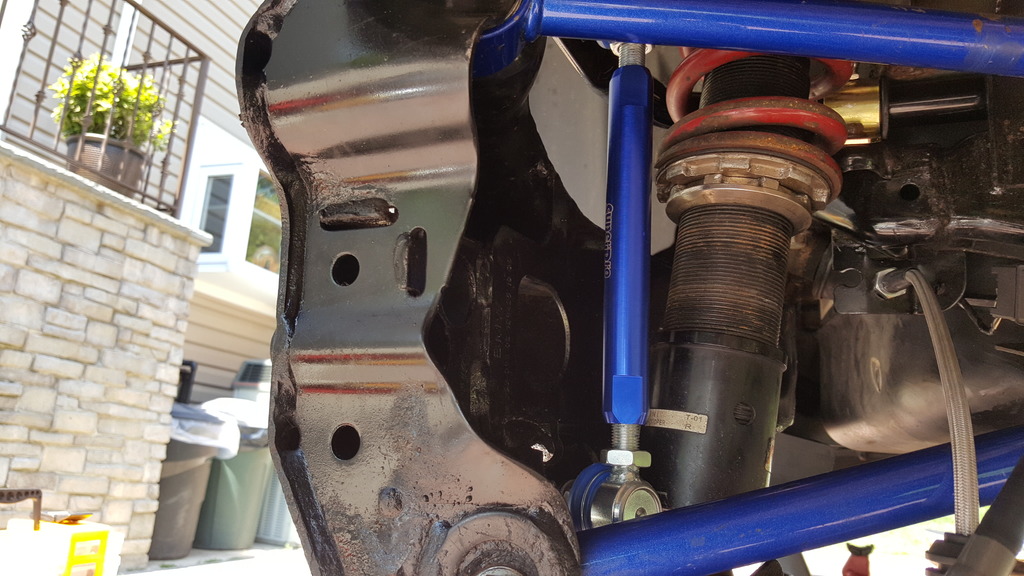
I also went totally against the grain and installed a 27mm solid front sway bar to go with the 25mm hollow rear sway bar. Think of it as a go kart with no front end dive when you turn the steering wheel...
http://www.waymotorworks.com/wmw-adj...-endlinks.html
But I also have an R56 and the clearance are different. Still, might work for you if you can't make yours work.
I also went totally against the grain and installed a 27mm solid front sway bar to go with the 25mm hollow rear sway bar. Think of it as a go kart with no front end dive when you turn the steering wheel...
#27
05-13-2016, 07:31 PM

Hopefully someone else can chime in regarding this style EL. I guess if push comes to shove ill get does, but giving them a second looks it looks like ill have the same problem. If you take a close look at the join part of this EL

This is much smaller
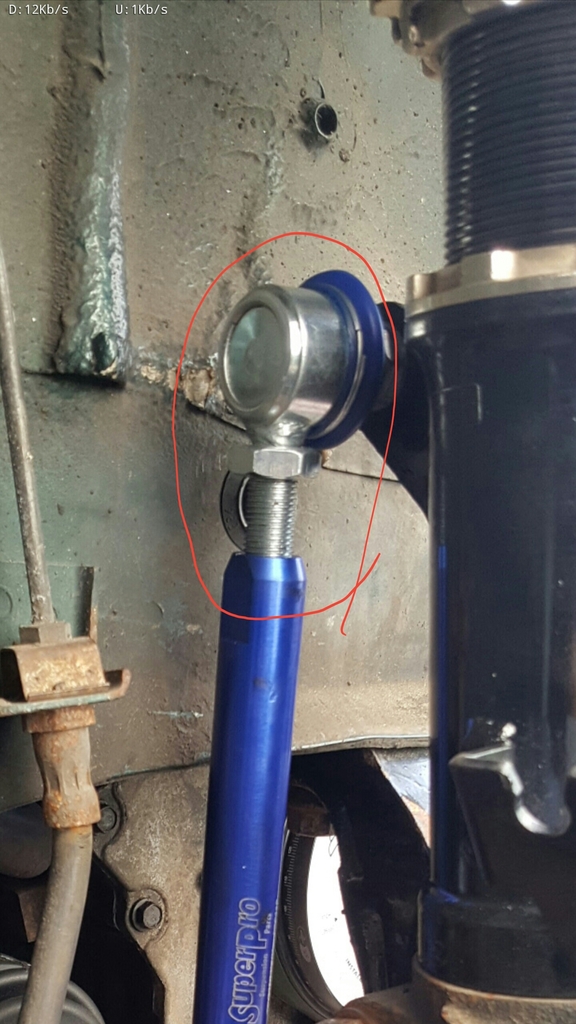
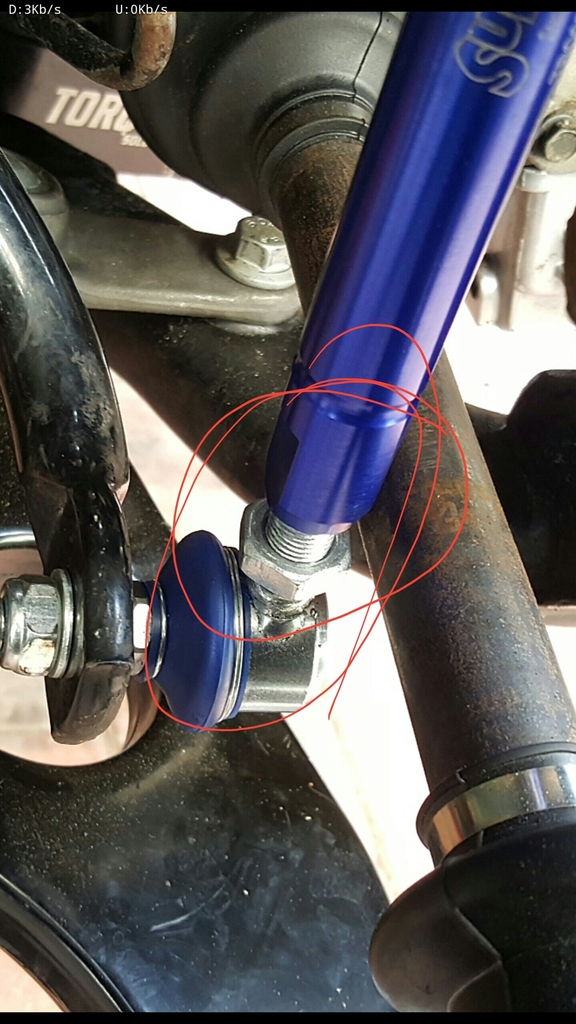
I got lots of things from Way. Really cool guys and give you sound advice. Wish he was local, so i can get a custom tune from him, since I'm not a fan of canned tunes.

This is much smaller


I got lots of things from Way. Really cool guys and give you sound advice. Wish he was local, so i can get a custom tune from him, since I'm not a fan of canned tunes.
#28
05-13-2016, 08:14 PM
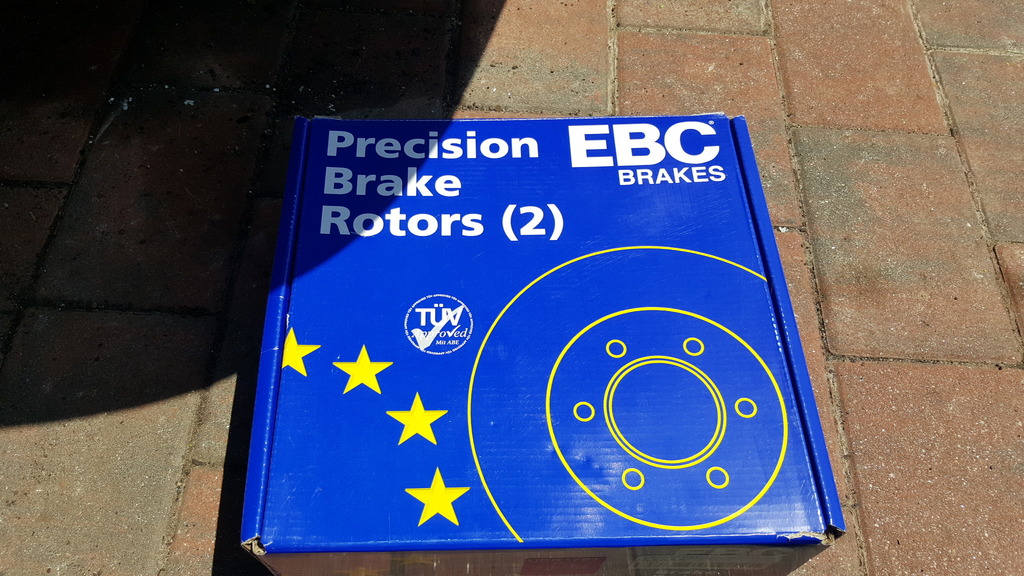
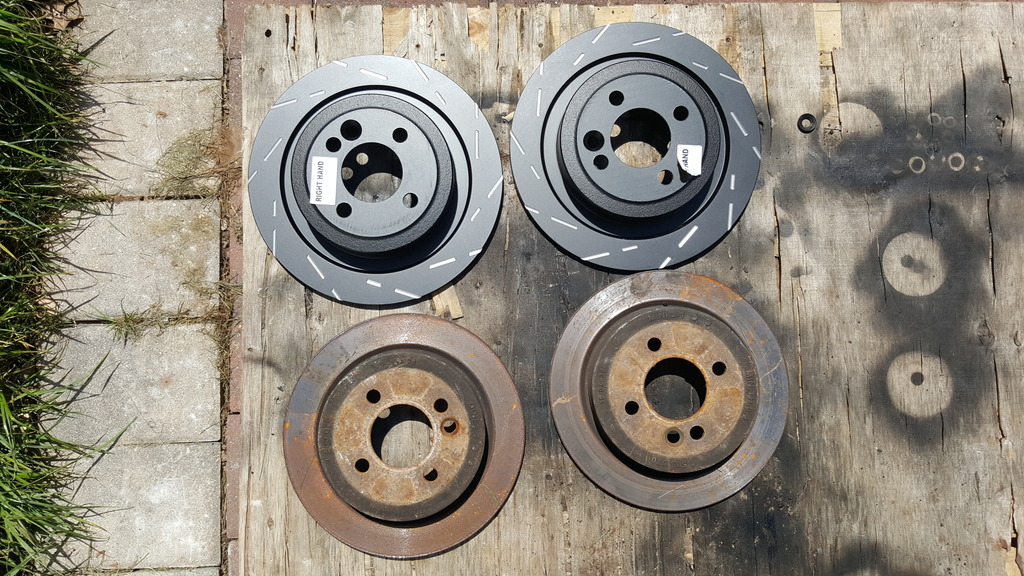
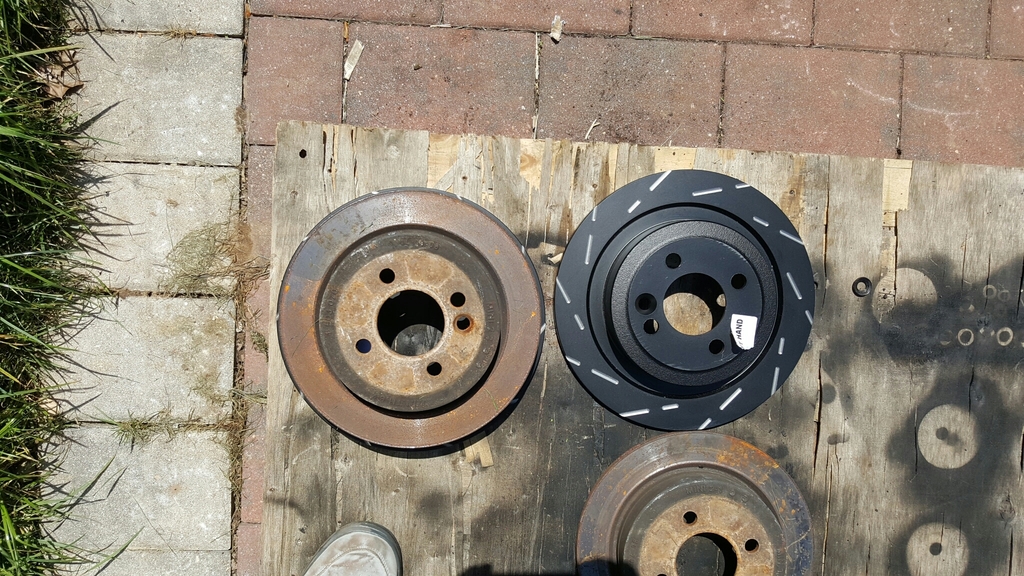
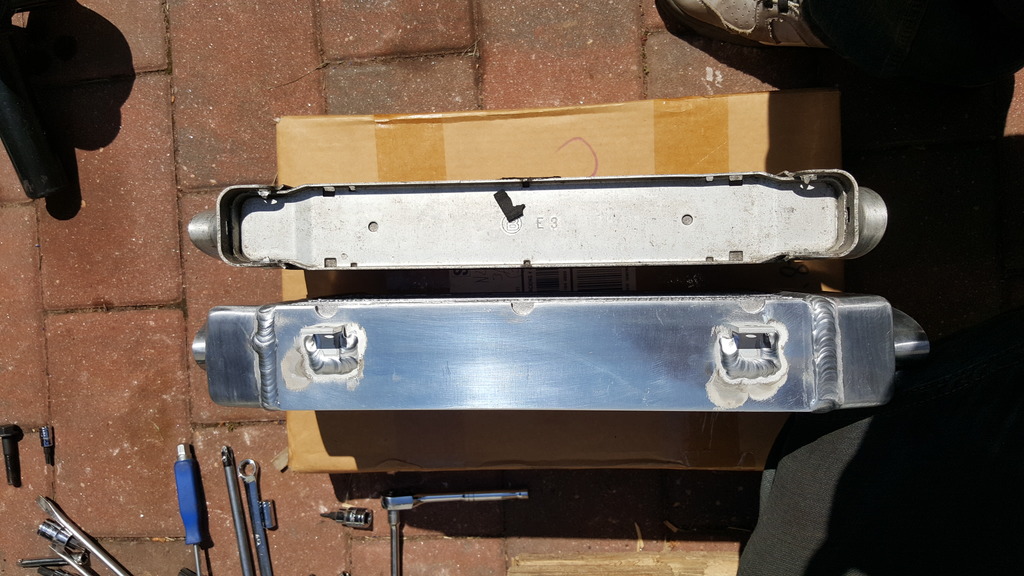
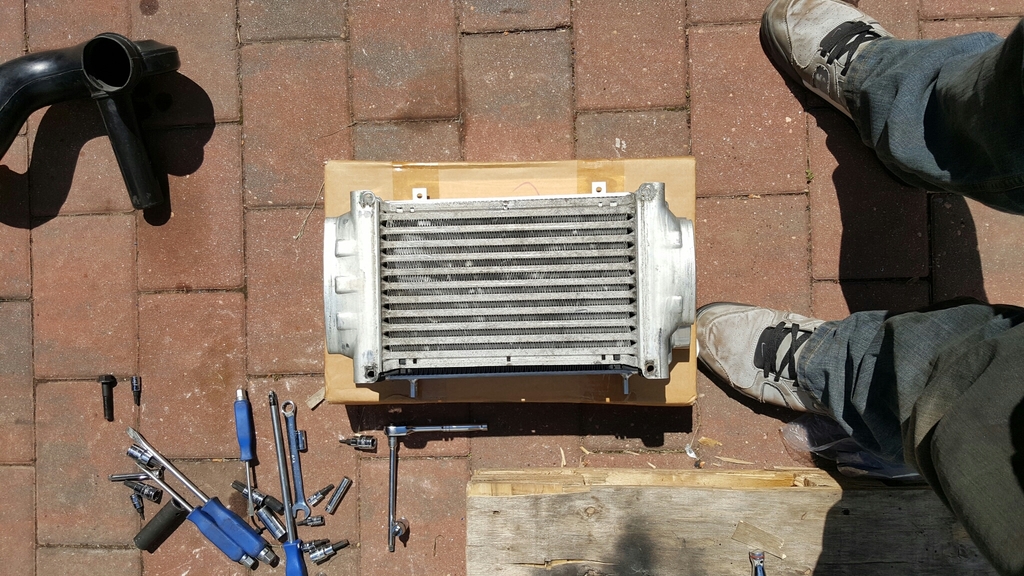
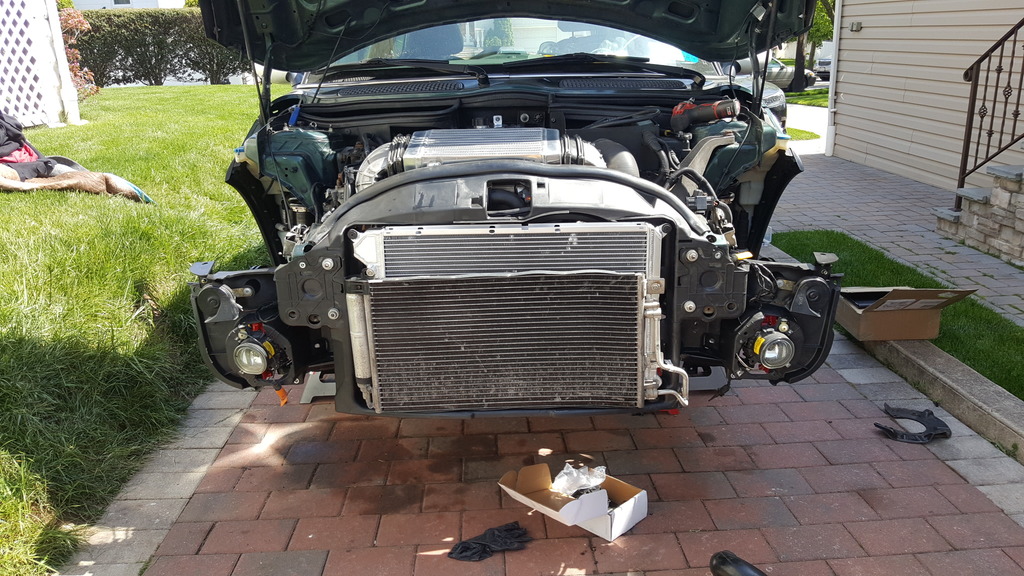
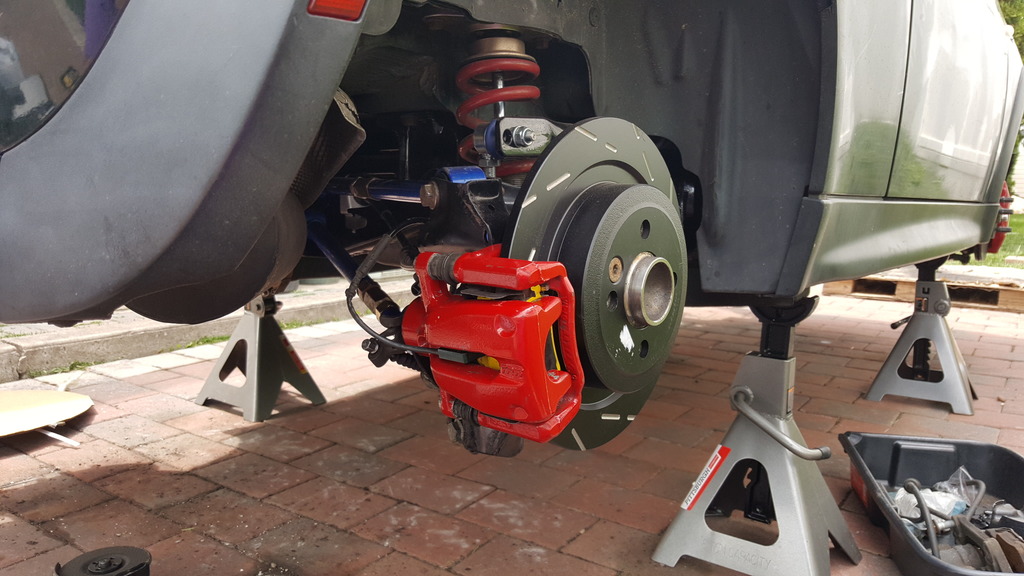
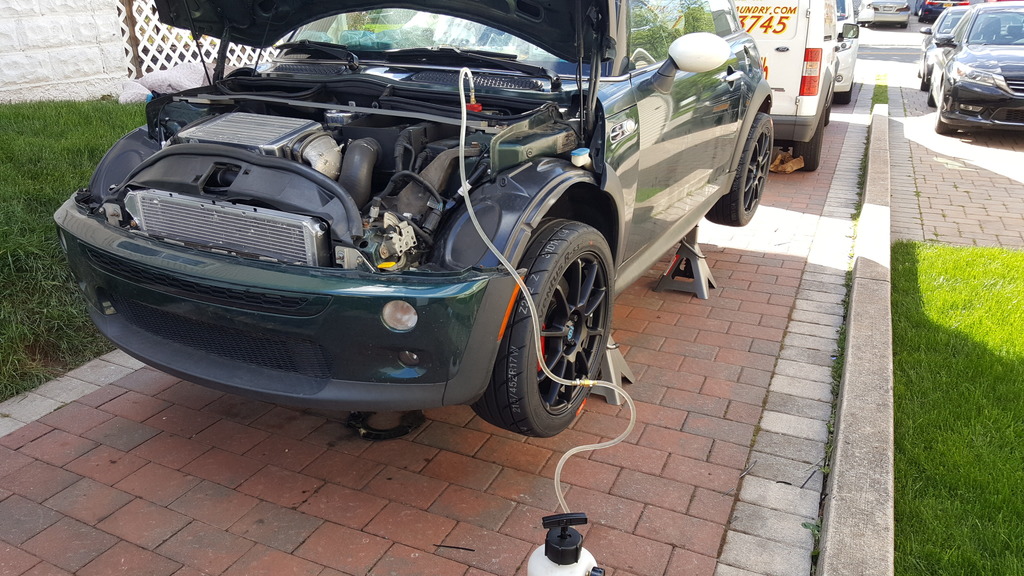
Yesterday i got the rear rotors right from the UK. it was suppose to get here two weeks from now, but i can't complain. It looks like in my rush to order the wheel bearings, i ordered a set of front wheel bearings, So i just source used once, which were in good condition.
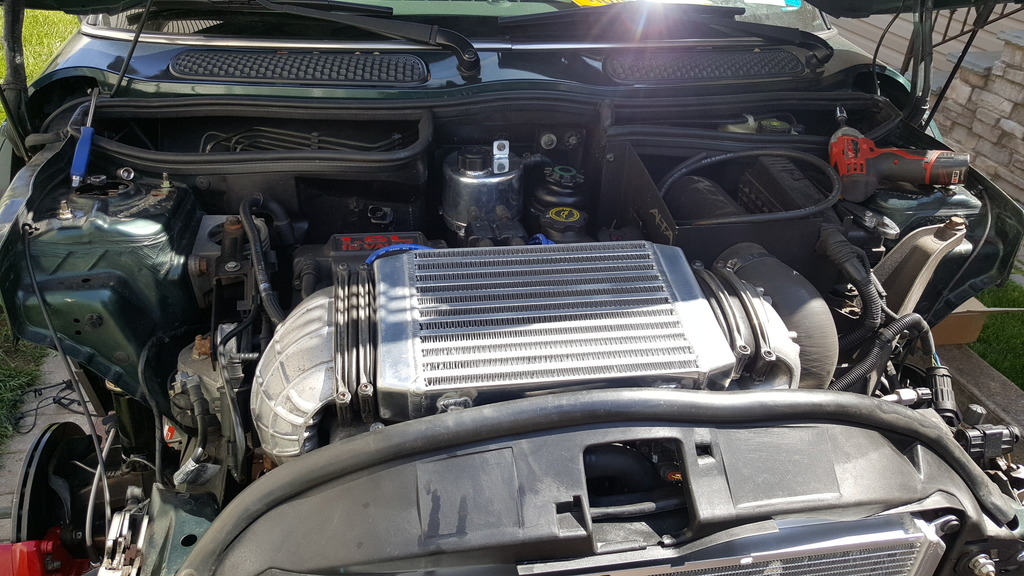
Also it seems that I have installed the rear right caliper on the left and the left on the right. Need to swap this to the right way. The E-brake bracket and Line is in the way now and won't mount to the trailing arm. I made the needed modification for the SS lines. installed the rotors/pads, the intercooler, Power steering fan and the Power steering fluid. Installed the exhaust and heat shield.
Ordered a replacement Vband Clamp since the one i took off looks little destroyed and new boots for the intercooler.
Tomorrow I will be working on diverter for the Radiator and Intercooler and finding out where i will be installed the OCC.
Unmodified

modified

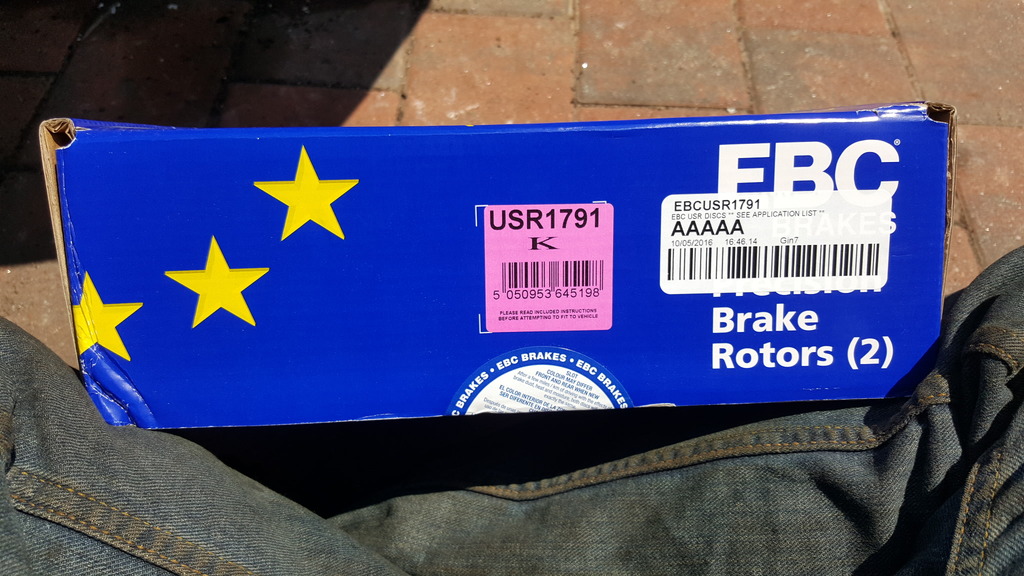
USR1791

Almost there.
Also it seems that I have installed the rear right caliper on the left and the left on the right. Need to swap this to the right way. The E-brake bracket and Line is in the way now and won't mount to the trailing arm. I made the needed modification for the SS lines. installed the rotors/pads, the intercooler, Power steering fan and the Power steering fluid. Installed the exhaust and heat shield.
Ordered a replacement Vband Clamp since the one i took off looks little destroyed and new boots for the intercooler.
Tomorrow I will be working on diverter for the Radiator and Intercooler and finding out where i will be installed the OCC.
Unmodified

modified

USR1791


Almost there.
#29
05-14-2016, 04:24 AM
Hopefully someone else can chime in regarding this style EL. I guess if push comes to shove ill get does, but giving them a second looks it looks like ill have the same problem. If you take a close look at the join part of this EL
This is much smaller


I got lots of things from Way. Really cool guys and give you sound advice. Wish he was local, so i can get a custom tune from him, since I'm not a fan of canned tunes.
This is much smaller
I got lots of things from Way. Really cool guys and give you sound advice. Wish he was local, so i can get a custom tune from him, since I'm not a fan of canned tunes.
Hope it works out. The car seems to be coming together well and is looking good.

#31
05-15-2016, 04:10 AM
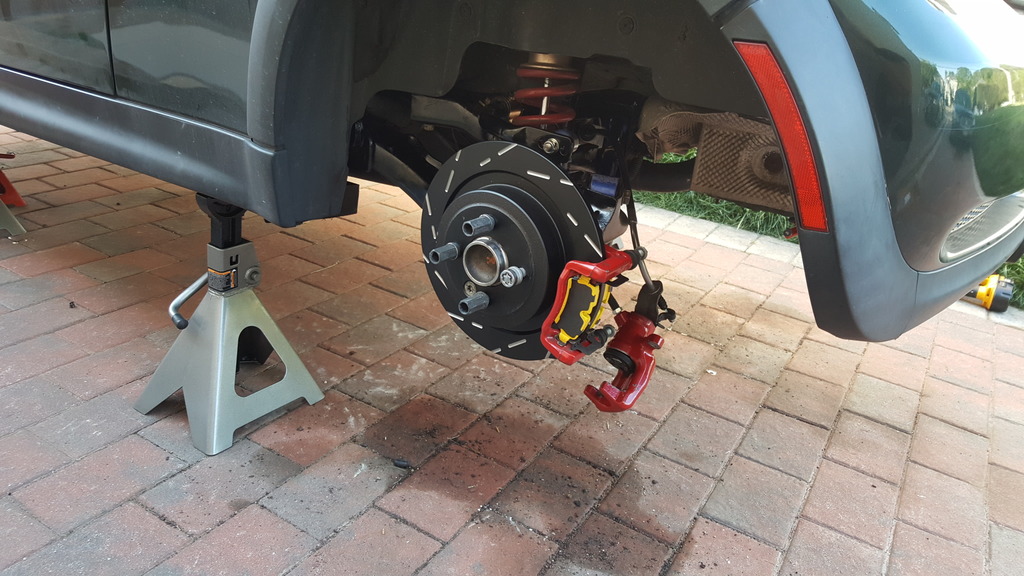
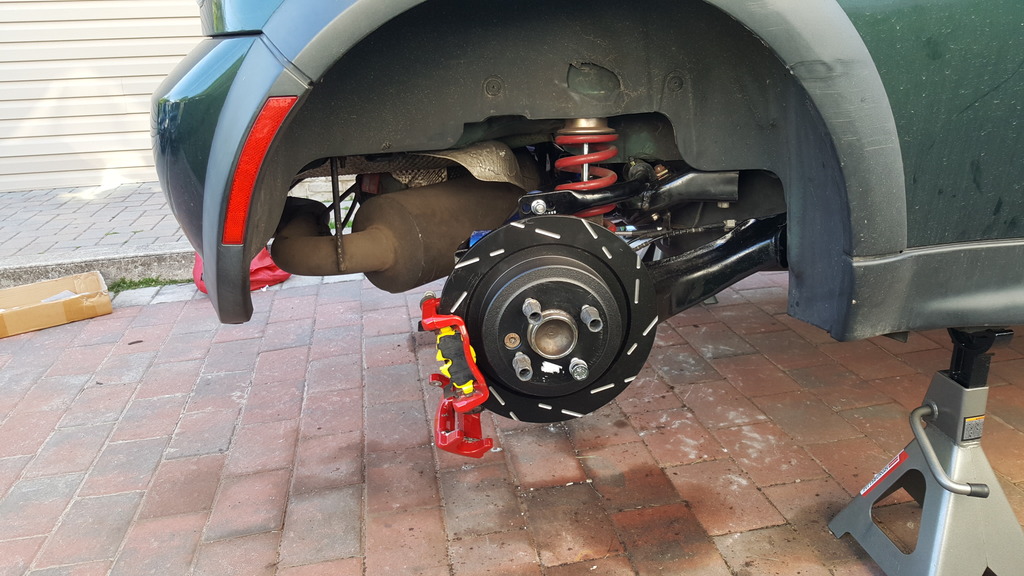
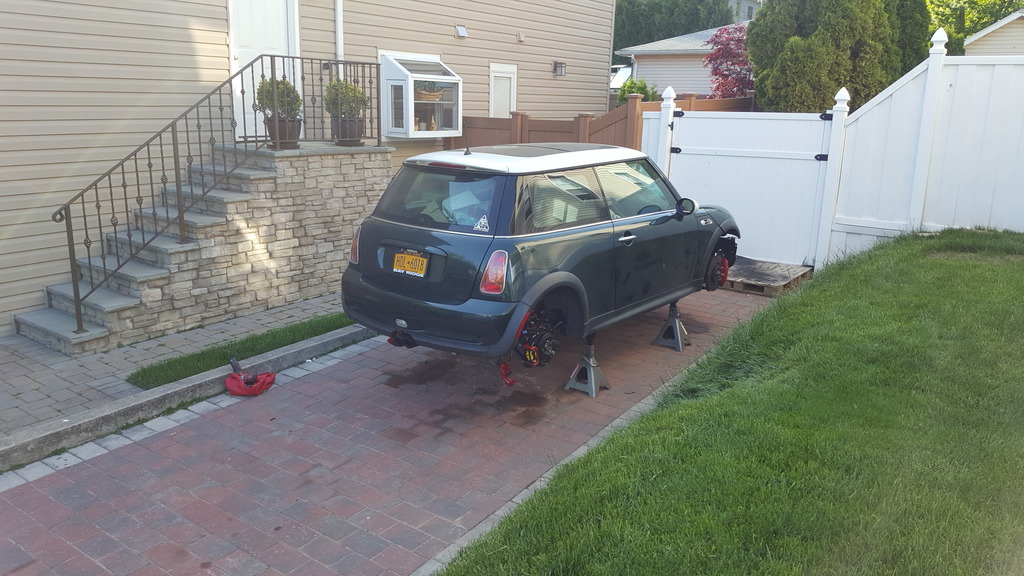
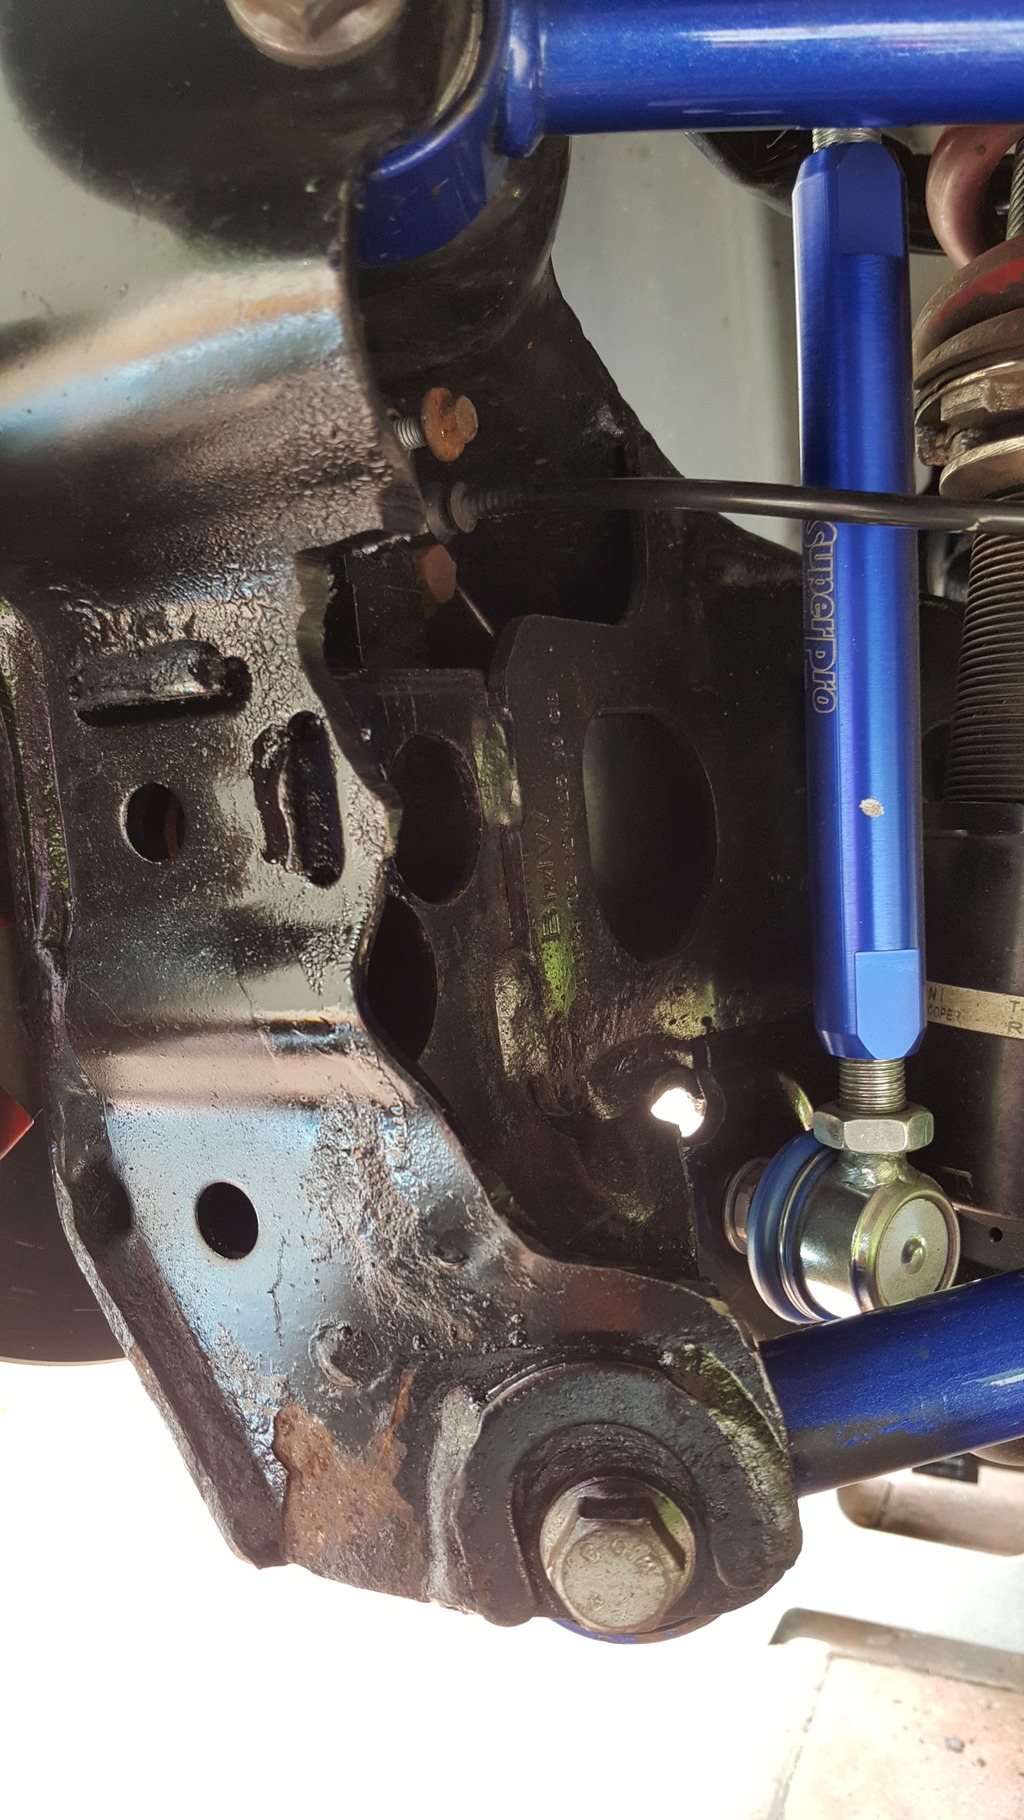
So yesterday i flipped the caliper to the right side and put in the parking brakes and i had to do a little more modification. After grinding everything fit perfectly. Was able to install the Cabrio Support bars. Installed the WMW Strut tower bar.
Here are before and after of the modification i had to do to the Trailing arm.
NO modification
Mod just for the SS lines

Modification for everything to fit lol
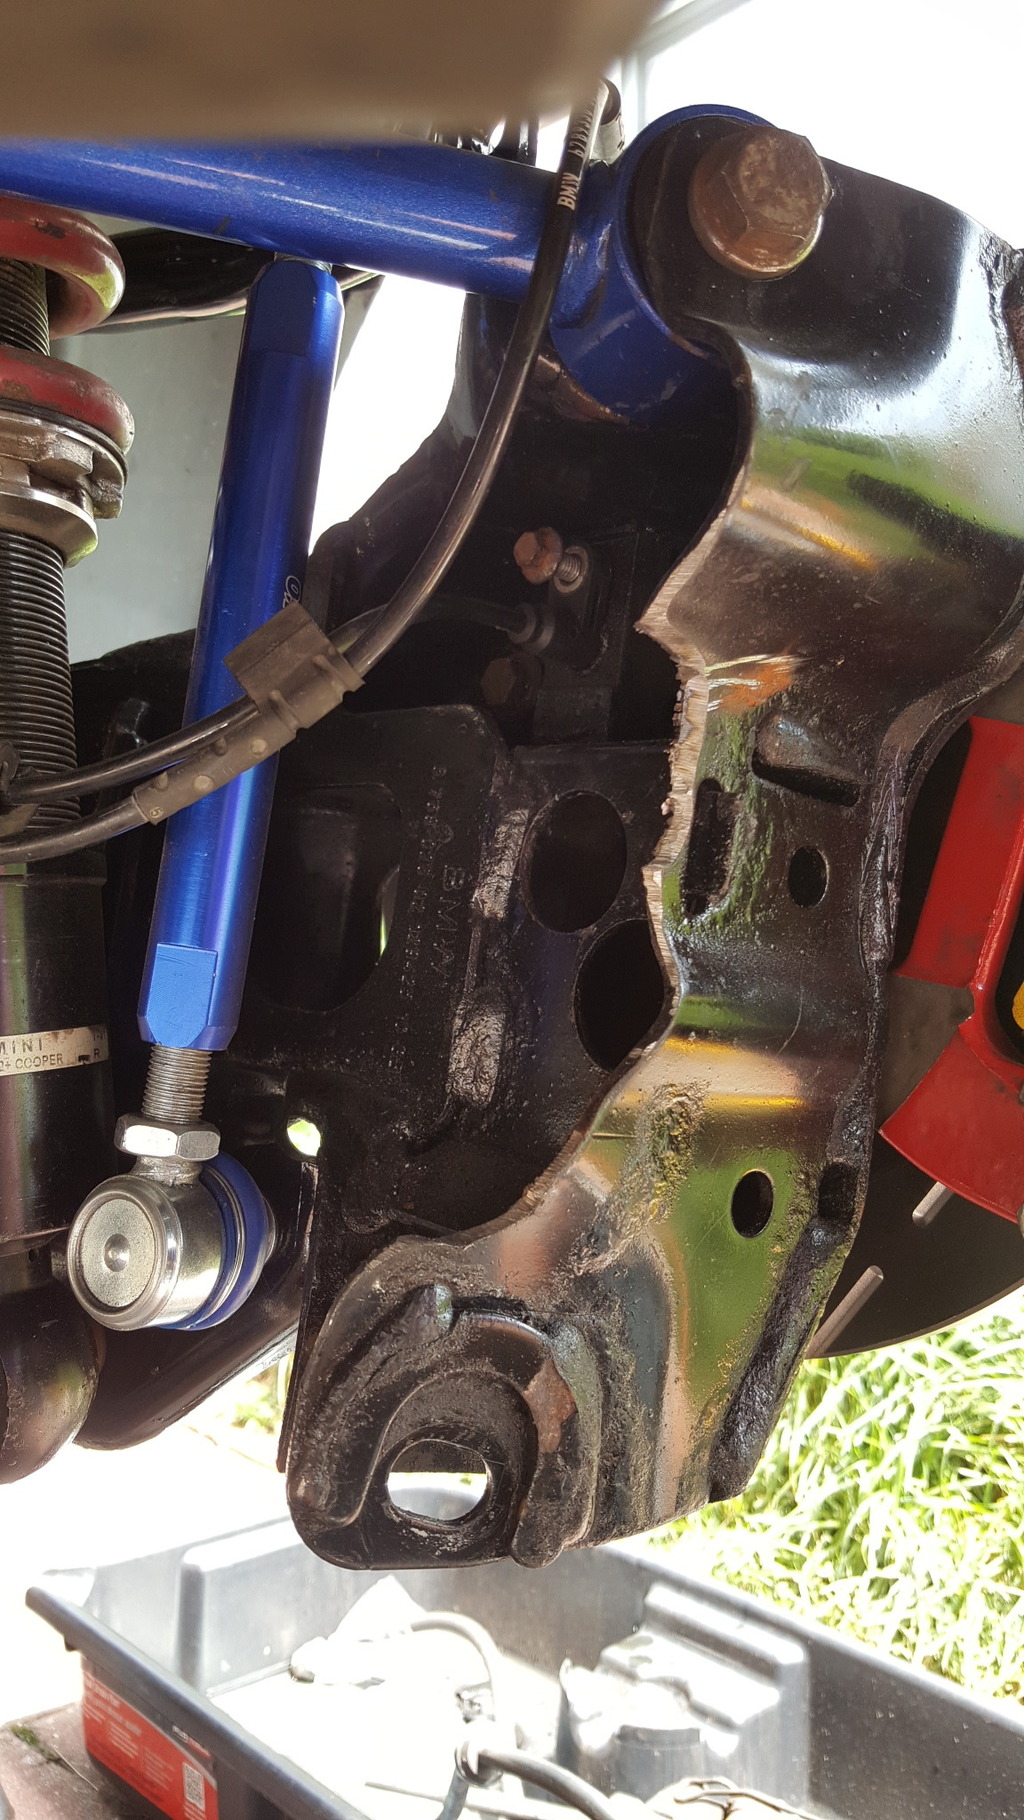
Caliper Install after the mods
Cabrio Bars

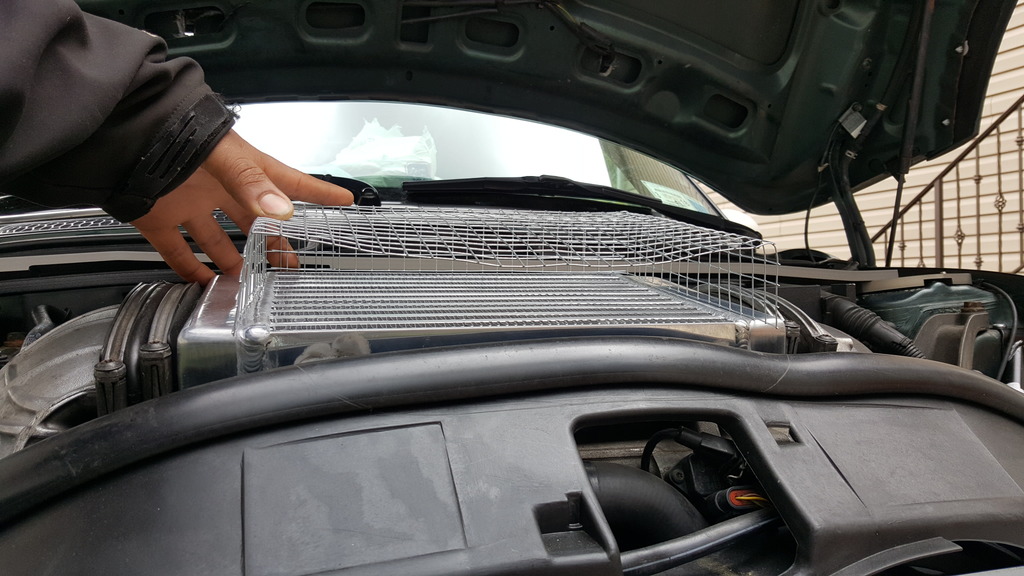
Trying to measure to create diverter Plates for the Radiator
Made this Diverter plate for the Intercooler. This is just a ruff. I will make it taper off at the rear to create velocity hopefully and maybe add fins to make even more.
Rain Kind of stopped me for working. Hopefully i can completely finish today.
Here are before and after of the modification i had to do to the Trailing arm.
NO modification
Mod just for the SS lines
Modification for everything to fit lol


Caliper Install after the mods

Cabrio Bars


Trying to measure to create diverter Plates for the Radiator


Made this Diverter plate for the Intercooler. This is just a ruff. I will make it taper off at the rear to create velocity hopefully and maybe add fins to make even more.

Rain Kind of stopped me for working. Hopefully i can completely finish today.
#32
05-16-2016, 06:35 AM
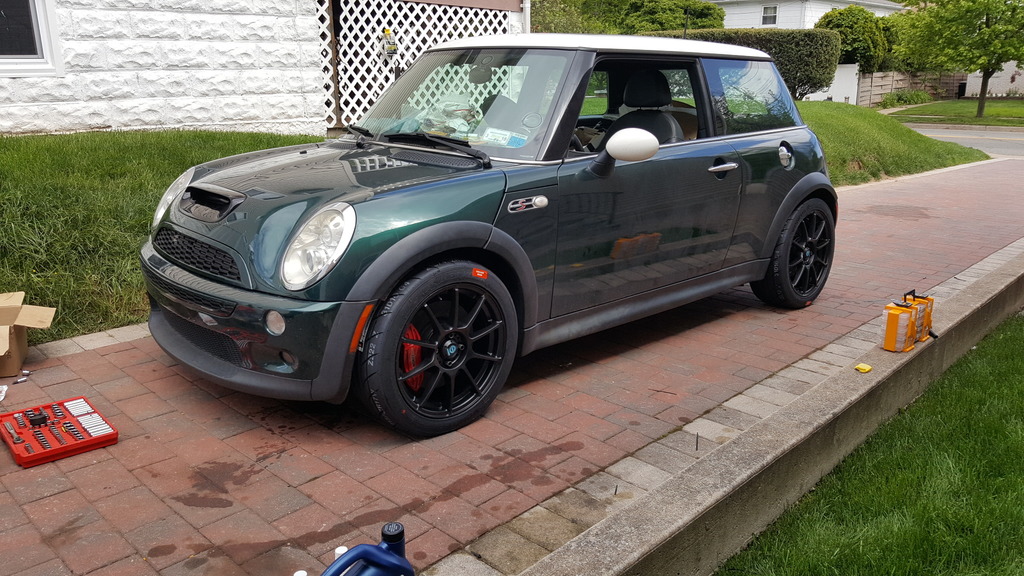
Yesterday was a fun fact finding day and finally on the ground.
Bleed the brakes with Valvoline DOT4 fluid. Flushed about 2 liters to make sure all the old fluid as well as any dirt got out of the calipers and will flush it out at a later time with RBF. Changed oil and filter and the surprise seems like someone put engine oil in the tranny (not a big deal since this is what tranny fluid is just a different viscosity). Took it for a test drive and everything seem to work just fine. The endlinks are not rubbing, but then again i didn't got for a crazy test drive, but i will today. It should only rub when i go lock left or right.
Just notice the car feels a lot slower lol. Maybe it because i have been driving my R56 a lot harder lately or maybe that i changed to the ATI damper which weighs a lot more then Alta 2% light pulley i had, Added more weight with the 17" wheels, as well as all the bracing and bigger tires 215/45/17 and bigger Rotors ect.
The exhaust is making a funny ring like it vibrating too much (it almost sounds like an Old beetle when you step on the gas), So ill take a look at this today I'm hoping it just the carbon build up that needs to happen. Also need to get the Catback lighted up since it's touching the body in the rear.
Still working on making my diverter.
Need alignment and would like to know what is a good set up over all for track use.
READY Still more to come
WMI
Boost/AFR Gauge
Temp/Pressure Gauge
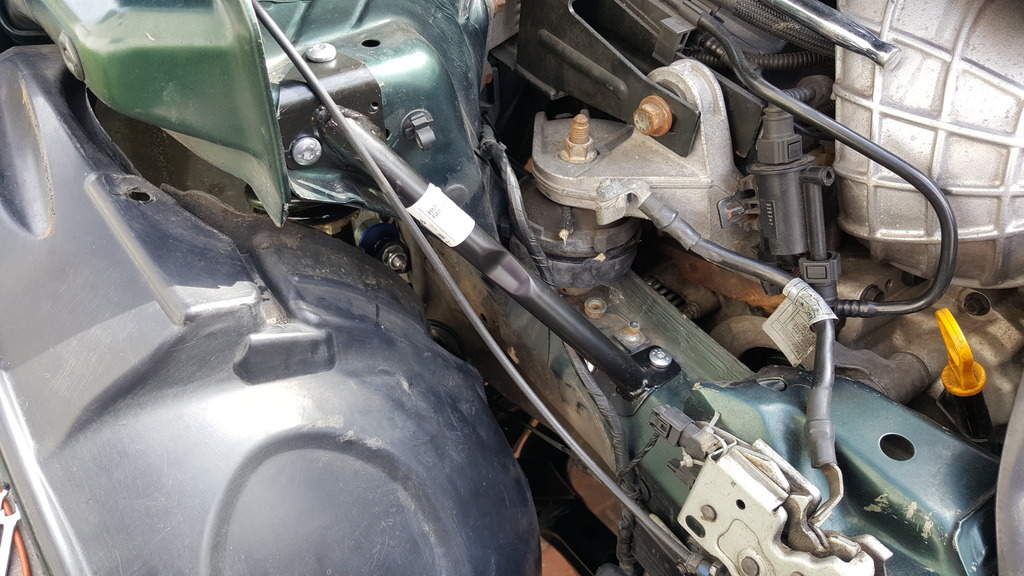
Transmission Top rubber bushings replacement
Passenger Side Top mount
Bleed the brakes with Valvoline DOT4 fluid. Flushed about 2 liters to make sure all the old fluid as well as any dirt got out of the calipers and will flush it out at a later time with RBF. Changed oil and filter and the surprise seems like someone put engine oil in the tranny (not a big deal since this is what tranny fluid is just a different viscosity). Took it for a test drive and everything seem to work just fine. The endlinks are not rubbing, but then again i didn't got for a crazy test drive, but i will today. It should only rub when i go lock left or right.
Just notice the car feels a lot slower lol. Maybe it because i have been driving my R56 a lot harder lately or maybe that i changed to the ATI damper which weighs a lot more then Alta 2% light pulley i had, Added more weight with the 17" wheels, as well as all the bracing and bigger tires 215/45/17 and bigger Rotors ect.
The exhaust is making a funny ring like it vibrating too much (it almost sounds like an Old beetle when you step on the gas), So ill take a look at this today I'm hoping it just the carbon build up that needs to happen. Also need to get the Catback lighted up since it's touching the body in the rear.
Still working on making my diverter.


Need alignment and would like to know what is a good set up over all for track use.
READY Still more to come
WMI
Boost/AFR Gauge
Temp/Pressure Gauge
Transmission Top rubber bushings replacement
Passenger Side Top mount
#33
05-16-2016, 06:26 PM
#34
05-16-2016, 06:52 PM
So the exhaust is making a vibration that is making the car sound like a old Beetle. You would only know the sound if you are old enough lol. Also need to get a coolant reservoir cap, since my cap leaks, is this a common problem?. The gourmet on the Brake reservoir came off so getting a replacement for that as well.
Still have the question what would be a nice setting for an alignment?
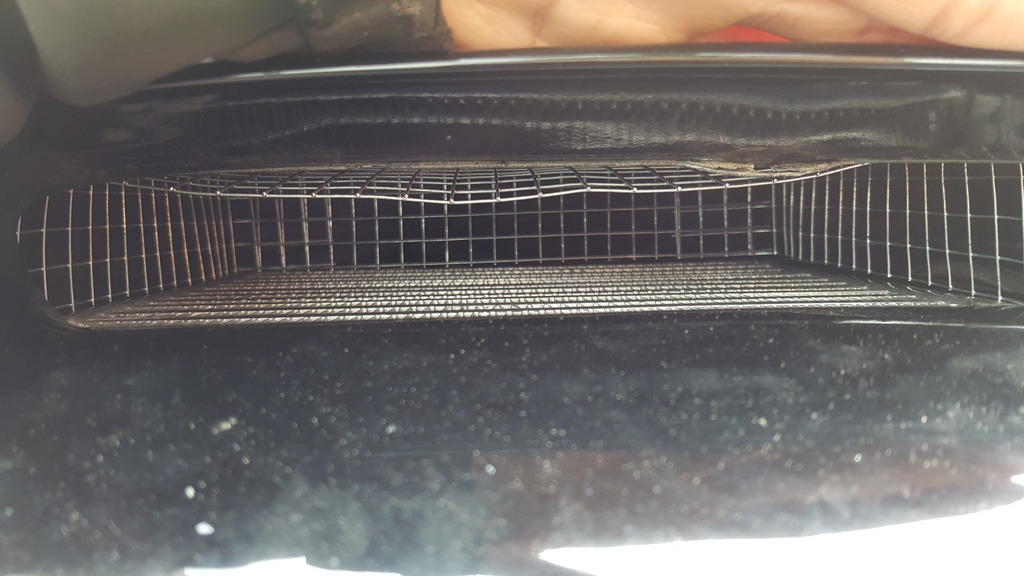
So today i made (not finish yet) air Diverter. If this is a bad idea i would like opinions and why?


#35
05-16-2016, 08:25 PM
I am not the best for suspension setup as I don't follow conventional wisdom and my setup is different than yours but I will toss out the little I have come up with for tires similar to yours (Dunlop ZIIs) and of the same size:
Front camber: suggest -2.0 deg.
I max out at -1.5 deg and don't roll over past the side wall markers. I have also measured fairly even temps across the tread. So this seems pretty good for the tires. The tires might be able to handle more but you need to check roll over and temps.
Front toe: conventional wisdom is 0 deg, I believe.
I run factory spec (0.4 deg total)
Rear camber: someone else should chime in here
I thought conventional wisdom is -1.0 deg, but not sure. Factory is -1.25 and I am running -2.0 deg. My thought is the -1.0 deg would be an autocross setting where you want the backend a little loose. I don't need that on the track. Also like the front, I am rolling the tire over to the sidewall marks, not past them, so I am getting good use of the tires.
Rear toe: don't know as I run the factory settings. I can get them if you want. (factory 0.38 deg total)
Hope this helps a little. Maybe some else can be more definitive. I know this is posted elsewhere but it will take a bit of searching to find.
Last edited by Eddie07S; 05-17-2016 at 03:55 PM. Reason: added factory settings
#36
05-16-2016, 08:38 PM

It's hard to tell from the pictures, but it looks like that diverter is going to block a lot of air flow to the intercooler. It's hard to tell scale and what's going on with the hood scoop would affect it some but I think it's too restrictive. Check out Alta's diverter, I think it's generally regarded as the best. If you don't buy one it could atleast give you ideas.
#37
05-17-2016, 05:44 AM
Platinum Sponsor
Those JCW BBK are going to make a huge difference in braking. Love them on my R52. Looking good, well done.
__________________

MINI Guru/ MINI Owner Since 2004 | NEW Lifetime Part Replacement | Local Pickup
Milltek | Genuine MINI | Forge Motorsport | NM Engineering | ECS Performance | M7 Speed
Customer Service Hours: 8am-8pm EST|Sales Team Hours: 8am-11pm | SAT 10am-7pm 800.924.5172
MINI Guru/ MINI Owner Since 2004 | NEW Lifetime Part Replacement | Local Pickup
Milltek | Genuine MINI | Forge Motorsport | NM Engineering | ECS Performance | M7 Speed
Customer Service Hours: 8am-8pm EST|Sales Team Hours: 8am-11pm | SAT 10am-7pm 800.924.5172
#38
05-17-2016, 06:17 AM
I am not the best for suspension setup as I don't follow conventional wisdom and my setup is different than yours but I will toss out the little I have come up with for tires similar to yours (Dunlop ZIIs) and of the same size:
Front camber: suggest -2.0 deg.
I max out at -1.5 deg and don't roll over past the side wall markers. I have also measured fairly even temps across the tread. So this seems pretty good for the tires. The tires might be able to handle more but you need to check roll over and temps.
Front toe: conventional wisdom is 0 deg, I believe.
I run factory spec.
Rear camber: someone else should chime in here
I thought conventional wisdom is -1.0 deg, but not sure. Factory is -1.5 and I am running -2.0 deg. My thought is the -1.0 deg would be an autocross setting where you want the backend a little loose. I don't need that on the track. Also like the front, I am rolling the tire over to the sidewall marks, not past them, so I am getting good use of the tires.
Rear toe: don't know as I run the factory settings. I can get them if you want.
Hope this helps a little. Maybe some else can be more definitive. I know this is posted elsewhere but it will take a bit of searching to find.
#39
05-17-2016, 06:49 AM
It's hard to tell from the pictures, but it looks like that diverter is going to block a lot of air flow to the intercooler. It's hard to tell scale and what's going on with the hood scoop would affect it some but I think it's too restrictive. Check out Alta's diverter, I think it's generally regarded as the best. If you don't buy one it could atleast give you ideas.
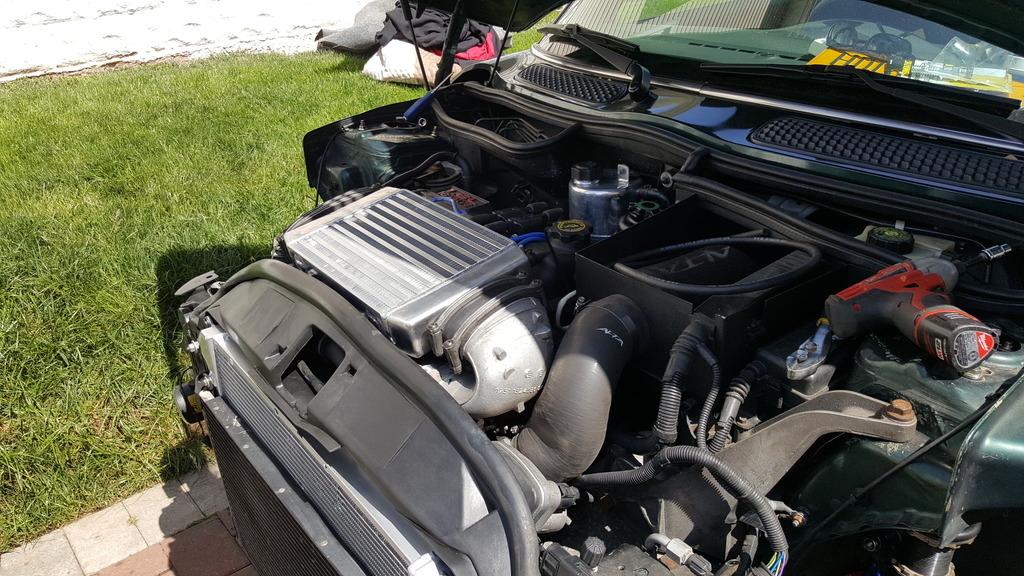
I have been keeping track on intake temperature and it been at about 115f even sitting in traffic, with an ambient temperature of about 55-65 with this IC installed. With Stock it was about 122-128f setting in traffic with cooler temps 45-55f. While moving at a constant speed maybe 55-60mph it has been holding steady at about 89-92f. I should finish the diverter hopefully by the end of the week.
#40
05-17-2016, 07:03 AM
A thought i had for the lost of power which happen on my last car i upgraded the IC. Since this IC is bigger then stock, I would have some Boost lost. I don't know what the boost should be in this car with a 17% pully, But max i have seen after the upgrade is about 14.x PSI. If i remember correctly before this, i was seeing about 15-16 psi (don't quote me on this, but if my memory servers me correct this is about right).
Last IC i upgraded on other turbo car, the boost drop was about 2-3psi and that core was not the much bigger then stock just like this one.
This core if not LXW bigger per say, but it is thicker.


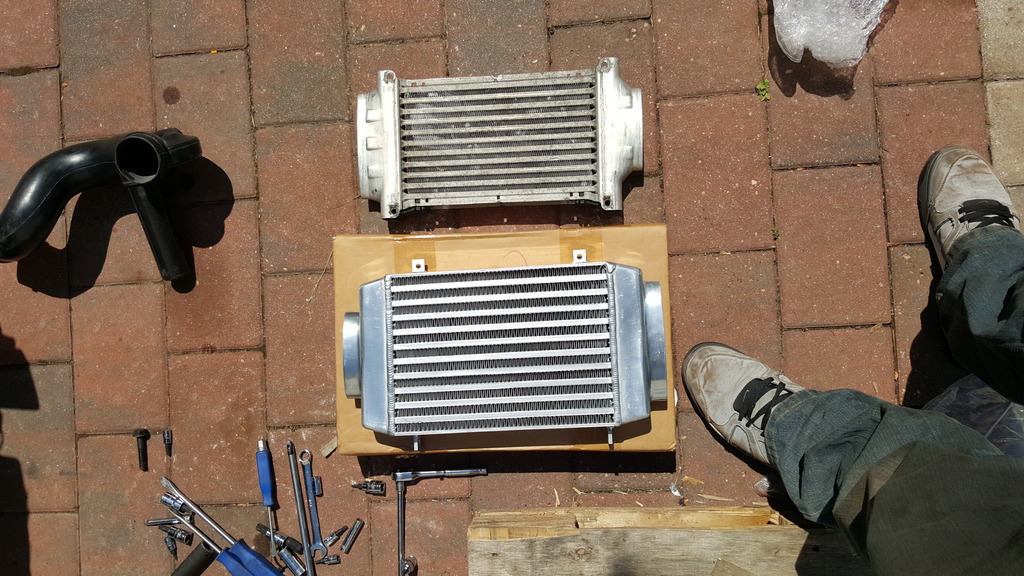
Last IC i upgraded on other turbo car, the boost drop was about 2-3psi and that core was not the much bigger then stock just like this one.
This core if not LXW bigger per say, but it is thicker.
#41
05-17-2016, 03:56 PM
#42
05-17-2016, 07:55 PM
If it doesn't rain tomorrow I'm going to Lower the car and then ill wait for the part i need and take it for an alignment. Looking for someone that is not going to freak out once they see Coilovers and all the non OE suspension parts lol. Last time i went to a shop to get and alignment they where so lost. I had to tell them how to do it. I just wish someone would rent me the alignment machine and let me do my own lol.
#43
05-17-2016, 07:59 PM
It's hard to tell from the pictures, but it looks like that diverter is going to block a lot of air flow to the intercooler. It's hard to tell scale and what's going on with the hood scoop would affect it some but I think it's too restrictive. Check out Alta's diverter, I think it's generally regarded as the best. If you don't buy one it could atleast give you ideas.

Plan on creating a flap and attach it to the Radiator support so it force all the air into the IC.
#44
05-22-2016, 08:43 PM


#45
05-23-2016, 05:13 PM
I look at the picture showing the diverter through the hood scoop and it seems to show that your diverter might work a bit better if it had an upward bow that follows the contour of the hood. Just an observation.
I have used a leaf blower to provide a fairly high volume, high velocity air to see how well scoops and whatnot are working. A bit of ribbon and a blower might show if air is getting above the diverter.
Say, where did you get your radiator? I may be in the market for more cooling on my MINI.
I have used a leaf blower to provide a fairly high volume, high velocity air to see how well scoops and whatnot are working. A bit of ribbon and a blower might show if air is getting above the diverter.
Say, where did you get your radiator? I may be in the market for more cooling on my MINI.
#46
05-23-2016, 06:14 PM
I don't understand what you mean regarding the Bow part.
I plan on attaching a lip to the top and the sides also plan on Attaching a lip to the Rad support, so all the air the comes thru the scoop gets forced down thru the IC. Today i took it for a spin and OMG this really works. I was seeing temps of only 112 max (while sitting in super heavy NYC traffic) and it was averaging anywhere between 92 and 104 while moving from light to light. Today was warmer then it has been at about 75f. I'm happy with it total cost was about $30.
I'm sure when i add the WMI it will be even better. I plan on having 2x250cc nozzle. 1 right into the intake (right after the IC on the horn) and other to spray the IC (this one I'm not too sure yet. I primarily want to use it for cooling.
Regarding the Rad it a very affordable Unit i found on eBay.it actually does a better then the Stock Rad. The temps come down really fast when it the fan kicks in. I can't wait for the tune to tell the tuner to program the Fan to kick in at 200f instead of 220f. As long as you have air flow the temps will stay about 190s or something. I PM you the link.
I still need to make the diverter for the Rad. This will be next after i fix all the little things still needed.

#48
05-23-2016, 07:20 PM
Make the leading edge of the diverter have an upward curve shape, like a frown-face, ⌢ (sorry couldn't resist) but leave the back end straight across. This will give the top of the diverter a slight conical shape that should help to push the air into the IC.
(sorry couldn't resist) but leave the back end straight across. This will give the top of the diverter a slight conical shape that should help to push the air into the IC.
Last edited by Eddie07S; 05-23-2016 at 07:26 PM. Reason: symbol didn't come through
#49
05-23-2016, 07:31 PM
#50
05-23-2016, 08:13 PM
The diverter is 1.5" in the front and tapers off to 1", but i will make all the air go thru the IC eventually.