
Interior/Exterior Joey mod R56!


4th Gear
Joined: Oct 2007
Posts: 510
Likes: 0
From: Kansas City
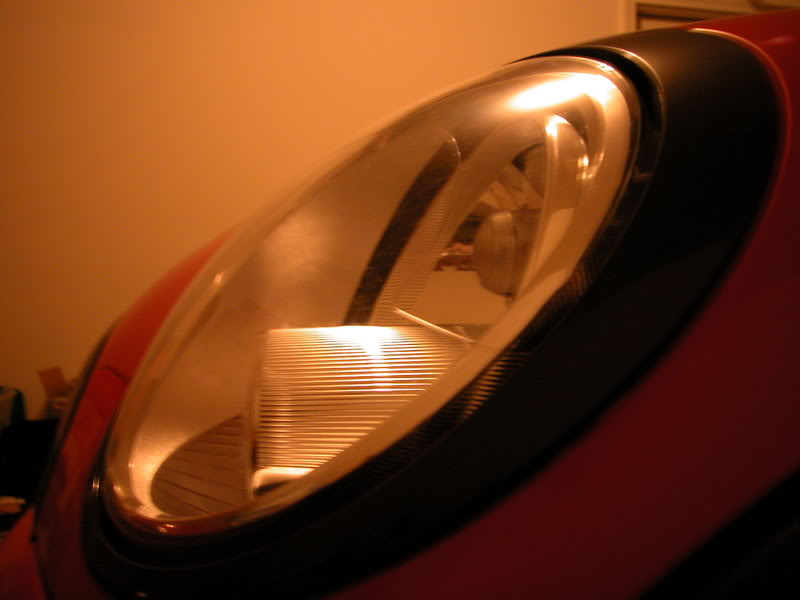
I am thinking of doing this on my non-Xenon headlights, but just the outer rim of the inner workings. If you look at a photo of the non-Xenons you will know what I mean. Basically everything that doesn't look like it is necessary for light projection.


Thread Starter
|
6th Gear
Joined: May 2007
Posts: 1,442
Likes: 0
From: Sacramento, Ca
it took me about 2 cycles because i kept checking on them. I think if you just leave them in the oven for 5 minutes @ 200 degrees 1 cycle may be enough. Try to use the widest screwdriver you can find to pry it open though, just so you dont damage any of the plastic. The sealant is VERY sticky and goopy.
Getting the projector out of the housing is kind of tricky... I forgot to take pictures of the screws i needed to take out but after i figured it out for the first light, the second one went off without a hitch. If you guys are attempting this, take some pix and i will try to point out which screws need to be taken out first and whatnot.
Getting the projector out of the housing is kind of tricky... I forgot to take pictures of the screws i needed to take out but after i figured it out for the first light, the second one went off without a hitch. If you guys are attempting this, take some pix and i will try to point out which screws need to be taken out first and whatnot.

3rd Gear
Joined: Dec 2006
Posts: 297
Likes: 0
From: La Mirada, CA
haha, congrats on the project. if there are any white mini's that are thinking about doing this please do so :D
I'm wondering how it'll turn out on a white mini.
Friend has a impreza and did this, looks amazing, i guess the reason why it's called joey mod is beacuse some guy named joey did this mod..
the subaru guys usually call it "baking the headlights" (i think), lol. but yeah the mod looks beautiful. congrats!
Thread Starter
|
6th Gear
Joined: May 2007
Posts: 1,442
Likes: 0
From: Sacramento, Ca
on nasioc i think it has been referred to as the koeji *sp mod or something like that as well.
I think it would look awesome with white r56 MINIs, i know it looked real good on the r53.
I think it would look awesome with white r56 MINIs, i know it looked real good on the r53.

Thread Starter
|
6th Gear
Joined: May 2007
Posts: 1,442
Likes: 0
From: Sacramento, Ca
putting it together took maybe 30-40 mins per light to reassemble. I did not use more glue as there was more than enough sealant. I just closed up the light, stuck it back in the oven, then after it got heated up again, i pushed the two halves together as hard as i could. You can hear little air bubbles popping that were trapped in the sealant.
4th Gear
Joined: Oct 2007
Posts: 510
Likes: 0
From: Kansas City
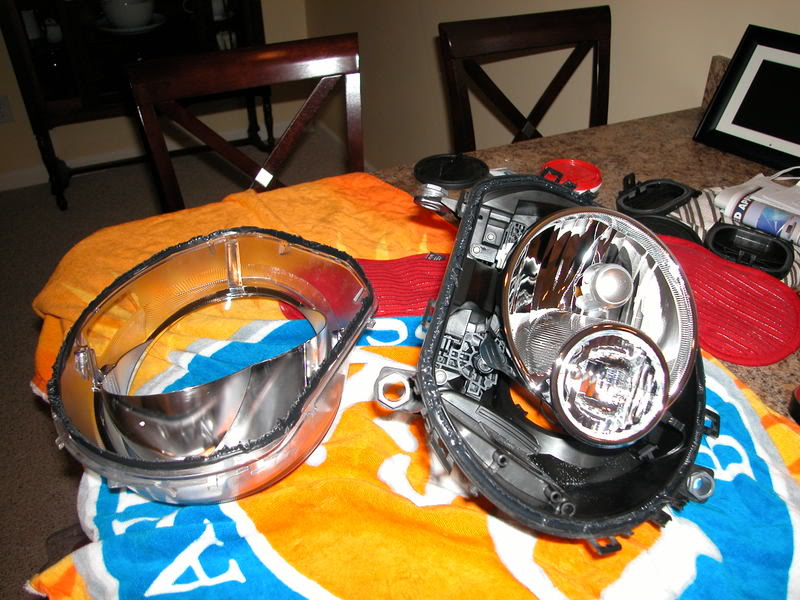
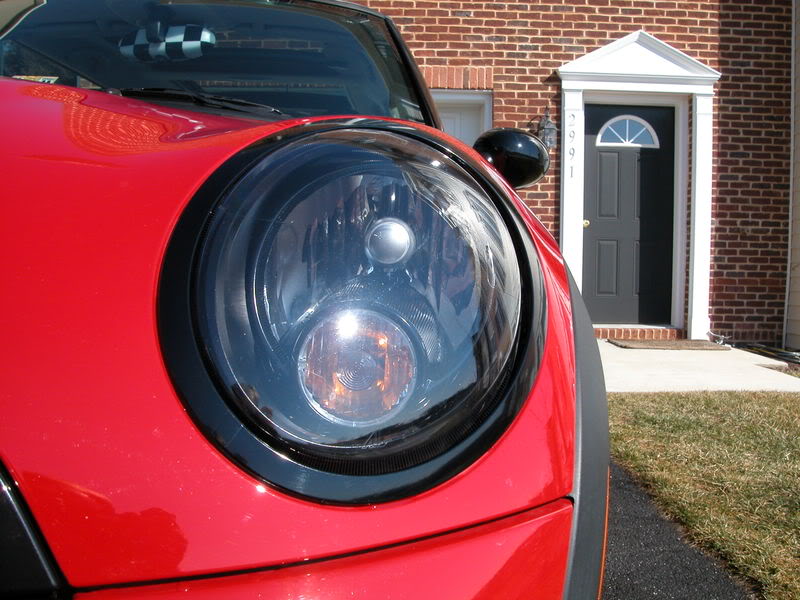
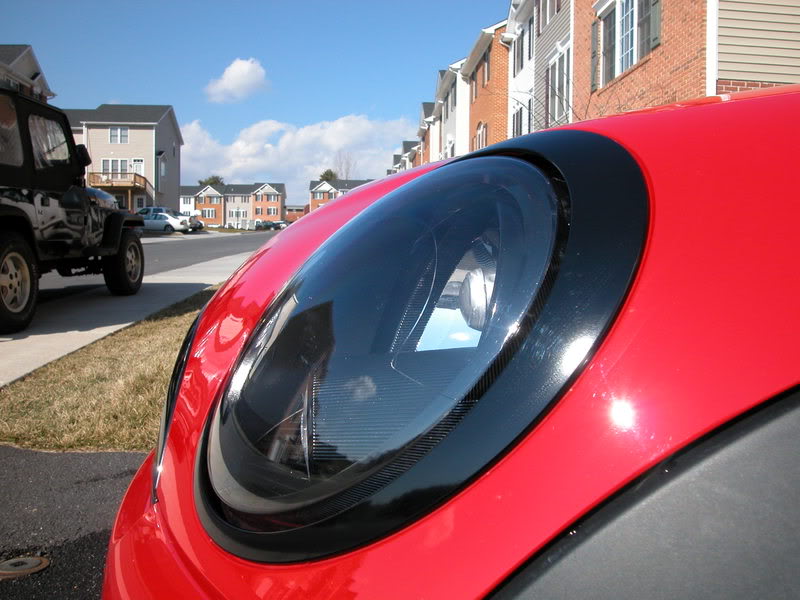
If I were to Joey Mod the standard headlights, what does everyone think about affecting the light pattern if I paint the "tube" holding the turn blinker lense? In the following photo, I would paint the outer piece black. That is a no brainer. But I also want to paint the "tube" on the inner piece. I really don't think it would be a problem. Thoughts?

Thread Starter
|
6th Gear
Joined: May 2007
Posts: 1,442
Likes: 0
From: Sacramento, Ca
If I were to Joey Mod the standard headlights, what does everyone think about affecting the light pattern if I paint the "tube" holding the turn blinker lense? In the following photo, I would paint the outer piece black. That is a no brainer. But I also want to paint the "tube" on the inner piece. I really don't think it would be a problem. Thoughts?

4th Gear
Joined: Oct 2007
Posts: 510
Likes: 0
From: Kansas City
I think that is correct. I was looking at the reflection of my headlights in the back of a truck at a stoplight last night and the light pattern was all from the back reflector and the "tube" was dark showing that there is no meaningful light reflection on the tube. At least not in the forward direction. Some negligible light might scatter upward or to the side, but not useful light. The parabolic reflector handles the useful light spread.


I'm going to do it on a PW R56, but in body color instead of black. Just waiting to get more PW paint. I'm not sure if it will even be that distinguishable from chrome. If I don't like the look, I'll switch to flat black.
Thread Starter
|
6th Gear
Joined: May 2007
Posts: 1,442
Likes: 0
From: Sacramento, Ca
there were some R53 owners who did it body color and it looked good. I think they painted, or wrapped, the chrome in PW as well.
Ok here we go. This is honestly a really straightforward mod. Its nerve-racking, but once you take the first light out of the oven it gets easier.
First, take the headlights off, they're held on by 4 bolts. Next, remove the bulbs. To get to the bulbs, you need to remove the 2 latched covers on the back of the headlights. I didn't take any pics of this, but they'd be hard to miss. Turn both bulbs counterclockwise and pull them out. Next, bake the lights at 200 degrees for 6 minutes.
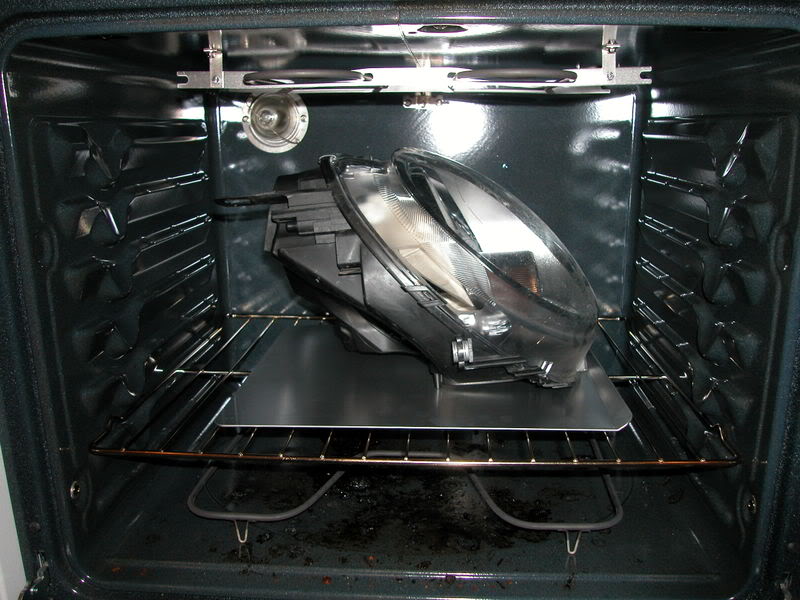
The sealant is extremely sticky, so even after 6 minutes it was really difficult to pry them off. You could probably cook them for longer or at a higher temp, but I didn't want to chance it.
Once the lens is off it looks like this:
I left the reflector assembly in the headlight and taped it up to paint. I didn't see any reason to remove it as there's nothing vital that can't be painted around it. Here it is all taped up. I also left the turn signal lens in because its easier to tape up the lens.
All taped up:
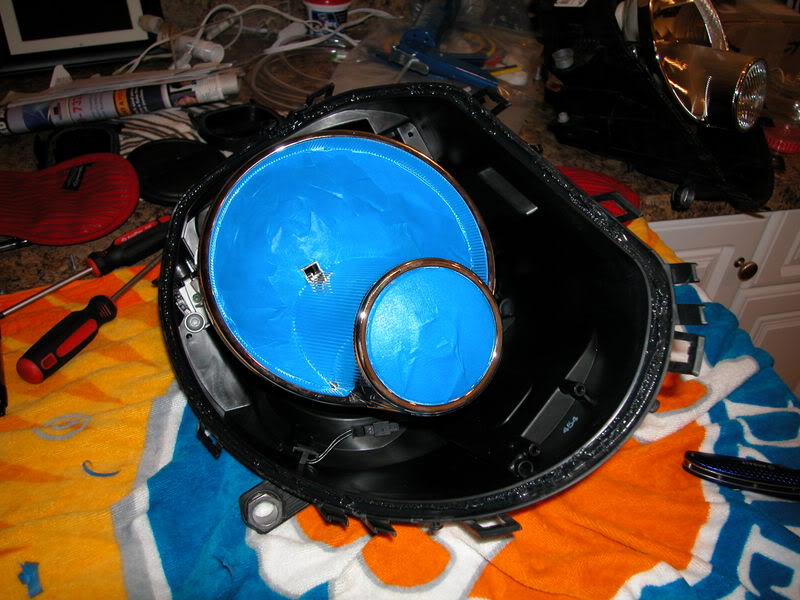
Taping it is a royal pain in the ***. I used 2" painters tape and used a razor blade to trim it up. I also used some 1" painters tape to help get to the tight spots.
Next, there's the piece thats attached to the lense. These are held on by 4 screws.
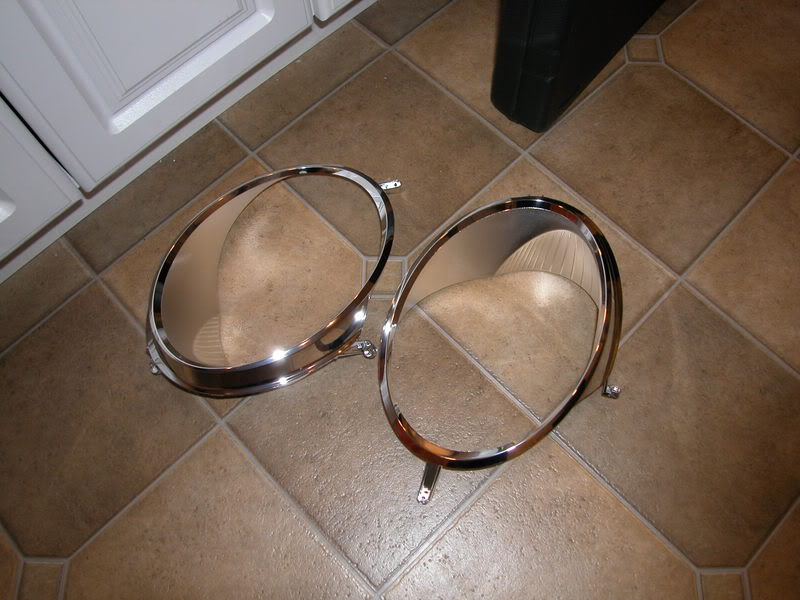
These need to be roughed up with some steel wool in order to take to the Krylon fusion paint. I learned this the hard way :( It would also be a good idea to rough up any part of the reflector piece that is smooth chrome as it will also not take the paint as well.
Here it is all painted up:

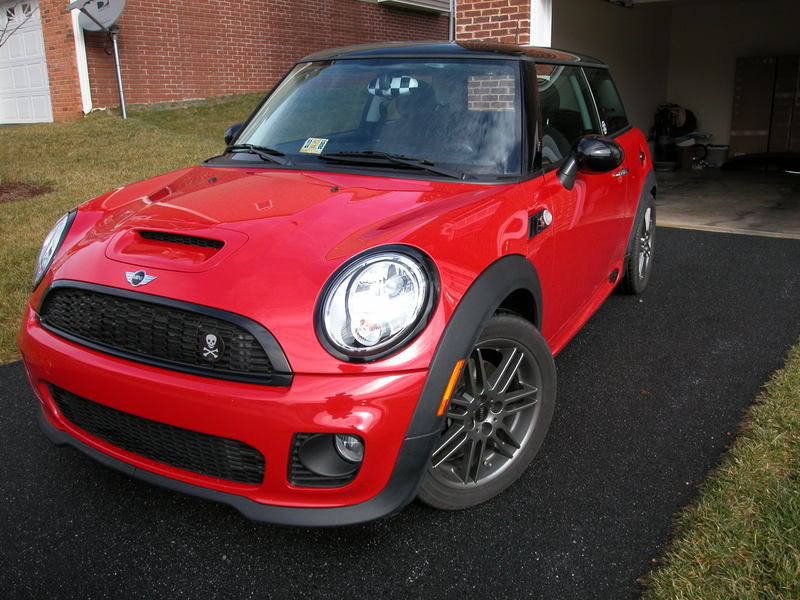
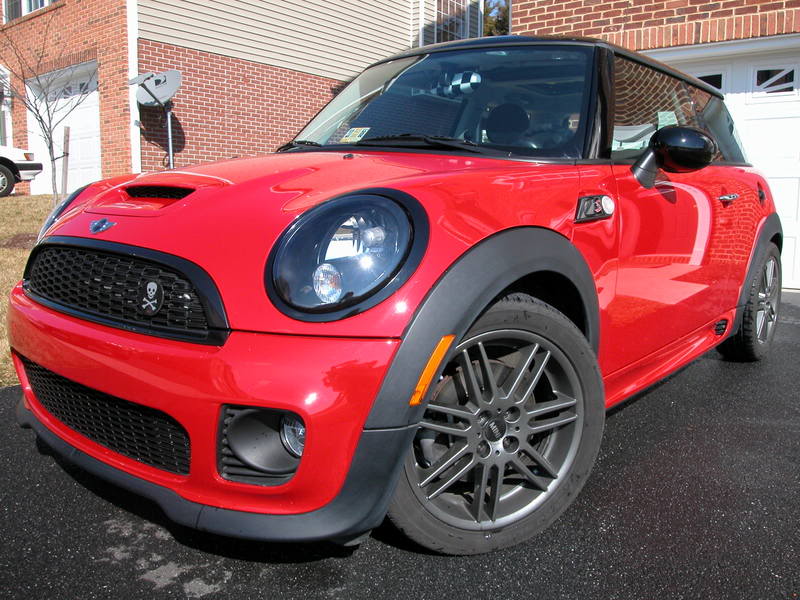
Then, its just a matter of reassembling them, shoving them back in the oven to loosen up the sealant and throwing them back on the car. Here's some before and after shots

I did not paint the bulb shield piece and I will probably go back and do that later. It is made of metal and therefore may need a different kind of paint. I used semi-satin Krylon Fusion spray paint and it worked great. I applied 3 coats to each piece. Overall it took about 4 hours, but only about an hour of that was actually spent working on the lights.
This mod looks more intimidating than it actually is. I would highly recommend it to anyone, even if you don't have any experience working with cars.
First, take the headlights off, they're held on by 4 bolts. Next, remove the bulbs. To get to the bulbs, you need to remove the 2 latched covers on the back of the headlights. I didn't take any pics of this, but they'd be hard to miss. Turn both bulbs counterclockwise and pull them out. Next, bake the lights at 200 degrees for 6 minutes.
The sealant is extremely sticky, so even after 6 minutes it was really difficult to pry them off. You could probably cook them for longer or at a higher temp, but I didn't want to chance it.
Once the lens is off it looks like this:
I left the reflector assembly in the headlight and taped it up to paint. I didn't see any reason to remove it as there's nothing vital that can't be painted around it. Here it is all taped up. I also left the turn signal lens in because its easier to tape up the lens.
All taped up:
Taping it is a royal pain in the ***. I used 2" painters tape and used a razor blade to trim it up. I also used some 1" painters tape to help get to the tight spots.
Next, there's the piece thats attached to the lense. These are held on by 4 screws.
These need to be roughed up with some steel wool in order to take to the Krylon fusion paint. I learned this the hard way :( It would also be a good idea to rough up any part of the reflector piece that is smooth chrome as it will also not take the paint as well.
Here it is all painted up:
Then, its just a matter of reassembling them, shoving them back in the oven to loosen up the sealant and throwing them back on the car. Here's some before and after shots
I did not paint the bulb shield piece and I will probably go back and do that later. It is made of metal and therefore may need a different kind of paint. I used semi-satin Krylon Fusion spray paint and it worked great. I applied 3 coats to each piece. Overall it took about 4 hours, but only about an hour of that was actually spent working on the lights.
This mod looks more intimidating than it actually is. I would highly recommend it to anyone, even if you don't have any experience working with cars.
My wife just finished wrapping the top grille surround in black, and she's about to start the bottom. I just did a test wrap of the gas cap to see if I'd like it in black, but I think I'm going to like it in PW better.
For anyone considering doing their own wrapping, skip the frustration and sore thumbs and just order them from Lyle

