Drivetrain My build. Teaser photos and updates


#152
 02-25-2014, 09:03 AM

nah.
Those were pictures from the company who made it when they were shipping it. Picked it up at the post office this morning. (required a signature for delivery.. and you know.. 8-5 job... means I am not at home. Silly post office.)
Those were pictures from the company who made it when they were shipping it. Picked it up at the post office this morning. (required a signature for delivery.. and you know.. 8-5 job... means I am not at home. Silly post office.)
#153
02-26-2014, 07:26 AM


#155
02-26-2014, 08:59 AM

#157
02-26-2014, 12:19 PM
Platinum Sponsor
This thread is great. Eye candy for the fabricators.
__________________

MINI Guru/ MINI Owner Since 2004 | NEW Lifetime Part Replacement | Local Pickup
Milltek | Genuine MINI | Forge Motorsport | NM Engineering | ECS Performance | M7 Speed
Customer Service Hours: 8am-8pm EST|Sales Team Hours: 8am-11pm | SAT 10am-7pm 800.924.5172
MINI Guru/ MINI Owner Since 2004 | NEW Lifetime Part Replacement | Local Pickup
Milltek | Genuine MINI | Forge Motorsport | NM Engineering | ECS Performance | M7 Speed
Customer Service Hours: 8am-8pm EST|Sales Team Hours: 8am-11pm | SAT 10am-7pm 800.924.5172
#158
02-26-2014, 08:15 PM
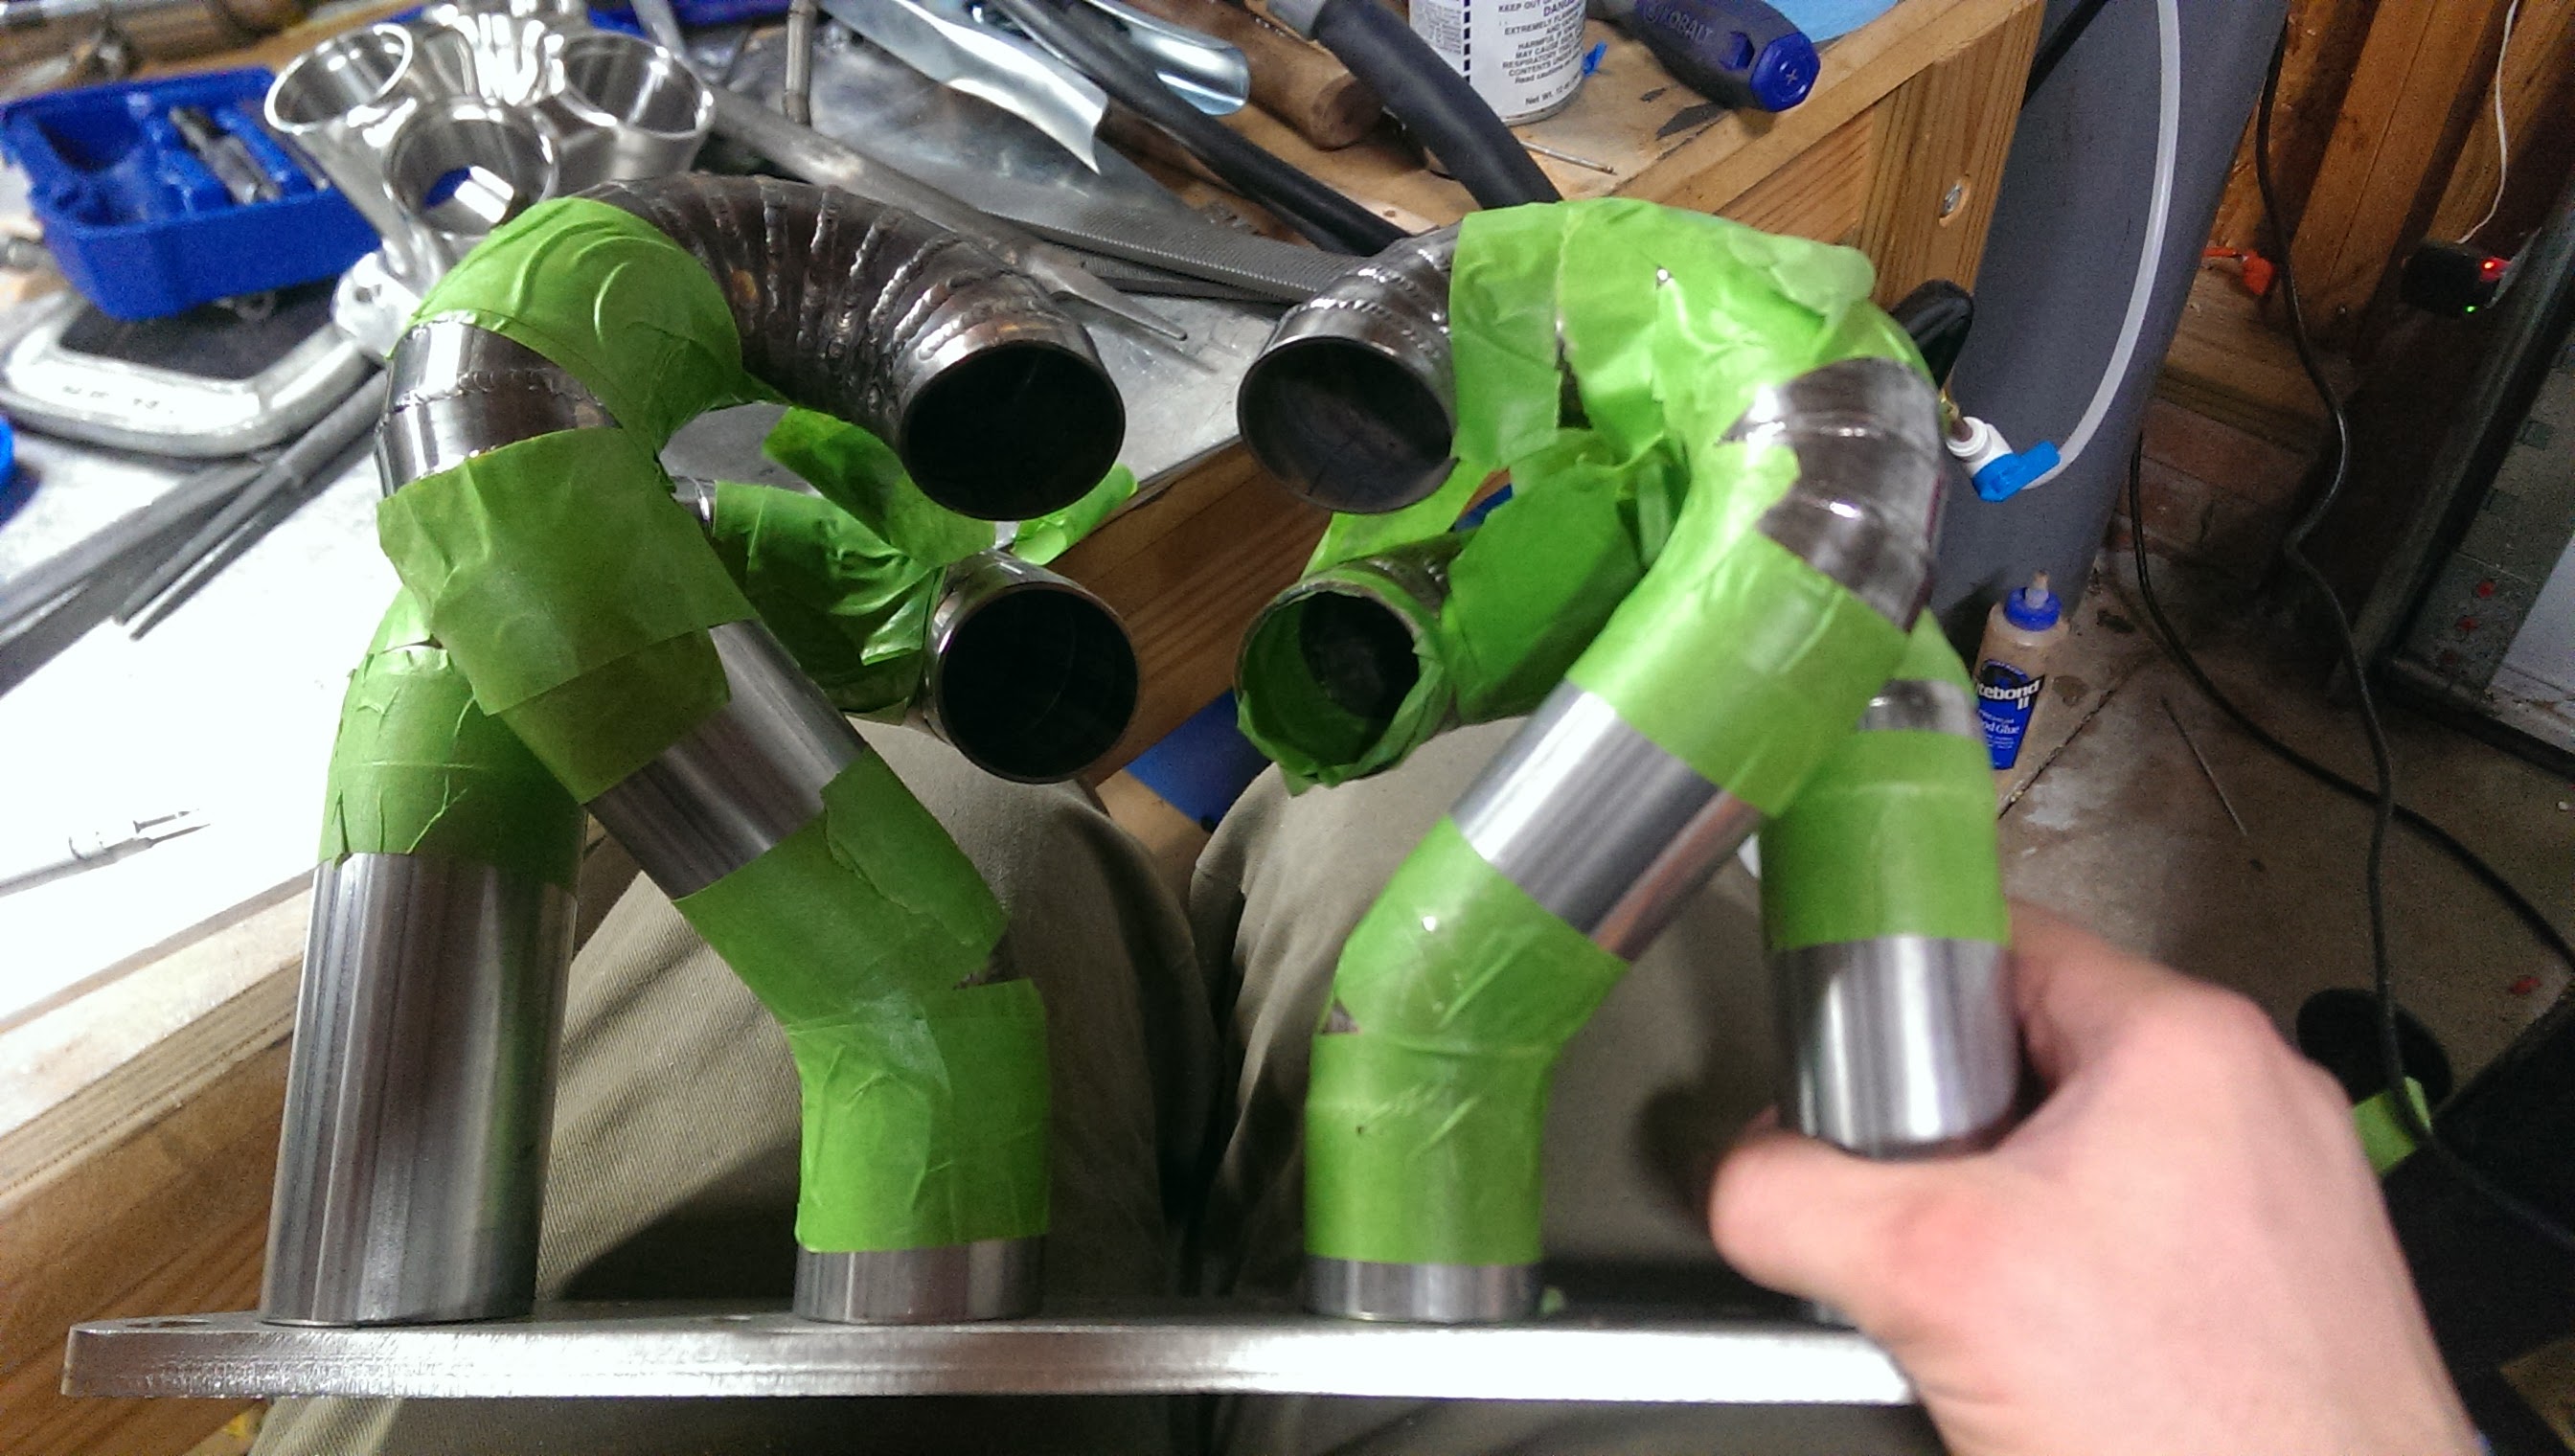
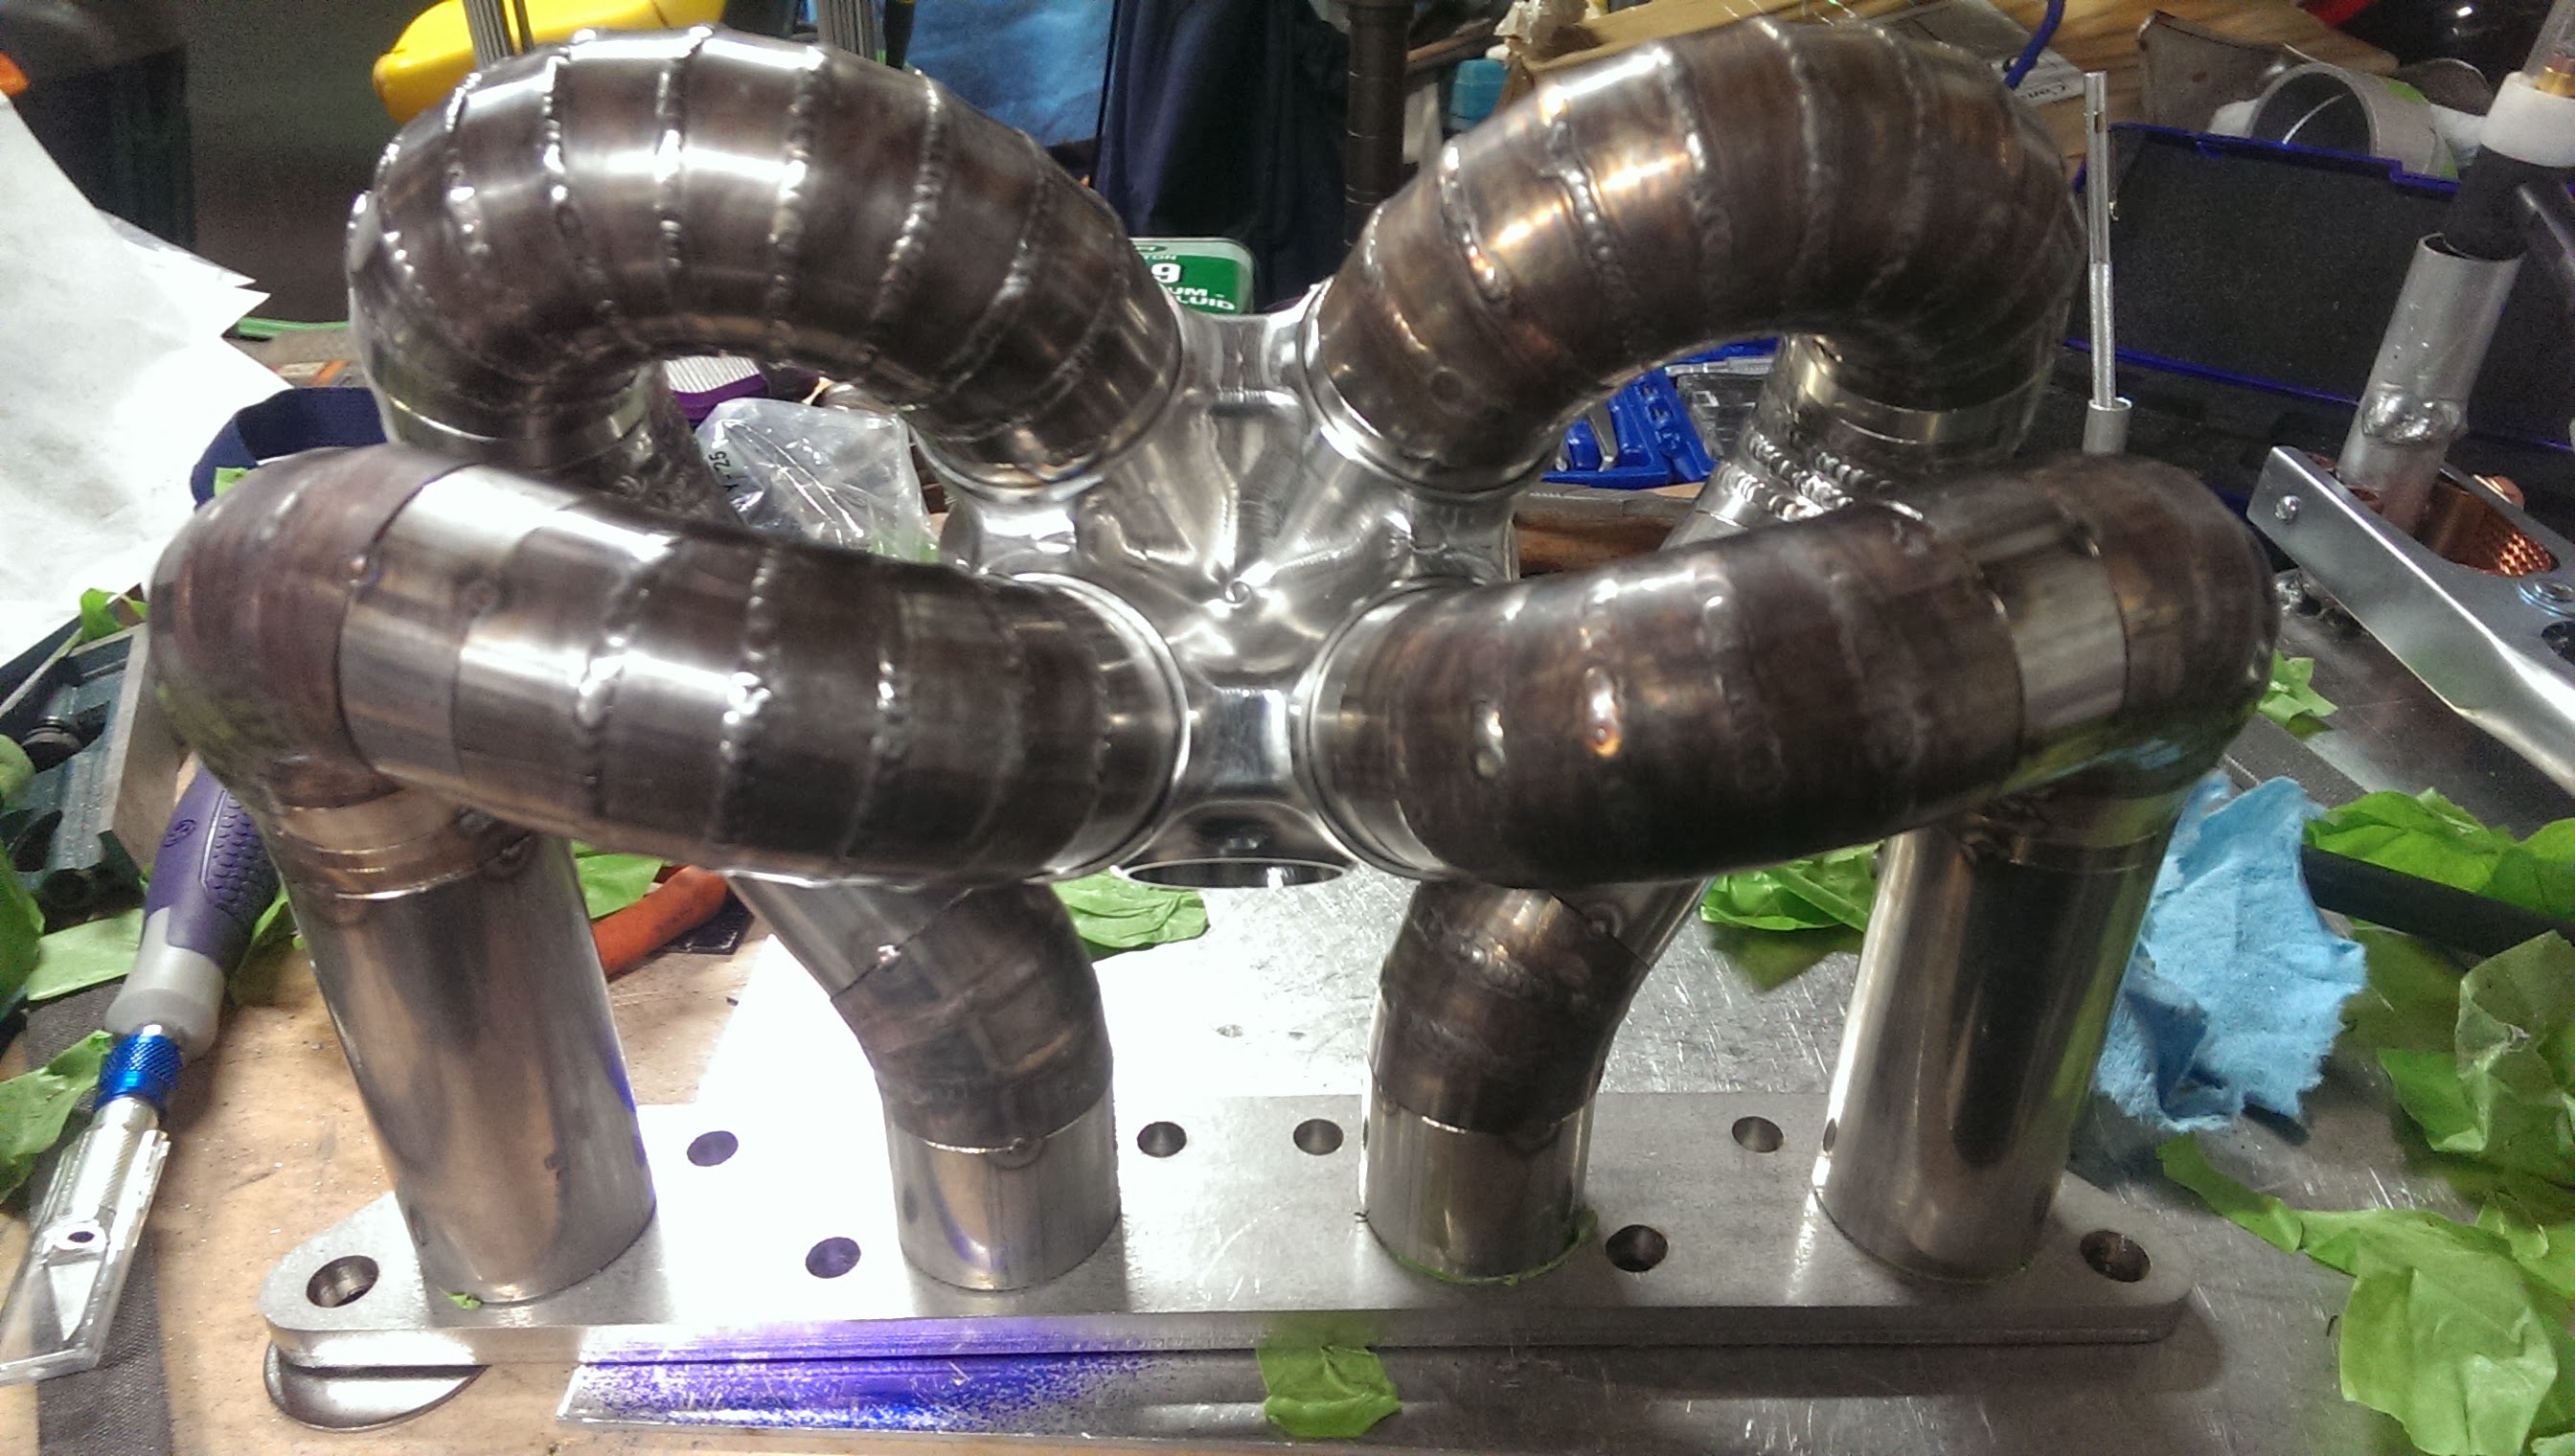
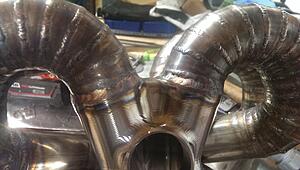
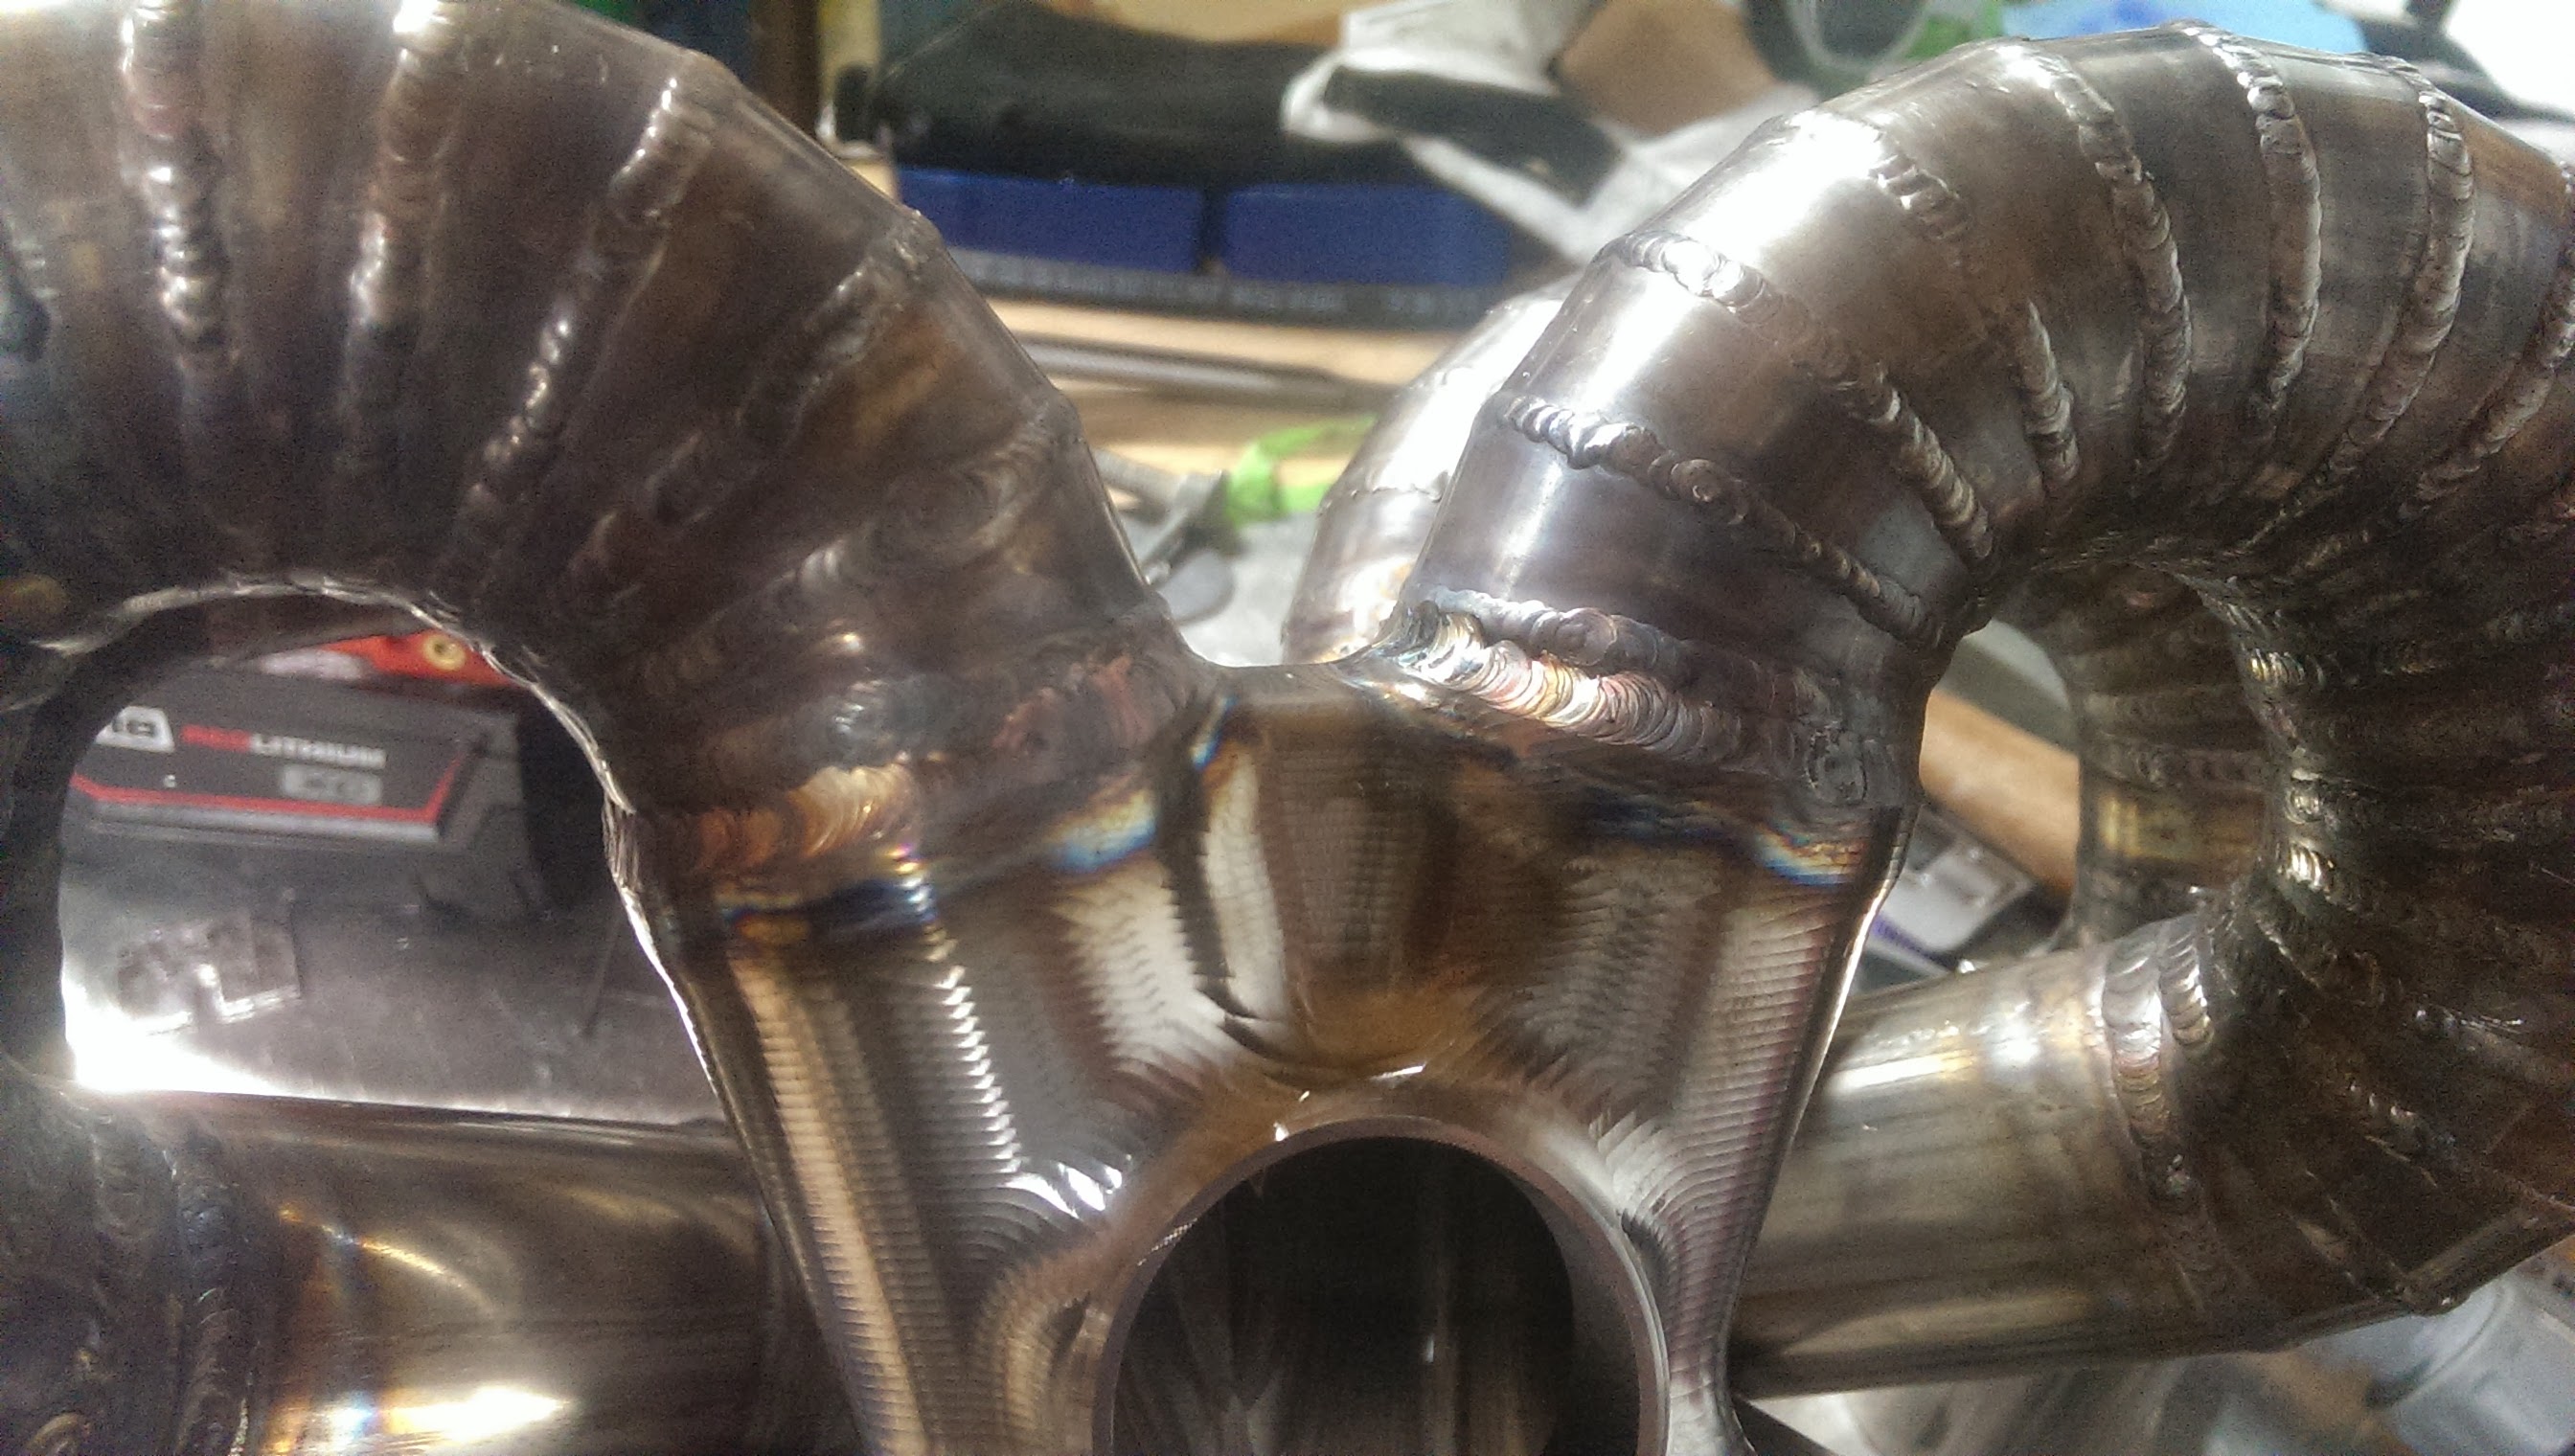
well after 3 hours of cutting, filing, sanding, cutting again. (on top of many other things, the guy who machined the collector made the primary ports 1.625" exact. As I asked. Silly me meant to ask for 1.625 +0.005..0.010 (clearance fit) )
aka. primaries did not want to go into the collector, so it took a good bit of sanding on the last little straight piece to bring its OD down 0.003" all the way around.
Anywho.
NO MORE TAPE!!!!
and its purdy :3
Oh.. since it may be asked... The white bits at the header flange are 3d printed blocks I made that are the shape of the D port on one side and step to the ID of the tubing. Made them just to keep things centered up while I was doing the fab work.
Collector is currently just press fit (not welded) for mock up.
And yes I know it is not perfectly symetrical, but one of the "155" degree bends came out to 157, the other to 154, 90's came out to 93, 93, 93, 91, , 45's came out to 46 each... etc etc.
really pretty proud of how close they are when you back calculate how much that makes each cut off (<.3�)
but since the bends were not the same, it moved thing around slightly. But it all still fits, and I think it is still drop dead sexy.
And straights are just tac'd in place (3 spots each)

mmmmmm
aka. primaries did not want to go into the collector, so it took a good bit of sanding on the last little straight piece to bring its OD down 0.003" all the way around.
Anywho.
NO MORE TAPE!!!!
and its purdy :3
Oh.. since it may be asked... The white bits at the header flange are 3d printed blocks I made that are the shape of the D port on one side and step to the ID of the tubing. Made them just to keep things centered up while I was doing the fab work.
Collector is currently just press fit (not welded) for mock up.
And yes I know it is not perfectly symetrical, but one of the "155" degree bends came out to 157, the other to 154, 90's came out to 93, 93, 93, 91, , 45's came out to 46 each... etc etc.
really pretty proud of how close they are when you back calculate how much that makes each cut off (<.3�)
but since the bends were not the same, it moved thing around slightly. But it all still fits, and I think it is still drop dead sexy.
And straights are just tac'd in place (3 spots each)
mmmmmm


#161
02-27-2014, 05:08 PM

2nd Gear
Join Date: Oct 2013
Location: St. Xavier University
Posts: 119
Likes: 0
Received 0 Likes
on
0 Posts
#162
02-28-2014, 10:02 AM
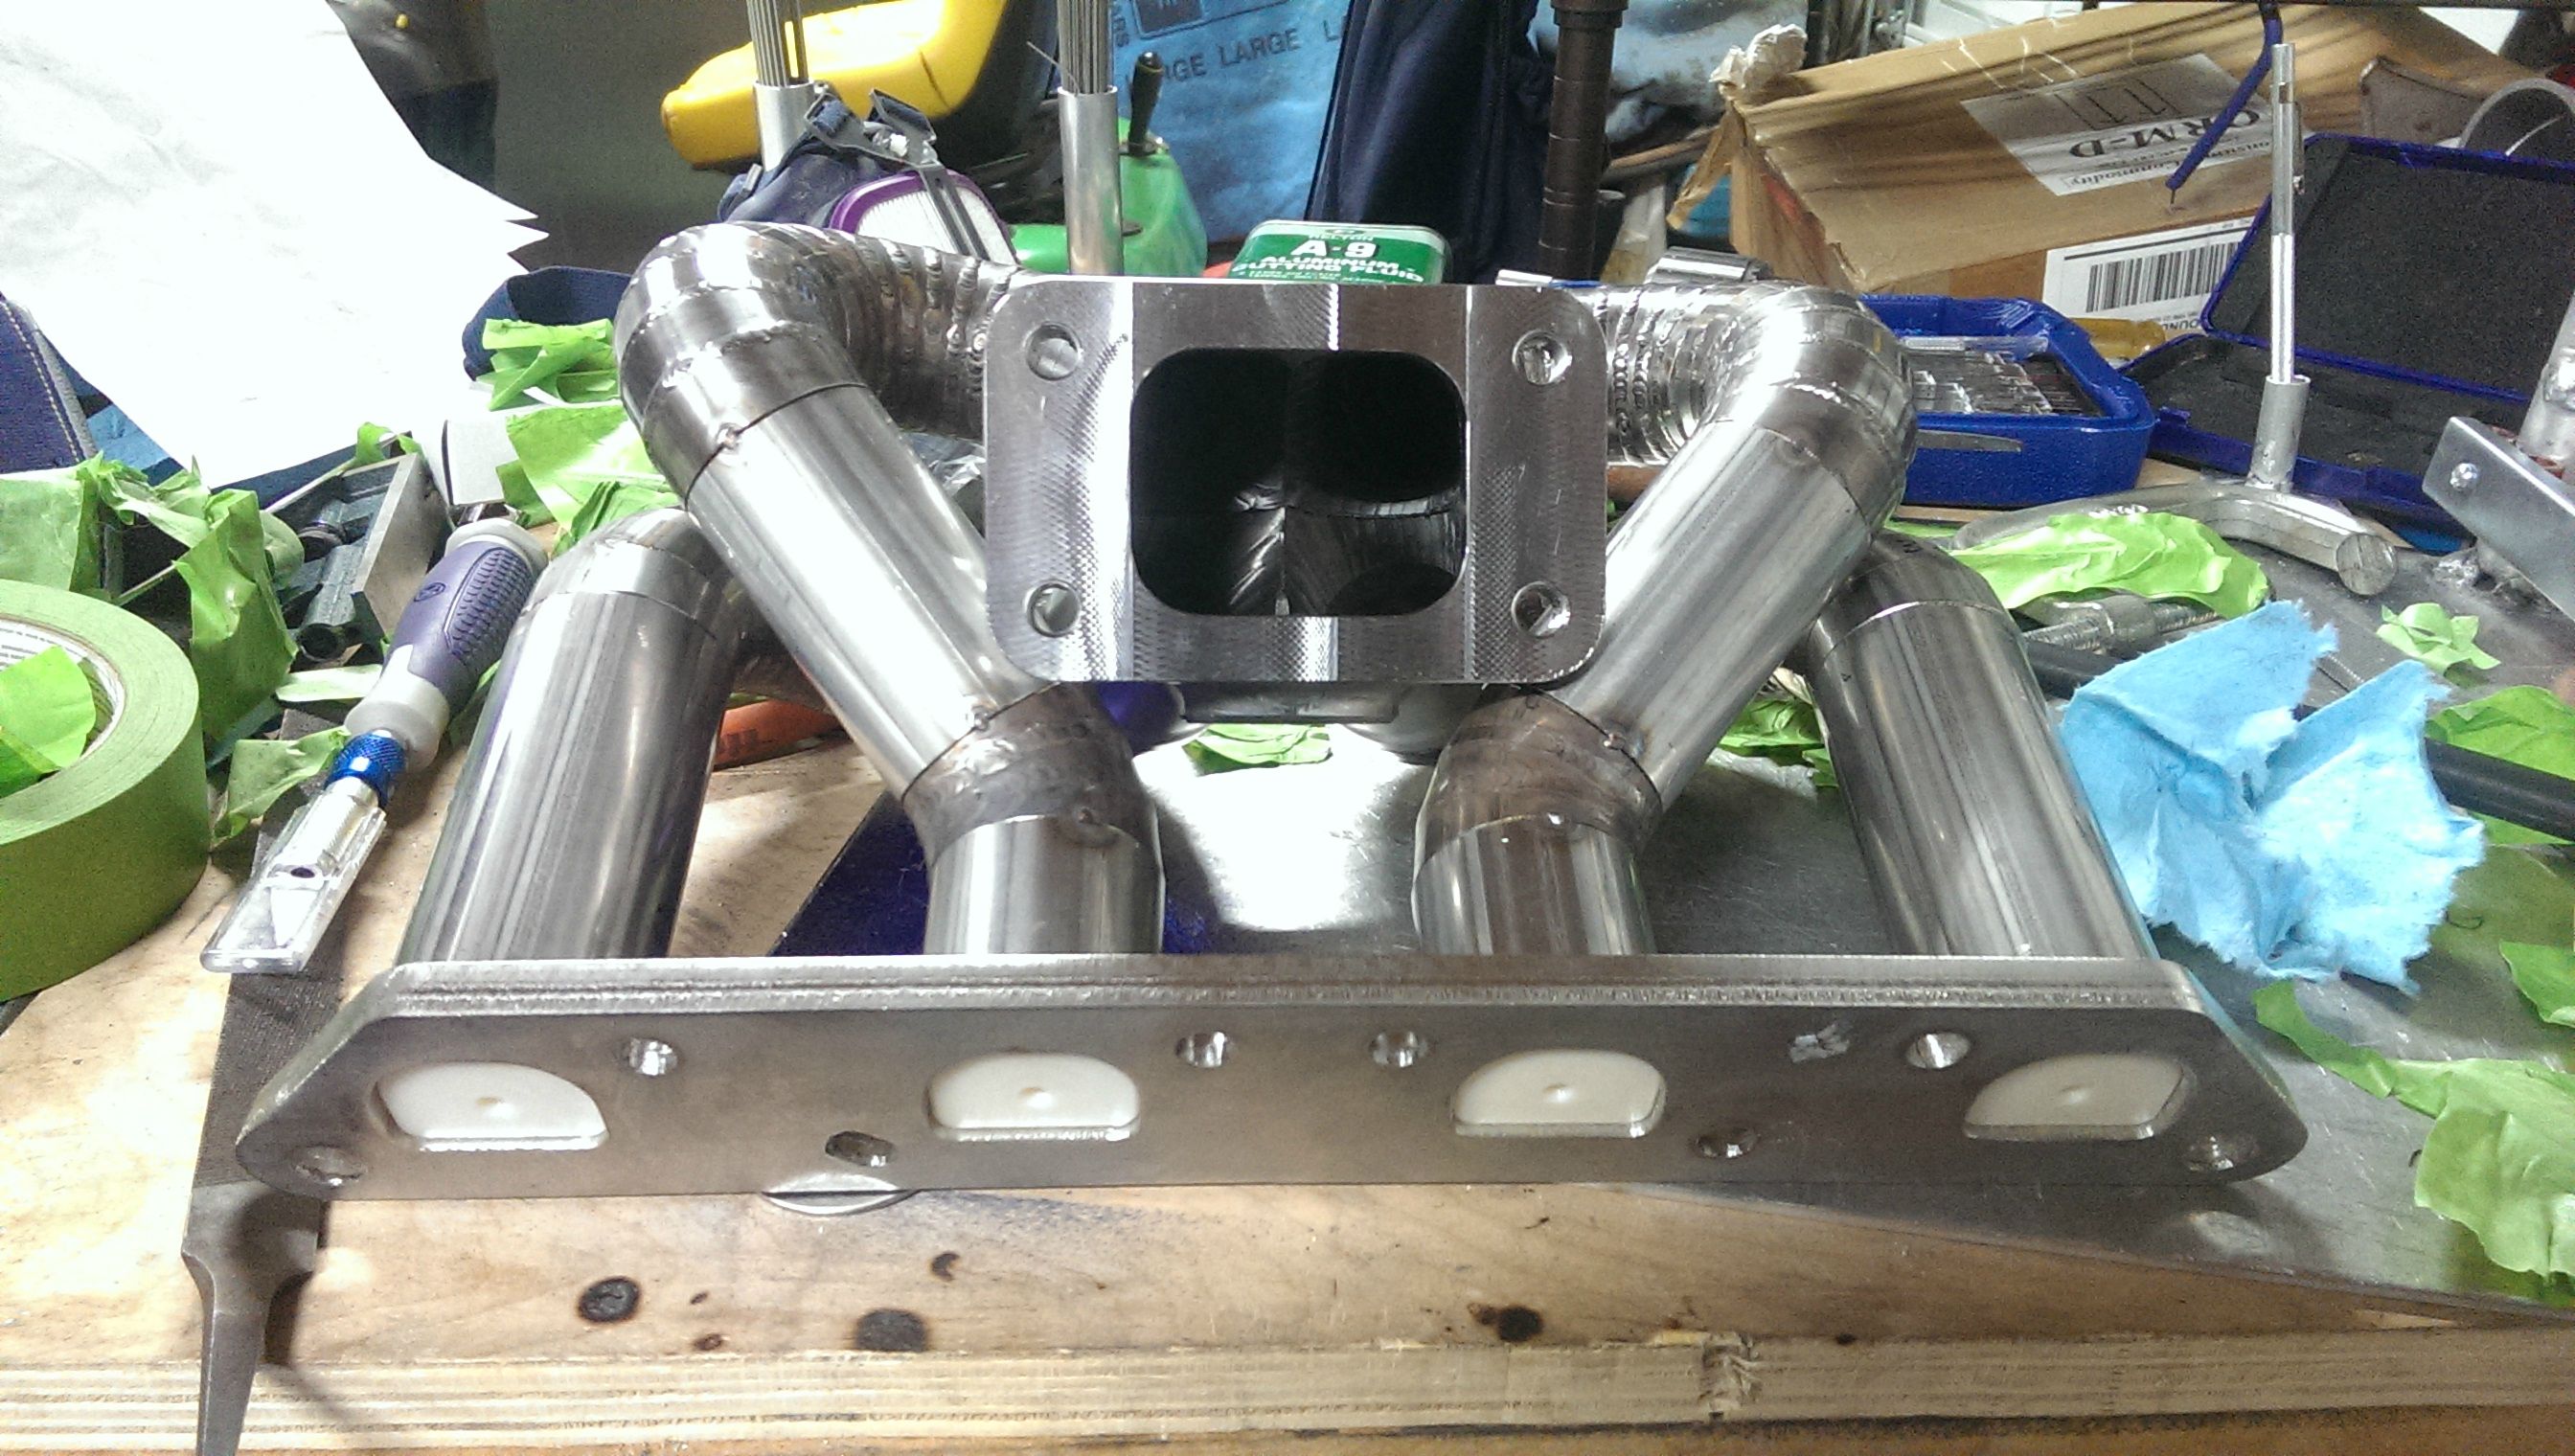
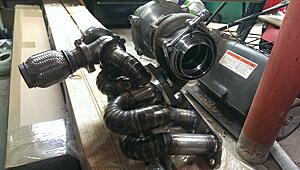
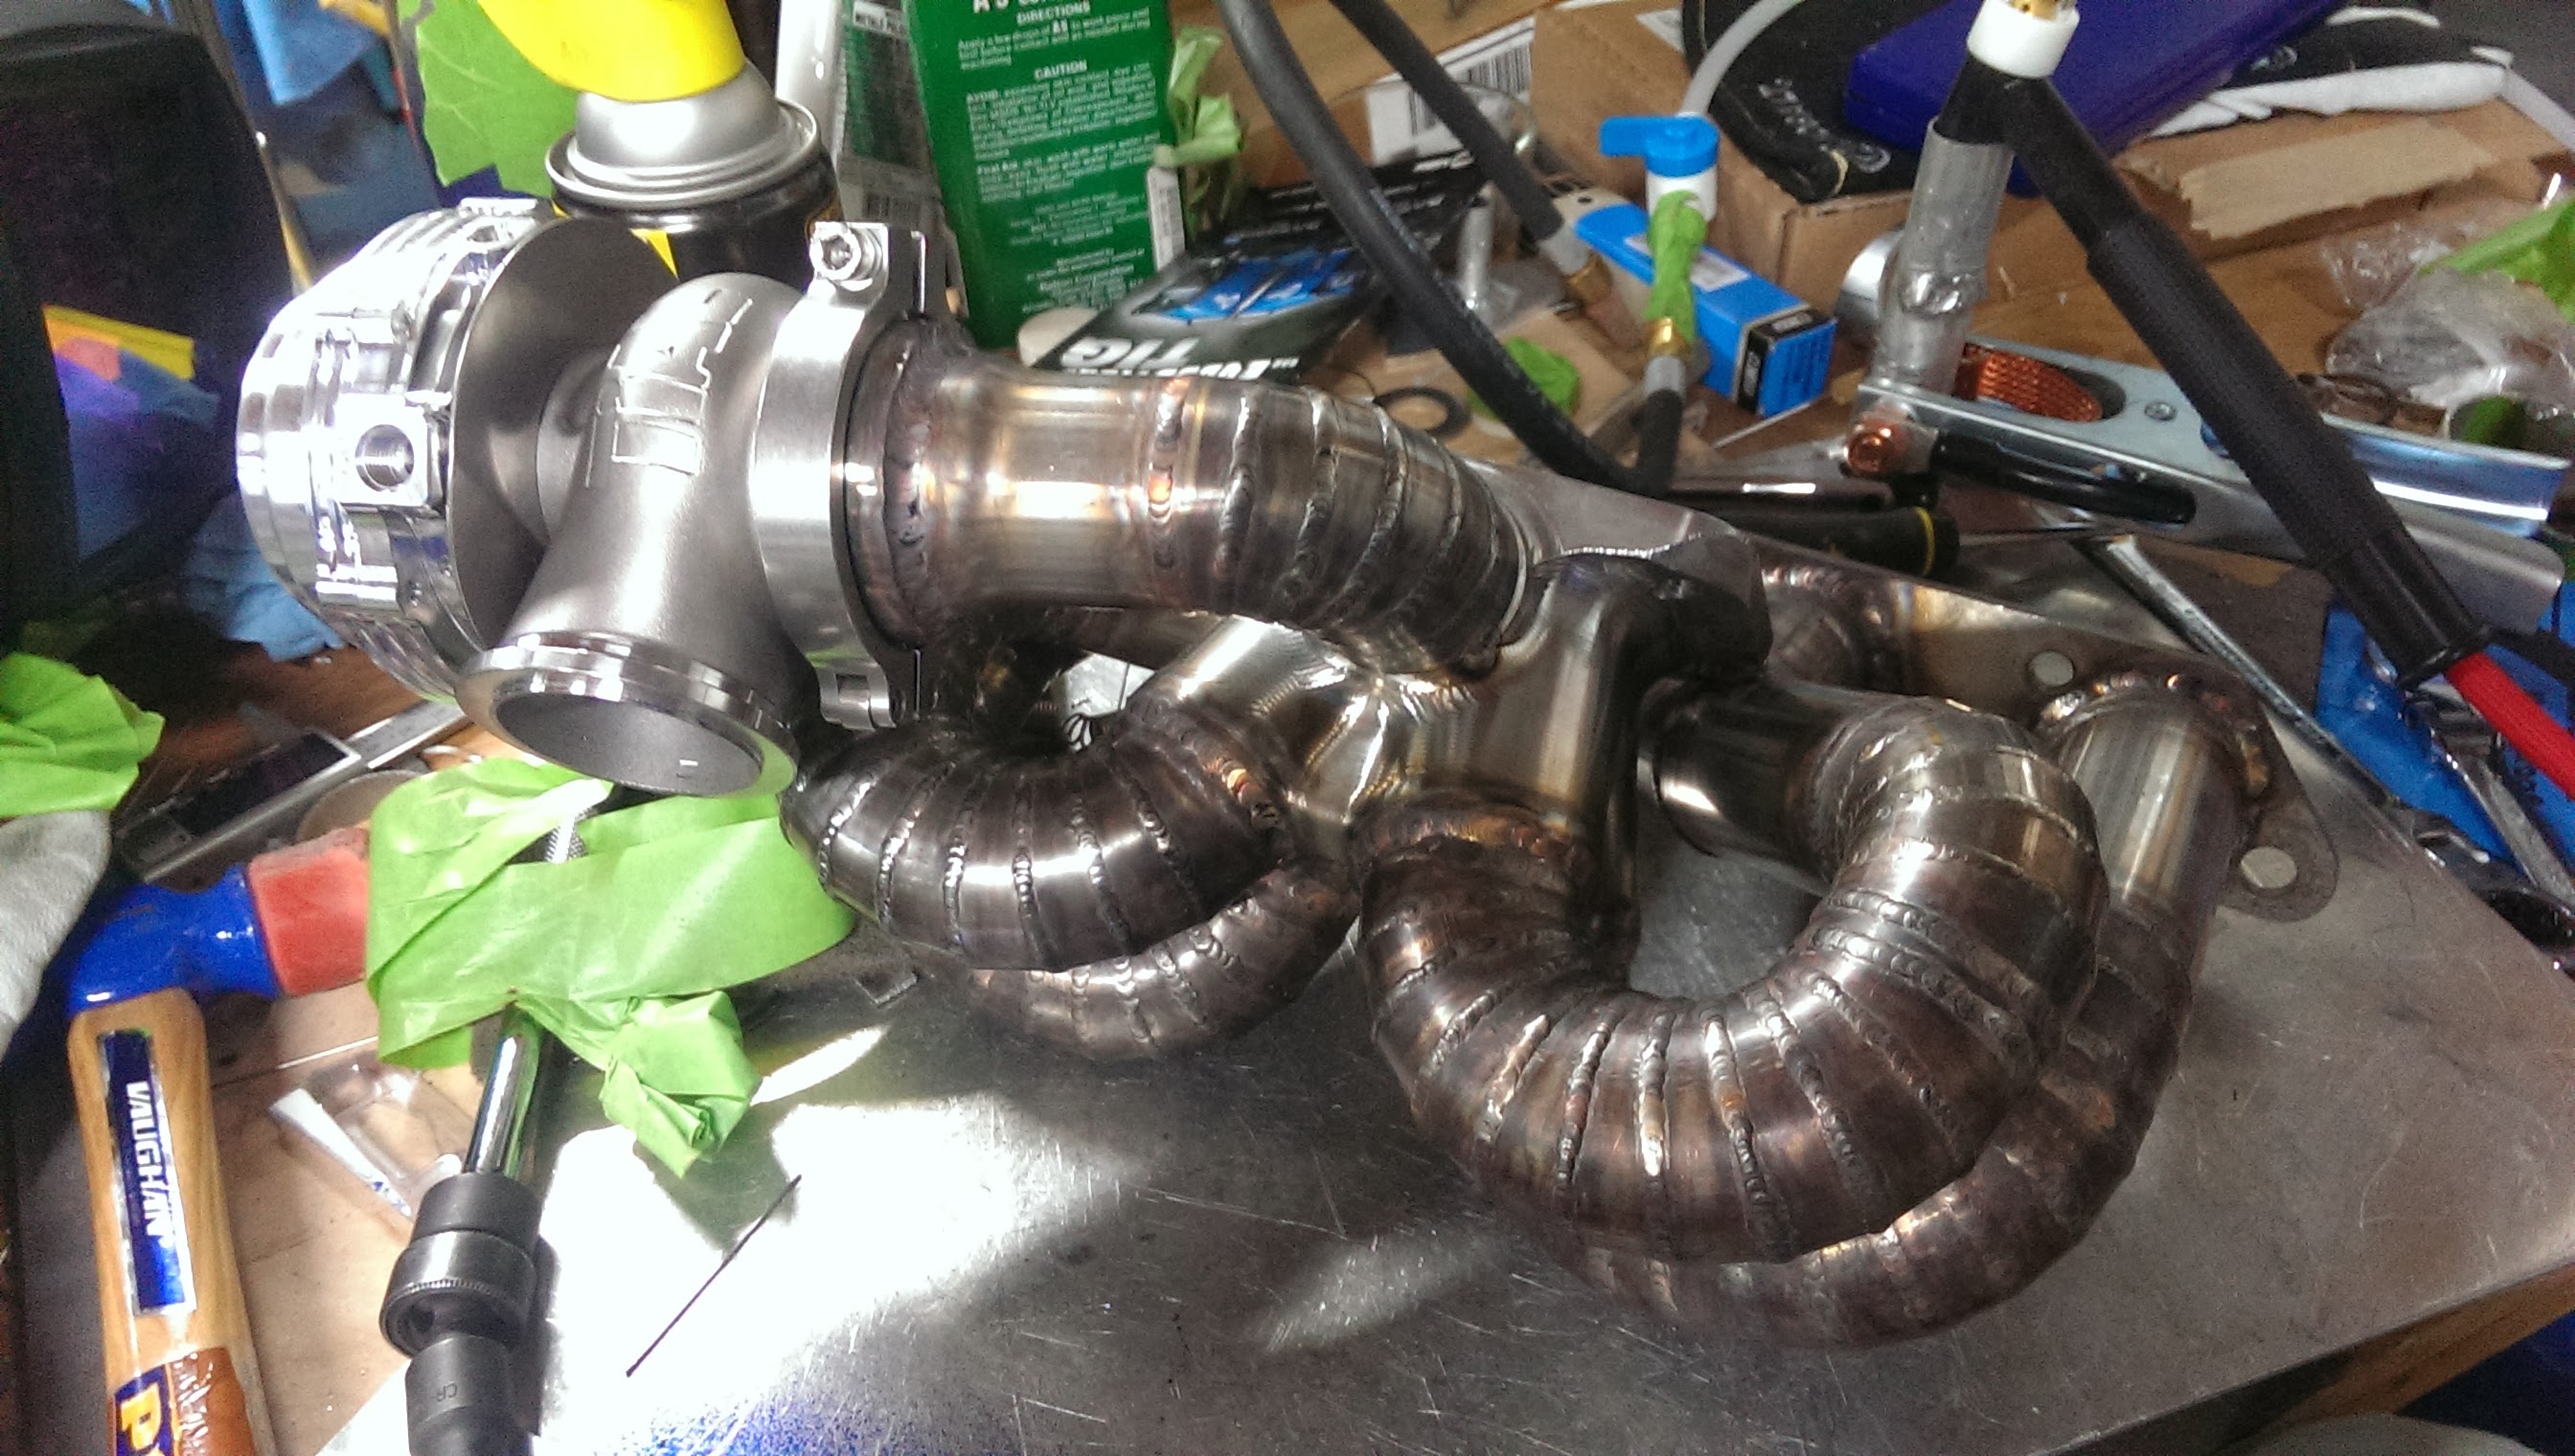
well I ended up making a last minute judgement call on welding this thing up, and flipped the collector around so that the waste gate port faced up instead of down.
I think it will give me a little more breathing room and make things easier to connect
Anywho... blah blah blah.. nobody reads this ***** anyways right?
:3
well, have some more popcorn

back purge was a goin.
(blew through over 160 cuft of argon welding these things up.... and got a foot cramp from pedal modulation...)
just for a little extra ridgidity..
May add in some plate to stiffen it up even more.
Also thinking about adding bolt on supports that bolt into the factory heat shield location to help out.... probably overkill at that point...
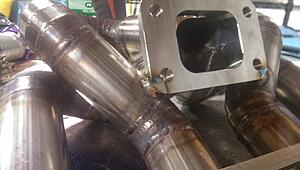
welding to the collector! (what an absolute PITA in some of the spots under those bends. First two went on fine, but doing the inner two... the torch did not fit.
Had to get... creative...
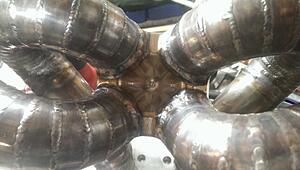
test fit!
I think it will give me a little more breathing room and make things easier to connect
Anywho... blah blah blah.. nobody reads this ***** anyways right?
:3
well, have some more popcorn
back purge was a goin.
(blew through over 160 cuft of argon welding these things up.... and got a foot cramp from pedal modulation...)

just for a little extra ridgidity..
May add in some plate to stiffen it up even more.
Also thinking about adding bolt on supports that bolt into the factory heat shield location to help out.... probably overkill at that point...

welding to the collector! (what an absolute PITA in some of the spots under those bends. First two went on fine, but doing the inner two... the torch did not fit.
Had to get... creative...

test fit!


#165
02-28-2014, 11:48 AM

#166
03-01-2014, 05:05 PM
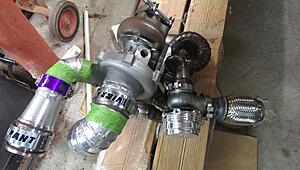
So I boughts s giant (well.. large-ish) block of aluminum, drilled and tapped some holes in it and started welding on the flange.
Promptly ran out of argon.. again,
But!
I did get my little 15� wedges added in and everything tacked up at least (one primary is 100% finished, another has about 30% of the last two welds done, the other two are just tac'd up)
but man oh man did I cut it close!
Less than a finger of clearance to the starter motor heat shield, and almost touching the one over the oil filter housing (but it is not)
May send it out to get swaintech coated :3
But I think it would actually be okay

#168
03-01-2014, 06:13 PM
#170
03-03-2014, 04:14 AM
#171
03-06-2014, 04:42 PM
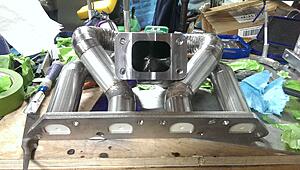
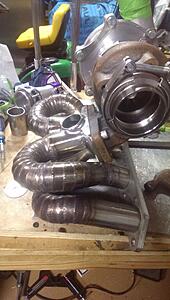
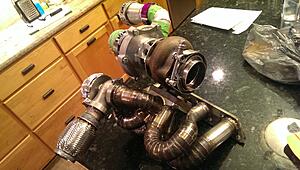
well I guess I should start this off by saying that the main part of the manifold is finished!
Woohoo!!
forgot to take pictures of that though.
I will get them to you guys later. haha
instead have a picture of some of the changes to equipment I made earlier this week so I could even get to a few of the spots on the manifold.
Some of the welds were near impossible to do without getting this. Even then they were difficult
First off, my diversion d180 tig
It came with a thick and heavy black cable, a hand control (I use the pedal all the time) and wrapped in a synth leather sheath.
It was bulky, heavy, and did not like to twist or rotate. This makes it hard to do single pass multi position welding (like going around a tube)
so I got a new ultra flexible, ultra light welding cable!
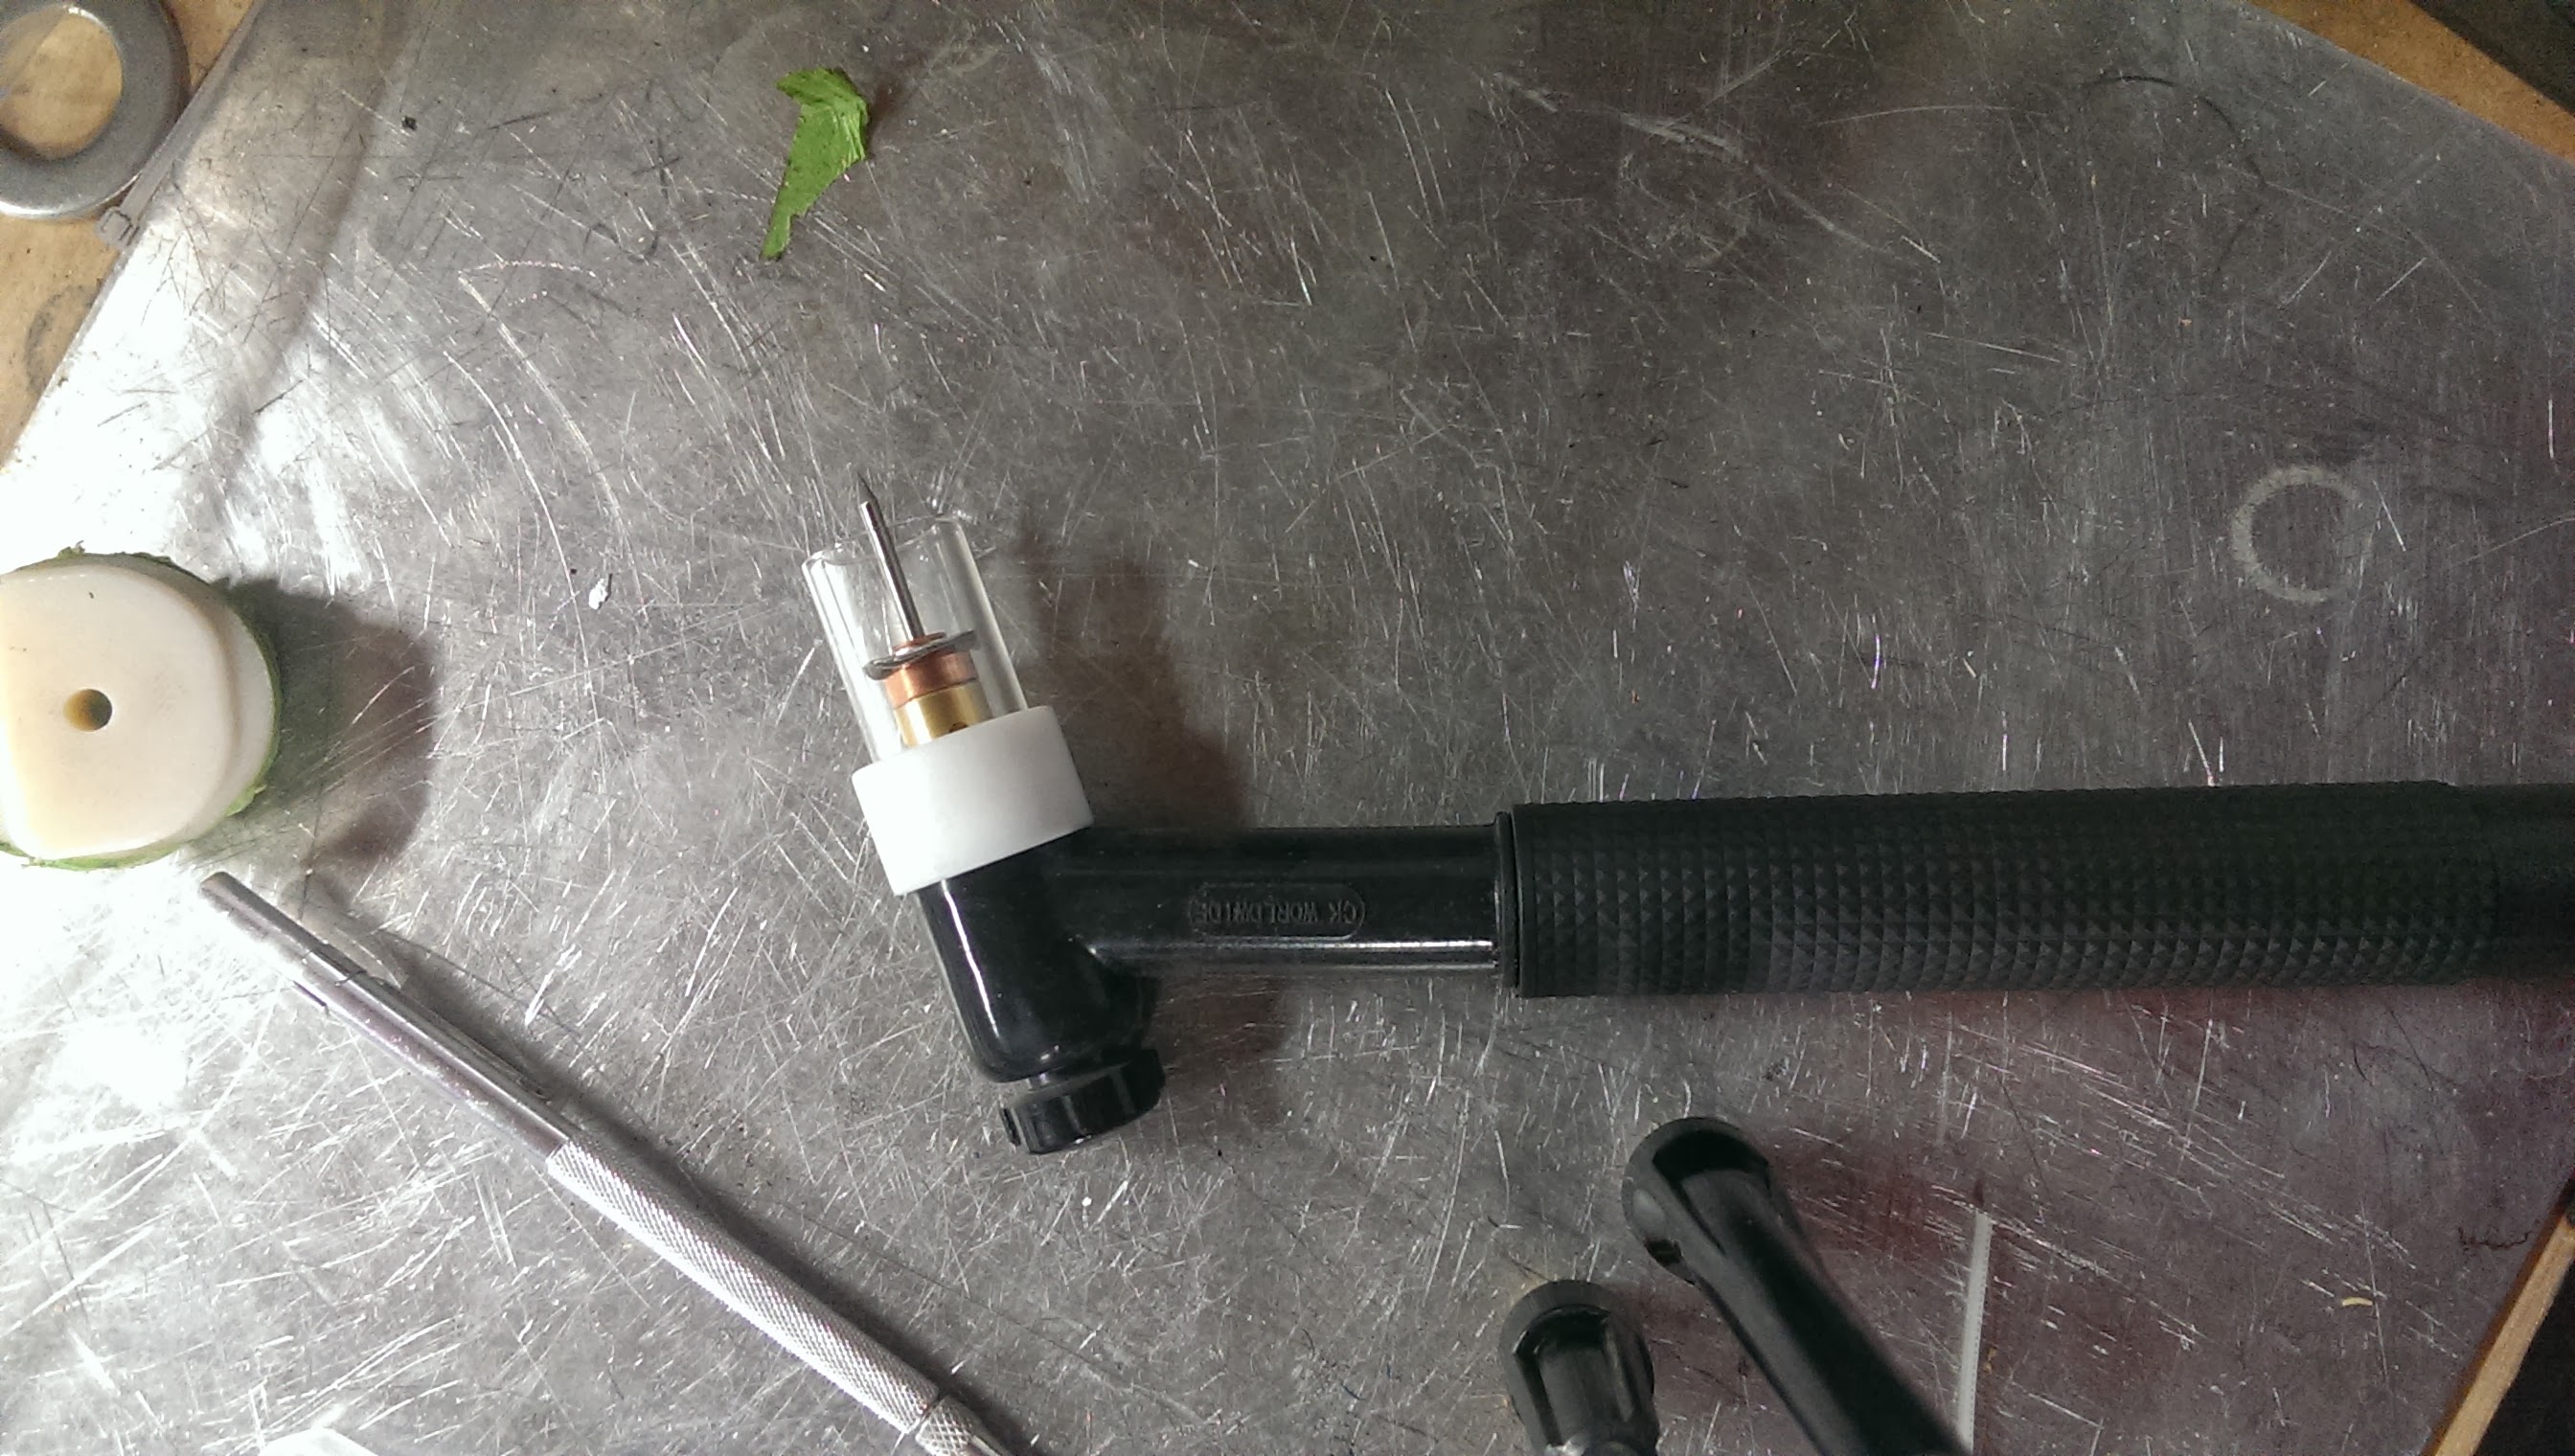
Next I had problems with the length of the torch.
The back end of the torch which holds excess tungsten was hitting everything and keeping me from getting the torch into some critical places.
as well as I could not see in some joints, and the cups were hitting in others.
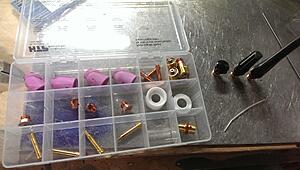
So in come gas lenses for better argon coverage.
different size cups.
As well as short back plugs.
The long black one on the far right is standard length.
Here is the torch set up with the shortest plug and a pyrex cup with a gas lens

Woohoo!!
forgot to take pictures of that though.
I will get them to you guys later. haha
instead have a picture of some of the changes to equipment I made earlier this week so I could even get to a few of the spots on the manifold.
Some of the welds were near impossible to do without getting this. Even then they were difficult
First off, my diversion d180 tig
It came with a thick and heavy black cable, a hand control (I use the pedal all the time) and wrapped in a synth leather sheath.
It was bulky, heavy, and did not like to twist or rotate. This makes it hard to do single pass multi position welding (like going around a tube)
so I got a new ultra flexible, ultra light welding cable!

Next I had problems with the length of the torch.
The back end of the torch which holds excess tungsten was hitting everything and keeping me from getting the torch into some critical places.
as well as I could not see in some joints, and the cups were hitting in others.
So in come gas lenses for better argon coverage.
different size cups.
As well as short back plugs.
The long black one on the far right is standard length.

Here is the torch set up with the shortest plug and a pyrex cup with a gas lens
#173
03-08-2014, 03:30 PM
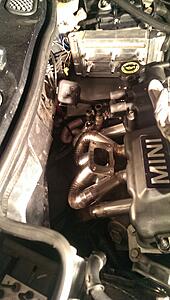
micro update of sorts.
not a whole lot of progress this weekend. Travel for work yesterday, then some contract welding for a buddies FD RX7, and staining floors today.
but in lite of that I thought I would at least share a oil-filter heat shield clearance photo!
because ***** cray.
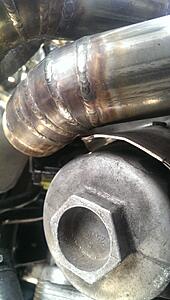
/fitment haha.
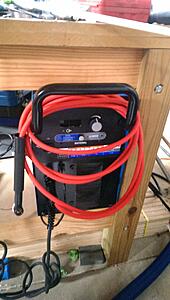
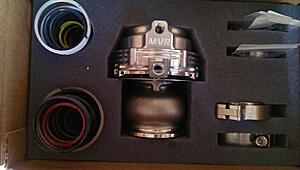
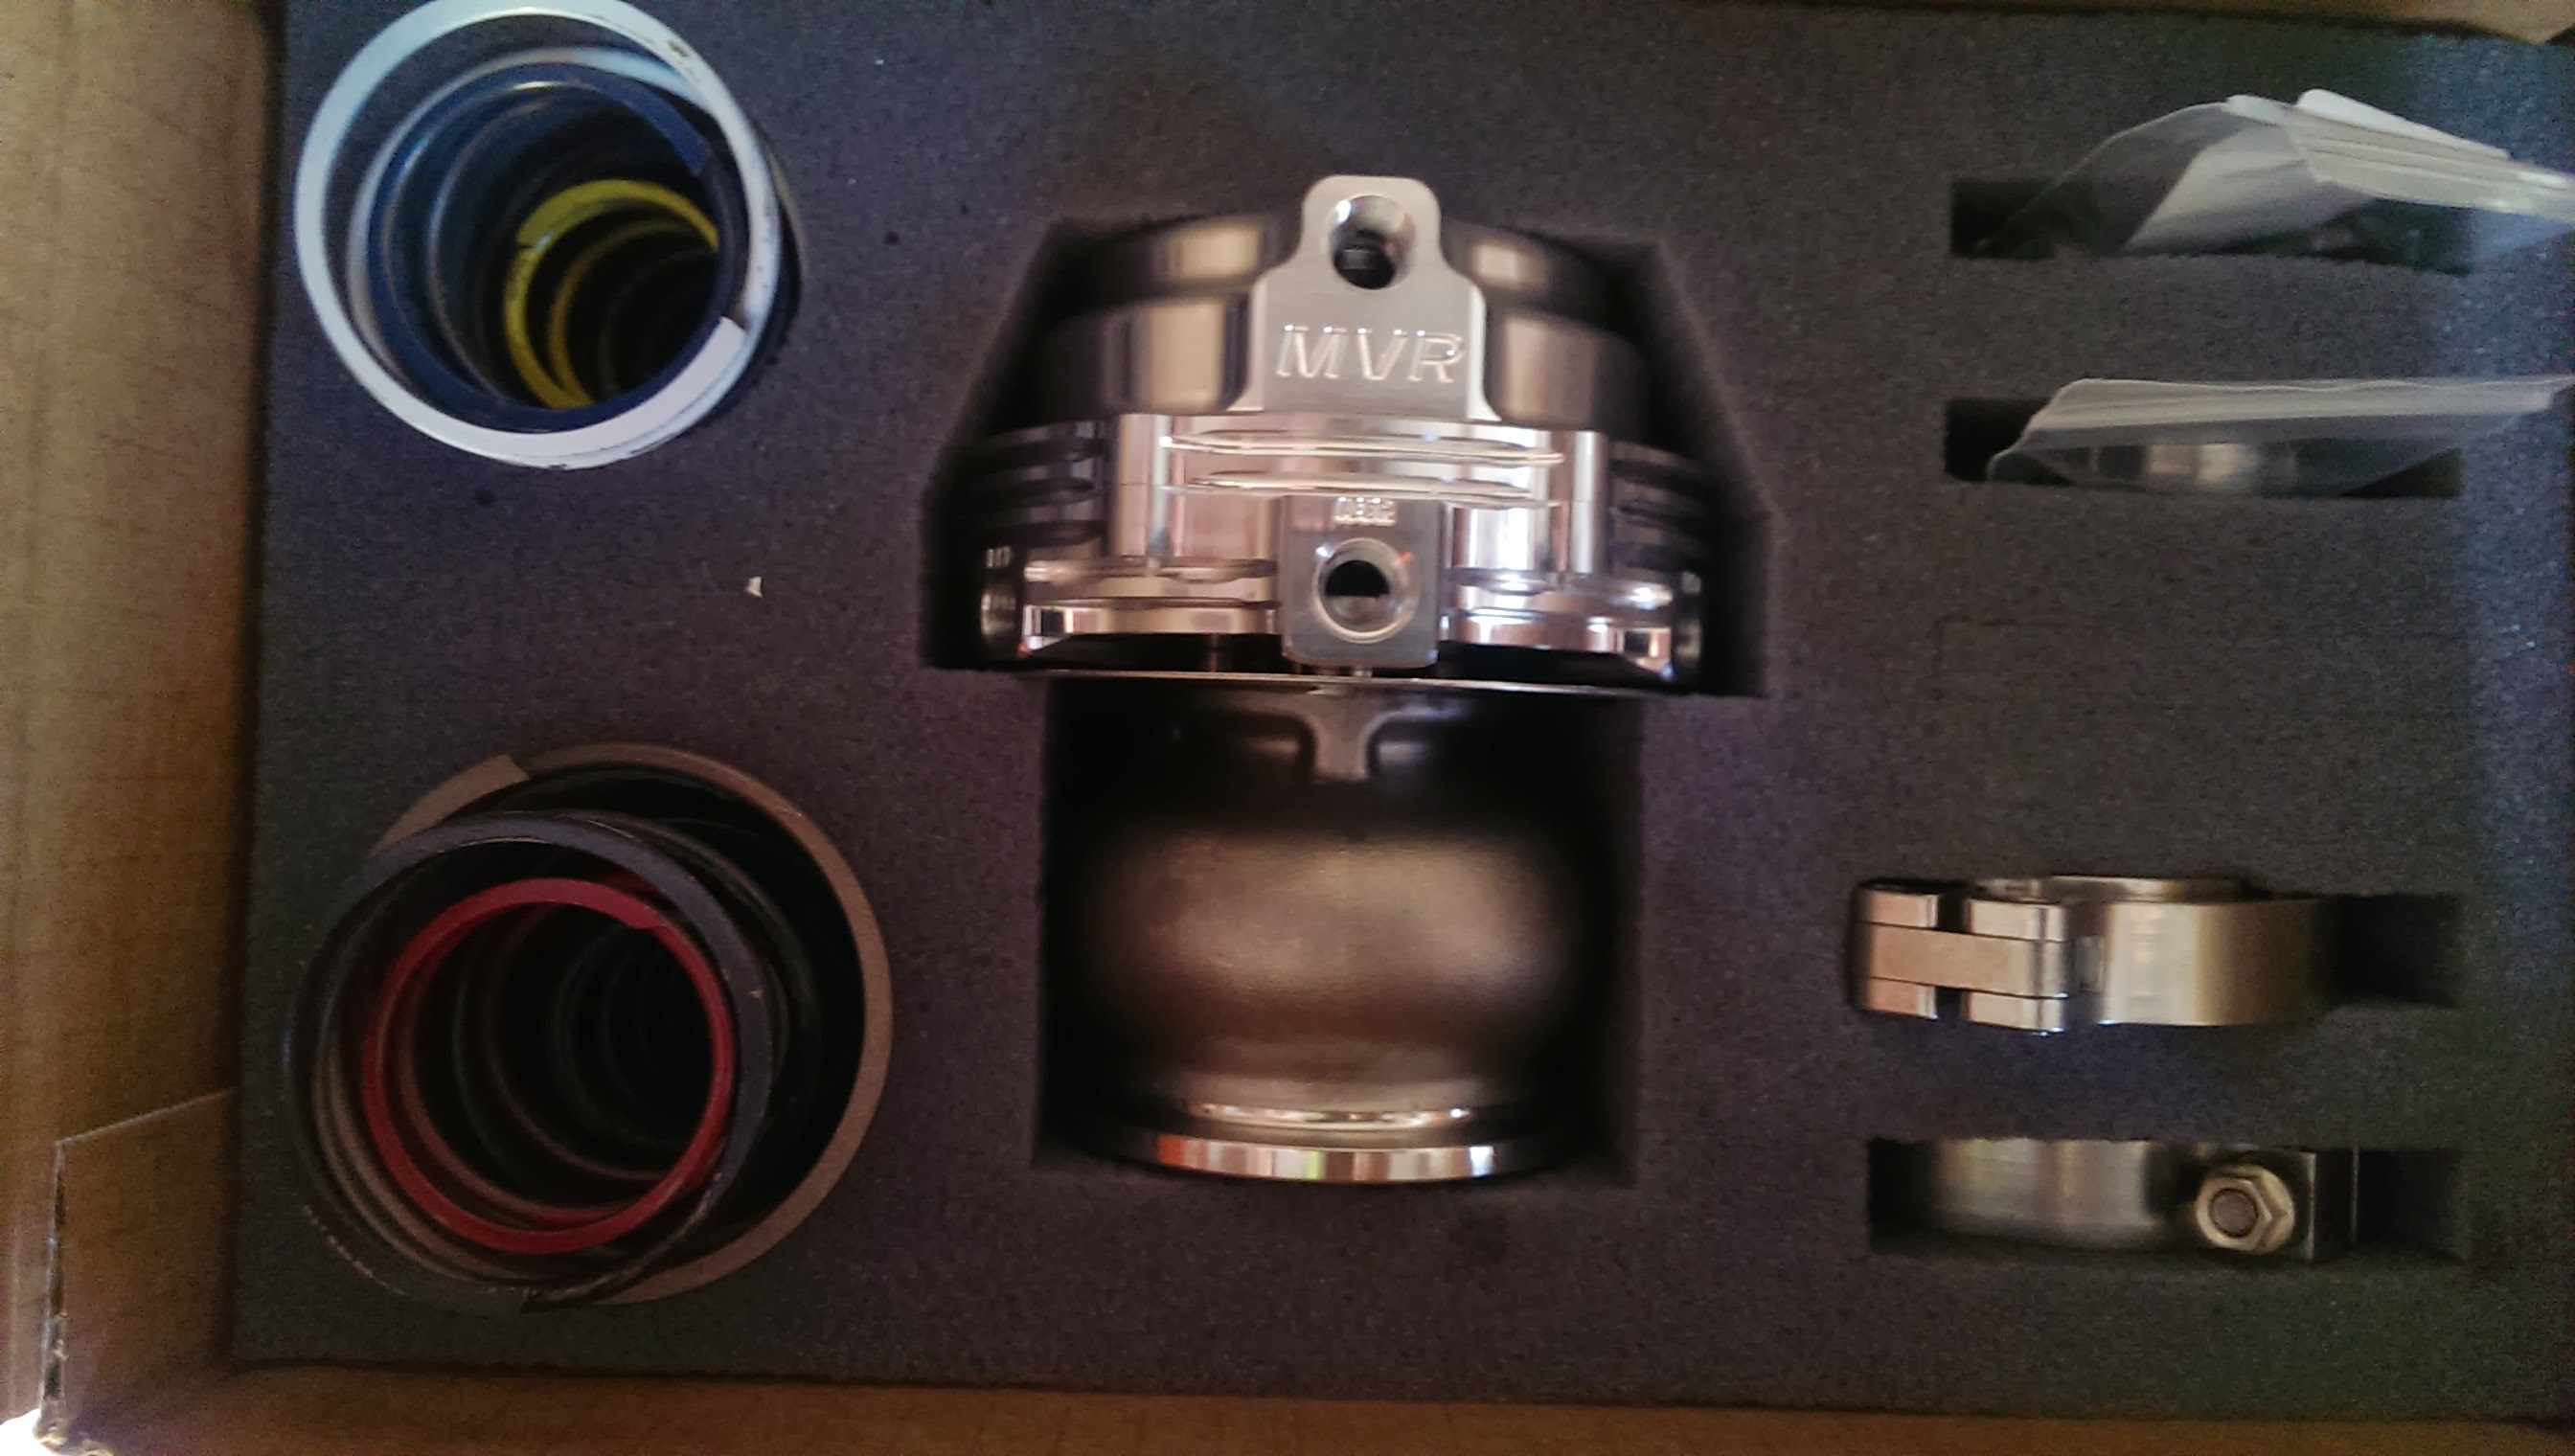
and secondly a thing of beauty and control arrived today :3
for example on size, here is a photo I took to show a friend that unfortunately it no longer fits off of the back side of the merge collector due to the 15 deg turn downs I added. Oh well.
I will add ~ 75-90 deg bend and it will fit nicely and get it a little farther away from the heat source.
not a whole lot of progress this weekend. Travel for work yesterday, then some contract welding for a buddies FD RX7, and staining floors today.
but in lite of that I thought I would at least share a oil-filter heat shield clearance photo!
because ***** cray.

/fitment haha.
and secondly a thing of beauty and control arrived today :3
for example on size, here is a photo I took to show a friend that unfortunately it no longer fits off of the back side of the merge collector due to the 15 deg turn downs I added. Oh well.
I will add ~ 75-90 deg bend and it will fit nicely
and get it a little farther away from the heat source.
#174
03-11-2014, 08:38 PM
man, you guys are getting difficult to entertain!
Maybe this will garner some more interest... but maybe not.
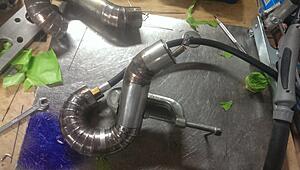
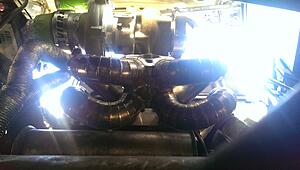
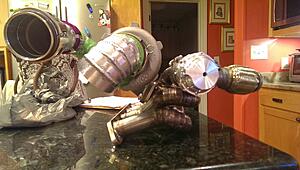
Finally got a chance to work on it again a little bit tonight, so I dropped by a local exhaust shop on the way home and had them flare some of the 321 to a 1.75" ID tube (for the inlet to the waste gate.
Then I made another pie bend (ugh.. getting good at these damn things sadly.. only took 30 min to cut and weld this one...)

then took it to the engine bay (where I had the header already bolted up) marked the alignment.. ish... then took her back to the bench and tac welded it on.
At this point I made sure I could still get the waste gate and clamp on and off easily, and took it back to the car and made sure everything cleared like it was supposed to.
It did, so I finished welding her up and put it back into the car.
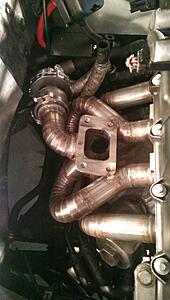
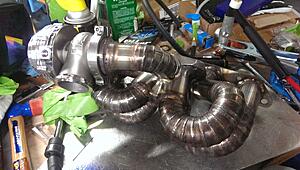
Then I was about to call it a night, but I decided what the hell (it is beautiful outside right now)
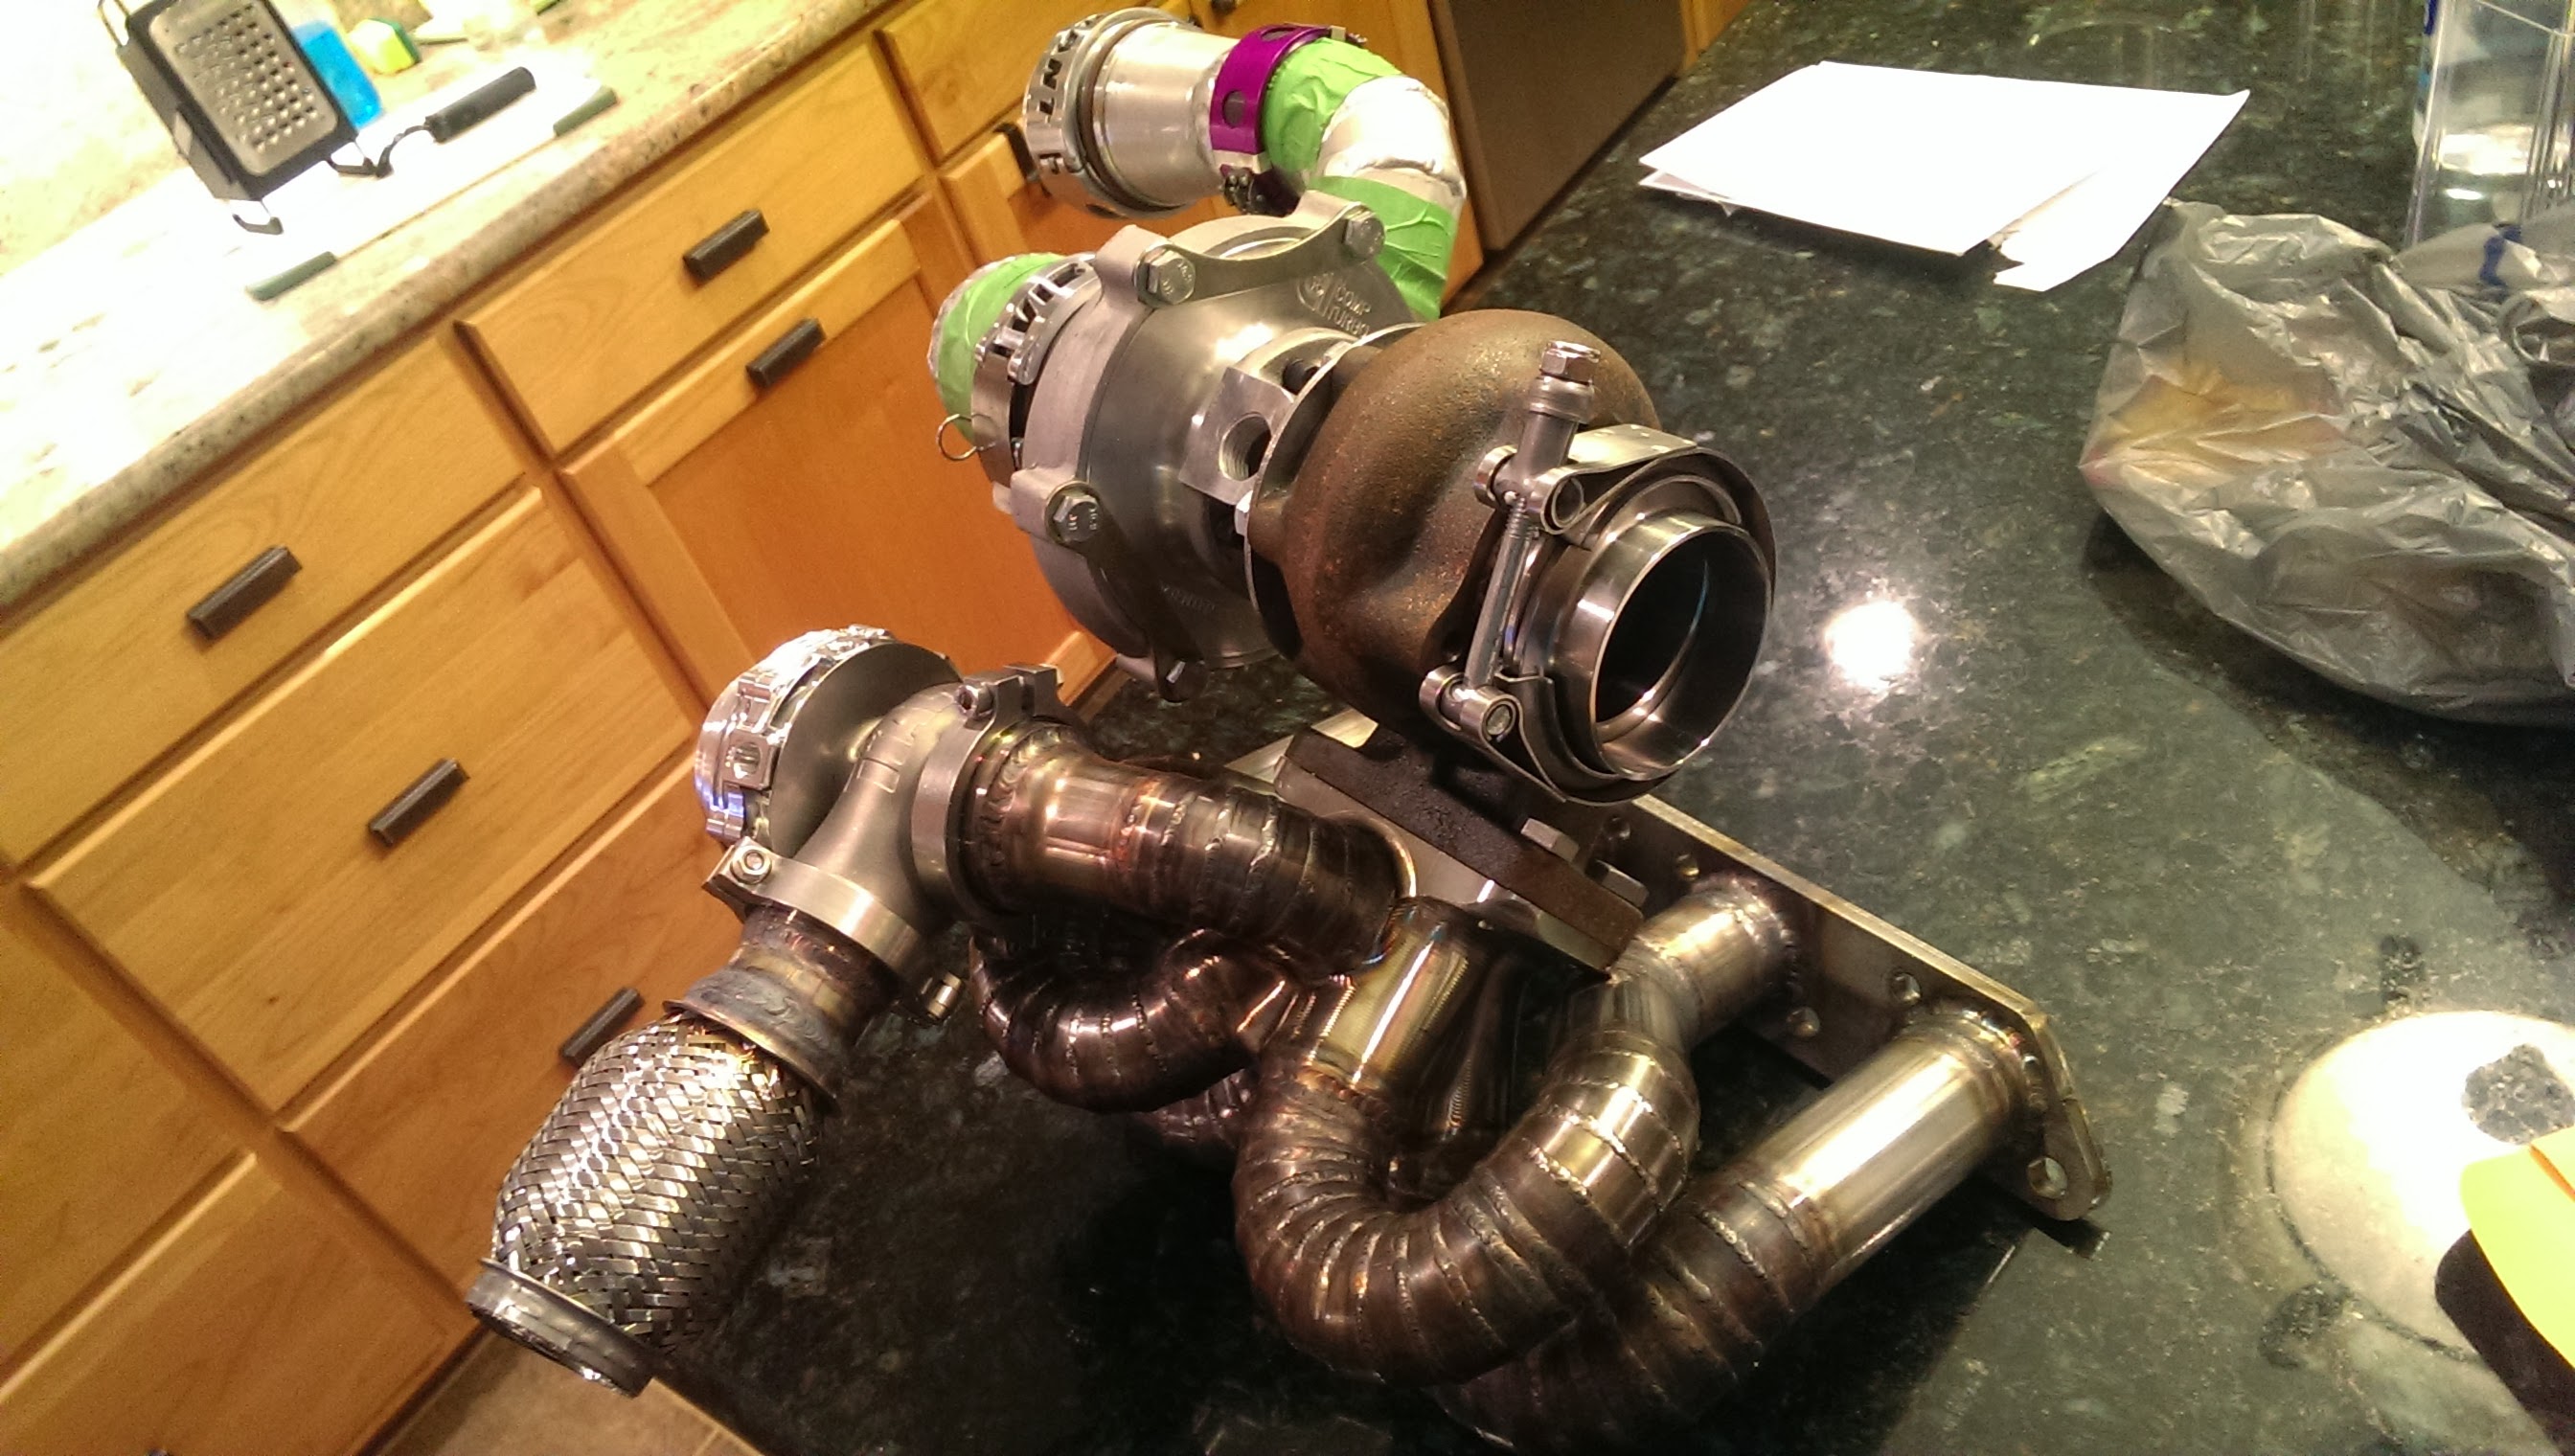
So I went ahead and welded up the flex fitting to the waste gate outlet, slapped her on, and took a few shots of the whole system
enjoy!
you may need a second bag...
Maybe this will garner some more interest... but maybe not.
Finally got a chance to work on it again a little bit tonight, so I dropped by a local exhaust shop on the way home and had them flare some of the 321 to a 1.75" ID tube (for the inlet to the waste gate.
Then I made another pie bend (ugh.. getting good at these damn things sadly.. only took 30 min to cut and weld this one...)

then took it to the engine bay (where I had the header already bolted up) marked the alignment.. ish... then took her back to the bench and tac welded it on.
At this point I made sure I could still get the waste gate and clamp on and off easily, and took it back to the car and made sure everything cleared like it was supposed to.
It did, so I finished welding her up and put it back into the car.

Then I was about to call it a night, but I decided what the hell (it is beautiful outside right now)
So I went ahead and welded up the flex fitting to the waste gate outlet, slapped her on, and took a few shots of the whole system
enjoy!
you may need a second bag...