Mini Cooper: Why Aren't My Interior Lights Working?
Has one or more of your Mini Cooper's interior lights stopped working? Read on to learn how to diagnose the issue.
This article applies to the Mini Cooper (2001-present).
You never know the importance of the interior lights in your Mini Cooper until they stop working the way they should. It's especially frustrating when you drop something important down a crevice and can't see well enough to find it. There are various causes for interior light problems, and it's not always a bad light bulb. Before you go racing to your dealership, try these diagnostic steps; you could end up fixing the problem for a tiny fraction of the cost. This guide will shine some light on your non-working lights.

Materials Needed
- Flathead screwdriver
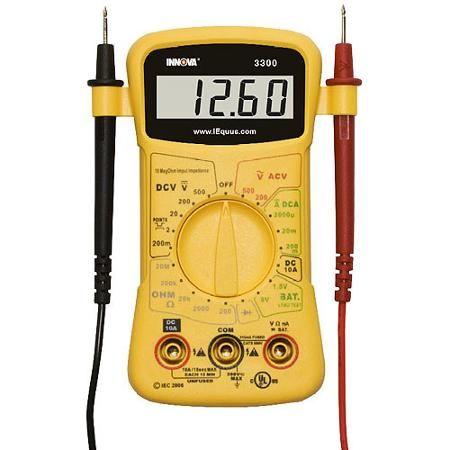
- Multimeter
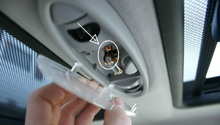
Step 1 – Check the bulb
It could be blown.
The most common cause for a non-working interior light is a blown bulb. Using your flathead screwdriver, gently pry off the plastic cover on your interior light, being very careful not to break it, then pull the light bulb out. Check the inside of the bulb to see if it's blown, if the metal piece in it is not connected, then you need a new bulb. Luckily, a replacement bulb costs as little as four dollars, so this could be a very cheap fix.

If the bulb is not the culprit, proceed to Step 2.
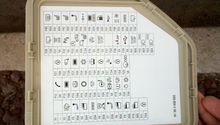
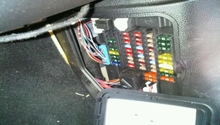
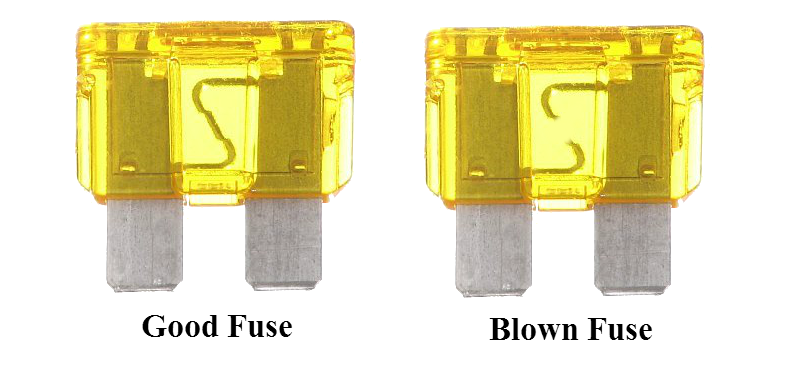
Step 2 –Check the fuse
It could also be blown.
Another very common reason for your interior light(s) to not work is a blown fuse. This could happen if there has been some extra voltage going through your wires. The dome light fuse is in the interior fuse box of your Mini Cooper, which you can find in the driver side's foot well. Simply pop the plastic cover off the box, then turn it around to look at the fuse box diagram, locate the dome light fuse, then remove it from the fuse box. Hold the fuse up to check the metal bar inside of it; if it's broken, then you need a new fuse. If it's in one piece, then your fuse is in good, working condition.
If your fuses are in good, working condition, proceed to Step 3.
Step 3 – Check for voltage
You may have a wiring issue.
If the bulbs and fuses are fine, then you may have a wiring issue. Before removing the whole dome light to check for any worn wires, use a multimeter to check if your interior light is getting any voltage. Remove the bulb, turn on your interior light, then put your multimeter on each side where the bulb goes.
If it doesn't read any voltage, then you have to remove the whole dome light and check the wires. Use a Phillips screwdriver to remove the two Phillips screws holding your dome light or interior light, then remove the light and check the wires. Make sure all the wires are attached properly and have no wears or cracks.
Related Discussions
- Interior light issues - NorthAmericanMotoring.com
- Interior light not working - NorthAmericanMotoring.com
- Interior light problem - NorthAmericanMotoring.com