When you click on links to various merchants on this site and make a purchase, this can result in this site earning a commission. Affiliate programs and affiliations include, but are not limited to, the eBay Partner Network.
Suspension R53 Owners: Avoid Koni Sport Adjustable Shocks
SuspensionSprings, struts, coilovers, sway-bars, camber plates, and all other modifications to suspension components for Cooper (R50), Cabrio (R52), and Cooper S (R53) MINIs.
thanks for the excellent pics and explanation pnw. that sucks about the yellows not quite fitting in the rear, thus requiring drilling out where the top of the strut is bolted. anyone know if the oranges are a poor fit as well? if you can't adjust the rear yellows anyway, why not just install yellows in front and oranges in rear?
Sometime being old turns out pretty good. Our Gen1 cars are old but with more than 85,000 threads here, chances are that most questions have been answered. If you do some research the 50% setting on the back units is what most have done, myself included.
If you are going to put in some lowering springs, the Yellows will work with the height reduction and as the lowering spring is normally stiffer, the dampening ability of the Yellow also will match up better.
thanks for the excellent pics and explanation pnw. that sucks about the yellows not quite fitting in the rear, thus requiring drilling out where the top of the strut is bolted. anyone know if the oranges are a poor fit as well? if you can't adjust the rear yellows anyway, why not just install yellows in front and oranges in rear?
You might have misunderstand what the spring perch drilling entails. You don't modify anything on the chassis. You enlarge the hole of the top hat which comes out in one assembly when you remove the spring and damper assembly. The reason for this enlargement is Koni's shaft has to be of larger diameter since it is hollow to accommodate the adjuster the extends to the top of the shaft. You need to try understand this more.
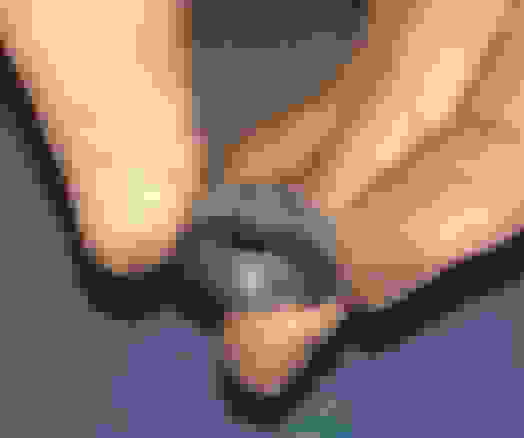
the top hat is the round black cap in my left hand here
thanks for the excellent pics and explanation pnw. that sucks about the yellows not quite fitting in the rear, thus requiring drilling out where the top of the strut is bolted. anyone know if the oranges are a poor fit as well? if you can't adjust the rear yellows anyway, why not just install yellows in front and oranges in rear?
You only have to drill the spring top hat in the rear to get the larger Koni yellow shock shaft through it. The shaft has to be larger to make them adjustable.
And yes you have to remove the rear shocks to adjust them, but it's only 3 bolts.
You could run yellows in the front and oranges. But keep in mind the oranges are equal to the Yellow on full soft so you will always be adjusting the fronts stiffer than rear. https://www.waymotorworks.com/koni-s...0-r52-r53.html
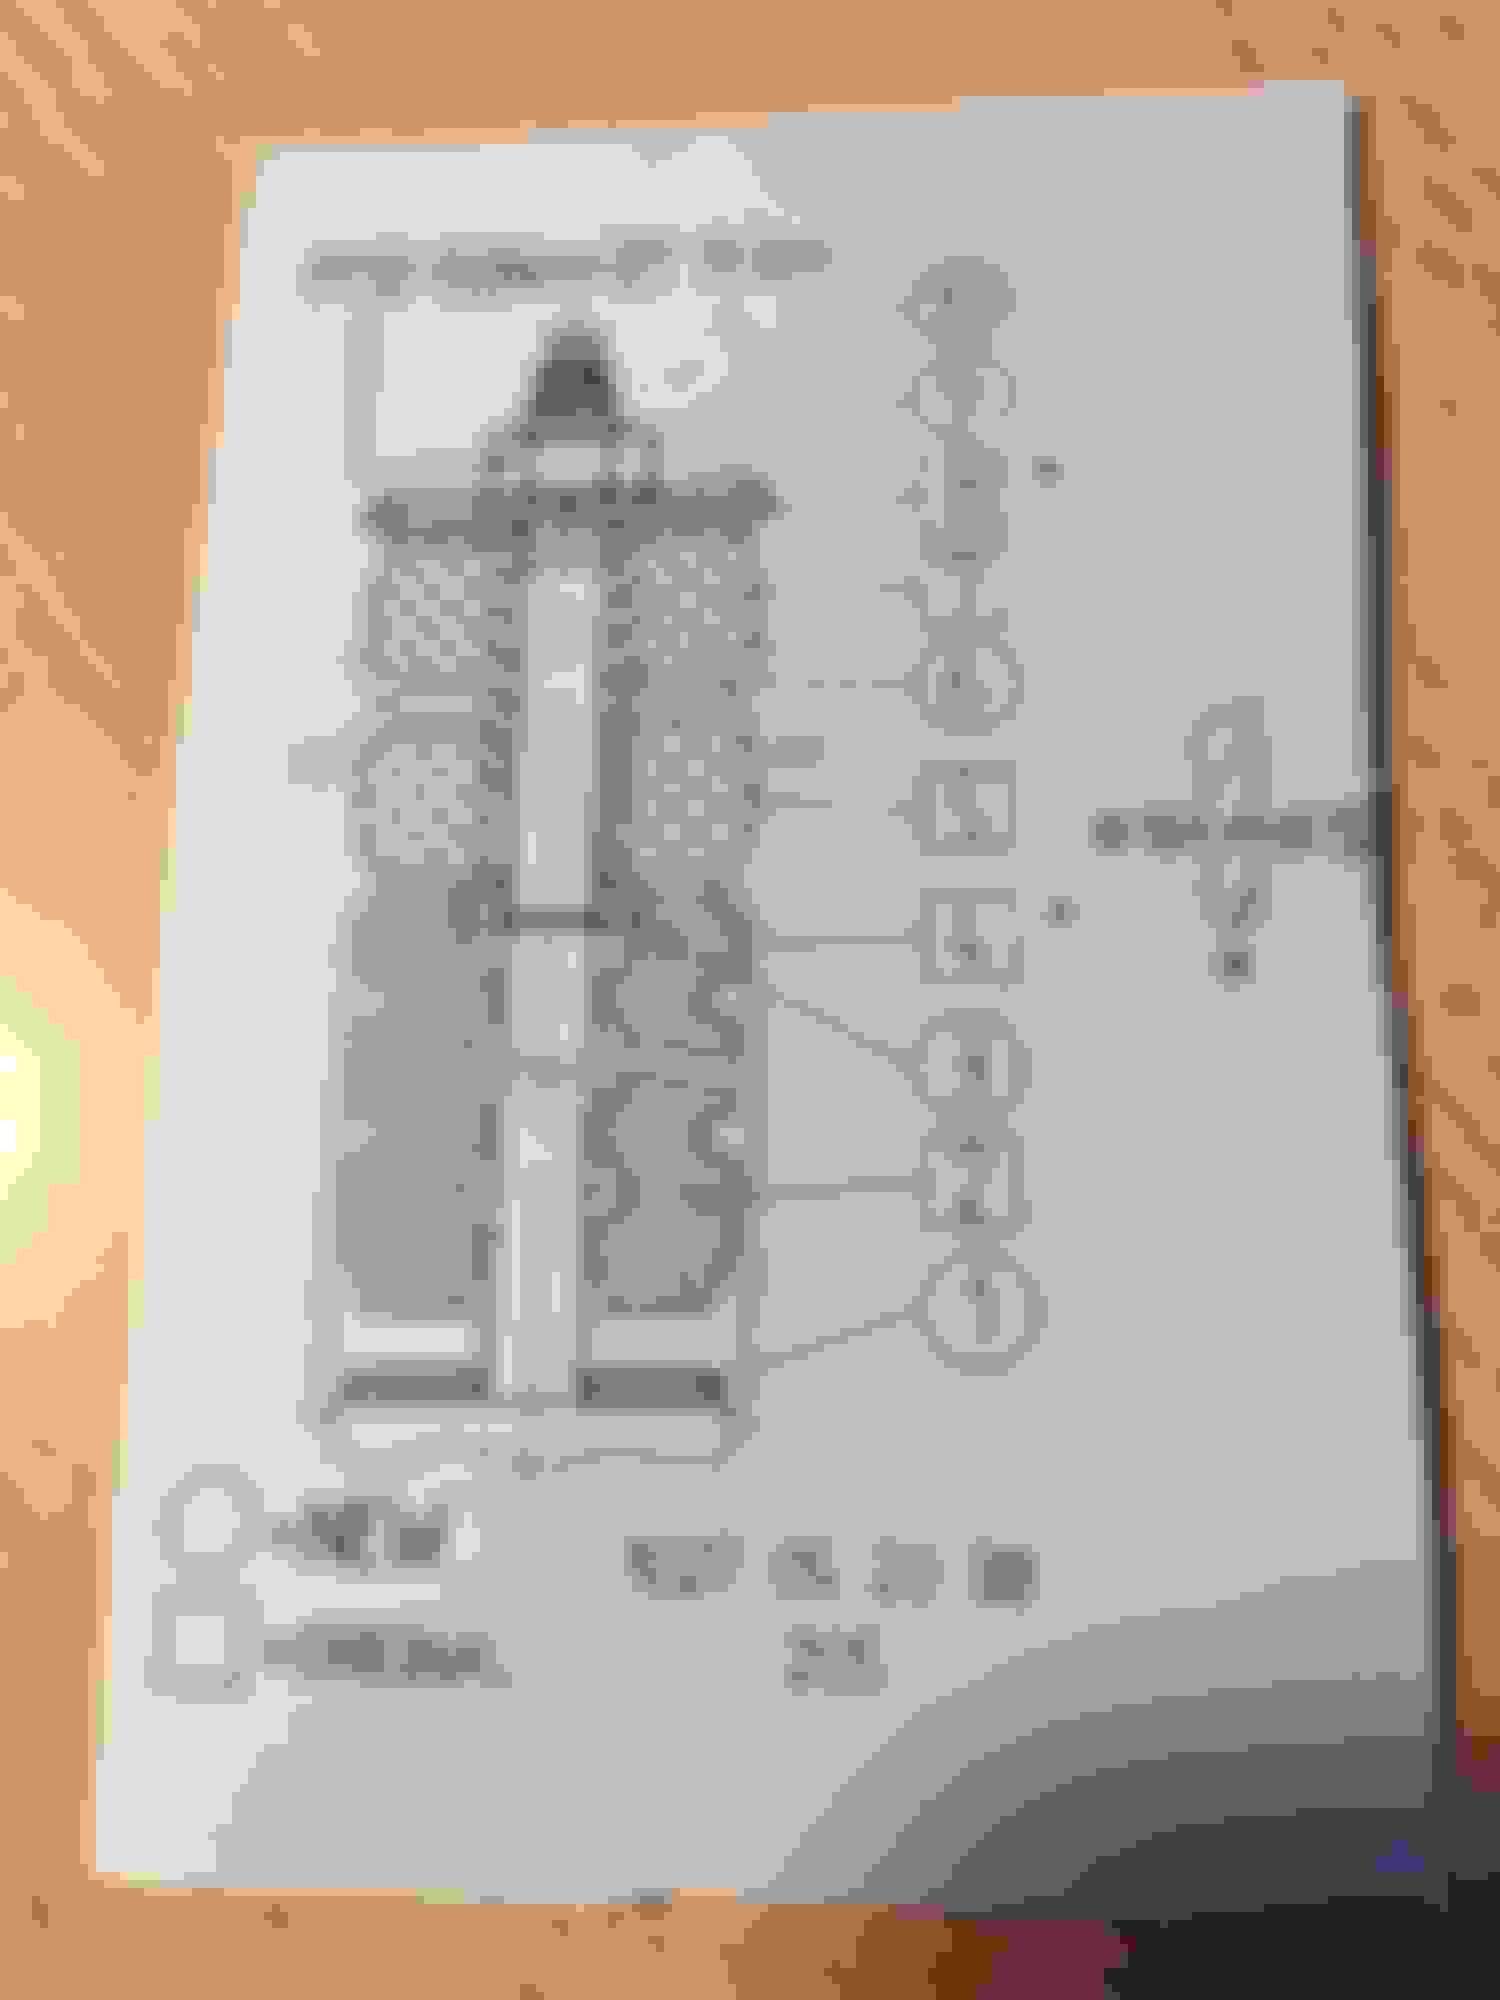
So I purchased the Rear Yellows, drilled out parts 9 and 12 in attached picture, and reassembled. But I'm not sure about a few things:
1 - Should the upper spring plate (part 9) be drilled so that it fits over the shaft but not past the lock ring? (see lock ring in red rectangle, but imagine it is sitting in the groove) That is, should the upper spring plate essentially sit on the lock-ring?
2 - The Yellows come with a split-lock washer (see pic)...where does this go?
(sorry for using other people's pics for these questions; I re-assembled the unit before taking pics)
Oh boy, if you have to ask... Just be very careful when drilling out the top hat (#9). Do note my remark that twisted drill bit will result in a triangular hole. The hole must be round and just large enough for the threaded section of the damper shaft to be snug fit. There is a steel collar in my photo below which together with the large washer and top hat stacked together, compresses against the thick stainless steel washer that keeps the lock ring from slipping out. The split spring washer is used per my photo below as well above the top big washer (#12). Do note that my photo was taken not to show all the piece parts on a properly assembled Koni Yellow. To me it was intuitively obvious so I did not set out to take a sequence of photos.
The most critical thing about the Koni Yellow is proper orientation of the thick washer which is designed to sit on the thin spring c-clip by restraining it from leaving the groove of the shaft. Examine the washer carefully.
So the split-lock washer basically serves as a locker for the top big washer, right?
So do the stainless steel Cylinder and Washer (outlined in red from your photo) slide past the lock-ring on the shaft? Or do they sit on top of lock-ring toward the threaded part of the shaft?
I ask this because on the original strut, the brass cylinder (similar to the stainless cylinder above) sits within the yellow shock absorber (part 7 above, see pic below), and the yellow shock absorber sits all the way down on the body of the shock (at the base of the shaft). The Stainless cylinder that comes with the Koni is too large to fit inside the yellow shock absorber, so it's not clear to me where the yellow shock absorber sits on the Koni. Does that make sense?
So the split-lock washer basically serves as a locker for the top big washer, right?
Yes. It sits between the top nut and the curved disc washer. Do note that the curved disc washer is concave side up.
So do the stainless steel Cylinder and Washer (outlined in red from your photo) slide past the lock-ring on the shaft? Or do they sit on top of lock-ring toward the threaded part of the shaft?
The purpose of the stainless steel sleeve that comes with the Koni is it works with the yellow synthetic rubber bushings. Please refer to my photos below for more detail. In all likelihood the OP's problem likely caused by 1) use of wrong collar, or 2) improperly assembled sequence or orientation of the top disc washer.
I ask this because on the original strut, the brass cylinder (similar to the stainless cylinder above) sits within the yellow shock absorber (part 7 above, see pic below), and the yellow shock absorber sits all the way down on the body of the shock (at the base of the shaft). The Stainless cylinder that comes with the Koni is too large to fit inside the yellow shock absorber, so it's not clear to me where the yellow shock absorber sits on the Koni. Does that make sense?
Here are a few photos of disabling the stock damper: Pay attention to the top bushings and the orientation of the curved disc washer.
the curved disc washer is concave side up
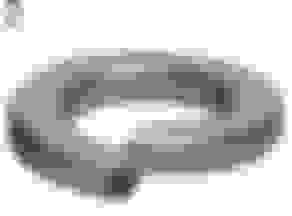
Here is the rear strut kebab sequence from the bottom up:
white nylon disc with a slit (I don't bother to use it as it serves no purpose)
yellow bump stop (the dog poop looking piece) with small end face down
the tiny stainless spring c-clip (sits on the grove of the strut shaft)
the thick stainless special washer that is design to hold the spring c-clip captive (make sure you understand how this work); the side with the groove faces the c-clip
the top hat (upper spring perch) with the black plastic dust sleeve
the stainless steel collar (which replaces the shorter stock steel collar)
the top steel mounting bracket sandwiched by the properly assembled yellow synthetic rubber bushing pieces
concave steel dish washer (concave side face the sky)
split lock washer
nut
Of course you have to include the spring and the rubber pad at the bottom spring perch.
Here is the proper orientation of the thick stainless washer that holds the c-clip captive:
If you are unsure or want to be extremely careful, I suggest you do a dry assembling without the spring first. You will see how all the pieces are supposed to function.
Of topic but hey I am getting ready to eat after watching Syracuse knock off Michigan State.
No pictures, but Shrimp Gaspar; 1.) clean 16 shrimp 2.) partially cook eight strips of bacon 3.) cut the bacon strips into 4 pieces. 4.) if wood skewers, let soak in water for at least 10 minutes 5.) open a can of chunk pineapple 6.) thread a chunk of pineapple, a piece of bacon and then a shrimp, then bacon, pineapple, bacon and another shrimp. four shrimp per skewer. 7.) preheat a gas bbq grill to very hot, place skewers on, close the top. depending on the heat, flip in 5 to 7 minutes for another 5-7 minutes. don't overcook the shrimp unless you like eating rubber 8.) remove from grill, remove skewer and serve over yellow rice. 9.) chili sauce on side, i do not like cocktail sauce.
On the Konis, have had mine apart a few times in the past couple of weeks figuring out the springs as my r52 is heavier than the 50/53 and the older Koni coilovers did not compensate. I have some other threads on this topic.
PNW: Many thanks for the awesome pictures and detailed explanation.
So this may seem like overkill, but just to be sure, this is how I think it should be ordered based on your description:
Does that look right?
A couple other questions. This is the thick stainless washer (number 4 in your list). I assume this is the groove that should be facing down over the C clip (number 3 in your list). Is that right?
And finally, does the stainless steel collar (number 6 in your list) sit with the tapered end up or down:
I presume it is up, like this:
Many thanks again. I hate to pull hairs, but clearly, as the OP demonstrated with two faulty installs by experienced techs, this is easy to F up.
The sequence photo left some ambiguity. Do make sure that the stainless collar is sandwiched by the concave disc on top, and the top hat (top spring perch) at the bottom.
A couple other questions. This is the thick stainless washer (number 4 in your list). I assume this is the groove that should be facing down over the C clip (number 3 in your list). Is that right?
Yes. You can try it the other way (wrong way) and you will see it will force the c-clip out of the shaft groove.
And finally, does the stainless steel collar (number 6 in your list) sit with the tapered end up or down:
I don't think it matter which way. I will orientate the tapered end up, since the compression stroke tends to has more energy.
I presume it is up, like this:
Yes. But make sure the top hat goes between the collar and the thick stainless washer for that c-clip.
If you still unsure. Dry assemble the pieces without the spring and the dust cover so you can see it is right.
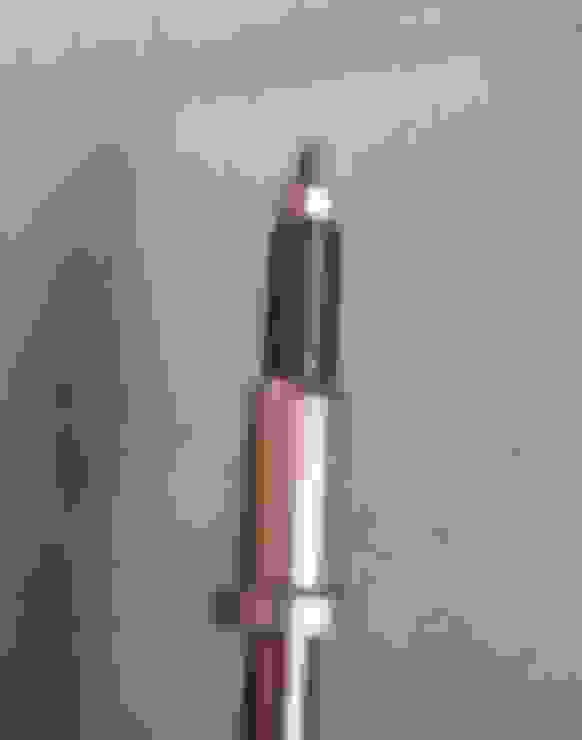
The picture I posted above of the relevant parts is close but definitely wrong. I added an arrow showing where to move the steel cylinder, which should be correct.
I have since installed the shocks and driven the car. I haven't done the front shocks yet and honestly can't tell a huge difference.
Regarding the front shocks, are there any "modifications" that are required for their installation? This project ended up being a real pain in the ***, between the hieroglyphic Koni instructions, drilling out the top-hat and washers, and the awful self-tapping bolt that attaches the bottom of the shock to the hub...I don't know how Koni justifies selling these as OEM replacements; they simply don't fit. (you need to make them fit). Just wondering what's in store for the fronts.
I am looking to upgrade my suspension and i ve read a lot. I decided to go konis instead of coilovers so i could invest the remaing money (koni sport about half price than BC, KW V1, ST) on other parts too. I must confess i am leaning towards KW now!
I am looking to upgrade my suspension and i ve read a lot. I decided to go konis instead of coilovers so i could invest the remaing money (koni sport about half price than BC, KW V1, ST) on other parts too. I must confess i am leaning towards KW now!
If you do want KWs they are freakin awesome if you do our custom TSW setup as it out performs the standard KWs by far as they ride better and out handle them hands down. https://www.waymotorworks.com/kw-var...r50-52-53.html
This experience is one that gives me pauses for helping others. Instead of trying to understand why a design is done it is, unreasonable consumers blame their own shortcomings on the product.
The recent poster obvious has this instruction, plus my go-out-of-my-way to help. Let me give him a clue. Koni increase the shaft diameter because it is adjustable and wanted to make sure the now hollow shaft does not fail.
I fail to see where does Koni represented the Yellow as OEM drop-in. I have no stake in Koni but fair is fair.
The picture I posted above of the relevant parts is close but definitely wrong. I added an arrow showing where to move the steel cylinder, which should be correct.
I have since installed the shocks and driven the car. I haven't done the front shocks yet and honestly can't tell a huge difference.
Regarding the front shocks, are there any "modifications" that are required for their installation? This project ended up being a real pain in the ***, between the hieroglyphic Koni instructions, drilling out the top-hat and washers, and the awful self-tapping bolt that attaches the bottom of the shock to the hub...I don't know how Koni justifies selling these as OEM replacements; they simply don't fit. (you need to make them fit). Just wondering what's in store for the fronts.
I've been following this thread, have never installed koni yellows on a MINI, and I think your order is right. But in my mind the metal cylinder / sleeve you are referring to in the image should have the tapered end facing down so that is matches with the corresponding larger opening of the fat metal washer.
I've been following this thread, have never installed koni yellows on a MINI, and I think your order is right. But in my mind the metal cylinder / sleeve you are referring to in the image should have the tapered end facing down so that is matches with the corresponding larger opening of the fat metal washer.
I too was stumped for a moment by the tapered SS sleeve when I install mine. Just for a moment though. It is Koni engineer thoughtfulness to make the skewer of the kebab easier.
There is no rhyme or reason why it is tapered on one end as the top steel washer nor the upper spring perch has feature to mate to it. I infer it is just a common part out of Koni's part bins. People forget that aftermarket equipment manufacturers make products for thousands of car models. Very often a part is used in many different models that share close enough attributes. That is why often Koni's red (supposed to be OEM drop in replacement) shock body can be a bit longer or shorter than OEM. It is the result of "close enough for government work" product design.
I should correct my reasoning to put the tapered end upwards. At compression stroke, the bottom end of the sleeve gets the load, not the top end. The truth is it makes no difference as the sleeve has enough meat on either end.
The installation of the front strut is very easy after you done the rear ones. The only surprise is you cannot put the dust caps of the strut bearings back on. I can do them blindfolded.
 02-27-2018, 04:20 PM