When you click on links to various merchants on this site and make a purchase, this can result in this site earning a commission. Affiliate programs and affiliations include, but are not limited to, the eBay Partner Network.
Stock Problems/IssuesDiscussions related to warranty related issues and repairs, or other problems with the OEM parts and software for MINI Cooper (R50), Cabrio (R52), and Cooper S (R53) MINIs.
A few weeks ago, the steering started getting stiff on my faithful '04 R50. I thought I had lost the power steering pump, and since I knew there was a recall out for it, I took it to the local dealership.
They replaced the pump under the recall, but told me the reason for the stiffness was the lower U-joint on the steering column seizing up. They quoted me over $700 to replace it.
I decided to order the parts and do this one myself. Some liberally-applied WD-40 really helped keep the U-joint moving for a couple of weeks until the parts came, but with all the spring rain, it keeps getting stiff again and it's time to replace it.
The new lower steering column came today, and I'm doing the swap tomorrow. Any tips? I haven't been able to find a tutorial anywhere.
Reading between the lines on a few other threads, it sounds like if I turn the wheels right, the best way to access the nut on the lower U-joint is through the driver's side wheel well, with a long extension.
Am I going to have trouble with the steering angle sensor? It looks like the connections on both ends are square, so it should drop right in without the computer knowing the difference... right? Do I have to pull the steering wheel and upper column off to get it out?
I will take pictures as I go and try to document the process here for the benefit of others. Just thought I'd check before I get started and see if anyone else can warn me of any "gotchas" on this job. It seems pretty simple, but I've had, and worked on, this little car long enough to know it can pack some surprises.
I got the job done. It wasn't bad, but I spent a lot of time doing stuff to get to the eccentric nut that ended up not helping. So, here are some tips for doing the job quickly.
Be sure to keep the steering wheel locked after you've got it set to the correct angle. It will turn like a fidget spinner when the steering column is disconnected. I read somewhere that bad things can happen to the airbag in this case, but I didn't want to find out for myself.
Here's the new part:
I lifted the front end of the car and put it on jacks. I thought I was going to need to access the lower U-joint from under the car, but it ended up being easier to get to it from the top. So while it may not be strictly necessary to lift the car at all, it did make it easier to turn the steering wheel to just the right angle to access the eccentric nut on the lower U-joint.
Here's the wheel angle I found best, about 60 degrees to the left:
The best way to get at the nut on the lower end of the lower steering column was to remove the airbox and battery box. Pelican Parts has a nice tutorial on this here: http://www.pelicanparts.com/techarti...ox_Removal.htm
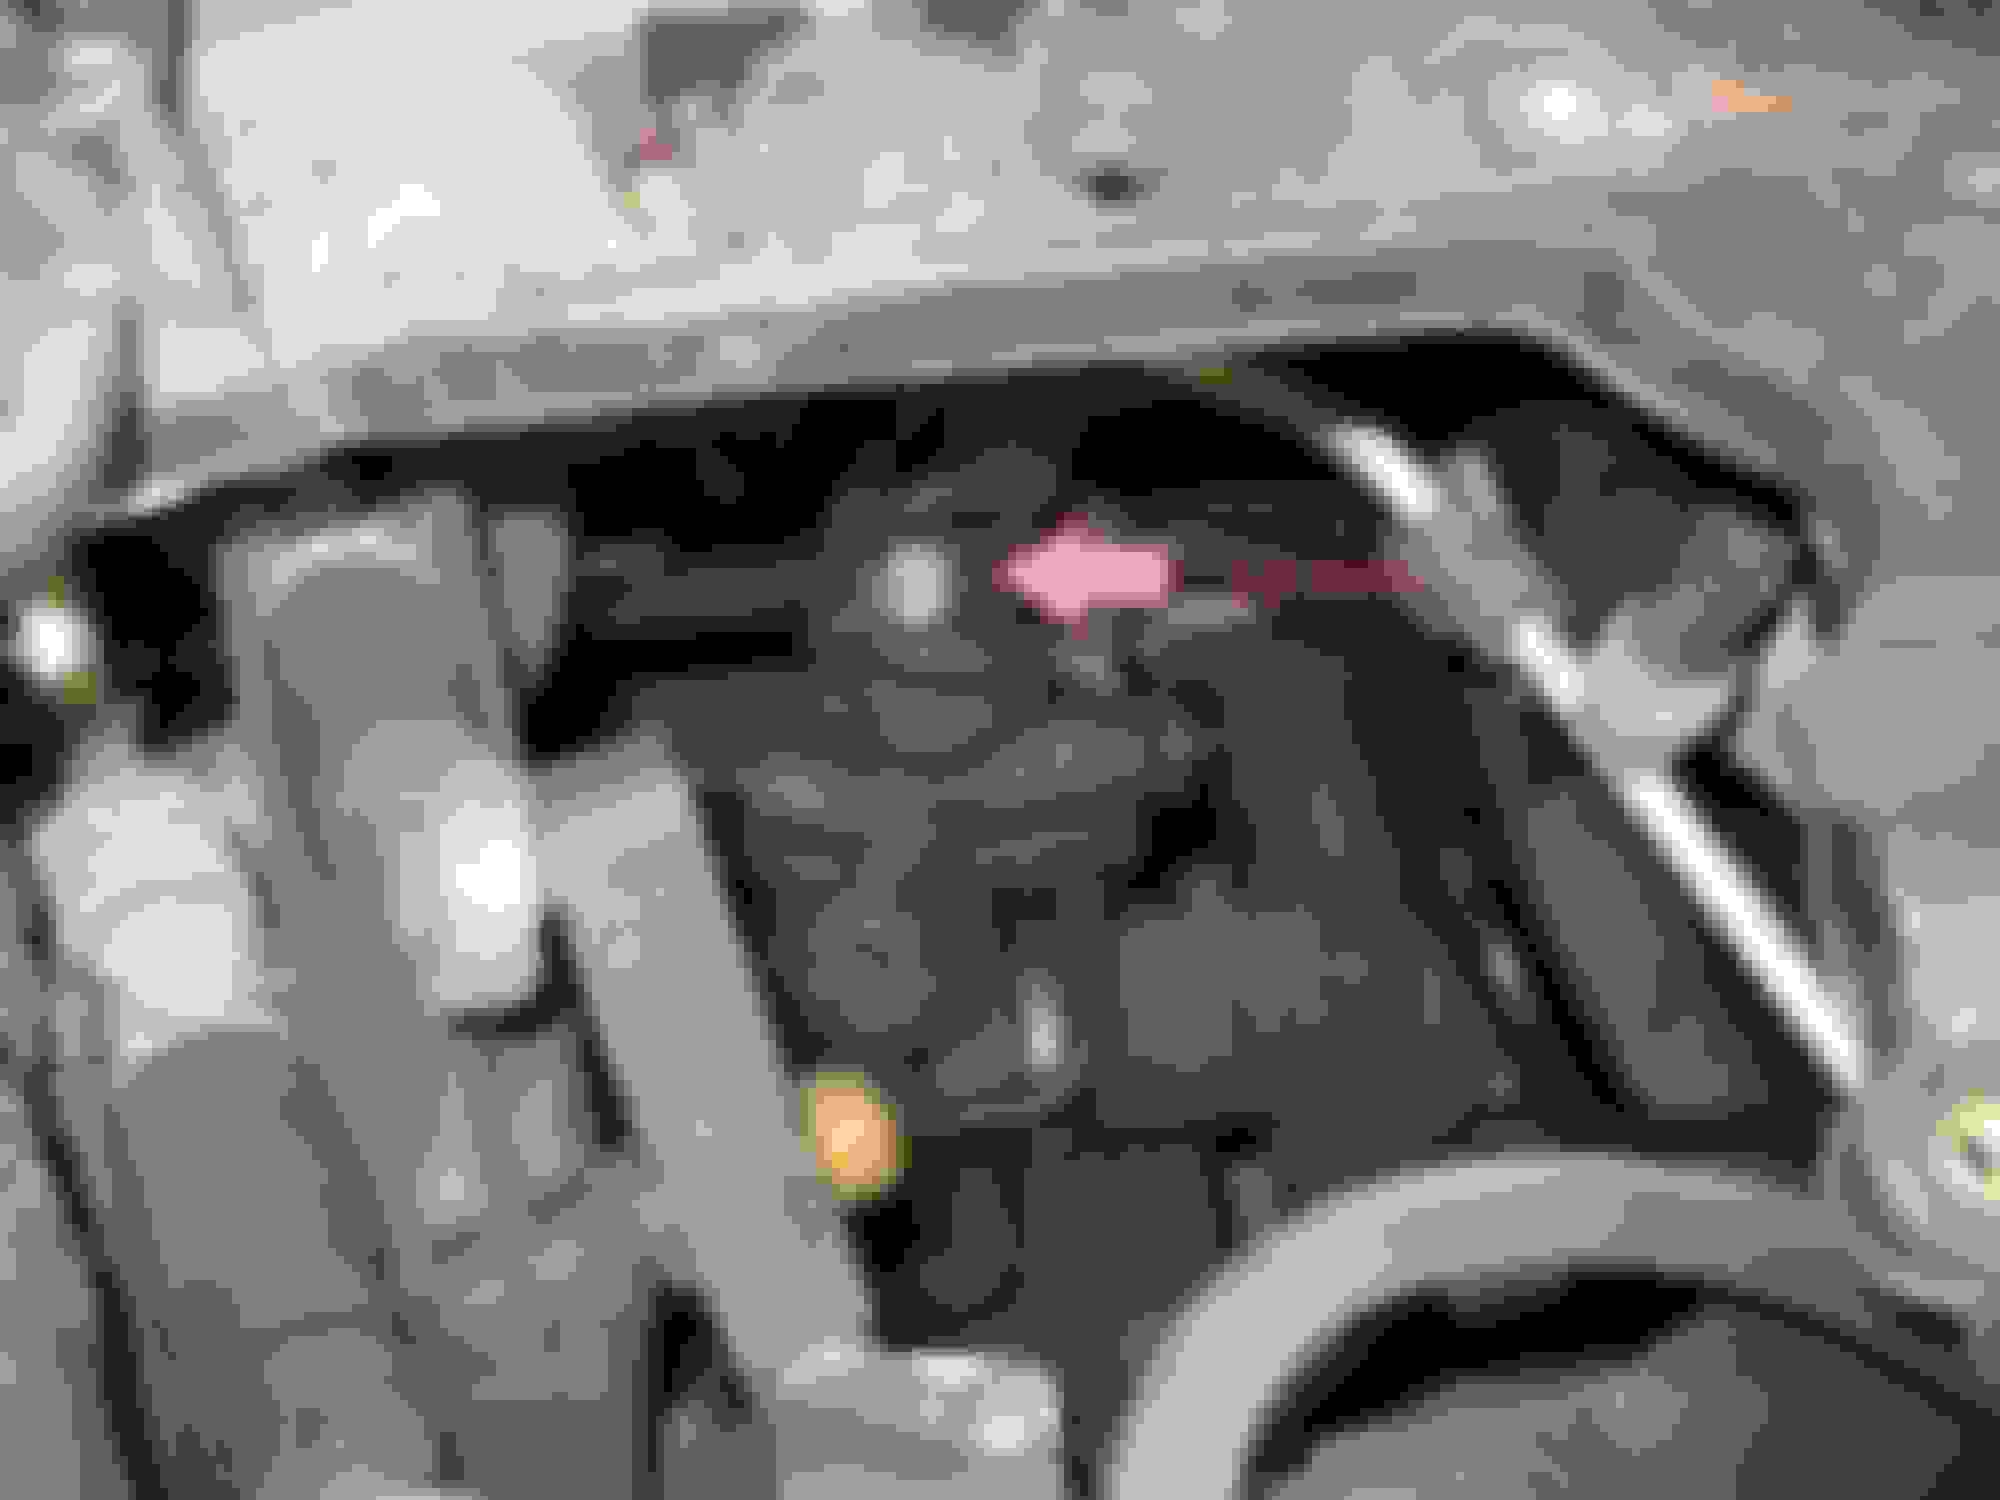
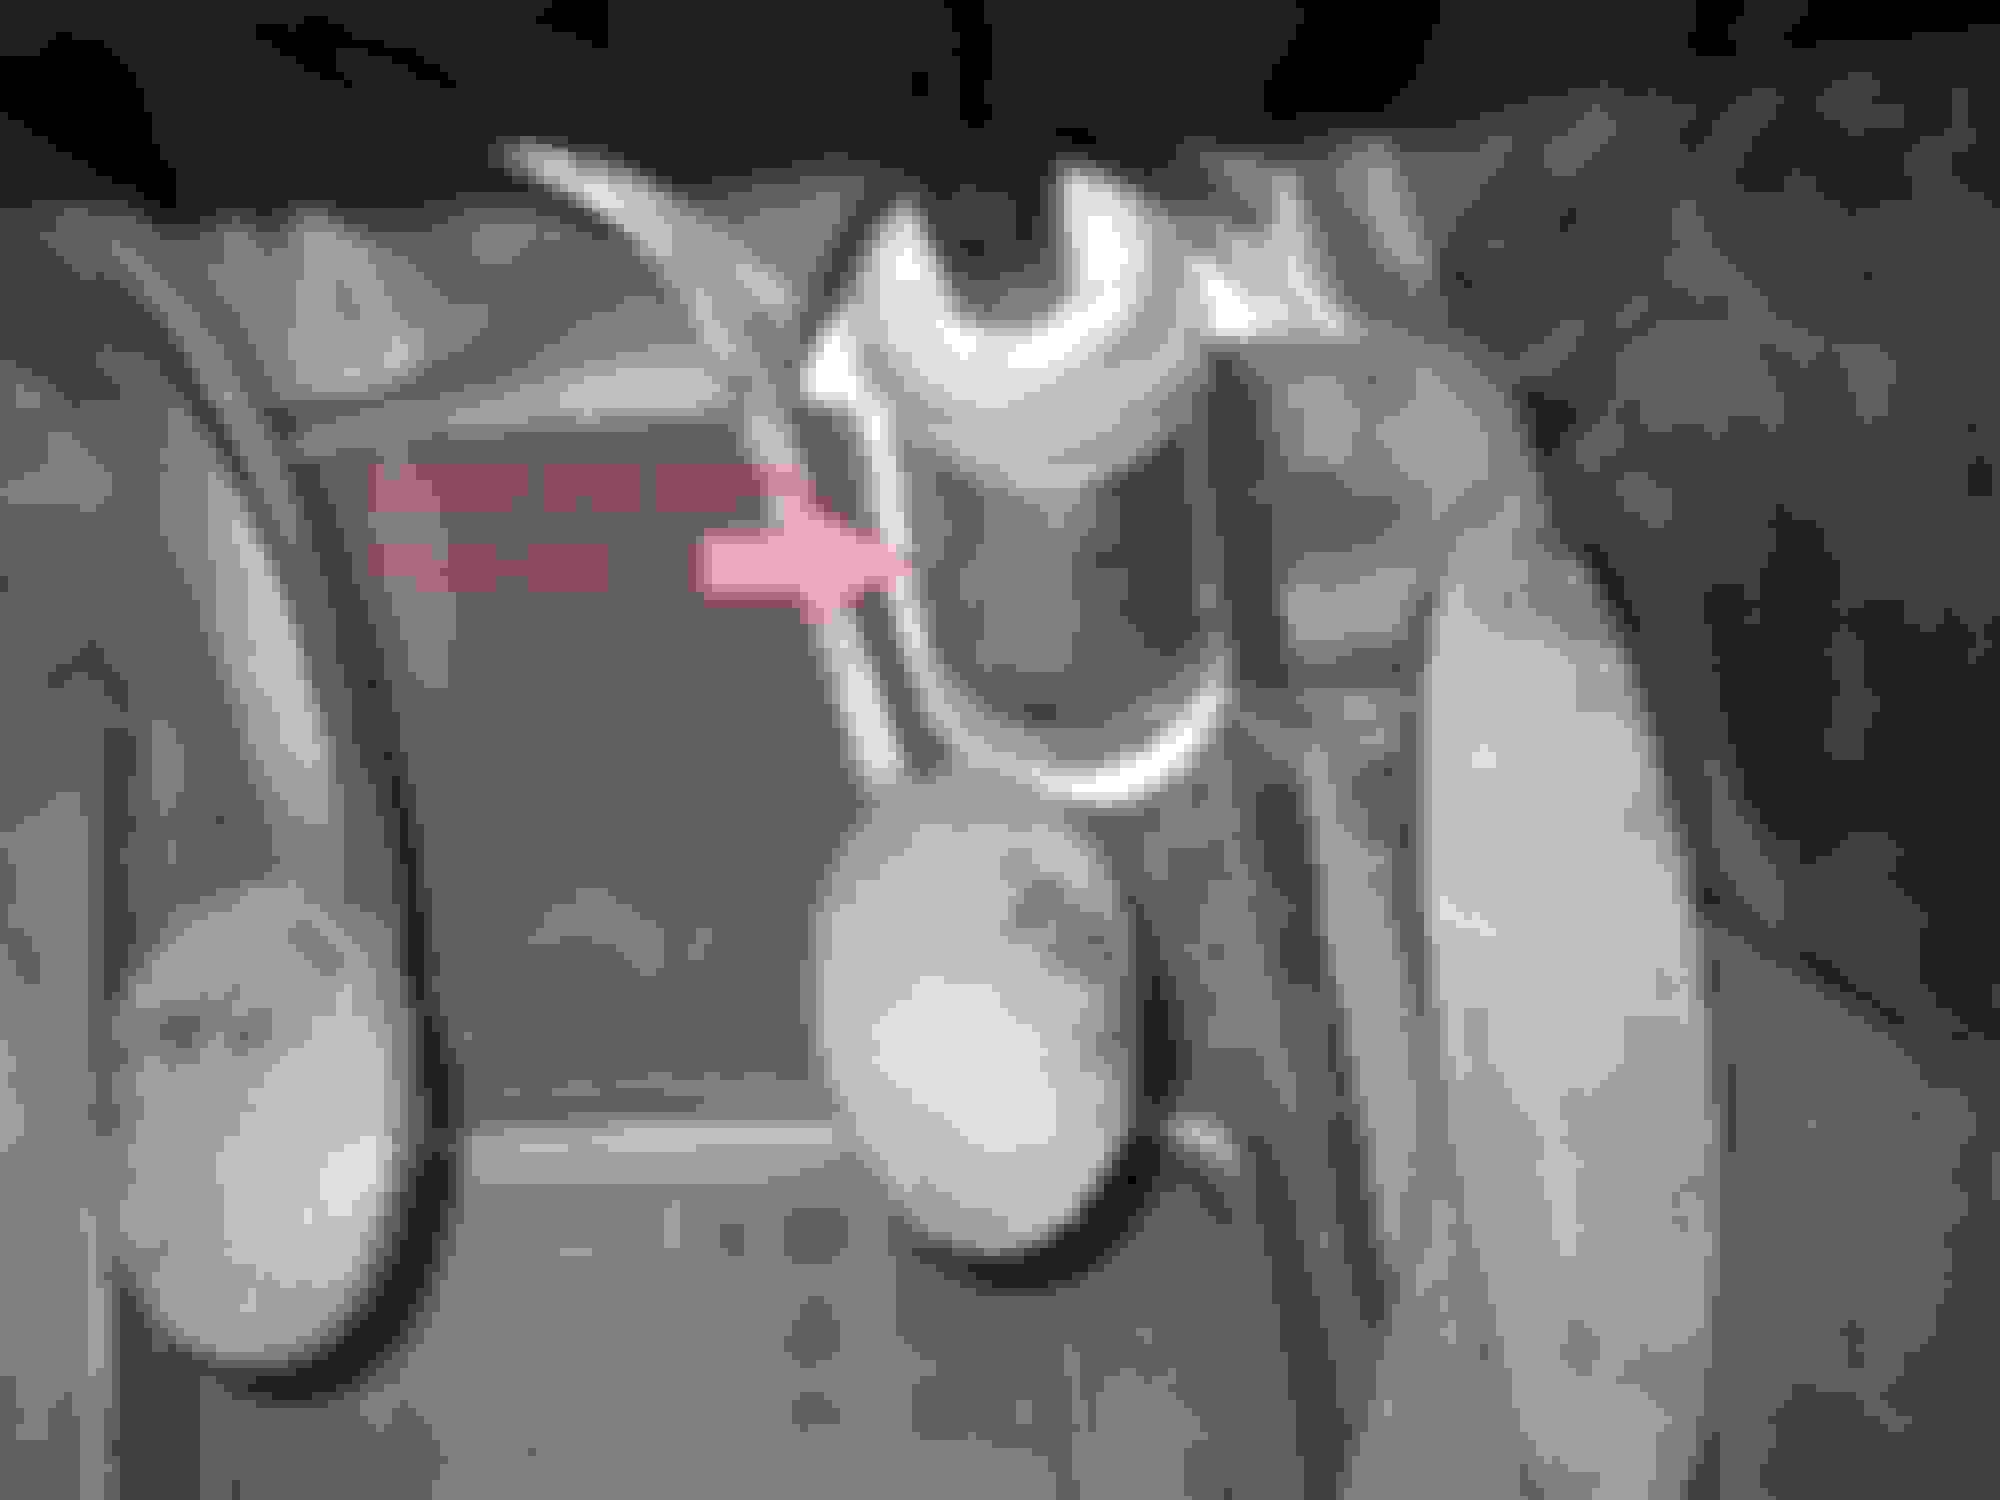
Once that was done, it really wasn't hard to get to the 13mm self-locking nut:
Once the nut is off, take out the eccentric bolt and tap the lower steering column off of the steering rack sideways with a small hammer or something.
Time to go dashboard diving now. Remove the lower dash, take off the cover around the ignition key and remove the lower steering column cover with to T25 Torx screws:
If the eccentric self-locking nut on the lower end was pointing straight at you, then the 10mm hex bolt on the upper end should be at a perfect angle to get to:
Remove the hex bolt and collapse the lower steering column a little to get it off of the upper steering column. The pull the lower end out through the firewall.
Unless it's damaged, don't mess with the firewall boot itself. Replacing it is like mounting a tiny bicycle tire under your dashboard. It is the Boot of All Evil. Ask me how I know.
This wasn't a bad job to do, but hopefully it'll be even easier for you now.
Nice write up, and another way to get it from the top and you don't have to go through the wheel well. I guess the nonjacking or non lift method.
I went through the driver side wheel well (with the wheel off) and a long extension to get the lower part out while I had it up on a rack. I imagine you could do that with a jack also.
Note the newest part 32306870777 does not require you to rotate and reset like the older short term RHD to LHD part. When MINI had a shortage of these.
Dude your instructions were awesome. Just did this repair this afternoon. Was the easiest method that I've seen when searching for a DIY so I decided to try it out. Took me 1 hour start to finish including a 10 minute test-drive! I stayed clean and dry doing this even after all the snow we've been getting in Ontario.
Removing the battery box (car has an intake so no need to remove the airbox) gives the best access to the lower u-joint... lots of room to maneuver down there.
Thank you sir! You were a great help to me! If we ever meet, I owe you a beer!
Did you treat the U joint once a year with grease as prevention for rust after you replaced? I have been hitting mine once a year.
I packed the u-joint with grease and greased the under dash components as well - should keep any rust or contaminants at bay. This is going to be part of my regular maintenance schedule with my own R53 as well...
I packed the u-joint with grease and greased the under dash components as well - should keep any rust or contaminants at bay. This is going to be part of my regular maintenance schedule with my own R53 as well...
 05-23-2017, 05:18 PM