R60 :: Countryman Talk (2010-2015) R60 Cooper and Cooper S hatchback discussion NOT REPAIR RELATED Discussions.
Sponsored by:
Sponsored by: DashLynx

R60 What did you do to your Countryman TODAY?

Thread Tools
 
Search this Thread
 
  #51  
Old 06-25-2012, 10:45 AM
chrunck's Avatar
chrunck
chrunck is offline
6th Gear
iTrader: (2)
Join Date: Jul 2008
Location: Albuquerque, NM
Posts: 2,197
Received 216 Likes on 181 Posts
I replaced the trim piece (MINI calls it a "pressure lip seal") in front of the driver side wheel that I broke this winter in a hasty driveway exit.
 
  #52  
Old 06-25-2012, 11:45 AM
Mini-b10's Avatar
Mini-b10
Mini-b10 is offline
4th Gear
Join Date: Nov 2009
Location: Fort Myers, FL
Posts: 512
Likes: 0
Received 1 Like on 1 Post
Originally Posted by Mojito
Where'd you get them from?
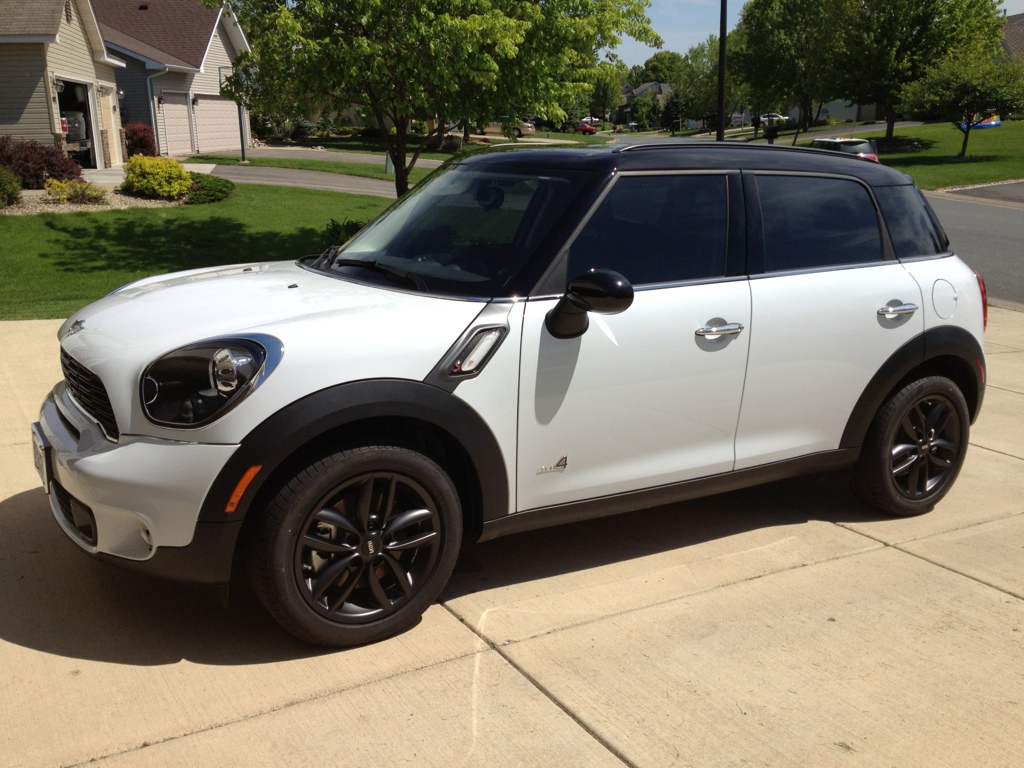
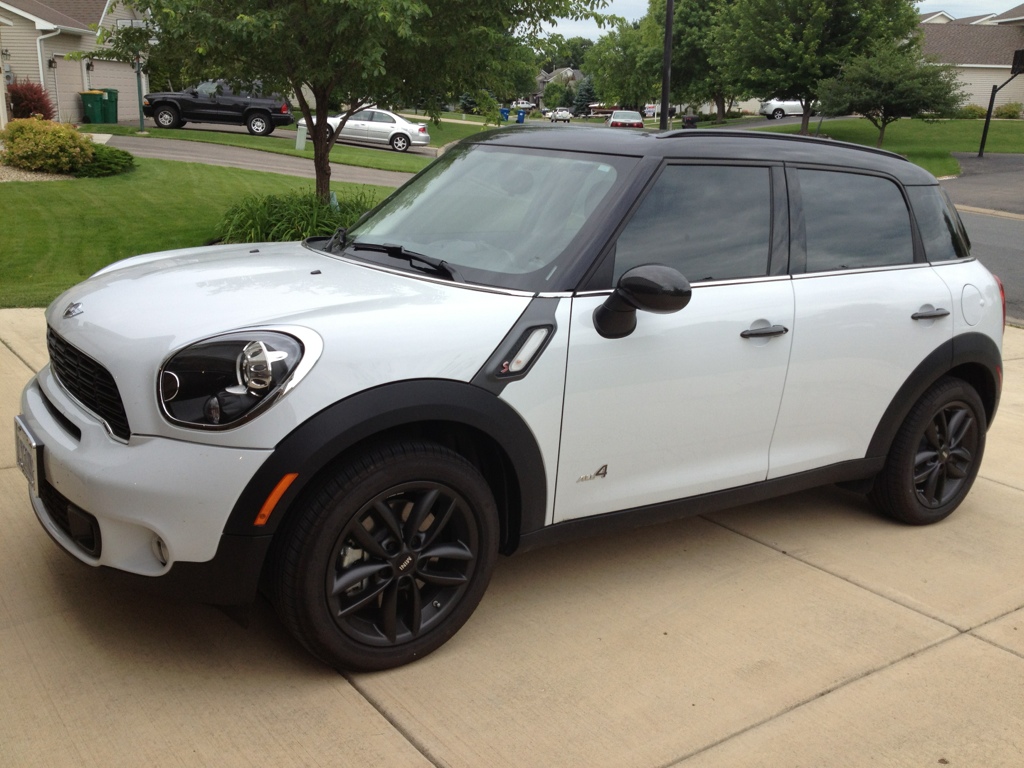
I got them from http://www.aesthetic-creations.com/c...id_category=23
I just happened to get lucky last week by checking their website and they had some in stock. They come flat black. I am getting mine painted Absolute Black to match the car.
 
  #53  
Old 06-25-2012, 01:31 PM
Hujan's Avatar
Hujan
Hujan is offline
5th Gear
iTrader: (2)
Join Date: Apr 2012
Posts: 795
Likes: 0
Received 1 Like on 1 Post
Using black plasti-dip, I successfully painted the "Cooper" part of the "Cooper S" on the rear hatch. Came out pretty nice, too, considering I did most of the work at 11:00 p.m. I am decidedly un-handy and have no real experience with spray paint (er, plasti-dip) and found it pretty easy to do.

Let me know if anyone wants to see pics and I'll post some up along with instructions.
 
  #54  
Old 06-25-2012, 01:45 PM
countryman-s's Avatar
countryman-s
countryman-s is offline
4th Gear
Join Date: Jul 2011
Location: Birmingham Al.
Posts: 524
Likes: 0
Received 1 Like on 1 Post
today i checked out the damage on the driver side mirror from my wife clipping the side entering the garage
 
  #55  
Old 06-25-2012, 01:48 PM
Mojito's Avatar
Mojito
Mojito is offline
5th Gear
Join Date: Apr 2011
Location: Kirkland, WA
Posts: 659
Likes: 0
Received 1 Like on 1 Post
Originally Posted by countryman-s
today i checked out the damage on the driver side mirror from my wife clipping the side entering the garage
bummer. how bad? If its just paint a good detailer and probably fix it. If not, at least the covers are available instead of a new unit.
 
  #56  
Old 06-25-2012, 01:51 PM
1bigpea's Avatar
1bigpea
1bigpea is offline
4th Gear
Thread Starter
Join Date: Dec 2010
Location: Orange County, CA
Posts: 429
Likes: 0
Received 2 Likes on 2 Posts
Originally Posted by countryman-s
today i checked out the damage on the driver side mirror from my wife clipping the side entering the garage
Bummer....
 
  #57  
Old 06-25-2012, 01:52 PM
countryman-s's Avatar
countryman-s
countryman-s is offline
4th Gear
Join Date: Jul 2011
Location: Birmingham Al.
Posts: 524
Likes: 0
Received 1 Like on 1 Post
the paint scratch it not to bad, it may buff out some. but somehow she creased the plastic ring between the mirror and the cap on front. i think thats part of the mirror frame
 

Last edited by countryman-s; 06-25-2012 at 01:55 PM. Reason: edit
  #58  
Old 06-25-2012, 04:54 PM
jthorst75's Avatar
jthorst75
jthorst75 is offline
3rd Gear
iTrader: (1)
Join Date: Feb 2007
Location: ABQ, NM
Posts: 191
Likes: 0
Received 0 Likes on 0 Posts
Originally Posted by Hujan
Using black plasti-dip, I successfully painted the "Cooper" part of the "Cooper S" on the rear hatch. Came out pretty nice, too, considering I did most of the work at 11:00 p.m. I am decidedly un-handy and have no real experience with spray paint (er, plasti-dip) and found it pretty easy to do.

Let me know if anyone wants to see pics and I'll post some up along with instructions.
I am curious on how this process turns out. Also curious on how you did the individual letters; where they removed or just taped off? I want to do my door handles beacuse I hate fingerprints! Plus I think it would look good in black including the taillight/headlight rings, cooper letters and rear Mini flag. LMK
 
  #59  
Old 06-25-2012, 05:50 PM
1bigpea's Avatar
1bigpea
1bigpea is offline
4th Gear
Thread Starter
Join Date: Dec 2010
Location: Orange County, CA
Posts: 429
Likes: 0
Received 2 Likes on 2 Posts
Originally Posted by jthorst75
I am curious on how this process turns out. Also curious on how you did the individual letters; where they removed or just taped off? I want to do my door handles beacuse I hate fingerprints! Plus I think it would look good in black including the taillight/headlight rings, cooper letters and rear Mini flag. LMK
With platidip there's no need to remove the letters. If done correctly (which is very easy) the plastidip peels away at the edge of the letter. As you peel away the excess it breaks at the edge of the lettering. You'll tape around the lettering leaving about 1.5" of paint exposed.

That probably sounds confusing, it's super easy. If you've never used plastidip before start on something easy like the MINI badge or something with more surface area. You can peel it off if you don't like it black. See the below pic, I have the badge and Cooper logo done already.

Check out youtube, there are tons of tutorials on how to use plastidip.


  #60  
Old 06-25-2012, 07:21 PM
jthorst75's Avatar
jthorst75
jthorst75 is offline
3rd Gear
iTrader: (1)
Join Date: Feb 2007
Location: ABQ, NM
Posts: 191
Likes: 0
Received 0 Likes on 0 Posts
Thanks for the heads up, I will check out youtube. I also planned on something small like the mini wings, since I have seen it done before and it looks great. So what are you drinking? Is it a requirement for using plasticdip? I'd agree either way.
 
  #61  
Old 06-25-2012, 07:45 PM
1bigpea's Avatar
1bigpea
1bigpea is offline
4th Gear
Thread Starter
Join Date: Dec 2010
Location: Orange County, CA
Posts: 429
Likes: 0
Received 2 Likes on 2 Posts
Originally Posted by jthorst75
Thanks for the heads up, I will check out youtube. I also planned on something small like the mini wings, since I have seen it done before and it looks great. So what are you drinking? Is it a requirement for using plasticdip? I'd agree either way.

I forget the beer at that time of pic but definitely a nice IPA, probably a double.

No requirements on using plastidip, it's just that it's cheap, easy to use, not permanent, looks good, and gives me a reason to hang out in the garage drinking good beer with good friends.
 
  #62  
Old 06-25-2012, 09:58 PM
Hujan's Avatar
Hujan
Hujan is offline
5th Gear
iTrader: (2)
Join Date: Apr 2012
Posts: 795
Likes: 0
Received 1 Like on 1 Post
Originally Posted by 1bigpea
With platidip there's no need to remove the letters. If done correctly (which is very easy) the plastidip peels away at the edge of the letter. As you peel away the excess it breaks at the edge of the lettering. You'll tape around the lettering leaving about 1.5" of paint exposed.

That probably sounds confusing, it's super easy. If you've never used plastidip before start on something easy like the MINI badge or something with more surface area. You can peel it off if you don't like it black. See the below pic, I have the badge and Cooper logo done already.

Check out youtube, there are tons of tutorials on how to use plastidip.


Wow, 1bigpea! I had to do a double take when I saw that picture you posted because our Countrymen look identical and I used the exact same approach with newspaper and blue masking tape. I thought, "Wait! I didn't post any pictures of my setup, did I?" VERY WEIRD!

Everything 1bigpea said is right on. Plastidip is very forgiving and tears very cleanly at right angles, so tearing away the plastidip around letters is very easy. The hardest part is getting it out of the center of the "Os," "P" and "R" in "COOPER."

Toothpicks and tweezers (with the tips wrapped in a bit of masking tape) are useful.

Also, maybe 1bigpea can confirm, but my impression is that you get a "flatter" texture by going slow and waiting for each coat to completely dry before adding another. Also, for each coat, less is more. In other words, a dozen thin coats are better than 3 heavy ones, in my experience. (Again, others can correct me if I'm wrong.)

I should also mention that you should resist the urge to make the plastidip too thin. It is counter-intuitive, but to get it to stick together and tear off in large sections cleanly it needs to be somewhat thick. Too thin and it will disintegrate into flakes rather than peeling off in large swatches (which is what you need in order to get clean edges). Bottom line, err on the side of being too thick rather than too thin.

Lastly, I found this material VERY helpful in understanding how to do the process:

http://g35driver.com/forums/v36-diy/...s-minutes.html
 

Last edited by Hujan; 06-25-2012 at 10:06 PM.
  #63  
Old 06-25-2012, 10:01 PM
Hujan's Avatar
Hujan
Hujan is offline
5th Gear
iTrader: (2)
Join Date: Apr 2012
Posts: 795
Likes: 0
Received 1 Like on 1 Post
Originally Posted by 1bigpea
I forget the beer at that time of pic but definitely a nice IPA, probably a double.

No requirements on using plastidip, it's just that it's cheap, easy to use, not permanent, looks good, and gives me a reason to hang out in the garage drinking good beer with good friends.
You got any after pics of the "wings"? I rushed it and got too much "texture" and ended up peeling them off. I nailed the "COOPER" though. (Given my skill set, anyway.)
 
  #64  
Old 06-26-2012, 07:04 AM
liveSTRONG's Avatar
liveSTRONG
liveSTRONG is offline
3rd Gear
Join Date: Feb 2006
Location: Minnesota
Posts: 256
Likes: 0
Received 0 Likes on 0 Posts
Installed my CARBONMINI carbon fiber door handles to match the carbon fiber mirrors

Before:
Name:  8f71596e.jpg
Views: 4226
Size:  309.2 KB

After:
Name:  264e829d.jpg
Views: 3872
Size:  282.8 KB
 
  #65  
Old 06-26-2012, 07:11 AM
cambunbosti's Avatar
cambunbosti
cambunbosti is offline
1st Gear
Join Date: Jan 2010
Location: Puerto Rico
Posts: 46
Likes: 0
Received 0 Likes on 0 Posts
I just go with a intake Duell style

here are some shots
 
Attached Thumbnails What did you do to your Countryman TODAY?-img_6739.jpg  
  #66  
Old 06-26-2012, 09:36 AM
days-like-this's Avatar
days-like-this
days-like-this is offline
4th Gear
Join Date: Oct 2010
Location: salt lake city, utah
Posts: 376
Likes: 0
Received 0 Likes on 0 Posts
Thumbs up kudos to Poochstyles

Originally Posted by pdoel
I ordered a poochstyle mat. Still have a few weeks before my CM gets here, but I like to be prepared. Now I'll be able to take the dogs to the park without fear!

LOVE LOVE LOVE our Poochstyles mat. We have 25k on our Countryman now and this mat not only works for our dog but we use it for EVERY camp trip or hauling trip of ANYTHING. Material is bullet proof (don't know which material you went with). Cheers and enjoy
What did you do to your Countryman TODAY?-img_0533.jpg
 
  #67  
Old 06-26-2012, 10:04 AM
1bigpea's Avatar
1bigpea
1bigpea is offline
4th Gear
Thread Starter
Join Date: Dec 2010
Location: Orange County, CA
Posts: 429
Likes: 0
Received 2 Likes on 2 Posts
Originally Posted by liveSTRONG
Installed my CARBONMINI carbon fiber door handles to match the carbon fiber mirrors

After:
That looks good. How do the door handles work, are they covers that snap on?
 
  #68  
Old 06-26-2012, 10:39 AM
Mini-b10's Avatar
Mini-b10
Mini-b10 is offline
4th Gear
Join Date: Nov 2009
Location: Fort Myers, FL
Posts: 512
Likes: 0
Received 1 Like on 1 Post
Dropped my door handle covers off to be painted this morning. Should be done this afternoon.
 
  #69  
Old 06-26-2012, 10:57 AM
Mojito's Avatar
Mojito
Mojito is offline
5th Gear
Join Date: Apr 2011
Location: Kirkland, WA
Posts: 659
Likes: 0
Received 1 Like on 1 Post
Originally Posted by 1bigpea
That looks good. How do the door handles work, are they covers that snap on?
They appear to be covers, very very expensive covers. But they look great
 
  #70  
Old 07-01-2012, 10:19 PM
1bigpea's Avatar
1bigpea
1bigpea is offline
4th Gear
Thread Starter
Join Date: Dec 2010
Location: Orange County, CA
Posts: 429
Likes: 0
Received 2 Likes on 2 Posts
Had the tires rotated.

I'm a few hundred short of 5k so I'm about to do the oil too...
 
  #71  
Old 07-02-2012, 10:23 AM
Mini-b10's Avatar
Mini-b10
Mini-b10 is offline
4th Gear
Join Date: Nov 2009
Location: Fort Myers, FL
Posts: 512
Likes: 0
Received 1 Like on 1 Post
Received the belt line blackout, black headlight and taillight rings and burnt orange S's for scuttles and rear boot. Hopefully get to installing parts of it tonight. All depends on the month old son and whether I can get into the garage.
 

Last edited by Mini-b10; 07-02-2012 at 12:01 PM.
  #72  
Old 07-02-2012, 11:35 AM
starman's Avatar
starman
starman is offline
3rd Gear
Join Date: Jun 2012
Location: San Diego Vegas Kihei
Posts: 291
Likes: 0
Received 2 Likes on 2 Posts
Originally Posted by Mini-b10
Received the blelt line blackout, black headlight and taillight rings and burnt orange S's for scuttles and rear boot. Hopefully get to installing parts of it tonight. All depends on the month old son and whether I can get into the garage.
Where did you buy the rings and other bits?
 
  #73  
Old 07-02-2012, 11:49 AM
SmithWerks's Avatar
SmithWerks
SmithWerks is offline
3rd Gear
iTrader: (1)
Join Date: Jul 2012
Location: Long Island, NY
Posts: 236
Likes: 0
Received 4 Likes on 4 Posts
Drove it to work for the 1st time. ha
:P
 
  #74  
Old 07-02-2012, 12:03 PM
Mini-b10's Avatar
Mini-b10
Mini-b10 is offline
4th Gear
Join Date: Nov 2009
Location: Fort Myers, FL
Posts: 512
Likes: 0
Received 1 Like on 1 Post
Originally Posted by starman
Where did you buy the rings and other bits?
I got my rings, belt line and S's from Lyle at Vinyl Styles and the door handle covers from Aesthetic Creations. Hopefully get a few pieces installed tonight and the rest on 4th of July. Have pictures after it's all done.
 
  #75  
Old 07-02-2012, 12:14 PM
starman's Avatar
starman
starman is offline
3rd Gear
Join Date: Jun 2012
Location: San Diego Vegas Kihei
Posts: 291
Likes: 0
Received 2 Likes on 2 Posts
Excellente'! Ordered the door handle covers from AC earlier today myself! Let me know how easily they stick on.


Quick Reply: R60 What did you do to your Countryman TODAY?


All times are GMT -7. The time now is 02:15 PM.