
R60 Help Removing Battery. Need to remove washer arm???
#1
 02-25-2012, 03:19 PM


Help Removing Battery. Need to remove washer arm???
Hey all,
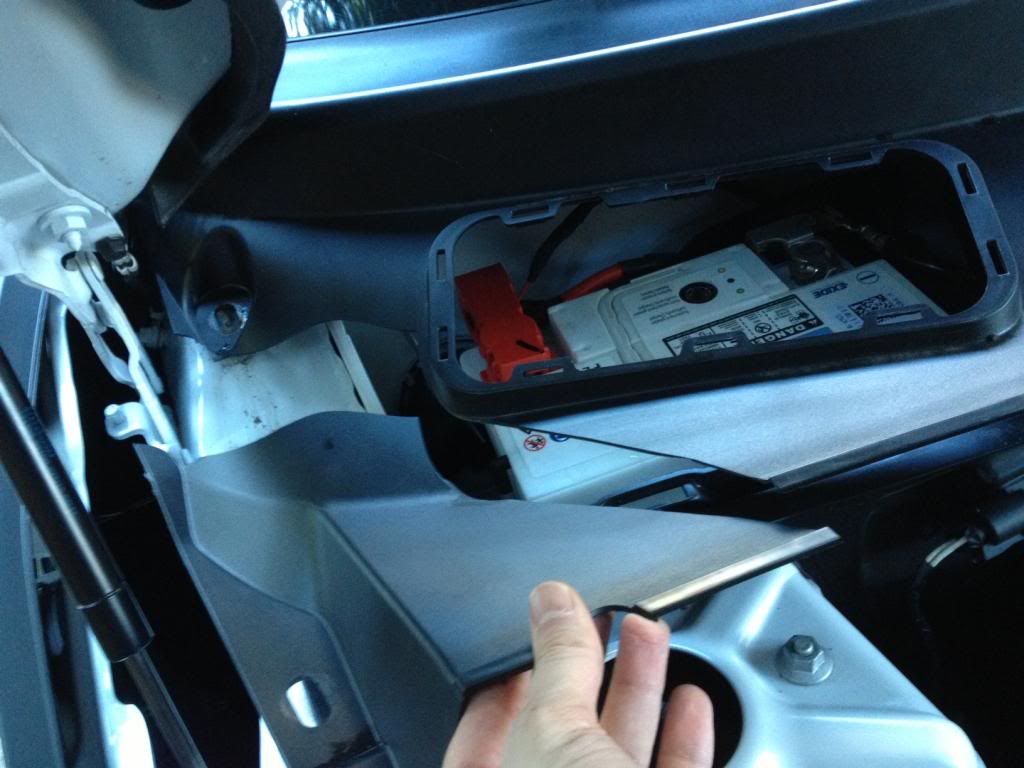
I'm doing some work on my Countryman and need to remove the battery to hook up some power. I can't seem to get the cover off without removing the washer arm. I did some research in the R56 threads but there's nothing showing how to get this cover off. I've got the whole part of the trim popped out of the clips everywhere but behind the washer arm.
If I remove the bolt holding the washer arm on the washer arm doesn't want to come off. Does anyone know if there is a service mode like on VW's that set the washer blades out of the way? One of the threads on R56 said a special pry tool is needed?
I really can't believe removing the battery is difficult when I've got the rest of the interior completely torn out! Geez.
Thanks in advance, pics below.
#3
02-26-2012, 05:28 AM

3rd Gear
Join Date: Oct 2011
Location: Cleveland, OH
Posts: 189
Likes: 0
Received 0 Likes
on
0 Posts
#4
02-26-2012, 06:51 AM


#7
02-26-2012, 01:50 PM

Trending Topics
#8
02-26-2012, 02:06 PM
Thanks.
#9
02-26-2012, 02:08 PM
Haha...I'm installing speakers and amps. There are speakers under the front seats so those have to come out and removed the back for wiring. I'll post pics of the dash soon, pretty crazy looking when its all removed.
#11
02-26-2012, 06:32 PM
It's definitely a plus to have a buddy who is great at car audio installations and has experience removing all interior body trim. I'm handy myself but it's a 2 man job for sure.
I'll be posting some photos of the install and some details of what to expect when you want to install new speakers.
#12
02-26-2012, 06:46 PM
Finally got it removed (after whole car was put back together)
OK, not sure if the R56 trim piece is the same as the R60 but they are different part numbers according to RealOem.com.
There is a "lip" that attaches to the windshield trim and when removing you have to pull all the nuts (3 obviously) and then pop up the clips. Once all that is completed it's necessary to reach all the way to the back and pop up along the windshield. Once it's separated there it can be pulled out.
Not sure if the R56 is the same...haven't had a chance to mess with the wife's 2011 MCS.
See photos below...
#13
02-26-2012, 07:32 PM
R60 and R56 Trim are different
Ok, I compared the trim on my wife's R56 and my R60. As you can see the trim is different. The R60 has a "lip" the trim fits into and the R56 has a rubber seal above where the lip would be on the R60.
Anyways, hope this thread helps someone in the future...here are the pics.
R56

R56

R60

R60

Anyways, hope this thread helps someone in the future...here are the pics.
R56
R56
R60
R60


#15
03-07-2012, 03:25 PM
#16
03-07-2012, 08:57 PM
Yeah, I did, glad you reminded me to post them! Got the pics and story up in the Countryman R60 Interior/Exterior thread, link below.
https://www.northamericanmotoring.co...tall-pics.html
https://www.northamericanmotoring.co...tall-pics.html
#17
11-13-2012, 07:49 PM

Cross-posting this from the R56 thread on the same topic, for the benefit of other R60 folks tackling the same issue:
1bigpea-
I've got to resurrect your thread here as I'm trying to tackle a subwoofer install of my own, and I've been stopped in my tracks just trying to get the battery cover removed to access the firewall pass-thru.
I had no trouble removing the 3 visible nuts and releasing the majority of the clips on the front edge of the cowl, but this "lip" that holds the rear edge of the cowl against the windshield is tough to release. I applied so much "upward pressure" to the thing that I cracked it
Now, the cowl replacement is only ~$40 or so, so not the end of the world if I need to go that route- but it's got my gun-shy about cranking any harder to get the cowl removed.
With that being said, is there any more explicit advice you can give on how one needs to maneuver the cowl out of that lip at the windshield edge? I'm convinced that once I get that part off, it should be smooth sailing for the rest of the project.
Thanks in advance for any help you can provide- and hell, thank you for starting this thread in the first place, as it's the only place I could find any information on how to access the battery compartment.
-Josh
#18
11-13-2012, 08:13 PM
Cross-posting this from the R56 thread on the same topic, for the benefit of other R60 folks tackling the same issue:
1bigpea-
I've got to resurrect your thread here as I'm trying to tackle a subwoofer install of my own, and I've been stopped in my tracks just trying to get the battery cover removed to access the firewall pass-thru.
I had no trouble removing the 3 visible nuts and releasing the majority of the clips on the front edge of the cowl, but this "lip" that holds the rear edge of the cowl against the windshield is tough to release. I applied so much "upward pressure" to the thing that I cracked it
Now, the cowl replacement is only ~$40 or so, so not the end of the world if I need to go that route- but it's got my gun-shy about cranking any harder to get the cowl removed.
With that being said, is there any more explicit advice you can give on how one needs to maneuver the cowl out of that lip at the windshield edge? I'm convinced that once I get that part off, it should be smooth sailing for the rest of the project.
Thanks in advance for any help you can provide- and hell, thank you for starting this thread in the first place, as it's the only place I could find any information on how to access the battery compartment.
-Josh
1bigpea-
I've got to resurrect your thread here as I'm trying to tackle a subwoofer install of my own, and I've been stopped in my tracks just trying to get the battery cover removed to access the firewall pass-thru.
I had no trouble removing the 3 visible nuts and releasing the majority of the clips on the front edge of the cowl, but this "lip" that holds the rear edge of the cowl against the windshield is tough to release. I applied so much "upward pressure" to the thing that I cracked it
Now, the cowl replacement is only ~$40 or so, so not the end of the world if I need to go that route- but it's got my gun-shy about cranking any harder to get the cowl removed.
With that being said, is there any more explicit advice you can give on how one needs to maneuver the cowl out of that lip at the windshield edge? I'm convinced that once I get that part off, it should be smooth sailing for the rest of the project.
Thanks in advance for any help you can provide- and hell, thank you for starting this thread in the first place, as it's the only place I could find any information on how to access the battery compartment.
-Josh
Hey what's up Josh, glad you found this thread and I do share your pain!
Yup, you cracked it at the weakest point, not hard to do so don't stress it. Honestly there really should be no issue with it cracked because it's not noticeable to anyone usually. (but you will, probably just replace it )
The advice I can give is don't lift and pull anywhere near that point, reach your hand way back under the cover and start popping from the passenger side. It takes a lot of upward force and it's hard to get leverage with the angle. You see how in post #11 (I think) the photos show me installing it, and the far left side is last to pop in? That's cause it goes back on that way easiest. Left to right to remove, right to left to replace. Seems the plastic flexes more because there are not weak points.
Also, do try and pull outwards to relieve some of the pressure holding the piece into the lip.
When you put it back on you will see exactly what I'm talking about. It slides on and then pops in for install. However if you do it wrong on removal you'll crack it unfortunately.
Hope this helped you out, and keep us posted!
#19
11-14-2012, 08:07 PM
What up again Josh. Posting my response here for information purposes as always.
Hey what's up Josh, glad you found this thread and I do share your pain!
Yup, you cracked it at the weakest point, not hard to do so don't stress it. Honestly there really should be no issue with it cracked because it's not noticeable to anyone usually. (but you will, probably just replace it )
The advice I can give is don't lift and pull anywhere near that point, reach your hand way back under the cover and start popping from the passenger side. It takes a lot of upward force and it's hard to get leverage with the angle. You see how in post #11 (I think) the photos show me installing it, and the far left side is last to pop in? That's cause it goes back on that way easiest. Left to right to remove, right to left to replace. Seems the plastic flexes more because there are not weak points.
Also, do try and pull outwards to relieve some of the pressure holding the piece into the lip.
When you put it back on you will see exactly what I'm talking about. It slides on and then pops in for install. However if you do it wrong on removal you'll crack it unfortunately.
Hope this helped you out, and keep us posted!
Now starts the debate about whether I want to tap my audio signal at the X9331 connector up front or off the inputs to the HK amp in the rear...
#20
12-08-2012, 03:36 PM
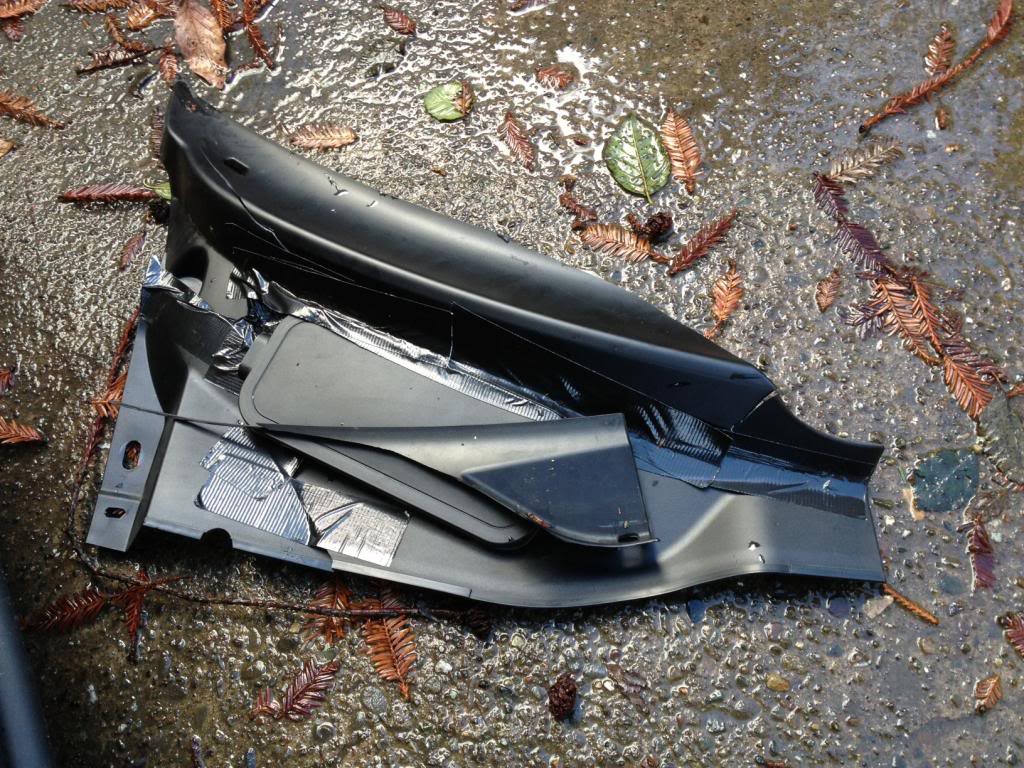
I finally had a chance to tackle this again last weekend and was able to get access to the battery compartment...by completely destroying the apron cover:
I tried everything I could think of to get the proper leverage and angle on the thing, but just when I thought I was finally 'getting it' there was a loud crack that told me and the neighbors that I'd be ordering a new one. Since I was past the point of no return, I just broke it apart enough to be able to get the battery out and run the wiring I needed to. The rest of the subwoofer install went swimmingly, and the car's been bumping ever since.
A quick order from Sewell let me go out with the old:
...and in with the (good as) new:
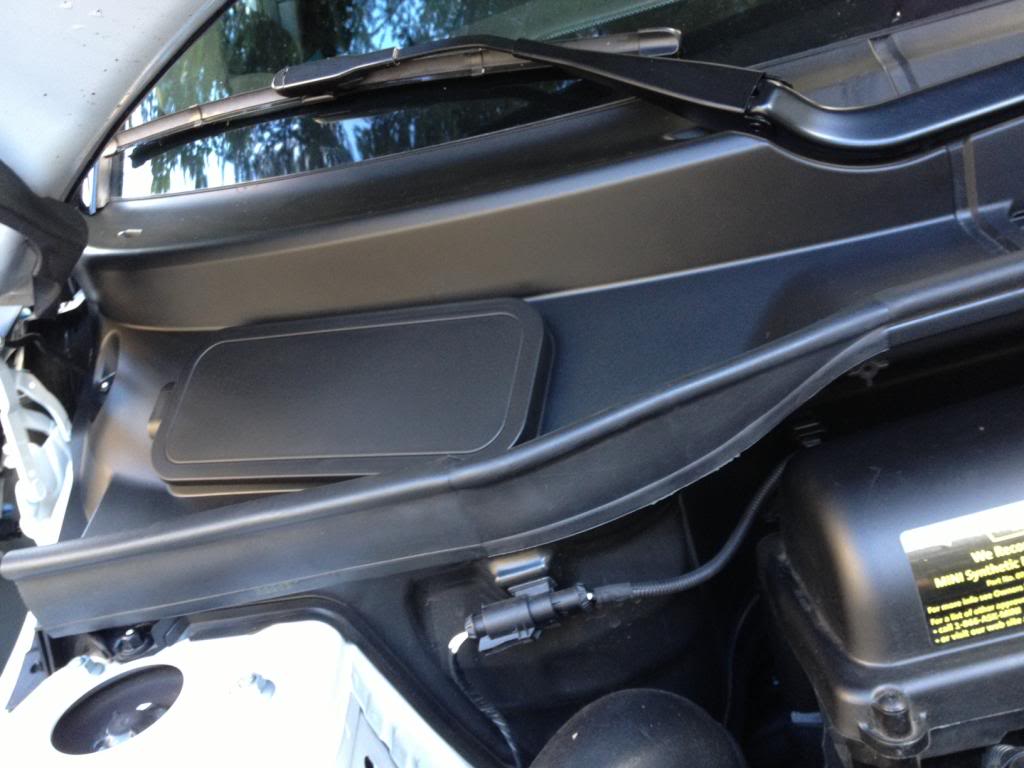
Sure was a heck of a lot easier putting the new piece on than getting the old one out. I think I'd have much better luck next time having finally understood the mechanics of that damn lip at the windshield edge, but here's hoping I won't have any reason to find out.
Thanks again for the guidance, 1bigpea!
I tried everything I could think of to get the proper leverage and angle on the thing, but just when I thought I was finally 'getting it' there was a loud crack that told me and the neighbors that I'd be ordering a new one. Since I was past the point of no return, I just broke it apart enough to be able to get the battery out and run the wiring I needed to. The rest of the subwoofer install went swimmingly, and the car's been bumping ever since.
A quick order from Sewell let me go out with the old:
...and in with the (good as) new:
Sure was a heck of a lot easier putting the new piece on than getting the old one out. I think I'd have much better luck next time having finally understood the mechanics of that damn lip at the windshield edge, but here's hoping I won't have any reason to find out.
Thanks again for the guidance, 1bigpea!
#21
12-08-2012, 03:54 PM

#22
12-08-2012, 05:08 PM
Sure was a heck of a lot easier putting the new piece on than getting the old one out. I think I'd have much better luck next time having finally understood the mechanics of that damn lip at the windshield edge, but here's hoping I won't have any reason to find out.
Thanks again for the guidance, 1bigpea!
#23
04-30-2013, 09:06 PM

hello all! i just found this forum after picking up a new R60 last month. it appears that i find myself driving down the same road that others before me have successfully navigated. specifically, joshknot and 1bigpea, before him. i'm trying to run cable to the battery for an amp install. i managed to get the apron off without damage (thanks guys!), have removed the battery and had a chance to look around. my question is this...is the rubber grommet in the pic below how you got the cables through the firewall? thanks!

#24
05-01-2013, 09:08 AM
hello all! i just found this forum after picking up a new R60 last month. it appears that i find myself driving down the same road that others before me have successfully navigated. specifically, joshknot and 1bigpea, before him. i'm trying to run cable to the battery for an amp install. i managed to get the apron off without damage (thanks guys!), have removed the battery and had a chance to look around. my question is this...is the rubber grommet in the pic below how you got the cables through the firewall? thanks!
Welcome aboard! Glad you got the apron off, that thing is a pain in the ****.
For some reason your pic is not opening...
#25
05-13-2013, 09:43 PM
https://www.dropbox.com/s/h3tjnrlj7j118gl/firewall.jpg