Drivetrain Intercooler Installation Pics
#1
 03-23-2013, 01:44 PM


Intercooler Installation Pics
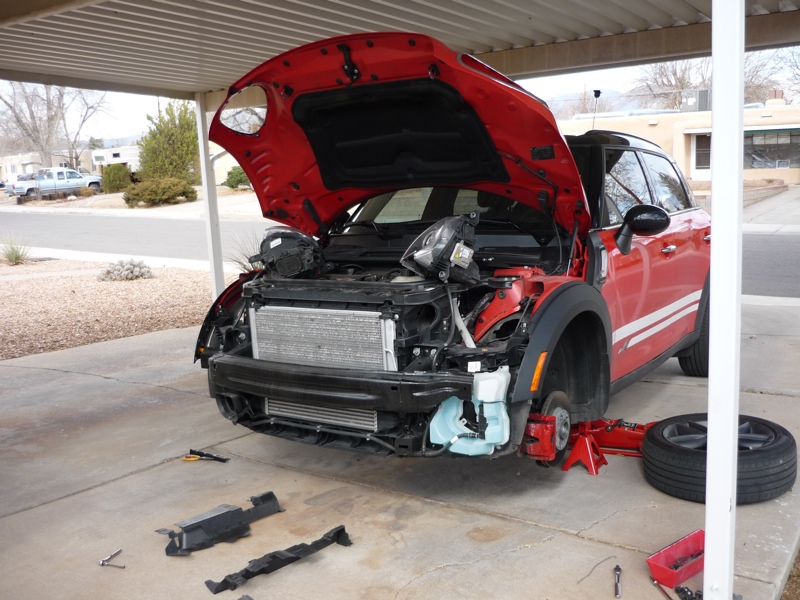
I installed the Helix intercooler on my R60 last weekend and wanted to share some installation pics. I didn't take enough pictures for a full how-to, but these may be useful for anyone else installing one.
My order of operations:
1. Jack up car and remove front wheels. This isn't completely necessary, but it does make it easier to work.
2. Remove front grille. There are 4 10mm bolts on top, then pull bottom edge towards you to release. You can also remove the headlights to make it easier by removing 4 10mm bolts on each one.
3. Remove front bumper apron. This is pain in the *** the first time you do it, but it's not so bad once you get the hang of it. Open the cap inside the wheel well and disconnect fog lights, turn signal, and side reflector. Remove 2 torx screws underneath as well as 3 plastic rivets. Pop out the center pieces of the rivets on the underside of the arch trim, along with 1 8mm screw. Release the white rivet on the inside of the arch trim to pull it away from the car. You don't need to remove then entire arch, but you do need it to be free up to the halfway point so you can pull it away from the car. Underneath you'll find 1 torx screw on each side of the car. Once those are out, remove the 2 torx screws on the upper front of the apron and it should come free. This is the most time-intensive step, and it gets easier after this.
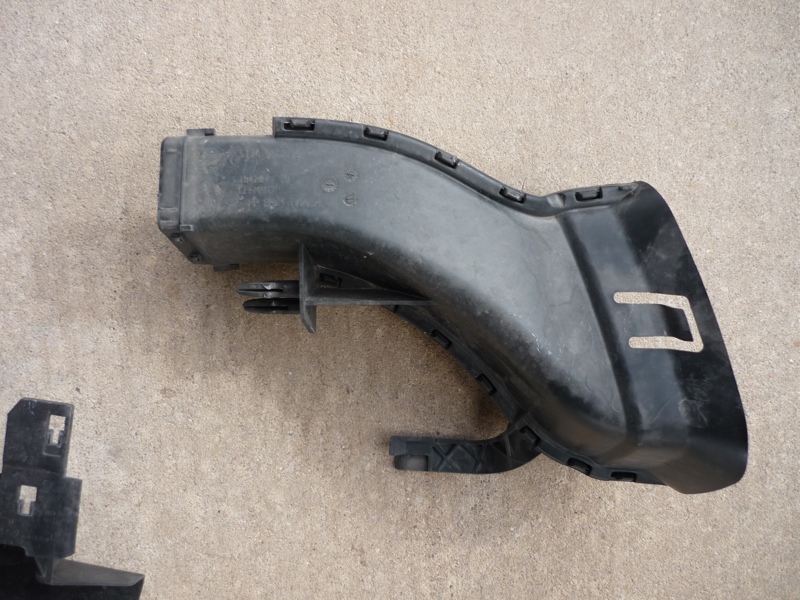
4. Remove the air ducts for the brakes. Do not remove the 4 8mm screws inside the wheel well--it won't do any good. They just pull forward off the car. Here is a pic--notice the two plugs that hold them in place.
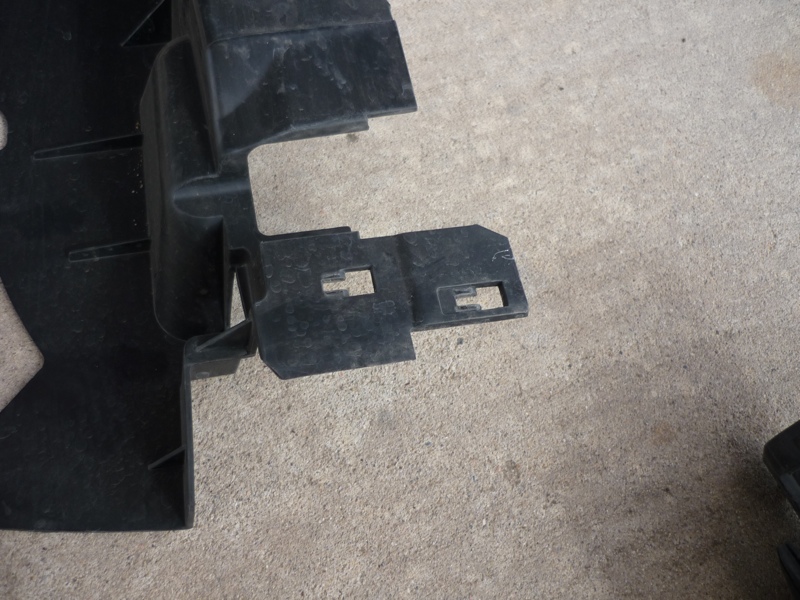
5. There are 2 long plastic pieces on either side of the radiator that need to be removed. Make sure you unclip the temperature sensor from the passenger side one. They look like this:
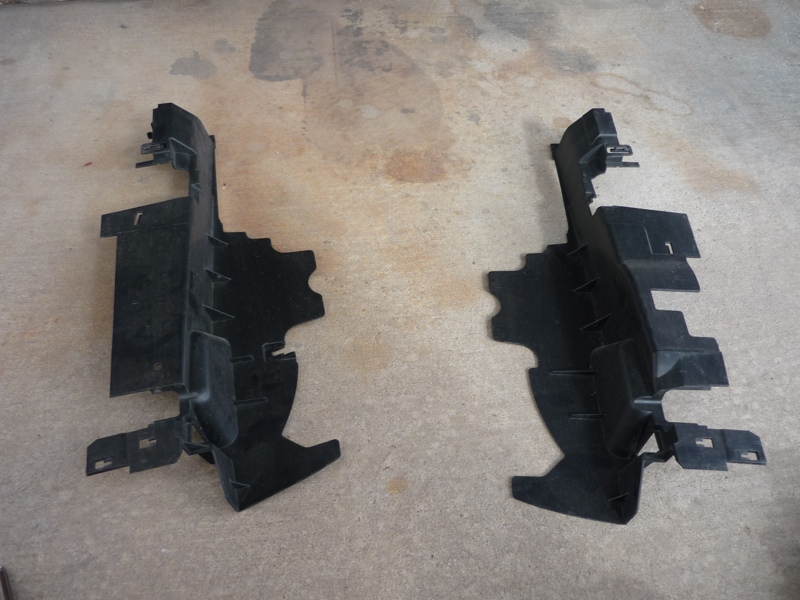
When you're taking them off, you have to pull forward to clear these square cutouts. Feeling with your hand, it will feel like they are bolts, but they aren't. They just slide forward and then off.
6. Now remove the old intercooler. On the driver side, take a flathead screwdriver and insert vertically from below to loosen the hose clamp. It's easy once you find the right hole. On the passenger side, you have to angle in from behind, but this one is also fairly easy to access. After the hose clamps are loosened, just pull the intercooler forward until it comes free.
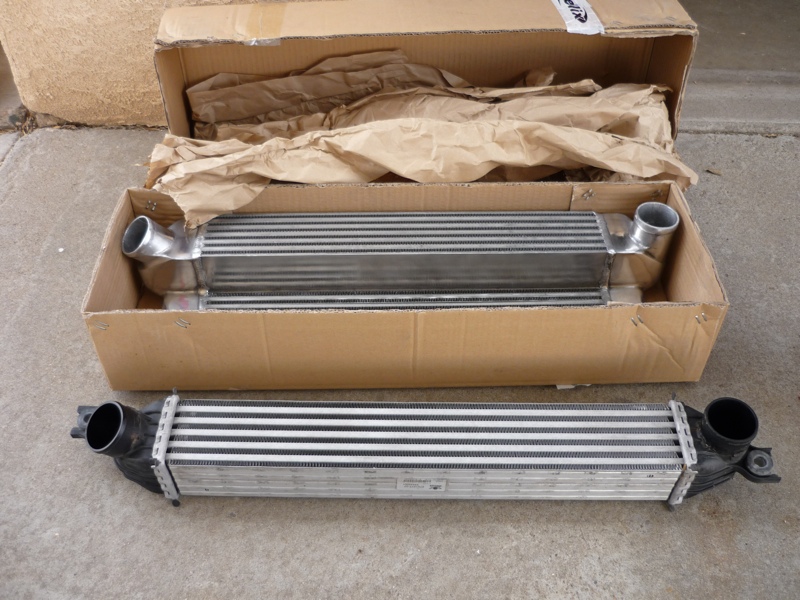
Here is the old vs the new:
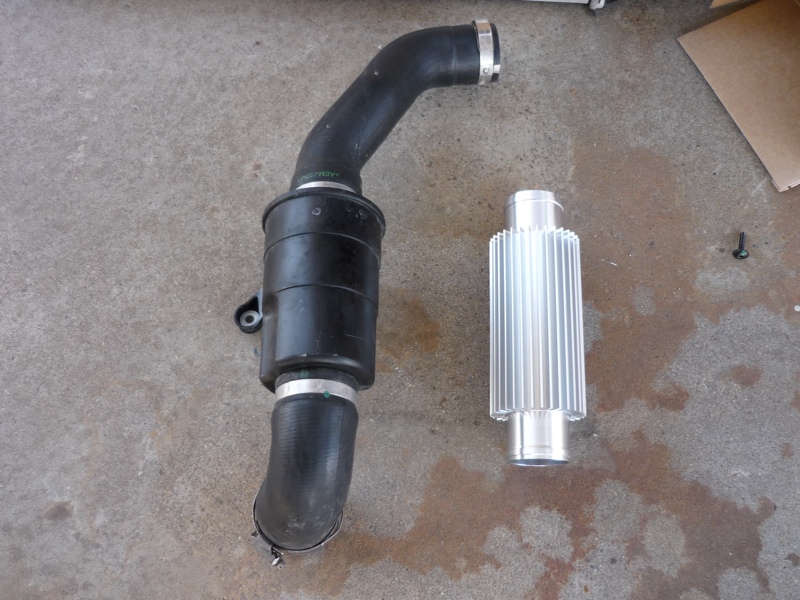
7. While you have the intercooler and bumper off, it's generally recommended to do something about the muffler on the hot side (driver side) boost tube. The muffler is restrictive to airflow and you're generally better off without it. You have 2 options: replace the entire tube (NM sells one), or replace the muffler with a store-bought piece or make your own (there's a good thread here if you want to make your own).
Holding the muffler on is a T25 torx screw that's a major pain to get to because of the various hoses, but it can be done with enough perseverance. I used a torx screwdriver and it wasn't too bad. Whether you're replacing the entire tube or just the muffler, you need to remove this screw, loosen the hose clamp on the turbo and remove the entire tube by dropping out the bottoms side of the car.
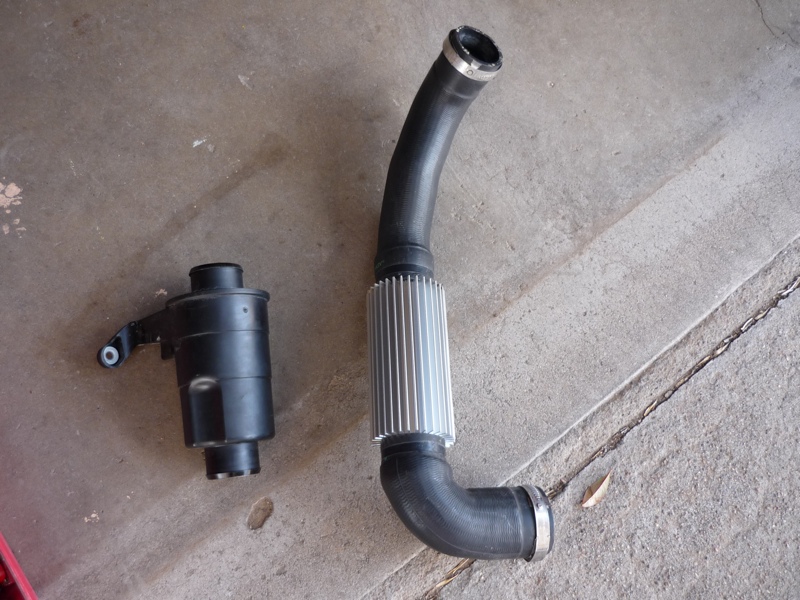
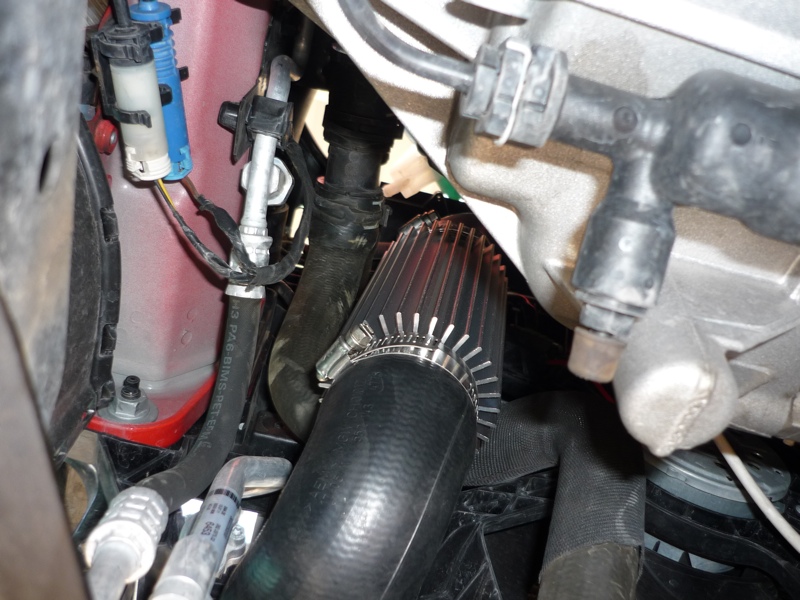
In the thread above on removing the muffler, I read about this pre-intercooler cooling pipe which is basically a small intercooler for your intercooler. It's only $40, so I went with it. I doubt it can really cool all that much in the 9" or so of its length, but it can't hurt. Here's a couple pics of it in place of the muffler:
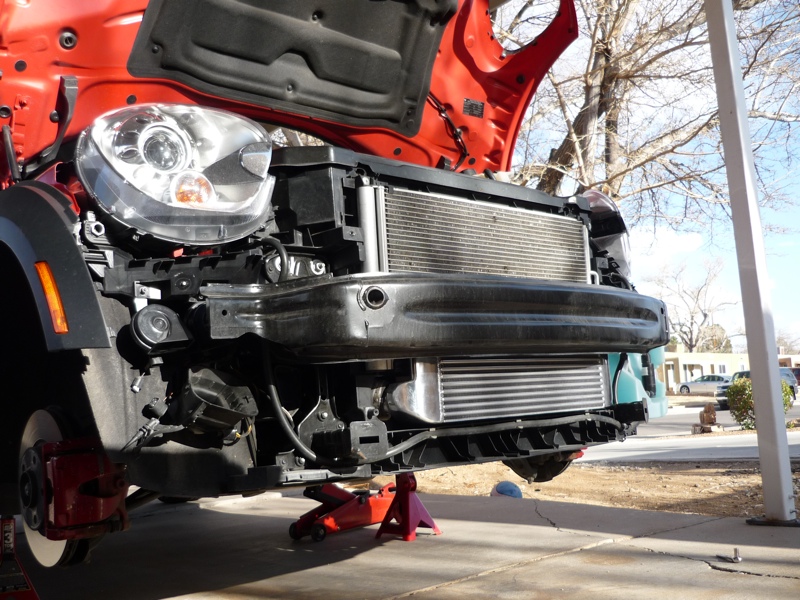
8. At this point, just reassemble in reverse. It's a lot quicker putting it back together than taking it apart. Here's the intercooler installed:
Underside view of the hot side boost tube:
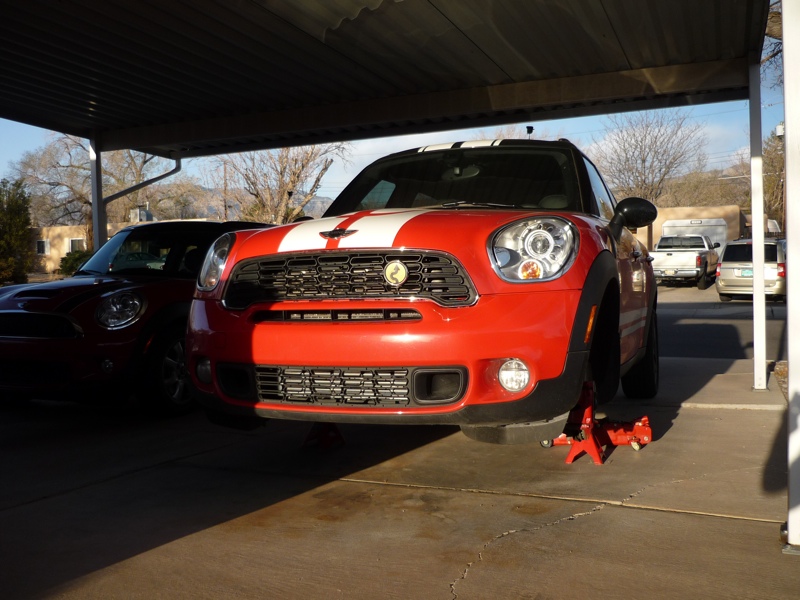
Bumper apron back on and everything back together (except the wheels):
IMPORTANT NOTE: I highly recommend starting your car after installing the new intercooler and reconnecting all the tubes before putting the bumper back on. Should there be a loose connection somewhere, you don't want to have to disassemble everything all over again.
All in all, it took me about 4 hours, though that included a trip to the hardware store to buy a couple of hose clamps. If you buy the pre-intercooler pipe, make sure you pick up a couple of hose clamps that are 2.25" diameter.
Hopefully that is somewhat clear. I should have taken more pictures, but I didn't think about it until I had the bumper off. Let me know if you have any questions.
My order of operations:
1. Jack up car and remove front wheels. This isn't completely necessary, but it does make it easier to work.
2. Remove front grille. There are 4 10mm bolts on top, then pull bottom edge towards you to release. You can also remove the headlights to make it easier by removing 4 10mm bolts on each one.
3. Remove front bumper apron. This is pain in the *** the first time you do it, but it's not so bad once you get the hang of it. Open the cap inside the wheel well and disconnect fog lights, turn signal, and side reflector. Remove 2 torx screws underneath as well as 3 plastic rivets. Pop out the center pieces of the rivets on the underside of the arch trim, along with 1 8mm screw. Release the white rivet on the inside of the arch trim to pull it away from the car. You don't need to remove then entire arch, but you do need it to be free up to the halfway point so you can pull it away from the car. Underneath you'll find 1 torx screw on each side of the car. Once those are out, remove the 2 torx screws on the upper front of the apron and it should come free. This is the most time-intensive step, and it gets easier after this.
4. Remove the air ducts for the brakes. Do not remove the 4 8mm screws inside the wheel well--it won't do any good. They just pull forward off the car. Here is a pic--notice the two plugs that hold them in place.
5. There are 2 long plastic pieces on either side of the radiator that need to be removed. Make sure you unclip the temperature sensor from the passenger side one. They look like this:
When you're taking them off, you have to pull forward to clear these square cutouts. Feeling with your hand, it will feel like they are bolts, but they aren't. They just slide forward and then off.
6. Now remove the old intercooler. On the driver side, take a flathead screwdriver and insert vertically from below to loosen the hose clamp. It's easy once you find the right hole. On the passenger side, you have to angle in from behind, but this one is also fairly easy to access. After the hose clamps are loosened, just pull the intercooler forward until it comes free.
Here is the old vs the new:
7. While you have the intercooler and bumper off, it's generally recommended to do something about the muffler on the hot side (driver side) boost tube. The muffler is restrictive to airflow and you're generally better off without it. You have 2 options: replace the entire tube (NM sells one), or replace the muffler with a store-bought piece or make your own (there's a good thread here if you want to make your own).
Holding the muffler on is a T25 torx screw that's a major pain to get to because of the various hoses, but it can be done with enough perseverance. I used a torx screwdriver and it wasn't too bad. Whether you're replacing the entire tube or just the muffler, you need to remove this screw, loosen the hose clamp on the turbo and remove the entire tube by dropping out the bottoms side of the car.
In the thread above on removing the muffler, I read about this pre-intercooler cooling pipe which is basically a small intercooler for your intercooler. It's only $40, so I went with it. I doubt it can really cool all that much in the 9" or so of its length, but it can't hurt. Here's a couple pics of it in place of the muffler:
8. At this point, just reassemble in reverse. It's a lot quicker putting it back together than taking it apart. Here's the intercooler installed:
Underside view of the hot side boost tube:
Bumper apron back on and everything back together (except the wheels):
IMPORTANT NOTE: I highly recommend starting your car after installing the new intercooler and reconnecting all the tubes before putting the bumper back on. Should there be a loose connection somewhere, you don't want to have to disassemble everything all over again.
All in all, it took me about 4 hours, though that included a trip to the hardware store to buy a couple of hose clamps. If you buy the pre-intercooler pipe, make sure you pick up a couple of hose clamps that are 2.25" diameter.
Hopefully that is somewhat clear. I should have taken more pictures, but I didn't think about it until I had the bumper off. Let me know if you have any questions.
#3
03-23-2013, 02:23 PM

4th Gear
Join Date: Jun 2012
Location: Chicago, IL
Posts: 350
Likes: 0
Received 0 Likes
on
0 Posts
That muffler replacement pipe sounds like a good idea, way cheaper than most pipes you see being sold as well.
Theoretically, as long as the air around the outside of the pipe is cooler (less hot?) than the air inside, it will definitely dissipate heat. Any temperature drop there, even if it's small, is a help!
Theoretically, as long as the air around the outside of the pipe is cooler (less hot?) than the air inside, it will definitely dissipate heat. Any temperature drop there, even if it's small, is a help!


#6
03-07-2015, 08:38 PM

4th Gear
#7
04-15-2015, 07:55 PM

1st Gear
Join Date: Mar 2015
Location: Frederick, CO
Posts: 22
Likes: 0
Received 0 Likes
on
0 Posts
Trending Topics
#8
04-22-2015, 07:33 AM
4th Gear
#9
04-22-2015, 08:50 AM
Vendor
Great write up and pictures! Looks good.
-Luccia
-Luccia
__________________
Your Trusted Source For DIY and Parts
FREE SHIPPING over $99 click here
MINI Parts | DIY Help | Facebook | Twitter | Instagram | YouTube | Promos
888.280.7799 | 6am - 5pm PST

FREE SHIPPING over $99 click here
MINI Parts | DIY Help | Facebook | Twitter | Instagram | YouTube | Promos
888.280.7799 | 6am - 5pm PST
#10
05-09-2015, 06:31 AM
The hose clamps on the muffler weren't the reusable kind unfortunately. I had to make a quick trip to the hardware store.
#11
08-09-2015, 08:08 PM
1st Gear
Join Date: Jun 2015
Location: Lanikai, HI
Posts: 35
Likes: 0
Received 0 Likes
on
0 Posts
#12
09-10-2015, 03:15 PM


#14
12-30-2018, 03:09 PM

#16
04-08-2019, 10:33 AM

Intercooler install
I watched the Helix video and they don't show the removal of brake ducts or those large plastic pieces. I'm guessing we have to on the Countryman? I also don't see the point of removing the wheels or headlights. Helix doesn't touch headlights but they do take off the wheels. Is this just for extra room? I ask because I bought car ramps for the downpipe install and planned on using them for this job as well because I don't have a jack or stands. Thanks!
#17
04-10-2019, 02:49 PM
Finished
I watched the Helix video and they don't show the removal of brake ducts or those large plastic pieces. I'm guessing we have to on the Countryman? I also don't see the point of removing the wheels or headlights. Helix doesn't touch headlights but they do take off the wheels. Is this just for extra room? I ask because I bought car ramps for the downpipe install and planned on using them for this job as well because I don't have a jack or stands. Thanks!
#18
07-27-2019, 06:13 AM


#20
08-10-2019, 12:26 PM
The benefit of replacing the pipe this way is that you'll save money. A 1 foot aluminum pipe is like $10 or something.
I personally just used a regular 2" aluminum straight pipe. Just measure and cut with a handsaw.
I personally just used a regular 2" aluminum straight pipe. Just measure and cut with a handsaw.
The following users liked this post:
Svampfest (08-10-2019)
#21
10-03-2019, 04:34 AM

Just started my Helix Intercooler install last night.
Had some time to spare in the evening. I figured I'd do 30 minutes worth of work last night to save on some of the job this morning.
With the car on the ground
I removed the 4-10mm screws along the top of the front grill assembly and removed that.
On each side of the car I....
removed the 8mm screw in the fender well and then popped out the lower tab insert ( reusable press rivet/trim thingy) under the 8mm screw and removed 3 of the plastic rivets above the 8mm screw along the arch of the wheel well.
Pulled the black fender trim away from the car and carefully removed the bulb holder and bulb from the side marker.
Removed the 1 Silver Torx 20 side bolt.
then on the front of the car removed the 2 silver Torx 20 bolts on the top of the bumper cover. on either side of the radiator. Basically the two lower edges of where the grill would be.
At this point the bumper cover was loose, I pulled the top of it away from the car about 10" and saw that I could now access the connector on the lower DRL, disconnected those carefully.
I saw that the bottom was being held by something, felt around underneath the lower spoiler and felt the other 2-Silver Torx 20 bolts. Removed those and out came the Bumper cover complete. Set it inside the garage,(No lifting the car, opening the inner fender cap or removing the wheels or lights) Went back in and continued binge watching shows with my wife....Total time to remove the front was 25minutes, Thanks greatly to threads like this one and several others I read dozens of times to get an idea of what I would be dealing with, I also starred at the car in every direction looking for the bolts/rivets/wires I would be dealing with several days beforehand, The tools used were Trim removal Tool, both metal and plastic, Phillips head driver and a 10mm and 8mm socketwith small 1/4" drive ratchet.... Fast forward to this morning....Now the kids are off to school, it's daylight again, back to the job at hand.
#22
10-03-2019, 06:29 PM
OK.... Went outside. and continued the install. Pulled the brake ducts straight toward me while sitting in front of the car and they both came out with no trouble.
then did the same thing with the plastic pieces on either side of the radiator and as Chrunck explained in the first original post, those are not bolted in, they are snapped in on top and at the bottom held in place by way of Square keyed slots. those pull out easily enough, make sure to remove the temp sensor from the passenger side one ( if a left hand drive vehicle).
now I had access to the Intercooler, l loosened the two hose bands on either side, removed the 2 torx 20 screws on either side of the stock intercooler. and a few wiggles and out came the stock one. I removed the two rubber grommets from the intercooler and installed them on the Helix.. As quickly as the old one came out, I put on the new one. Although much heavier and bigger, it went on without much fuss. reached under the car to help get those hoses on there right, made sure the bands were still in a place where I could access the tightening screw like I did before and then I first attached the two Torx 20 screws thru the grommets to secure it in place, then proceeded to secure the hose bands.. Once that was in, I replaced the two radiator plastic side pieces, attached the temp sensor and the two brake air ducts and started the car to make sure everything seemed good and it was.
Total time to do the intercooler swap 2 hours 30 minutes. This includes the 25 minutes last night and the install today and refit of the front bumper cover. Not including the other hour for the Horns.
Next I moved on to installing two Hella Horns in place of the factory ones. This took some doing and the horns alone took about an hour to fit, make the custom connectors and install. The car now has horns that sound like a small freight train... Love it.
Did a short video about the install.
https://youtu.be/AdsK5WjsR9w
Last edited by OSilvera; 10-06-2019 at 12:09 PM.
#23
01-03-2020, 09:29 AM
1st Gear
Thanks for the write up, appreciate that very much.
Couple of questions;
1) Which mods did you have already existing on the car before you performed this intercooler swap?
2) Was there a note-able difference in performance after doing the muffler removal and intercooler install?
3) Is that muffler soley installed on the charge tube for intake noise reduction?
#24
01-04-2020, 08:56 AM
2) There is a slight difference in increased spool due to less turbulence. Very minimal.
3) It is solely installed for intake noise reduction.
3) It is solely installed for intake noise reduction.
Thanks for the write up, appreciate that very much.
Couple of questions;
1) Which mods did you have already existing on the car before you performed this intercooler swap?
2) Was there a note-able difference in performance after doing the muffler removal and intercooler install?
3) Is that muffler soley installed on the charge tube for intake noise reduction?
Couple of questions;
1) Which mods did you have already existing on the car before you performed this intercooler swap?
2) Was there a note-able difference in performance after doing the muffler removal and intercooler install?
3) Is that muffler soley installed on the charge tube for intake noise reduction?
The following users liked this post:
WeBad_Paceman (01-04-2020)

Thread
Thread Starter
Forum
Replies
Last Post
mitemini
Drivetrain (Cooper S)
35
05-01-2009 06:10 AM
junior1459
Drivetrain (Cooper S)
20
01-06-2008 07:25 AM

