When you click on links to various merchants on this site and make a purchase, this can result in this site earning a commission. Affiliate programs and affiliations include, but are not limited to, the eBay Partner Network.
Thanks for the hands on experience with regards to bearing wear. Makes me feel a little better about spacing things out. Just spoke to Dan and he already sent the RMA info and will get with the parts guys to sort out the bolt diameter / part number issue.
Picked up the A94 Midnight Black Metallic base/clear coat as well as the adhesion promoter for the trim. Now to start prepping everything. I haven't seen photos of anyone running these flares with the splash guards. Hopefully I'll be able to heat and reshape the splash guards without messing them up. Spacing the wheels is gonna make splash and slinging more of an issue but there's no way I'm putting rally style splash guards on. Looking forward to finally being able to install the Ohlins on the front.
Vlad will never see those kind of numbers lol. Nor did I ever say he would. My intent in making the statement was to point out the increased capacity of the drive train and that the axles will be next. With Vlad my plan is to build as strong of a foundation as possible. First with the drivetrain then later in the engine. 100 octane race fuel and meth will get you to 400 but that would make a pretty impractical daily driver. God knows what it would take to get to 600 but I'll bet good money it wouldn't last very long.
I agree spacers will make it harder on the bearings. However, I know several track enthusiasts and even a professional driver running spacers to make the wheel base wider which increases stability and cornering power. Seems like there's always trade offs with performance.
Somewhere in all these changes I have to decide on a BBK as the factory Brembo's will not cut in on track when pushed hard. AP Racing, StopTech and TCE Performance has some nice kits but I'm also in discussion with EBC about a BBK for the Mini.
Cars are carefully designed by engineers and mods crafted by car enthusiasts.
I believe I can trust the the first ones. As for testing the physics laws, it depends if the purpose is intended on a racetrack or on public roads. I am sure an insurance company may question these facts if a car is heavily modified.
For 20 years, I lived in Vegas where some Cadillac guys were driving on 13" wheels with spacers. Believe me, I saw pretty weird stuff happening.
Thanks for the hands on experience with regards to bearing wear. Makes me feel a little better about spacing things out. Just spoke to Dan and he already sent the RMA info and will get with the parts guys to sort out the bolt diameter / part number issue.
Picked up the A94 Midnight Black Metallic base/clear coat as well as the adhesion promoter for the trim. Now to start prepping everything. I haven't seen photos of anyone running these flares with the splash guards. Hopefully I'll be able to heat and reshape the splash guards without messing them up. Spacing the wheels is gonna make splash and slinging more of an issue but there's no way I'm putting rally style splash guards on. Looking forward to finally being able to install the Ohlins on the front.
Welcome. Here to help out my fellow R58 owners. Taking mine to the PVGP this weekend. http://www.pvgp.org/
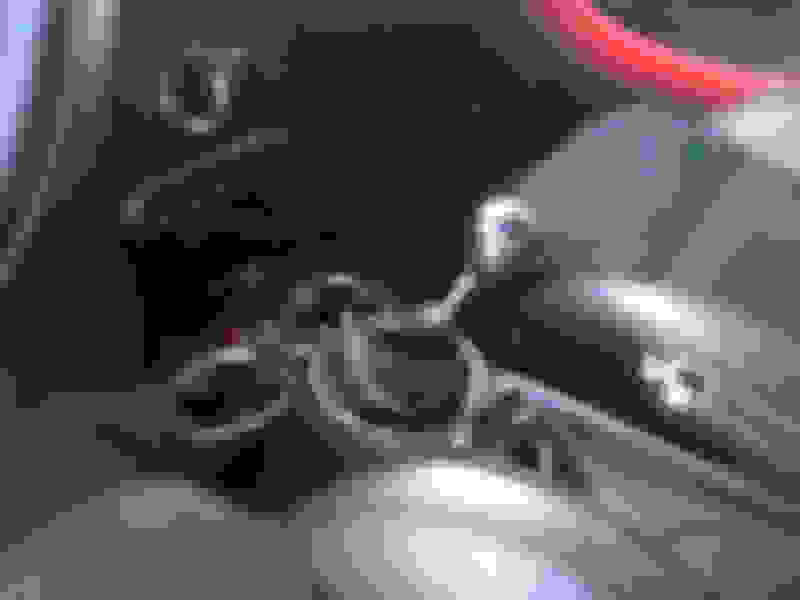
Got some time this weekend to do a couple of little things that have been hanging out there on my to do list. Customer vehicles always take precedence over Vlad. Luckily he hasn't held it against me yet. I kinda got a little tired of the way the shifter boot looked so I used a rubber grommet to hold the boot half way down the shifter. I think its a nice improvement.
I also finally got around to installing the OCC. As I mentioned previously I don't care for the way most RX cans are routed, and based on feedback some users have been experiencing pressure buildup in the crankcase. I believe this is caused primarily by how the "clean" side is routed which provides insufficient vacuum under boost.
I used the factory Norma connectors by using a heat gun to slightly heat the factory flex tubing. This allowed the connector to be easily removed and they fit perfectly in a 3/4" hose.
A 3/4" hose will also fit nice and snug over the clean side output with a little oil on the inside of the tube.
These lines were then connected via a 3/4" x 3/4" x 5/8" Tee fitting and routed to the center port of the OCC. The aft port of the OCC was routed to the intake manifold with a 1/2" hose and a one way check valve. The check valve prevents the OCC from being pressurized when in boost. After the check valve there is a 1/2" to 3/4" adapter then 3/4" hose with the factory Norma connector going to the manifold.
The forward OCC port connects to a 5/8" line to the regular connection on the turbo inlet pipe. I purchased a larger one way check valve for this line from UPR. The check valve allows vacuum draw under boost but prevents air being pulled through the OCC and into the manifold when not in boost.
Here's everything put together. My apologies for the dirty engine but I didn't have time to clean it up and was starting to loose daylight. I also had to fabricate a 2" x 7" L bracket to lower the OCC sufficiently so that the elbow fittings on the top of the can would clear the DDMWorks Intake. The elbows I'm not real crazy about either. The AN/NPT fittings on the OCC are 3/8" but the lines themselves have a 1/4" ID.
Installing the OCC this way allowed me to save all the factory hardware in case I'm not pleased with the results. The drain line out of the OCC is routed to the underside of the vehicle and tie wrapped to the subframe. This way I can just slide a small pan under Vlad and open the petcock. I'll be keeping an eye on what the OCC catches as well as any changes in oil consumption and post any surprises.
I've read that you tried another OCC arrangement in a later post, but I'm wondering where you ended up with your OCC. Did you decide to block off the passenger side? I believe that you mentioned that....did the design with the Tee not work? I have an RXPerformance OCC....not hooked up though...and I'm wondering if it will work. Thx
Yes I blocked off the passenger side port on the valve cover. Now the clean goes direct into the center port of the RX can. The rear exit port on the can is connected to the intake manifold with a one way check valve. This prevents boost from pressuring the can and back flowing into the intake tube. The forward exit on the can is connected to the intake tube and also includes a one way check valve. This prevents air from being pulled out of the intake tube through the can and into the intake manifold when not in boost. In essence the two external check valves have replaced the functionality built into the valve cover. System has been working great and maintains 1" of vacuum in normal driving and boost. The only time the crank case is not under vacuum is when the intake manifold is at atmospheric pressure when transitioning to boost. No great loss as the factory valve cover worked the same way.
Every three or four tanks of gas I open the petcock drain on the can and the oil filler cap. Since the check valves prevent air from entering the can if you don't open the filler cap the can wont drain.
I've converted to your setup....thanks for helping me understand how it works.
Glad to help. I used UPR 19mm check valves in the 5/8 portion of the lines on my setup but mine are the older design. The newer ones from UPR while more expensive look much more robust.
Now back to our fun with flares program. The folks at ECS were great about returning the other set of spacers and I've ordered two sets of the H&R DRA series 25mm spacers which have the 14x1.25 threads. Unfortunately, they don't appear to be available in black, only in silver so I guess I'll have to have them powder coated when they arrive. I've used Bullseye powder coating in Fort Lauderdale with great results in the past so I'll have them do these as well. The anodizing on the ECS branded ones was nice so I'm gonna miss that. I fiberglassed in three tie wrap anchors on one flare and fitted it using tie wraps. The problem there is in order to keep the flares from rattling the tie wraps have to be so tight that they alter the curvature of the arch. No bueno for caca. So looks like an adhesive it will be. I'll use a polysulfide based adhesive when the time comes. We use these types of sealant/adhesives in aviation a lot. Holds really well while still being flexible and is resistant to heat, cold, fuel, oil and various chemicals.
Spent the last week when, I had time prepping the plastic trim pieces to be painted to match the body color. I used a 3" pneumatic orbital sander as a regular DA is too large to get into all the tiny curves. Wow! What a gigantic PITA it was to sand off the texturing on the plastic. But it beat paying someone $1,800 to do the job which was what I was quoted to paint everything. Started with 280 grit and finished with 600. Also ordered a lot of new clips for two reasons really. The red clips that hold the lower rocker panels on did not want to play nice and every single one of them broke. Most of the others could be reused but I figured since they're six years old I might as well get new. Also ordered new fender liner clips. A couple of those were a bit sketchy the last time I had them off. With the paint and clips I'm into this about $300 so far. The H&R spacers came in from our friends as ECS and they are the right size. Wohoo!! While I had the wheels off for test fit I tried using a string and altering the length and center location to draw smooth arcs for my cut lines on the fenders. None of which lined up well so next week I'll use .5cm pinstripe tape to freehand the lines. Everything should arrive this week and all the bits and bobs are in the paint booth. It's been a few years since I've painted professionally but we'll see how it turns out. This whole phase of the project has been taking way longer then intended but customers cars always come first. I've been driving Vlad all week with no rocker panels and no front spoiler or rear trim. Kinda looks like he forgot to put his pants on.
Short update. All but two pieces were primed and the flares are painted as well as some of the plastic trim pieces. I ran out of paint lol. Did I mention it had been a while since I painted. I'm using Sherwin Williams Automotive ATX series paint which comes already reduced. If you decide to do something similar be sure to get two quarts as one isn't enough.
Once everything is back together I'll address final polishing but so far I'm fairly happy with how it's going.
I wish I was there to record your process. This would make an awesome video series, and something tells me you�re a natural giving explanations in front of the 🎥 😁
Haha yeah but then everyone would see all the mistakes I made along the way. "Oops forgot the adhesion promoter", "Dang thats fugly", "Ah snap its already reduced", etc..
The good news is our plastic panels are impervious to any solvent I've tried (mek, iso, paint thinner, acetone, methanol, etc.) so wiping them down is easy at least.
Planned on finishing up the flares last weekend but had a client that wanted a tune on Saturday. So Sunday I got the right hand side done. Drove Vlad for a week with one side done lol. Yeah I'm that guy. Finished the rest this weekend so a couple of photos are due. First up trusty tools for cutting out the arches.
Next up using pin stripe tape to layout my cut lines.
A little cutting action.
After cutting I used a round sanding roll to smooth everything out and applied a single stage midnight black metallic paint to seal the cuts. After that it's apply the adhesive and the flares which I let cure overnight. Next up was reinstalling the Mini splash guards which had been sanded and painted. Needed a bit more heat to alter their shape to fit with the flares. I also placed new double sided black foam tape to hold them in place along with the factory clips and screws. One clip on each couldn't be reused however because the RSI c6 flares don't have the same lip as the OEM.
Pretty happy with how it turned out. Still need to install the front Ohlin's but couldn't wait and took it for a spin. One thing I noted is the 25mm spacers seems to have made the ride a little softer. Not much but thought it worth mentioning. I'll try and get some better shots after I've had a chance to install the Ohlin's and clean Vlad up.
It stopped raining yesterday evening so I was able to finally install the front Ohlin's. Same dampener setting as the rear. Adjusted the front wheel gap to a fingers width. Still need to bring the rear struts down some to match the front. Took Vlad out for a little spirited driving and headed for some rough roads as well. Wow, the Ohlin's are outstanding. No rub anywhere with the flares. The ride is better than stock or any other coilover I've driven. They just eat up imperfections in the road without becoming unsettled. No crashing or jarring. Wasn't able to really push it hard though as the roads are still damp. Will update with clearance photos later today.
Been admiring this car and your work from afar for awhile now. Congratulations. I would imagine you're not finished so I look forward to seeing what you do next.
Thanks. Other Mini enthusiasts ideas and input are always welcome. Its funny though how one mod just leads to another.
Up next It looks like I'll finally be able to install the wideband O2 and ethanol sensor system. Among other things, Im curious to see how the local E85 in South Florida checks out in the winter months.
Removed the boost gauge since that information is indicated on the boost controller, and installed the E85/Wideband gauge. Besides displaying ethanol content and AFR or Lambda it can also display fuel pressure on the low pressure side as well as fuel temperature. I still need to put together the right connectors to use the fuel side of the gauge. It can display a single function like below, duel function with one larger than the other or all four functions. You can also set an alarm if the low pressure side drops below a point that you define. These options can be set from the gauge or through the LM Programmer software and all values can be data logged with LogWorks3 software. In addition it has various outputs that can be configured as inputs for a engine ECU that has the capability. My apologies for the crappy photo. Shaky Jake with the camera here.
I finished installing the ethanol and fuel temp/pressure sensors. Planning ahead I used AN6 teflon lines that are surrounded by a braided steel layer with a black nylon mesh over that. Bare braided steel lines can act like saw blades to anything they come in contact with so having a braided nylon covering is a good idea. Since using teflon tape is a no no when assembling couplings that handle E85 the temp/pressure sensor was installed without anything. That led to me having to take the sensor adapter off and tighten it 3 times. On the last attempt I was expecting the sensor fitting to just shear off but it was either that or have a fitting leak fuel right over the exhaust. Me thinks that would fall under the heading of a bad thing.
Now I can data log fuel pressure and temperature on the low pressure side in addition to being able to record AFR from a second source. One of the things I wanted to verify was what the winter blend E85 ethanol content really is in South Florida. Turns out the published data is accurate and that my local sources are in fact following published standards. Winter blend here is 74% ethanol which I verified by first adding 1.5 gals of E85 to 10 gallons of gas, then doing the same with 3 gallons of E85 and bouncing the observed values against expected based on an E85 blending Excel sheet I have. Another reason I wanted the pressure sensor was to be able to see low pressure side fall off as ethanol content increases before it becomes a problem.
One thing that I learned that surprised me was just how hot the fuel in our returnless fuel system gets. The highest I have observed so far is 117�F....Yikes.
So Vlad decided to play a late Halloween prank and scared the hell out of me yesterday. I was taking the wife out for a little surf and turf at Bonefish Grill and we were about five minutes from the house waiting at a stoplight. When all of a sudden Vlad started running on three cylinders just like Tigger did when he dropped an exhaust valve. Not rough I mean one cylinder totally dead. My heart sank so I turned around and headed home. Dropped of Vlad and we took the wifes car to eat. Meal was excellent and I tried not think about it.
Got home and pulled the plugs so I could take a peek with a videoscope. Cylinder #1 looks pretty wet but intact. Pistons two, three and four looked great and the valves are fine. So I'm thinking #1's rings are going, using oil and I better speed up on my builder engine. Plugs looked great though with no fouling on #1...hmm. They had about 20k miles on them so it's about time to change them anyway. Before putting them back in I take a second look in holes and guess what... cylinder #1 now looks like all the others. Holy crap it was fuel not oil. Yeah! Ok now we know we got fuel and air but spark appears to be a problem. Luckily, I never throw away anything I take off a vehicle I mod just in case I ever decide to return it to stock. I throw in the spare coil and Vlad is back to his old self.
So after changing my underwear, I fire up the laptop. A new set of Ignition Projects coils and NGK's are on the way. All told that set of coils had about 70k miles on them between two different cars so I guess I got my moneys worth out of them.
You should stay with OEM ignition coils to avoid problems. This has been discussed many times on this board that the aftermarket products fail most of the time. OEM coils don't need to be replaced before 100K and I believe spark plugs service at 30K intervals on JCW engine.
You should stay with OEM ignition coils to avoid problems. This has been discussed many times on this board that the aftermarket products fail most of the time. OEM coils don't need to be replaced before 100K and I believe spark plugs service at 30K intervals on JCW engine.
When tuned, it's usually recommended to change the plugs closer to 20K miles from what I've read/been told.
Both generally good advice. Stock JCW change interval is 30k and I do recommend 20k when tuned, especially when running meth. I think some of the tribal lore in regards to coils is a carry over from the first gen. Truth is those MSD ignitions were junk. I went through two of those before I learned my lesson. I switched to IP on my last N18 when one of the stock coils failed at 30k. Upon closer examination of the IP coil that failed I found the spark plug electrode heavily corroded. Cleaned it with a bore brush but no luck as the retaining ball was totally seized and wouldn't lock anymore. I blame this on 1) poor design since there is no cover over the coils like the N18, and 2) myself for opening the hood scoop to let in more air. Ah always trade offs....
 07-10-2018, 10:42 AM