
R50/53 Tips for changing out LCA bushings???


4th Gear
Joined: Dec 2007
Posts: 543
Likes: 8
From: Raleigh, NC
Here is a video without dropping the subframe
http://www.youtube.com/watch?v=B7kQn82QB7U
Makes it look too easy.
http://www.youtube.com/watch?v=B7kQn82QB7U
Makes it look too easy.

Well, I just bought my LCA bushings and swaybar bushings from WMW....so I'll be tackling this project soon. I'll make sure I take lots of pics, and do a big write up on it. It sounds like lots of people could use some info on doing this job.


1st Gear
Joined: Jan 2012
Posts: 27
Likes: 0
From: Mesa, AZ
Look forward to reading it!

1st Gear
Joined: May 2011
Posts: 42
Likes: 0
From: Charleston, SC
OK,I need help and pretty fast. I hope someone out there is watching this blog. I decided to give the car a test run up in the air before I put the wheels back on and when I put the car in car and start to let the clutch out all I get is a horrible crunching sound of gears that are not happy. Is there a certain way the cv axles go in or something. I notice they popped out a little while I was working on the card changing the bushings. Help anyone who know what I've done wrong.HELP!

4th Gear
Joined: Dec 2007
Posts: 543
Likes: 8
From: Raleigh, NC
Here is an article on Pelican from the new book being released this year.
http://www.pelicanparts.com/techarti...me_Removal.htm
http://www.pelicanparts.com/techarti...eplacement.htm
http://www.pelicanparts.com/techarti...me_Removal.htm
http://www.pelicanparts.com/techarti...eplacement.htm
Last edited by GoThingNC; Jan 25, 2012 at 09:15 AM.
1st Gear
Joined: May 2011
Posts: 42
Likes: 0
From: Charleston, SC
Excellent articles. That's pretty much all there is to it. It was a lot easier than I thought it would be. Now just waiting for my new right side axle to come in and I will hopefully be done. Shouldn't have to work on it for another 200,000 miles 

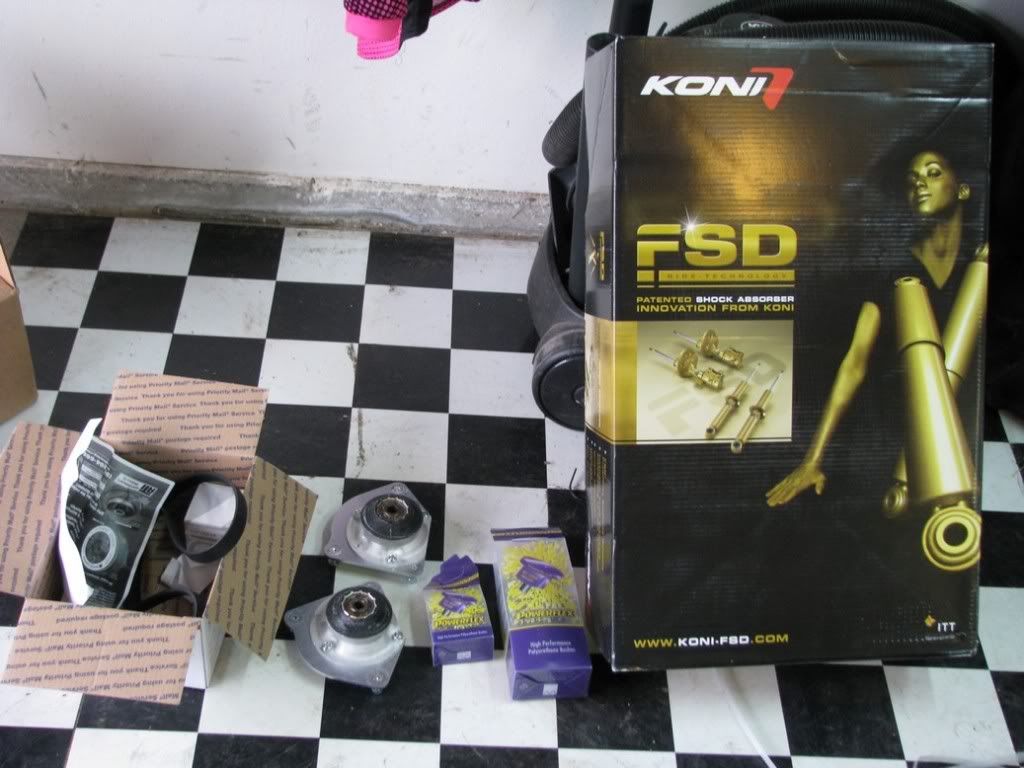
Well, I have my LCA bushings, but I decided to order some new tires, Koni FSD's, ansd IE camber plates As soon as it all shows up I'm going to do it all at once....then get it aligned
As soon as it all shows up I'm going to do it all at once....then get it aligned

6th Gear

Joined: May 2007
Posts: 3,790
Likes: 10
From: Kansas City
I removed the lower control arms so it was easier to work on them on the bench, I used a vise to press the new bushings in. The second set I did the owner bought the pre-pressed bushings from Way, just that much quicker and easier.
I only drop the subframe far enough to get the bolts out....once the bolts are out I just press it down with a long prybar - just enough to get the bolts out and back in again.
Having the ball joint tool makes all the difference in the world.
I only drop the subframe far enough to get the bolts out....once the bolts are out I just press it down with a long prybar - just enough to get the bolts out and back in again.
Having the ball joint tool makes all the difference in the world.
1st Gear
Joined: May 2011
Posts: 42
Likes: 0
From: Charleston, SC
WOW! Say it with me WOW! Put Nigella back on the road today after three weeks of down time. It all started with a bad control arm bushing (changed both), then found a ripped ball joint (replaced all), then CV axle made a horrible grinding noise and had a torn boot (replaced passenger side), what a difference (understand too that we live down two dirt roads). This thing drives like a new car, dirt road no longer beats us to death and the car just sounds different. Even though the ball joints didn't feel that bad besides the rip (but you never change just one). MINI rocks! We will drive this car into 300,000 and beyond. Glad I can work on it though (and I'm just a Shadetree mechnanic), dealerships are crazy! They wanted $850 just to change one control arm bushing. Motor on people!
Glad to hear you got your mini back on the road! I'm in the process of changing my LCA bushings right now (and also installing IE camber plates, and Koni FSD shocks).
I have the entire front subframe out, and I got the LCA bushings off and ready to press the new poly bushings in. Probably finish it up tomorrow, then install the shocks and camber plates. . It's not all that difficult.....just LOTS of work. I managed the get the subframe out in 4hrs...so I guess that's not too bad for doing it for the first time.


I have the entire front subframe out, and I got the LCA bushings off and ready to press the new poly bushings in. Probably finish it up tomorrow, then install the shocks and camber plates. . It's not all that difficult.....just LOTS of work. I managed the get the subframe out in 4hrs...so I guess that's not too bad for doing it for the first time.
Last edited by IQRaceworks; Feb 2, 2012 at 07:36 PM.

2nd Gear
Joined: Nov 2011
Posts: 51
Likes: 0
I did mine tonight. Took me about an hr and a half to do both sides. I left the subframe in place and used heat and an air hammer to remove. Then used a piece of allthread and a few washers to put the new ones in. Just like the video posted above. This could be done on jack stands but on a lift is nice(How i did mine). I'm also a mechanic by trade so this type of thing is nothing new to me. It would have taken less time but i couldn't find a nut to fit the allthread.

Just finished mine up today. I dropped the entire front sub-frame, it really wasn't all that hard....just took time. It took me about 4 hours to drop it down, and a little over an hour to put it all back together once I got the new bushings installed.
One thing I would really recommended to anyone who is wanting to do this, spend the extra $20 and get the LCA mounts with the bushings installed and ready to go (from Way Motor Works). I spend/wasted about 2 hours trying to press out and install the new bushings. It was a real pain.
After I got the sub-frame installed and everyone else back together, then I tackled changing my serpentine belt. It went pretty smooth, hopefully I won't have to do it again for a long time though
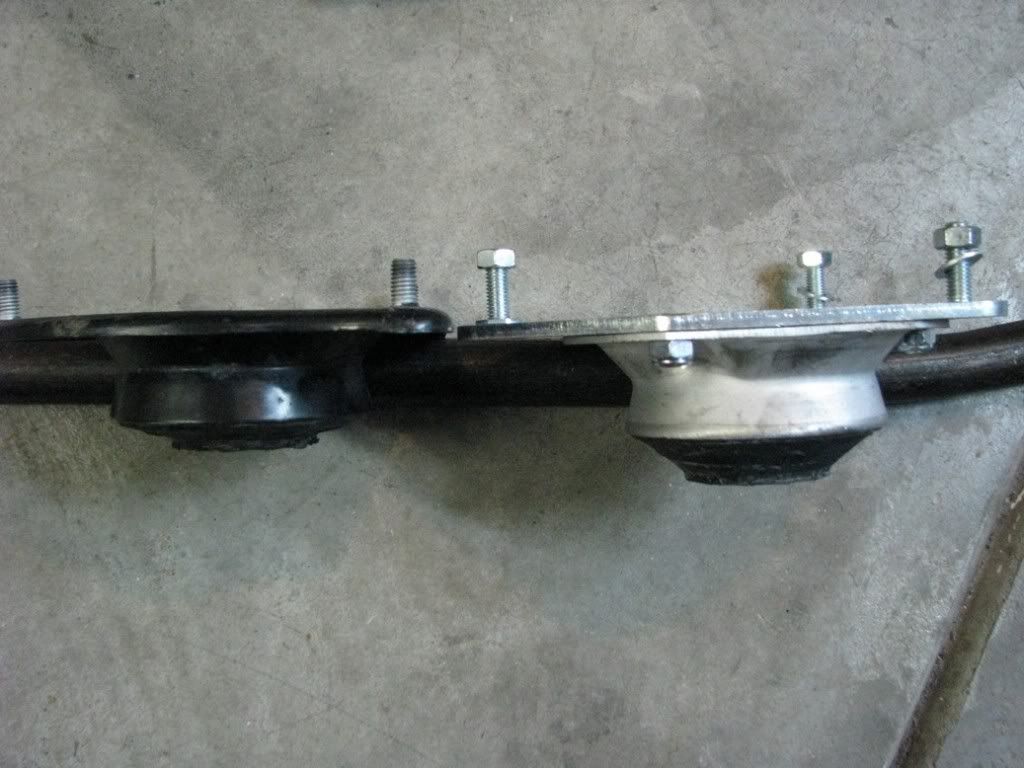
After that, I pulled out all of the stock shocks/struts and swapped them for KONI FSD's and IE fixed camber plates. Just like everyone said....the IE plates/upper shock mounts were quite a bit thicker than the stock plates. I didn't want the front of my MINI riding 3/8" or so higher in the front, so I decided to trim back the bracket on the FSD's to keep the ride height stock. It was easy the a dremel tool, cutoff wheel, and a steady hand. I hated cutting on the brand new (and expensive) FSD's....but it needed to be done. I also had to elongate the hold mount bolt hole. It just allows the front struts to sink a little deeper into the clamp.....compensating for the taller upper mount (IE camber plate)


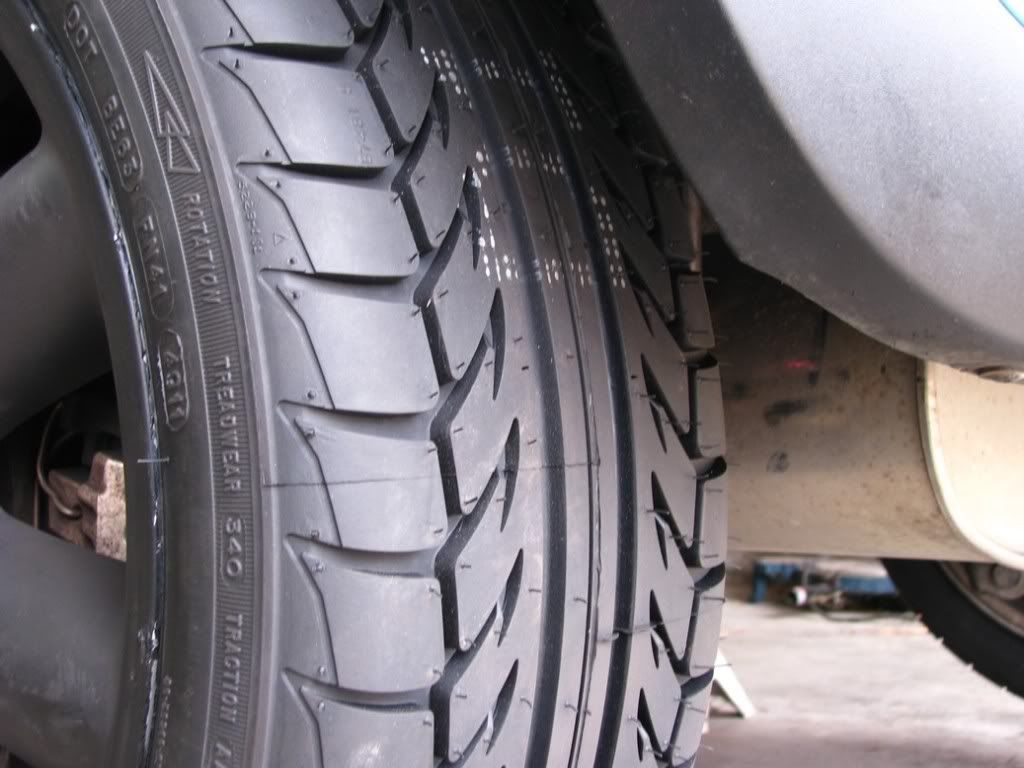
Then I got to bolt on my wheels with my new BFG G-Force Sport tires. They look great!.....I just wish Sam's Club would have been a little more careful and not chewed up my Plastic dip on the wheels so bad. They could have at least wiped all of the goo off of the tires and wheels when they were done. Looks like I'm going to have to redo them after I get my alignment done...I'm sure they will chew them up a little also.


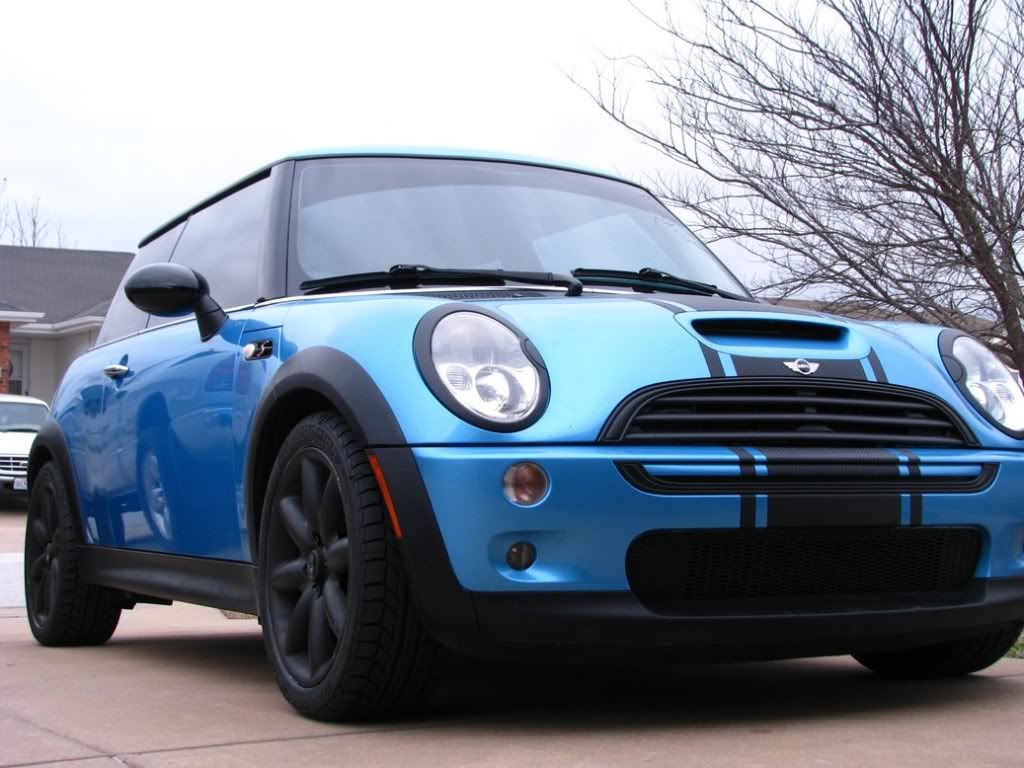
From start to finish it took me around 15 hours from start to finish. It was more work than I had planned....but it was worth it. I need to get it aligned tomorrow....but after a quick ride around the neighborhood street, all I can say it WOW!! It's like a new car...and it ride so nice! Not like the bone jarring ride it had before with the runflats and worn out shocks and LCA bushings! I can't wait to get this thing out on some twisty roads!
I was going to do a full How-To writeup on everything....but after searching the site, there are so many other great writeups on the same stuff, I figure it would be a waste of time. I give a big thanks to the people that have done the how-to write-ups on the site...they really helped me out!!
One thing I would really recommended to anyone who is wanting to do this, spend the extra $20 and get the LCA mounts with the bushings installed and ready to go (from Way Motor Works). I spend/wasted about 2 hours trying to press out and install the new bushings. It was a real pain.
After I got the sub-frame installed and everyone else back together, then I tackled changing my serpentine belt. It went pretty smooth, hopefully I won't have to do it again for a long time though
After that, I pulled out all of the stock shocks/struts and swapped them for KONI FSD's and IE fixed camber plates. Just like everyone said....the IE plates/upper shock mounts were quite a bit thicker than the stock plates. I didn't want the front of my MINI riding 3/8" or so higher in the front, so I decided to trim back the bracket on the FSD's to keep the ride height stock. It was easy the a dremel tool, cutoff wheel, and a steady hand. I hated cutting on the brand new (and expensive) FSD's....but it needed to be done. I also had to elongate the hold mount bolt hole. It just allows the front struts to sink a little deeper into the clamp.....compensating for the taller upper mount (IE camber plate)
Then I got to bolt on my wheels with my new BFG G-Force Sport tires. They look great!.....I just wish Sam's Club would have been a little more careful and not chewed up my Plastic dip on the wheels so bad. They could have at least wiped all of the goo off of the tires and wheels when they were done. Looks like I'm going to have to redo them after I get my alignment done...I'm sure they will chew them up a little also.
From start to finish it took me around 15 hours from start to finish. It was more work than I had planned....but it was worth it. I need to get it aligned tomorrow....but after a quick ride around the neighborhood street, all I can say it WOW!! It's like a new car...and it ride so nice! Not like the bone jarring ride it had before with the runflats and worn out shocks and LCA bushings! I can't wait to get this thing out on some twisty roads!
I was going to do a full How-To writeup on everything....but after searching the site, there are so many other great writeups on the same stuff, I figure it would be a waste of time. I give a big thanks to the people that have done the how-to write-ups on the site...they really helped me out!!