When you click on links to various merchants on this site and make a purchase, this can result in this site earning a commission. Affiliate programs and affiliations include, but are not limited to, the eBay Partner Network.
It worked out. I've been meaning to post about how I finally got them installed.
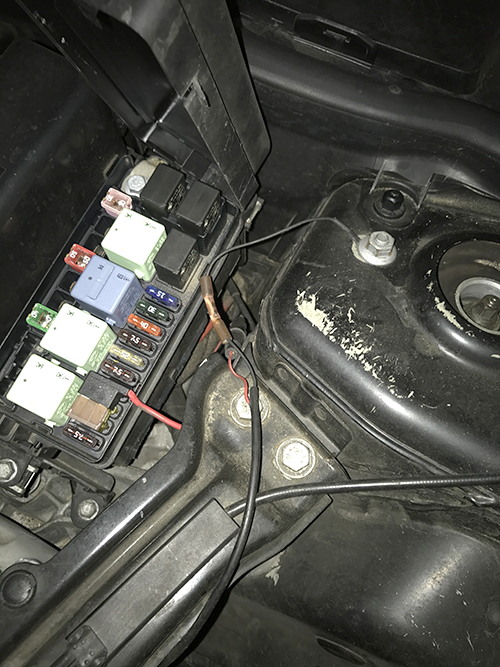
The transformer looking things are ballast that plug into the old parking light harness to prevent a bulb check warning.
The white wire is not used.
The red goes to any ignition on power source. I just piggybacked on a fuse in the engine bay cause it was easiest with wiring and grounding etc.
The black goes to any ground - I just used a bolt that was in the frame near the fuse box I tapped into.
All in all they are great and I love the look. The only small downside which isn't really an issue is since they are piggybacked on a fuse which holds some charge after the car is off they stay on for a while once I leave the car.
Lots of "hey your lights are still on..." since I installed them.
I get the feeling this version outputs a lot more light than the OEM version.
Are the Leds 6000K? I was hoping they would be more like 5000K.. something like that (white, not white/blueish). When I do get them, I will try to splice them somehow to the previous parking lights. I want it to be full circle always 100% brightness, but only when i turn the parking lights on.
Well, just ordered a pair from a local Portuguese dealer that gets them from Dectane... They'll arrive next week or so.
I think I'll splice the two positive and negative wires that comes with the LED to the existing parking lights (so that I can control them - on or off - whenever I want).
From what I understood, the LED housing already come with the led ballast/resistor attached to it, no need to have any exterior "electronic boxes" connected?
Curious which fuse you tapped for your light installation? Help a brother out?
Originally Posted by dez
It worked out. I've been meaning to post about how I finally got them installed.
The transformer looking things are ballast that plug into the old parking light harness to prevent a bulb check warning.
The white wire is not used.
The red goes to any ignition on power source. I just piggybacked on a fuse in the engine bay cause it was easiest with wiring and grounding etc.
The black goes to any ground - I just used a bolt that was in the frame near the fuse box I tapped into.
All in all they are great and I love the look. The only small downside which isn't really an issue is since they are piggybacked on a fuse which holds some charge after the car is off they stay on for a while once I leave the car.
Lots of "hey your lights are still on..." since I installed them.
Curious which fuse you tapped for your light installation? Help a brother out?
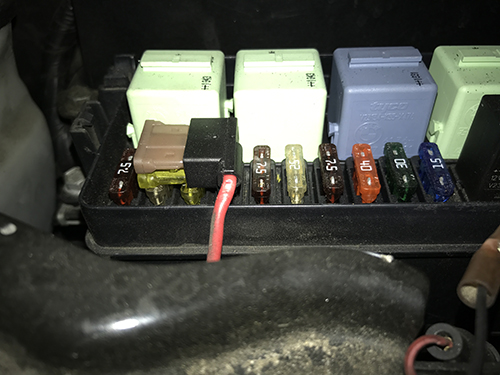
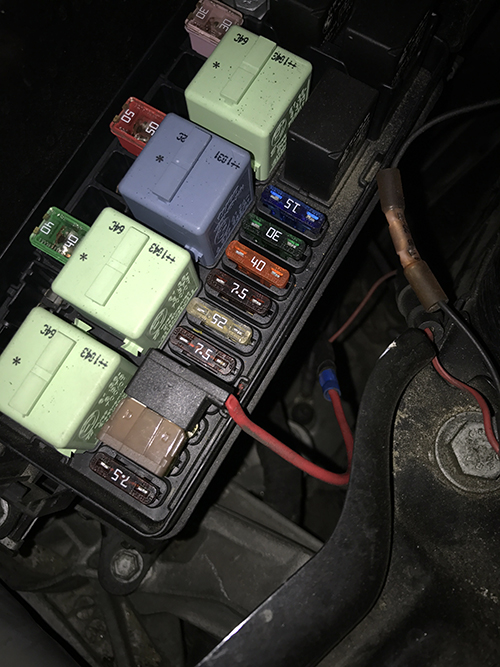
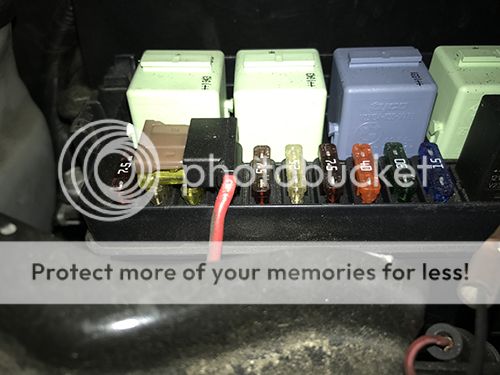
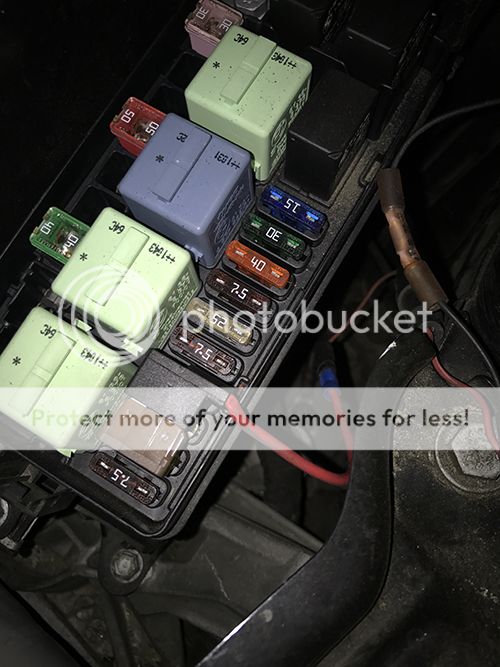
I used the engine bay fusebox for easier wiring.
I added an "add a circuit" fuse adaptor, and grounded on a strut bolt to the right in the first photo. I cut a hole/channel in the fusebox cover to allow for the circuit adaptor wire.
One last follow up question: How long do the lights stay on once you leave and lock the car?
Originally Posted by dez
I used the engine bay fusebox for easier wiring.
I added an "add a circuit" fuse adaptor, and grounded on a strut bolt to the right in the first photo. I cut a hole/channel in the fusebox cover to allow for the circuit adaptor wire.
Anyone know how to wire these so they run at 75 or 50% brightness? I have the latest version with two white wires, one brown and one green coming out of the driver.
I know this thread is old, but here's a heads-up to anyone who may be reading: you DO NOT have to remove the bumper to remove the fog light assemblies/housings! If you remove the headlights and undo the wheel well liner you can access the final bolt and simply remove it from the wheel well!
I'll update with more information / pictures once I'm done with the installation; so far I've just done one side. Should be within a day or two.
EDIT: Got them installed! After connecting them with a fuse tap, they work perfectly! Though they do have a tendency to stay on for a while, like dez said. I'll update with pictures and info when I'm not super busy.
I've been eyeing this install for a while, but have been apprehensive due to low... low technical skills, lol. Thanks for reviving a dead thread. How long did your install take you?
I've been eyeing this install for a while, but have been apprehensive due to low... low technical skills, lol. Thanks for reviving a dead thread. How long did your install take you?
Sorry for the slow response!
It took me about three afternoons worth of work, including breaks, interruptions, and my idiocy. If I didn't make so many silly mistakes, I suspect it would have taken a lot less time! Examples include: losing a screw for the mounting bracket, wiring into the wrong fuse (they wouldn't turn off lol!), and not realizing that the washer fluid reservoir slides UP to move it out of the way.
Also, I couldn't be bothered to remove the wheels, which would have made access MUCH easier. Leaving the wheels on made it take way longer, but I'm terrible at getting wheels back on properly. �\_(ツ)_/�
I didn't actually get the same type as most people did in this thread, since I'm not a fan of the "dotted" look. I got solid ring ones made by the same company, Vinstar, from eBay for ~$125.
Here's some pictures:
Spoiler
They're rather bright, and I'm probably going to change them to 50% brightness soon (I'm a tad worried that the LEDs might be overdriven or something...). At night they're like powerful flashlights - you don't want to stare into them for too long!
I can post more photos & info when I can/if anyone's interested
Last edited by anew742; 10-15-2018 at 05:18 PM.
Reason: Additional info
 12-17-2015, 11:20 AM