How To Maintenance :: Valve cover gasket
#1
 03-16-2012, 09:08 AM


Maintenance :: Valve cover gasket
This maintenance DIY applies to R50/R52/R53 Coopers and Cooper Ss; for non-supercharged models, just ignore the whole intercooler deal, and proceed logically! All these steps also assume you're doing this at the same time as an oil change. I don't know why you would do all this without changing the oil, but I don't see why it couldn't be done.
You're removing plugs, wires, and coil pack, so I highly recommend disconnecting your battery, too; this is done in the boot on R53s with a 10 mm socket/wrench.
Step half: remove everything that's key in a proper oil change, including your filter housing and drain plug, and let your oil drain while you're doing the rest. As usual, warming the car up a bit helps with this, and on cold winter days in cold winter garages will keep your hands warm a bit longer...
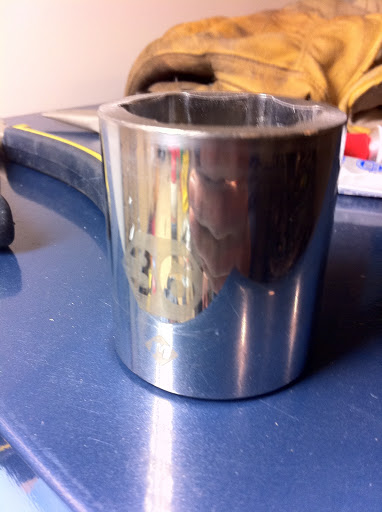
Giant socket:
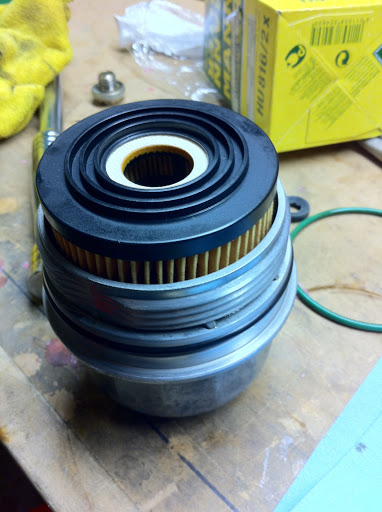
New filter snapped into filter housing, ready to be reinstalled:
Step one: remove intercooler, starting with plastic diverter and mounting bolts, finishing with boot clamps; all hardware is T30.
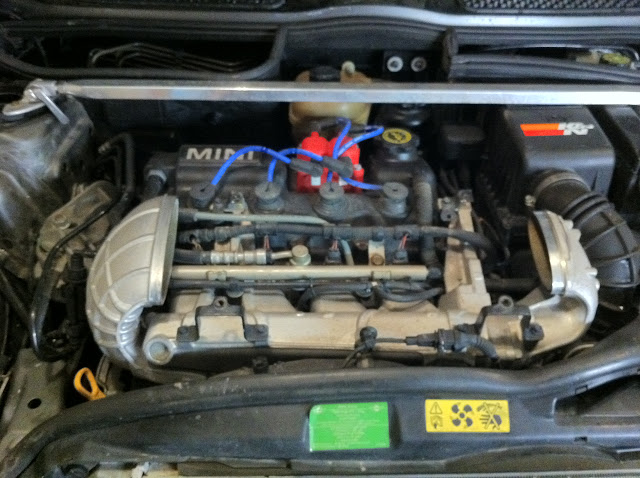
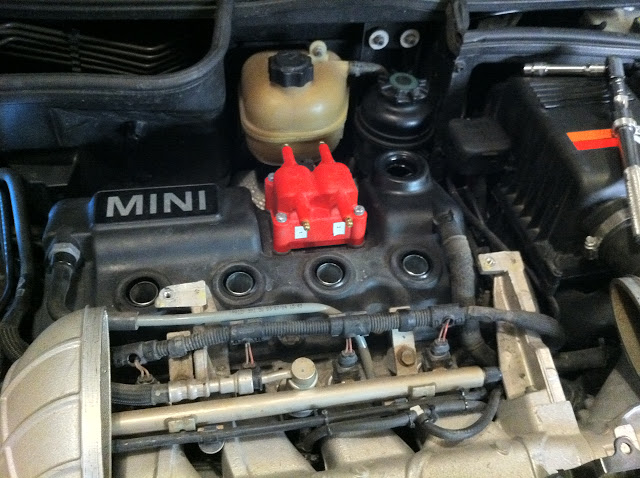
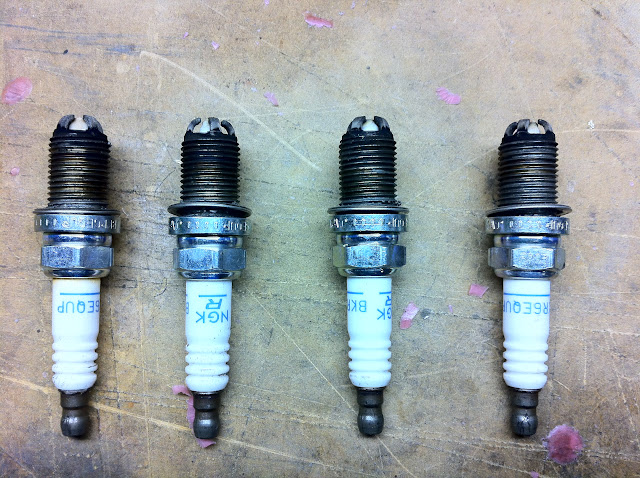
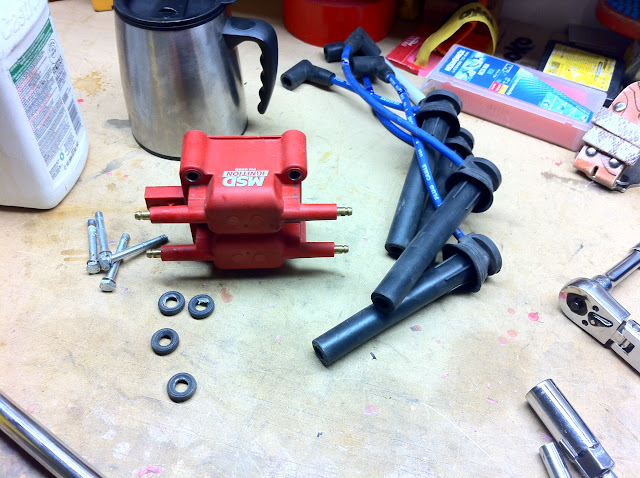
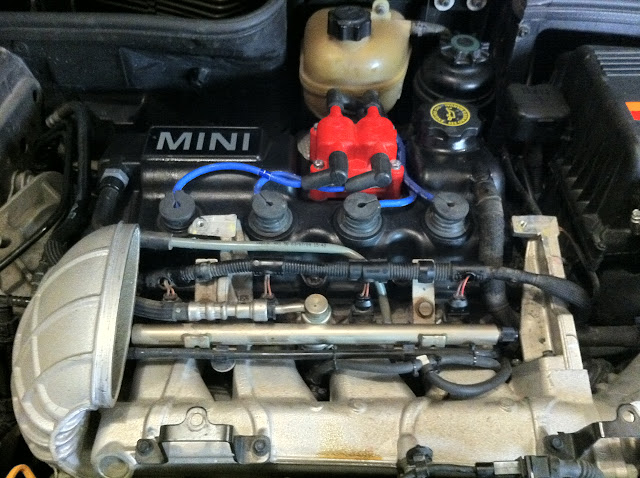
Step two: remove all your superfluous electrical gear, including wires, plugs (my stock MEGs are 5/8"), and coil pack (my MSD has 10 mm bolts, and I think the stock one does too). Clean and inspect these things and set them aside.
Look ma, no wires:
Good lookin' set o' plugs:
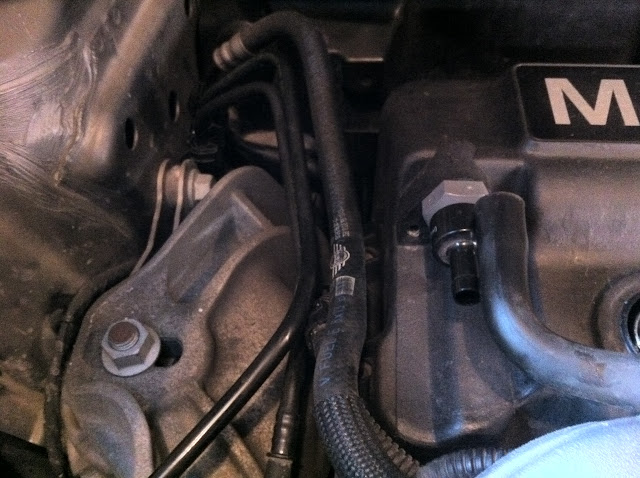
Step three: remove the vacuum line that gets in the way, pulling straight backwards, paying close attention to not breaking the plastic retainer clips.
Step four and four-and-a-half: start removing all the 8 mm super-special bolts that hold on your valve cover. I have a lovely socket set that includes a deep 8mm 1/4"-drive socket. You will need this: you can't get to these bolts with a combination wrench, nor can you use a standard shallow socket.
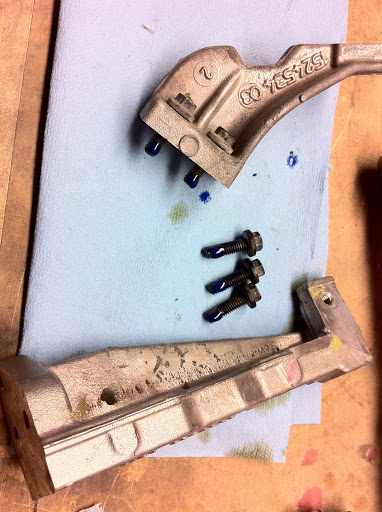
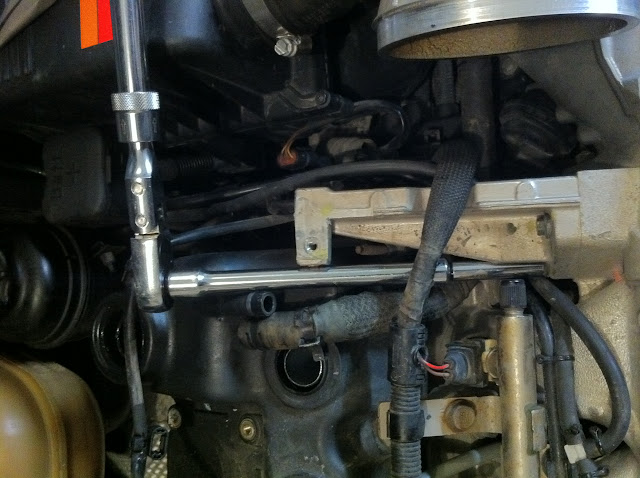
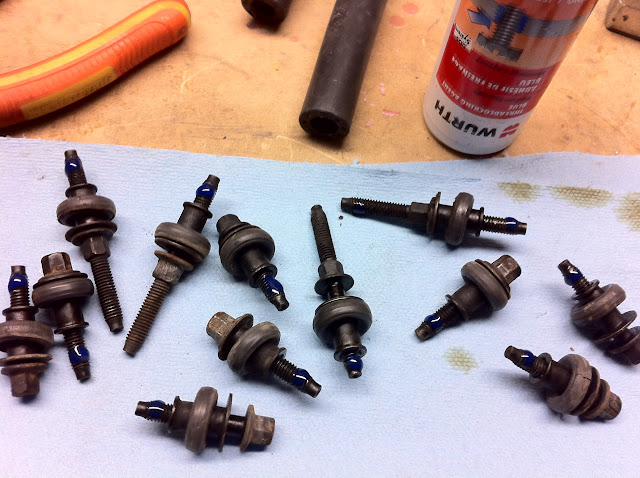
You'll quickly find the two that you can't reach - front left and second-to-front right, due in both cases to the intercooler arm mounts. Remove the right (skier's right, not spectator's right) intercooler arm via the two visible 10 mm bolts. Here's what they look like when they're off; the right one is on top:
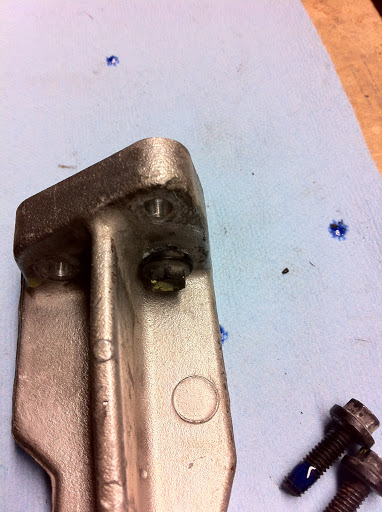
Three bolts hold the left IC arm on, one of which is hidden. I used a creative combination of a 3/8" extension, 3/8"-1/4" adapter, and then my skinny 8 mm socket on the end: this had enough play that this acted as a sort of crappy universal, and I could access the hidden 10 mm bolt. Here's the bolt layout, furthest left in the image being the underside of the arm:
And here's my tool:
Step five: remove your valve cover, pulling straight up; there shouldn't be much resistance, as you're replacing your gasket because it no longer forms a decent seal. The innards look like this:
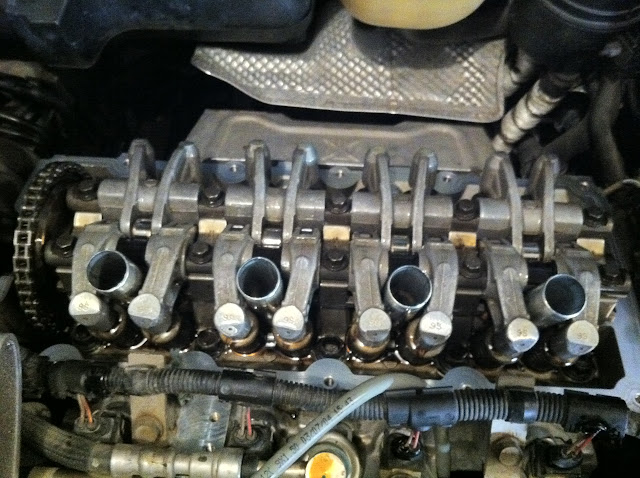
Everything should be sparkling clean. If it's not, you've got other issues.
Sidebar: this is the second time I've seen this, the other being from another NAM'er who said his was cracked and that this constituted a patch job:
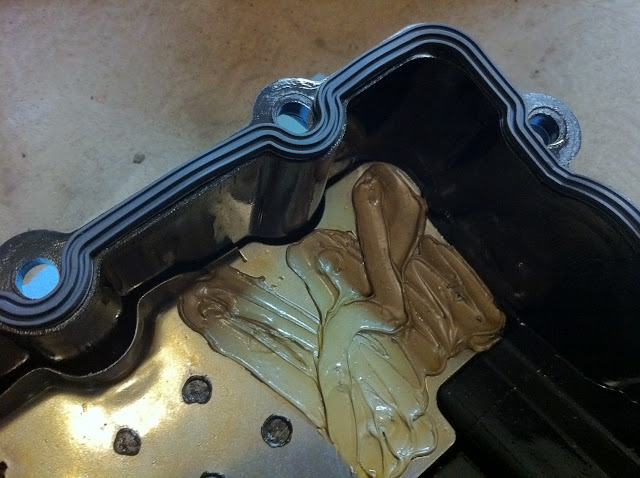
Well, mine sure ain't cracked, and that sure ain't no patch job. It's smeared only on one of the internal metal baffles, for starters, which force oil to flow off the time chain, over top of them, and over the valve train (or on the other side, into the motor through the oil-fill cap). In truth, I don't know what this is. Sound or vibration dampening, maybe? Additional oil-flow baffling? Anyone who knows should chime in.
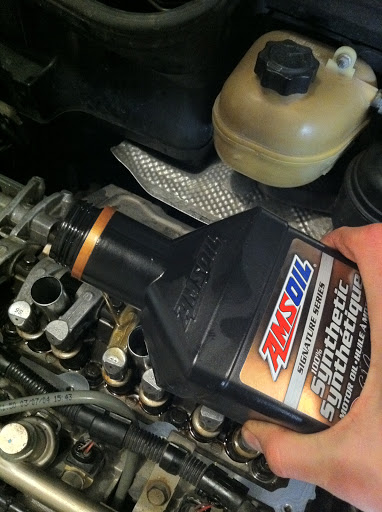
Step five-and-a-half: plug your oil pan, replace your filter, and start filling for your oil change, if applicable. I saw no reason not to flush my valve train with a bit of clean oil (before plugging the pan), so that's what I did. The oil that came out was still gunky, so this might not be such a bad idea... Plus, you'll see what gets left behind during a normal oil change! If you flush/flood your valve train with oil while it's exposed, just be careful not to pour oil into your open spark-plug wells!
Step six: pull your old gasket out and snap your new one in. This is pretty straightforward - don't scratch the gasket seat - and I didn't take any great pictures. But here's another one:

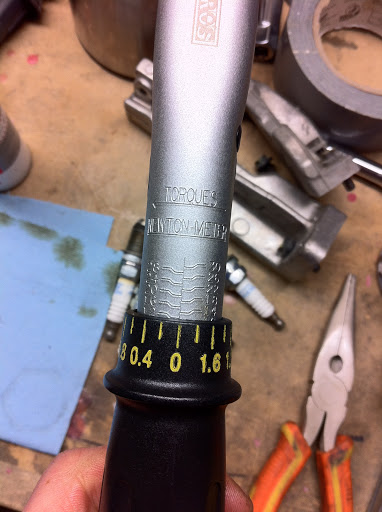
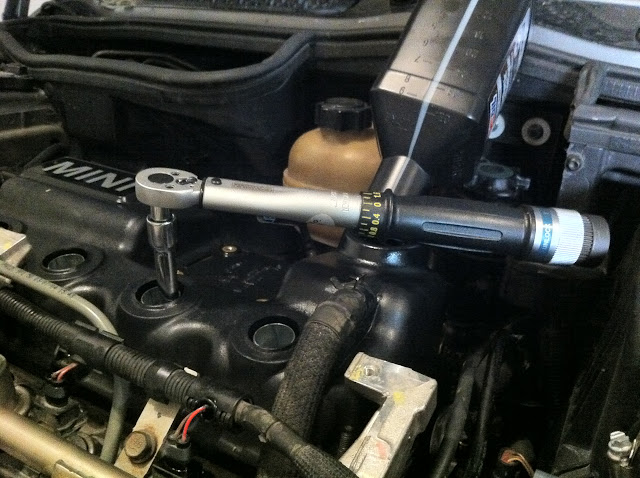
Step seven: reassemble. Use a torque wrench for everything. Always. Valve cover bolts have a sequence, working from the inside out in circles; imagine pushing the gasket out to the edges. I didn't know this when I put mine back together, and I just snugged everything up slowly. In any case, do not just install the bolts and start tightening them down. Get them all a bit snugger and a bit snugger still, before applying your final torque of 12 Nm.
I applied a bit of blue W�rth threadlocker to all of mine, though I'm not sure this was really necessary. It seemed like a good idea, as they're all very low-torque bolts, and the W�rth juice is rated to a high enough temperature for an application like this. I don't like most Loctite products, as they get brittle after they set up.
Step eight: reinstall everything - your intercooler arms, coil pack, plugs, and wires, and then your intercooler. I cleaned everything as I went, of course, and applied a bit of blue threadlocker on the bolts that hold the intercooler arms. These are not super-high-torque bolts, I don't think, and remember they thread into your intake manifold. Don't strip them! Use your special long, thin fingers and crazy extension to get to that last, hidden bolt on the left arm.
Torque your plugs properly, or lose them! 30 Nm. I always put a bit of antiseize on mine, but the jury is out on the necessity of this, and I don't want to be part of the argument.
Reinstall your coil pack, being very careful with the bolts; there's no sense in cracking your valve cover now that you've replaced the gasket!
I don't know what the torque spec is for this, but it can't be much more than the valve-cover bolts; again, this seems like a great place for blue threadlocker. Reinstall your plug wires; I always use a bit of dielectric grease, but I don't know what it does (it can't actually be dielectric, or your plugs wouldn't fire...).
Reinstalling your intercooler isn't the easiest thing in the world, but after a few kicks at the cat, you'll develop your own method. I read several tutorials on NAM, and none of them helped; I just needed to figure it out for myself. I like to get the boot-clamp bolts just a few threads in and install the boots; I then slide the boots - both of them - most of the way onto the horns, install my intercooler, and slide the boots back over the intercooler ends into final position. These bolts don't need to be crazy tight, but tight enough: you'll feel the boot-clamp bolts bottom out, and that's a good place to stop.
Go for a drive, and then have a beer.
You're removing plugs, wires, and coil pack, so I highly recommend disconnecting your battery, too; this is done in the boot on R53s with a 10 mm socket/wrench.
Step half: remove everything that's key in a proper oil change, including your filter housing and drain plug, and let your oil drain while you're doing the rest. As usual, warming the car up a bit helps with this, and on cold winter days in cold winter garages will keep your hands warm a bit longer...
Giant socket:
New filter snapped into filter housing, ready to be reinstalled:
Step one: remove intercooler, starting with plastic diverter and mounting bolts, finishing with boot clamps; all hardware is T30.
Step two: remove all your superfluous electrical gear, including wires, plugs (my stock MEGs are 5/8"), and coil pack (my MSD has 10 mm bolts, and I think the stock one does too). Clean and inspect these things and set them aside.
Look ma, no wires:
Good lookin' set o' plugs:
Step three: remove the vacuum line that gets in the way, pulling straight backwards, paying close attention to not breaking the plastic retainer clips.
Step four and four-and-a-half: start removing all the 8 mm super-special bolts that hold on your valve cover. I have a lovely socket set that includes a deep 8mm 1/4"-drive socket. You will need this: you can't get to these bolts with a combination wrench, nor can you use a standard shallow socket.
You'll quickly find the two that you can't reach - front left and second-to-front right, due in both cases to the intercooler arm mounts. Remove the right (skier's right, not spectator's right) intercooler arm via the two visible 10 mm bolts. Here's what they look like when they're off; the right one is on top:
Three bolts hold the left IC arm on, one of which is hidden. I used a creative combination of a 3/8" extension, 3/8"-1/4" adapter, and then my skinny 8 mm socket on the end: this had enough play that this acted as a sort of crappy universal, and I could access the hidden 10 mm bolt. Here's the bolt layout, furthest left in the image being the underside of the arm:
And here's my tool:
Step five: remove your valve cover, pulling straight up; there shouldn't be much resistance, as you're replacing your gasket because it no longer forms a decent seal. The innards look like this:
Everything should be sparkling clean. If it's not, you've got other issues.
Sidebar: this is the second time I've seen this, the other being from another NAM'er who said his was cracked and that this constituted a patch job:
Well, mine sure ain't cracked, and that sure ain't no patch job. It's smeared only on one of the internal metal baffles, for starters, which force oil to flow off the time chain, over top of them, and over the valve train (or on the other side, into the motor through the oil-fill cap). In truth, I don't know what this is. Sound or vibration dampening, maybe? Additional oil-flow baffling? Anyone who knows should chime in.
Step five-and-a-half: plug your oil pan, replace your filter, and start filling for your oil change, if applicable. I saw no reason not to flush my valve train with a bit of clean oil (before plugging the pan), so that's what I did. The oil that came out was still gunky, so this might not be such a bad idea... Plus, you'll see what gets left behind during a normal oil change! If you flush/flood your valve train with oil while it's exposed, just be careful not to pour oil into your open spark-plug wells!
Step six: pull your old gasket out and snap your new one in. This is pretty straightforward - don't scratch the gasket seat - and I didn't take any great pictures. But here's another one:
Step seven: reassemble. Use a torque wrench for everything. Always. Valve cover bolts have a sequence, working from the inside out in circles; imagine pushing the gasket out to the edges. I didn't know this when I put mine back together, and I just snugged everything up slowly. In any case, do not just install the bolts and start tightening them down. Get them all a bit snugger and a bit snugger still, before applying your final torque of 12 Nm.
I applied a bit of blue W�rth threadlocker to all of mine, though I'm not sure this was really necessary. It seemed like a good idea, as they're all very low-torque bolts, and the W�rth juice is rated to a high enough temperature for an application like this. I don't like most Loctite products, as they get brittle after they set up.
Step eight: reinstall everything - your intercooler arms, coil pack, plugs, and wires, and then your intercooler. I cleaned everything as I went, of course, and applied a bit of blue threadlocker on the bolts that hold the intercooler arms. These are not super-high-torque bolts, I don't think, and remember they thread into your intake manifold. Don't strip them! Use your special long, thin fingers and crazy extension to get to that last, hidden bolt on the left arm.
Torque your plugs properly, or lose them! 30 Nm. I always put a bit of antiseize on mine, but the jury is out on the necessity of this, and I don't want to be part of the argument.
Reinstall your coil pack, being very careful with the bolts; there's no sense in cracking your valve cover now that you've replaced the gasket!
I don't know what the torque spec is for this, but it can't be much more than the valve-cover bolts; again, this seems like a great place for blue threadlocker. Reinstall your plug wires; I always use a bit of dielectric grease, but I don't know what it does (it can't actually be dielectric, or your plugs wouldn't fire...).
Reinstalling your intercooler isn't the easiest thing in the world, but after a few kicks at the cat, you'll develop your own method. I read several tutorials on NAM, and none of them helped; I just needed to figure it out for myself. I like to get the boot-clamp bolts just a few threads in and install the boots; I then slide the boots - both of them - most of the way onto the horns, install my intercooler, and slide the boots back over the intercooler ends into final position. These bolts don't need to be crazy tight, but tight enough: you'll feel the boot-clamp bolts bottom out, and that's a good place to stop.
Go for a drive, and then have a beer.
Last edited by Applesauce; 03-16-2012 at 09:21 PM. Reason: Grammar.
The following users liked this post:
dayman (10-10-2021)

#3
04-29-2012, 07:59 AM

#4
04-29-2012, 10:22 AM
I didn't put any sealant on it, and read that it's not needed. It might have been necessary on older, flat gaskets. This gasket snaps into a channel on the underside of the valve cover, and has multiple ribs meeting the block; I suppose these do an adequate job of sealing. I'm six weeks out now, and mine's not leaking!
#6
06-19-2012, 04:54 PM

1st Gear
Join Date: May 2012
Location: Leesburg VA
Posts: 14
Likes: 0
Received 0 Likes
on
0 Posts
Bugger. I wish I had seen this earlier. I just had mine done at the dealer.
It was in for a clutch replacement and I got the call - "We noticed that your valve cover is leaking badly".
One thing the dealer did while replacing the valve cover gasket is to replace 4 seals, not sure what seals but the part number is 11127513066.
Just thought I would mention it as it must be recommended.
Cheers
#7
06-20-2012, 04:58 AM
5th Gear
Join Date: Mar 2005
Location: Pinellas Park, FL 33781
Posts: 651
Likes: 0
Received 0 Likes
on
0 Posts
Inside of the valve cover are the 4 spark plug holes. These parts seal the plug channel from the valve cover. I ended up replacing them in mine too when I was changing out the gasket. (a few of them were leaking.)
Trending Topics

#9
06-20-2012, 09:47 AM
5th Gear
Join Date: Mar 2005
Location: Pinellas Park, FL 33781
Posts: 651
Likes: 0
Received 0 Likes
on
0 Posts
#10
01-24-2013, 05:29 PM

Great article thanks I replaced my valve cover gasket and spark plug seals as a result. I would add two warnings as I was bitten by both of these... #1 When you remove the coil each of the 4 bolts has a rubber grommet that sits in between the back of the coil unit and valve cover, presumably to provide some vibration damping, be cautious that you don't drop one as in my case it could not be found. #2 If you replace the spark plug seals, which probably makes sense, then you'll find getting them out is tricky... I used a flat screwdriver to pry them out carefully from the inside of valve cover (remember which way they go in) when you replace these seals you have to press them in quite firmly so be careful not to break your PCV valve which sits on the top of your valve cover. I managed to break mine! Still better than going to the dealer and thanks to all on this thread and in particular many thanks to "applesauce". Good luck!
#11
04-22-2014, 05:44 PM
valve cover seals
Strange. I also have the smeared sealer as others and not really sure why but what I found was two more important things.
One the spark plug seals are the least of the worries as the small rubber o-ring type seals are the MOST likely to leak and often do. Nobody on here on all the threads I read mentions replacing those even the Mini gurus/specialists.
In order to replace those you need to buy the new hold down bolts from mini as the come as one piece assemblies. 8 of the bolts and 4 of the studs. About $52.00 for the 12.
The other is the cover itself tends to snap around the coil mount area inside and needs to be dressed before reinstalling the cover so I will insert some pics to show all what and how I did it. Cannot believe more are not complaining about leaking still without taking these steps beside the main gasket replacement? By taking a dremel or small grinder to cut the cracks out of the area it will relieve the stress and I chose to leave them as you see open however will definitely put a little black sealant around the outside of the mounting locations for the coil box atop the cover. Also don't forget to put the rubber orings back on the bottom of the coil pack before mounting as they also seal as well as vibration dampening. Happy Motoring!
Mike
Last edited by animal1; 04-22-2014 at 06:35 PM. Reason: additional info
The following users liked this post:
Maxs34 (10-26-2022)
#12
08-07-2015, 03:11 PM
1st Gear
Join Date: Nov 2013
Location: Portland, Oregon
Posts: 16
Likes: 0
Received 0 Likes
on
0 Posts

Thread
Thread Starter
Forum
Replies
Last Post
09R56
R56 :: Hatch Talk (2007+)
17
11-16-2022 10:49 AM

