How To HOW TO: R56 - Thermostat Housing + Thermostat
#1
 05-27-2011, 10:33 AM

HOW TO: R56 - Thermostat Housing + Thermostat
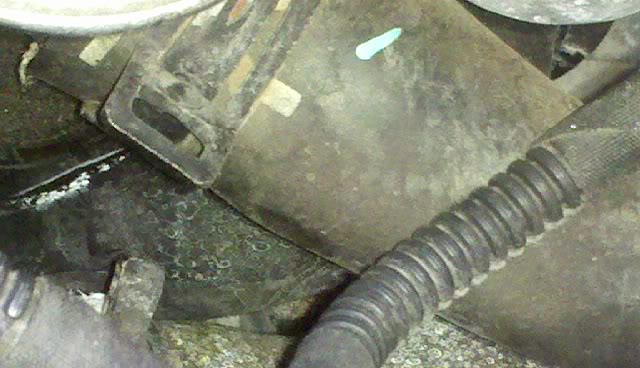
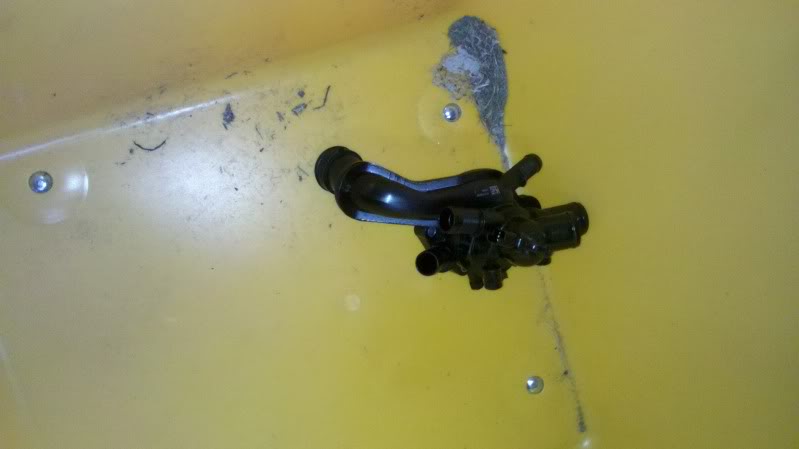
So I guess things fail in pairs. last week my water pump went out, this week the thermostat housing started to leak. Unfortunately MINI uses plastic parts yet again.. and they heat up and expand and leak, kinda irritates me. I have 59k miles, water pump started leaking at 53k.
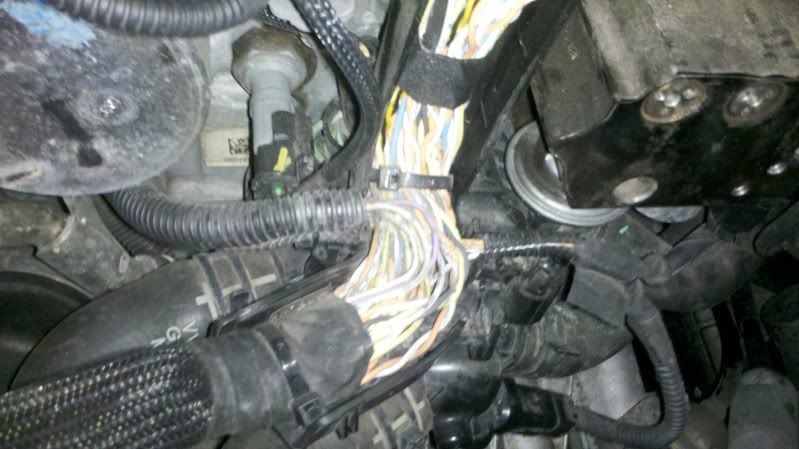
The white residue in the picture is where I was leaking from.
Again, I refuse to have MINI work on my car cause its over priced and I like to save money.
I bought the thermostat, which has an integrated housing and sensors. Cost was $111.67 and a gallon of MINI coolant - 29.12 so roughly $150 out the door with tax.
Tools needed - BEER, Flat head, 10MM socket, Extension, and pliers.
Thermostat housing:
1. I disconnected my battery.
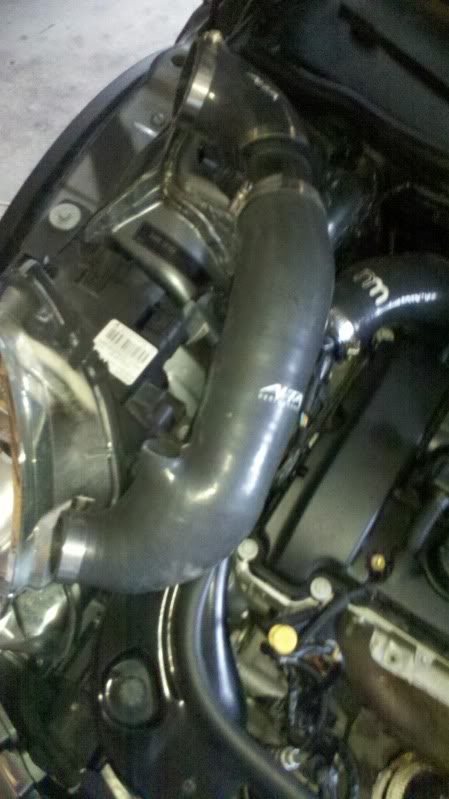
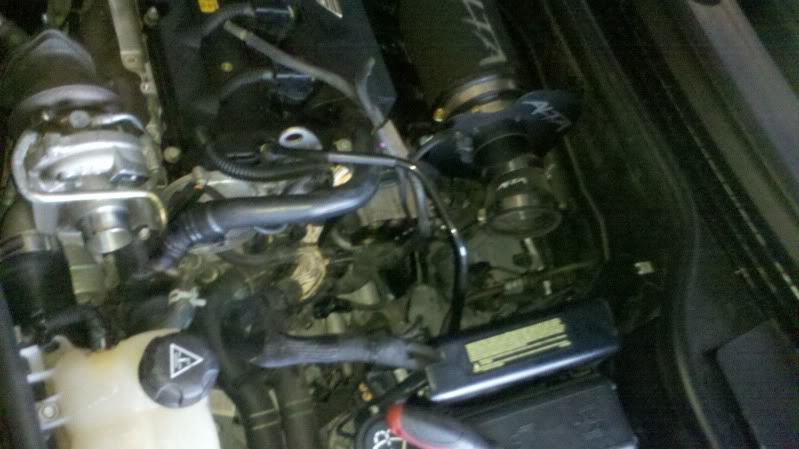
2. Removed my Alta Turbo Inlet Pipe and Maf. - Used a flathead.
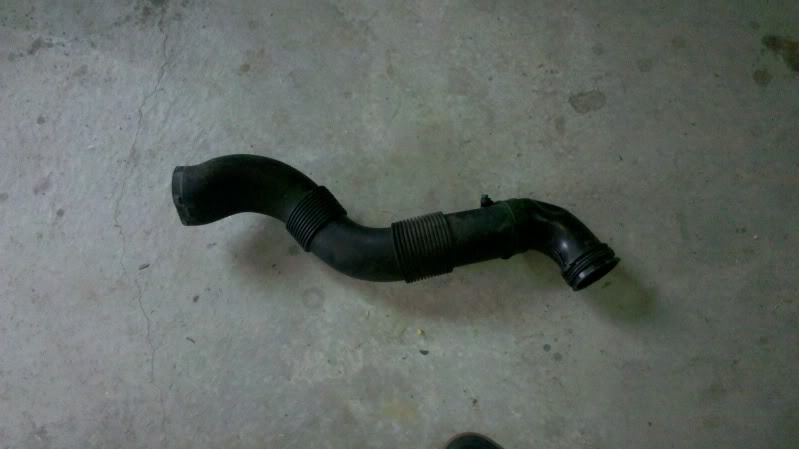
3. Remove the fresh air pipe that runs off the head light.
4. I disconnected the Vacuum line off the Wastegate and the other one that runs to a nipple near the wastegate.
5. I did my best to move the ECU wiring harness out of the way.
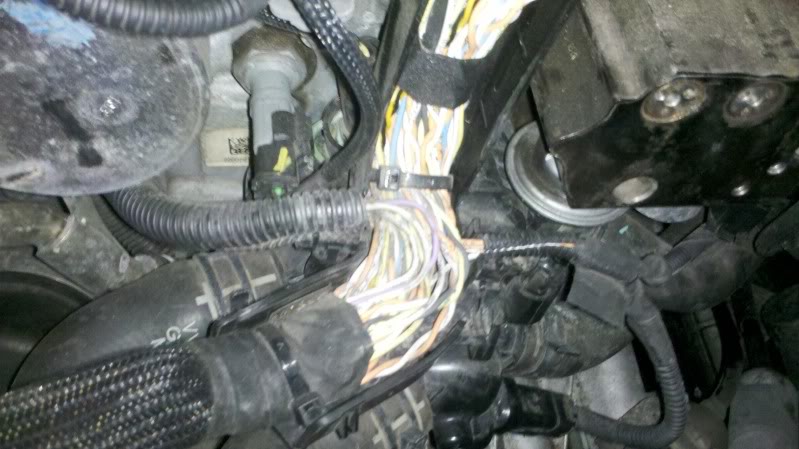
6. I unplugged all the surrounding sensors, including the sensor on the ABS unit.
7. I started removing houses one by one off the thermostat.
8. I removed the clip that is located under intake manifold that connects the housing to another water pipe.
9. I removed the 3 10mm bolts that hold the thermostat housing to the block.
10. I then reinstalled in reverse order.
11. Added coolant and bled the system using the flat head and the bleeder valve on the top of the thermostat housing.
Thats about it, it took under an hour to do myself. I used literally 3 tools though, it was simple and straight forward. I have saved roughly $500 just in labor doing this all myself.
Thank you
If anyone has questions please pm me.
The white residue in the picture is where I was leaking from.
Again, I refuse to have MINI work on my car cause its over priced and I like to save money.
I bought the thermostat, which has an integrated housing and sensors. Cost was $111.67 and a gallon of MINI coolant - 29.12 so roughly $150 out the door with tax.
Tools needed - BEER, Flat head, 10MM socket, Extension, and pliers.
Thermostat housing:
1. I disconnected my battery.
2. Removed my Alta Turbo Inlet Pipe and Maf. - Used a flathead.
3. Remove the fresh air pipe that runs off the head light.
4. I disconnected the Vacuum line off the Wastegate and the other one that runs to a nipple near the wastegate.
5. I did my best to move the ECU wiring harness out of the way.
6. I unplugged all the surrounding sensors, including the sensor on the ABS unit.
7. I started removing houses one by one off the thermostat.
8. I removed the clip that is located under intake manifold that connects the housing to another water pipe.
9. I removed the 3 10mm bolts that hold the thermostat housing to the block.
10. I then reinstalled in reverse order.
11. Added coolant and bled the system using the flat head and the bleeder valve on the top of the thermostat housing.
Thats about it, it took under an hour to do myself. I used literally 3 tools though, it was simple and straight forward. I have saved roughly $500 just in labor doing this all myself.
Thank you
If anyone has questions please pm me.
Last edited by Boosted_Mini; 05-27-2011 at 01:43 PM.
The following 6 users liked this post by Boosted_Mini:
BIGJOHNSD (05-29-2020),
classysporty (09-03-2022),
datanerd (08-08-2018),
ECSTuning (07-02-2019),
JeffInDFW (05-18-2022),
and 1 others liked this post.

#3
05-27-2011, 01:40 PM

Hate to say it
But one of your hoses is likely to go next. I reccommend squeezing them all. Any that feel soft are about to go. Since the plastic impeller on the pump and plastic housing of the thermostat both failed I assume you have a lot of miles on your car. That means all those coolant hoses have seen the same high number of heat cycles. The best way to address this is to do it all together. Then you wouldn't have to buy 3 gallons of coolant. Though honestly you can reuse the coolant as long as you filter it if any dirt gets in while draining.
Last edited by johne123; 05-27-2011 at 01:44 PM. Reason: Update
#4
05-27-2011, 01:42 PM
#5
05-27-2011, 03:27 PM


#6
05-27-2011, 06:34 PM
5th Gear
Join Date: Apr 2009
Location: The Nexus: I-95, I-20, I-40, I-85....etc.
Posts: 619
Likes: 0
Received 0 Likes
on
0 Posts
#7
05-28-2011, 09:10 AM
Trending Topics
#8
08-08-2011, 12:46 PM

Thanks for the post
I'll be doing this soon on my 07. The dealer wanted $570 for the repair and I just can't bring myself to pay that. I've got 29k miles and am a bit disappointed in the failure in what I still consider a young car. Oh well, my hands have been clean for a couple months and that's far too long 
-JL
-JL
Last edited by jlevy; 08-08-2011 at 12:47 PM. Reason: spelling

#11
08-12-2011, 01:36 PM
A couple more notes on this changeout
The repair took me about 2 hours. See the attached pic, but when reattaching the large radaitor coolant lines (the ones facing the front of the car), you need to 'clock' them so they stand up above the shifter linkage (at least on manual trans cars). Otherwise the shifter linkage hits these coolant lines and a failed hose will not be far behind.
Side notes:
1. I cleaned up some of the rough edges on the coolant passages inside the housing.
2. I was running water wetter in the cooling system before the failure and decided to use it again.
3. I ordered the part from a place in Florida and will post the link when I get a chance. They sold me the part for just under 100 bucks and were great to work with. https://www.koperformance.com/
4. Total 50% coolant needed for refill of the system was ~3 liters.
-JL
Last edited by jlevy; 08-12-2011 at 01:59 PM. Reason: spelling; added link to KO performance
#12
10-31-2011, 08:19 AM

What's the secret to getting the ECU wiring harness cover off? Thanks!
So I guess things fail in pairs. last week my water pump went out, this week the thermostat housing started to leak. Unfortunately MINI uses plastic parts yet again.. and they heat up and expand and leak, kinda irritates me. I have 59k miles, water pump started leaking at 53k.
The white residue in the picture is where I was leaking from.

Again, I refuse to have MINI work on my car cause its over priced and I like to save money.
I bought the thermostat, which has an integrated housing and sensors. Cost was $111.67 and a gallon of MINI coolant - 29.12 so roughly $150 out the door with tax.
Tools needed - BEER, Flat head, 10MM socket, Extension, and pliers.
Thermostat housing:

1. I disconnected my battery.
2. Removed my Alta Turbo Inlet Pipe and Maf. - Used a flathead.

3. Remove the fresh air pipe that runs off the head light.
4. I disconnected the Vacuum line off the Wastegate and the other one that runs to a nipple near the wastegate.
5. I did my best to move the ECU wiring harness out of the way.
6. I unplugged all the surrounding sensors, including the sensor on the ABS unit.

7. I started removing houses one by one off the thermostat.
8. I removed the clip that is located under intake manifold that connects the housing to another water pipe.
9. I removed the 3 10mm bolts that hold the thermostat housing to the block.
10. I then reinstalled in reverse order.
11. Added coolant and bled the system using the flat head and the bleeder valve on the top of the thermostat housing.
Thats about it, it took under an hour to do myself. I used literally 3 tools though, it was simple and straight forward. I have saved roughly $500 just in labor doing this all myself.
Thank you
If anyone has questions please pm me.
The white residue in the picture is where I was leaking from.
Again, I refuse to have MINI work on my car cause its over priced and I like to save money.
I bought the thermostat, which has an integrated housing and sensors. Cost was $111.67 and a gallon of MINI coolant - 29.12 so roughly $150 out the door with tax.
Tools needed - BEER, Flat head, 10MM socket, Extension, and pliers.
Thermostat housing:
1. I disconnected my battery.
2. Removed my Alta Turbo Inlet Pipe and Maf. - Used a flathead.
3. Remove the fresh air pipe that runs off the head light.
4. I disconnected the Vacuum line off the Wastegate and the other one that runs to a nipple near the wastegate.
5. I did my best to move the ECU wiring harness out of the way.
6. I unplugged all the surrounding sensors, including the sensor on the ABS unit.
7. I started removing houses one by one off the thermostat.
8. I removed the clip that is located under intake manifold that connects the housing to another water pipe.
9. I removed the 3 10mm bolts that hold the thermostat housing to the block.
10. I then reinstalled in reverse order.
11. Added coolant and bled the system using the flat head and the bleeder valve on the top of the thermostat housing.
Thats about it, it took under an hour to do myself. I used literally 3 tools though, it was simple and straight forward. I have saved roughly $500 just in labor doing this all myself.
Thank you
If anyone has questions please pm me.
The following users liked this post:
R56owner (09-05-2018)
#13
12-06-2011, 02:07 PM

Just did this myself. To flesh out some things that I would add as someone who hasn't done this serious a job on a MINI before (and to answer a question above):
1) The ECU harness cover is clipped on with lots of plastic clips. With these, as well as the sensors, etc., I found that dental pick was a great tool to hold down the keepers and pull off the connection. The hardest were the two round pegs that go from the wire cover to the top of the thermostat. It took some fiddling to get them to release, especially since you can't see underneath. I had to use my dental pick and some pulling and swearing.
2) For those of us without the Alta mods, the equivalent is removing the air intake and the filter box. Just takes a few screws and the box pulls out of its rubber mounts.
3) Note that the clip on the thermostat housing that goes into the tube on the back of the engine (under where the filter box goes) is a V shape. Just pull up on it with the pliers and it will pull right out.
4) If you don't have the special tool for the hose clamps a small pair of pliers with an angled head (like small water pipe pliers) comes in really handy.
5) Of course, you should drain the coolant before you do anything else. I found the best place is just under the front of the car where two hoses join.

#15
04-05-2012, 09:24 AM

I just did the thermostat replacement last night and would like to add my notes...
I had a very difficult time getting the hose clamps off. If you don't have the appropriate tool to remove the clamps, do yourself a favor and buy the tool. I don't know what tool it is, but I just used an old pair of pliers and I caused myself way too much grief. The majority of my time was wasted monkeying with those stupid clamps.
The difficulty with the pliers pushed me to probably unplug too much of the wiring harness. As I looked at the plugs, I noticed they were all various sizes with different length wires. I thought it would be easy to plug them back in the right spots. WRONG! I did fine up until the branch of three plugs towards the front - the set that includes the one plug that connects to the temp sensor. All three of those plugs look the same, but are color coded. I plugged them back in according to their colors. WRONG! After driving around a bit, I got a check engine light. Autozone was unable to make the CEL go away, so I limped to the mini dealership this morning (in engine protection mode). After paying the $119 diagnostic fee, they said it looked like I did a great job replacing the thermostat but simply flipped two connectors. The technician told the service adviser "it looks like he connected them according to their colors, which makes sense, but they don't connect like that." What colors go where? I don't know, but pay attention to which plug goes where and mark them with tape until you get them reconnected.
This isn't really mentioned anywhere in this thread, but as a side note, 99.9% of the work you'll be doing is done from above the engine, not below the car. The only thing you need to do below the car is disconnect the coolant hose at the splice connector to drain the old coolant.
I bought the thermostat from MINI, along with a jug of their coolant. Total was $165 out the door.
Anyway, I wouldn't classify this as an easy repair, but it was nice saving roughly $500 for about 5 hours of work. I'm sure it would take less time had I used the proper clamp tool. I only wish I'd paid more attention to the plugs, which reduced my $500 savings to $380.
The dealership said they see 2-3 of these thermostat replacements come through the shop every week. Being so common, it would be great if someone could shoot a video of the process...
The following 2 users liked this post by particle:
iwashmycar (10-02-2019),
JeffInDFW (05-18-2022)

#17
04-16-2012, 11:25 AM

4th Gear
#18
04-23-2012, 07:43 AM
#19
05-22-2012, 10:05 AM

I just did the repair last night in about 3 hours. I just placed cat litter under the car to catch the coolant and replaced what was necessary. I agree with everyone above, the hardest part about this job is probably dealing with the hose clamps. I didn't have the tool to remove the clamps, but I fared just fine with a pair of pliers. I also found that it's important to remove the hoses in a certain order since it'll make removing the part much easier.
I removed the two large hoses in the front (side closest to the front of the car) first, then the two larger hoses behind the part. I then removed the bolts to the part and began wrestling it out once I disconnected the tube that runs behind the engine. Once everything was loose (except for the small hose at the front of the part), I wrestled the part out while moving the clamp out of the way and pulled the part free from that last tube.
I installed in reverse order and everything worked out well. I also found that it helps to have a thin wall 10 mm socket. Don't connect any hoses except for the small one on the front of the part before bolting on the part. It makes working your socket into the part much easier.
Good luck!
The following 2 users liked this post by juchong:
iwashmycar (10-02-2019),
JeffInDFW (05-18-2022)
#20
06-07-2012, 04:00 AM

1st Gear
Join Date: Feb 2012
Location: Central Ky
Posts: 26
Likes: 0
Received 0 Likes
on
0 Posts
Thank you!
This how-to saved me almost $300. Thank you so much! It really wasn't a very hard job to do at all. A certified MINI mechanic said he doesn't even like doing the 2nd gens bc of how hard they are. I had everything off in about 45 minutes including 15 mins for a broken hose clamp.
#21
06-07-2012, 08:39 AM
#22
06-07-2012, 08:44 AM
#23
07-11-2012, 10:18 PM

1st Gear
Join Date: Apr 2012
Location: Vancouver, WA
Posts: 22
Likes: 0
Received 0 Likes
on
0 Posts
I sprang a leak today. Lucky for me I saw it as I backed out of the driveway and didn't drive off. So I jacked the car and could not really tell where it was coming from seems like from the thermostat area. So thank God I found this thread. Got my S40 put back together just in time for the R56 to take a crap, yeah.
#24
07-24-2012, 07:12 AM

Nice thread... I will be referring back to this thread when I receive my new Thermostat from ECS Tuning later this week. I have 46K miles on a 2008 MCS. Thermostat should last longer than this, especially sionce they cost $100! The thermostat on my mini van was $10 and extremely easy to replace.
The following users liked this post:
JeffInDFW (05-18-2022)
#25
07-29-2012, 06:47 AM
Received and install my new thermostat yesterday. Took longer to take it all apart and remove the old one, than it did to install the new one. Use the top of a bin lid to catch the antifreeze run off. Total of just under 3 hours. Refill antifreeze and use the bleeder value to insure the system was full of fluid.