

Picture request: Switches


6th Gear
Joined: Sep 2007
Posts: 1,342
Likes: 4
From: Youngsville, NC, USA
http://i214.photobucket.com/albums/c...led/led002.jpg
This if for the on-demand DRLs (aka tailgaiter repellant)
This if for the on-demand DRLs (aka tailgaiter repellant)

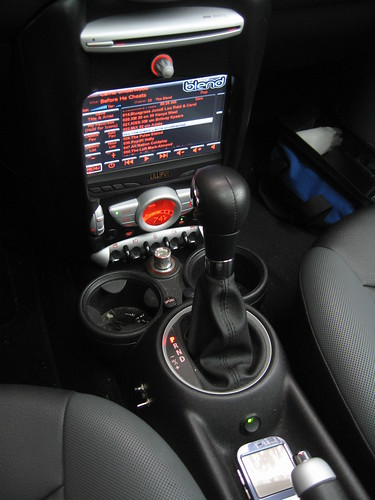
I'm a fan of the subtle... the ones on the downtube control the driving lamps (top) and fogs (bottom - intuitive, eh?). The safety-guarded switch in the console simply covers the hole where the switchplate used to be (I put a hole in it to install the aux input, but didn't like it there). That one controls the rocket launcher.


Here is a shot of mine. I simply put them on the drop down panel under the steering column. If i ever need to work on the wiring, I just pop it down. The small rocker switch that came with my driving lights went in the same location as Dixon's "rocket launcher" switch is located. 


That's an interesting place for them. Easy access !!! I like it.
Trending Topics


Thread Starter
|
2nd Gear
Joined: Jan 2009
Posts: 143
Likes: 0
hmm thanks for the pictures, lets see some more.. Im very confused on how to connect my led lights to the wire that goes to the lighter i dont know where it is. And im scared to drill a hole in my car lol. Does anyone have a picture of all the wires is it with the fuse box... the fuse box is hard to get to
I think you'd have to do the door ovals also - which leads to wear issues and chipping. Would probably look great, but make sure the black isn't too, umm, "formal" for the pebble-grained charcoal dash. I'm unsure, so I say Photoshop it, then see...
Agreed - despite the cig lighter being a good place to run accessories, if I were running separate circuits (for lighting or whatnot), I'd add another fused circuit via the add-a-fuse option. In my '06, that meant tapping the fuse block in the engine compartment on the driver's side - ran two circuits for fog and driving lamps.
The Mini's 12v power supply also transmits information to the Mini computer, and that's one thing I didn't want to mess with!
Also, anytime you run wiring, it's a good idea to make sure you
- Consider your wiring runs acrefully to prevent crimps, slices, cutting, or stretching (consider moving or opening parts, etc.)
- Protect the wiring against abrasion and cutting using some sort of sleeve or wrap
- Protect your connections by soldering or securely crimping, AND keep the elements out. It may be overkill, but taping (Scotch 33+ is the best IMHO) AND either shrink-wrapping or ziptying to prevent unraveling.
Good luck!
Dimi: Are you running the R50/53 or R56 chassis, or Clubman? The wiring's different.
(R50: MC 2006 and older, MCC 2008 and older)
(R53: MCS 2006 and older, MCSC 2008 and older)
(R56: all other MC and MCS)
(R50: MC 2006 and older, MCC 2008 and older)
(R53: MCS 2006 and older, MCSC 2008 and older)
(R56: all other MC and MCS)
I believe the R50 and 53 both have the fuse block in the engine compartment. Not a problem to pop an Add-A-Fuse in there and run a wire into the passenger compartment.
Remember, especially for lighting, horns, and other high current devices, it's best to use a relay to switch the 12v+ power to the device, then use the in-passenger-compartment switch to control signal wire to the relay. That prevents the lil' switch from handling all that current, and as a side benefit keeps the higher current out of the passenger compartment and in the relay, which is better able to handle it.
Remember, especially for lighting, horns, and other high current devices, it's best to use a relay to switch the 12v+ power to the device, then use the in-passenger-compartment switch to control signal wire to the relay. That prevents the lil' switch from handling all that current, and as a side benefit keeps the higher current out of the passenger compartment and in the relay, which is better able to handle it.


careful of second hand smoke lawsuits. are you using the biodegradable environmentally friendly oil? does the cloaking device really need to cloak the switch too? how's the hyperdrive holding up? does it go into limp mode often like my 2nd gen cooper? how big a battery do you need for the blasters?

6th Gear
Joined: Oct 2006
Posts: 1,511
Likes: 3
From: Las Vegas
Here's mine...safety covered toggles, one for each pair of lights (See sig). Illustrates that when I drilled the holes in the mirror panel I didn't get them symmetrical so I turned them to make it look like I meant to point them at the driver 


 Still haven't figured out what happened...

Thread
Thread Starter
Forum
Replies
Last Post
Sc00terbum
R50/R53 :: Hatch Talk (2002-2006)
6
Sep 11, 2015 07:17 AM
doug5g
R50/R53 :: Hatch Talk (2002-2006)
0
Sep 2, 2015 04:53 PM