

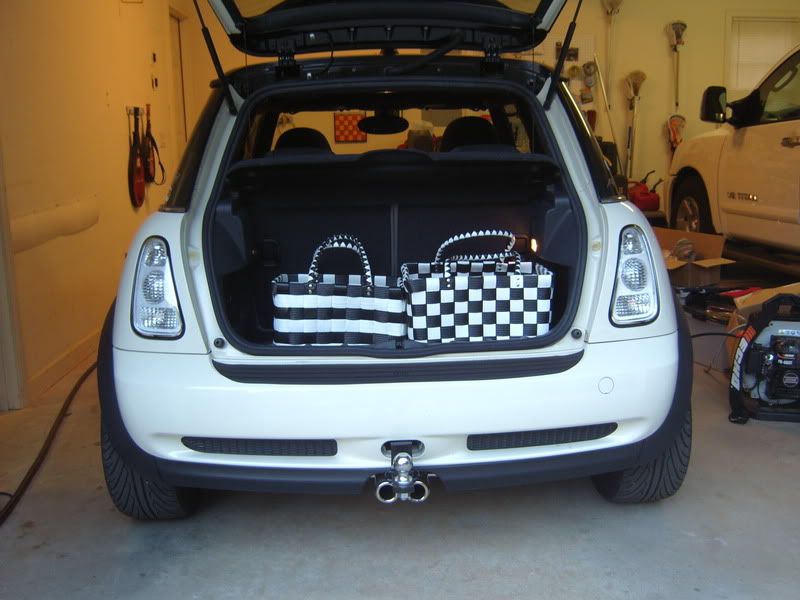
MCS (dual centered exhaust pipes) Trailer Hitch


Thread Starter
|
4th Gear
Joined: Nov 2006
Posts: 568
Likes: 0
MCS (dual centered exhaust pipes) Trailer Hitch
I'm not sure I can see how a standard trailer hitch can be mounted to the Mini Cooper S having the dual centered exhaust pipes. Are there special hitches for this car? Does anyone have photos? Or what?


4th Gear
Joined: Jan 2005
Posts: 384
Likes: 0
From: Minnesota

Banned
Joined: Nov 2006
Posts: 4,862
Likes: 3
From: Fresno Ca.
 . Thanks for the link.
Trending Topics
... and the MiniDoMore / MiniatureTrailers hitch (same hitch and same company) is a relatively easy install and works great. I have it and have no issues.
There are some compromises / tradeoffs associated with both this hitch and the MiniFini...
* MiniDoMore Pros: accepts "standard", relatively low cost 1-1/4" attachments (hitches, cargo carriers, bike racks, etc.). These add-ons tend to be less expensive than the MiniFini attachments. Invisible when no attachments are on the car (hidden by the rear fog light or grille)
* MiniDoMore Cons: you have to get on the ground, and reach under the car, around a (potentially hot) exhaust, and probably bend back the heat shield a bit to install attachments, because where the pin installs is hidden behind the bumper. Attachments must have a fairly long 1-1/4" mount, or they may not recess far enough into the bumper and thus may be un-usable (not every 1-1/4" bike rack will work, for example).
* MiniFini Pros: no crawling on the ground or reaching into uncomfortable places to mount attachments. Some people think the twin pipes look cool when nothing is attached.
* MiniFini Cons: Attachments are proprietary and expensive. I think the tongue weight rating is a bit lower than the MiniDoMore. You always have the "oil slick/machine gun" tips protruding, like it or not. Attachments don't look as clean (IMHO) because of how they mount.
Hope this helps.

Thread Starter
|
4th Gear
Joined: Nov 2006
Posts: 568
Likes: 0
Well .. I liked the dual rear fog lights on the R56S .. Until now.
https://www.northamericanmotoring.co...0&ppuser=29789
But I suppose you could cut through that 4" high plastic mesh looking material to get to the frame. It looks like there's a 1/4" x 2" L bracket back behind there.
https://www.northamericanmotoring.co...0&ppuser=29789
But I suppose you could cut through that 4" high plastic mesh looking material to get to the frame. It looks like there's a 1/4" x 2" L bracket back behind there.
Thread Starter
|
4th Gear
Joined: Nov 2006
Posts: 568
Likes: 0
I've ordered a trailer (Little Guy 4 wide platform teardrop - 770 lbs.) and it's ready for me to drive up to Colorado to pick it up (drove up today to see it, check it out, and ordered it - 800 miles round trip). Now all I need is the hitch (I'll order it tomorrow - tired - long drive)
I've tried to read and understand the instructions. I'm wondering if I'm up to this job. Hate to pay someone else to do it. So, back to the idea of documenting your work with photos. It might be helpful to some of the rest of us (moi). If you don't, I will (if I can get up the nerve to tear that whole bumper assembly apart).
I'm tired .. I'm rambling .. I'll write more tomorrow.
The only point I remember being concerned for a minute or two was the point where I unplugged the wires from the bumper cover. Trying to do that with one hand while holding the bumper cover with the other was a bit tricky; but they do come off pretty easy once you figure out how they are clipped in...
Just be real careful once you pull the bumper cover off; find a clean, soft spot to put it on so you don't scratch the paint on the outside of it.
The entire install probably took me 3 hours, but that was way too long. I was moving very slowly; almost methodically. It was also the first mod I did that require me to raise my car and remove the wheels, so I did a bunch of exploring.
Sorry I didn't take pics; in hindsight that would have been a good idea. But really, they wouldn't have been any better than the installation instructions...
Good luck, feel free to PM with questions...
-Ed
Really is an easy install. If you have a couple of properly sized cardboard boxes sitting below the bumper while removing it, they are a handy place to gently lay/lean it while unplugging the wires.
Also, I found that if you have a stubby phillips screwdriver, you can do it without jacking or removing rear wheels. You need the stubby to reach the screwclip inside the rear wheel well.
Otherwise just follow the instructions.
Also, I found that if you have a stubby phillips screwdriver, you can do it without jacking or removing rear wheels. You need the stubby to reach the screwclip inside the rear wheel well.
Otherwise just follow the instructions.
Coordinator :: Arkansas MINI Owners Klub (AMOK)
Joined: Apr 2006
Posts: 364
Likes: 0
From: Arkansas
I plan on taking pics and notes. So I'll post once I'm done. I'm doing it on a weekend so my husband can be standing by. So if I can do this, anyone can!! We have a big trade show (custom knives) coming up in Atlanta (Blade Magazine is hosting June 8-10) so he's really busy with that. Which is one reason I'm doing this. That and it's my MINI I want to be able to do it. (I'm not that possessive, honest!) We are planning on going over to the Dragon after our knife show and he has a Ducati we are trailering. 
If you're in the Atlanta area lmk, I'd love to come meet you and your MINI. The Friday we are there I plan on taking my daughter around to some of the historic sights. I'm hoping we'll get there early enough Thursday so my husband can go with us to the Cyclorama and Oakland Cemetery.
If you're in the Atlanta area lmk, I'd love to come meet you and your MINI. The Friday we are there I plan on taking my daughter around to some of the historic sights. I'm hoping we'll get there early enough Thursday so my husband can go with us to the Cyclorama and Oakland Cemetery.
Thread Starter
|
4th Gear
Joined: Nov 2006
Posts: 568
Likes: 0
Thanks! I feel more confident now. Just put in my order today. As soon as it arrives I'll install it then head up to Woodland Park, Colorado to pick up my new Little Guy Tear Drop Camping Trailer then head out to California on vacation.

Ken: The MDM hitch install is a breeze, I've only done a few but can probably do it in an hour now. The hardest part has been noted - removing the bulbs, a simple twist and pull complicated by holding the bumper cap up - the bumper cap is light, but large, and you don't want to scratch it - and the first time you remove it you're asking "have I gotten all the fasteners off?".
The only complication on one install (a cabrio) was removing the cabrio tailgate hinge covers and tailgate itself - which ended up not being a big deal at all.
If you were near Pittsburgh I'd offer to install it for you, I'm actually doing a hitch change-out this weekend (putting a non-foglight hitch in place of a foglight hitch).
That's one thing to be aware of - Brent (minidomore) has a couple of models of hitch, the 2002-2004 (for models with rear fog or backup light) is more recessed behind the bumper and requires a somewhat longer hitch drawbar (some 7" from hole to bumper cap surface). The 2005-6 hitch (the "1003") is closer to the surface of the bumper cap since there doesn't need to be room for a rear fog or backup light. The drawback of the earlier hitch model is that some bike racks won't fit due to the distance - the bike rack's "drawbar" length just isn't long enough.
Double check the tightness of your bumper bolts too - 4 on a side - on one cabrio we found improperly torqued bolts holding the bumper on - several were just a little more than hand tight! I think MDM gives the torque specs of ~50 ft-lb (not as tight as lugnuts, I remember, but I do NOT remember the exact number). If there's not a torque spec, it's "really tight" on a 6" ratchet handle, and "quite tight" on an 8".
Good luck, let us know how it goes!
PS: The problem with my hitch is that now I'm looking at the dual exhaust mod - even though installing the drawbar isn't that bad, it'd certainly be easier with the side-mounted duallies... the mod bug is ALWAYS biting...
Thread Starter
|
4th Gear
Joined: Nov 2006
Posts: 568
Likes: 0
Ken: The MDM hitch install is a breeze, I've only done a few but can probably do it in an hour now. The hardest part has been noted - removing the bulbs, a simple twist and pull complicated by holding the bumper cap up - the bumper cap is light, but large, and you don't want to scratch it - and the first time you remove it you're asking "have I gotten all the fasteners off?".
The only complication on one install (a cabrio) was removing the cabrio tailgate hinge covers and tailgate itself - which ended up not being a big deal at all.
If you were near Pittsburgh I'd offer to install it for you, I'm actually doing a hitch change-out this weekend (putting a non-foglight hitch in place of a foglight hitch).
That's one thing to be aware of - Brent (minidomore) has a couple of models of hitch, the 2002-2004 (for models with rear fog or backup light) is more recessed behind the bumper and requires a somewhat longer hitch drawbar (some 7" from hole to bumper cap surface). The 2005-6 hitch (the "1003") is closer to the surface of the bumper cap since there doesn't need to be room for a rear fog or backup light. The drawback of the earlier hitch model is that some bike racks won't fit due to the distance - the bike rack's "drawbar" length just isn't long enough.
Double check the tightness of your bumper bolts too - 4 on a side - on one cabrio we found improperly torqued bolts holding the bumper on - several were just a little more than hand tight! I think MDM gives the torque specs of ~50 ft-lb (not as tight as lugnuts, I remember, but I do NOT remember the exact number). If there's not a torque spec, it's "really tight" on a 6" ratchet handle, and "quite tight" on an 8".
Good luck, let us know how it goes!
PS: The problem with my hitch is that now I'm looking at the dual exhaust mod - even though installing the drawbar isn't that bad, it'd certainly be easier with the side-mounted duallies... the mod bug is ALWAYS biting...
The only complication on one install (a cabrio) was removing the cabrio tailgate hinge covers and tailgate itself - which ended up not being a big deal at all.
If you were near Pittsburgh I'd offer to install it for you, I'm actually doing a hitch change-out this weekend (putting a non-foglight hitch in place of a foglight hitch).
That's one thing to be aware of - Brent (minidomore) has a couple of models of hitch, the 2002-2004 (for models with rear fog or backup light) is more recessed behind the bumper and requires a somewhat longer hitch drawbar (some 7" from hole to bumper cap surface). The 2005-6 hitch (the "1003") is closer to the surface of the bumper cap since there doesn't need to be room for a rear fog or backup light. The drawback of the earlier hitch model is that some bike racks won't fit due to the distance - the bike rack's "drawbar" length just isn't long enough.
Double check the tightness of your bumper bolts too - 4 on a side - on one cabrio we found improperly torqued bolts holding the bumper on - several were just a little more than hand tight! I think MDM gives the torque specs of ~50 ft-lb (not as tight as lugnuts, I remember, but I do NOT remember the exact number). If there's not a torque spec, it's "really tight" on a 6" ratchet handle, and "quite tight" on an 8".
Good luck, let us know how it goes!
PS: The problem with my hitch is that now I'm looking at the dual exhaust mod - even though installing the drawbar isn't that bad, it'd certainly be easier with the side-mounted duallies... the mod bug is ALWAYS biting...
Last edited by Ken Cooper; May 26, 2007 at 09:14 AM.
OK, My wife and I re-installed the MDM hitch 2 nights ago - in 50 minutes! That included the obligatory "No, I need a Philips, not a straight blade" comments, as well as set-up and take-down. Add 5 minutes for washing hands and opening the traditional post-fix beverage. Budget about twice that for your first install though.
We replaced a reverse/foglight model (1002) with a non foglight ('05-06, or 1003) because the 1003 puts the drawbar hole closer to the bumper cap.
I thought of a couple other items:
1) The philips-screwdriver plastic clips (there are about 4 of 'em) get unscrewed BUT you have to hold the outer perimeter of the clip to unscrew the inner "plunger". Sometimes they strip, in which case wedging a straight blade screwdriver between the "plunger" inner part and the outer part can help the plastic threads to engage. Reinstallation takes no screwing around, just wiggle the prongs into the hole and push the center part so it's flush. (easier to do than to describe).
2) You'd need a VERY short philips screwdriver to reach the inner fender clips without jacking, but a 90 degree will do it. May need small fingers too. It can be done but jacking is easier for me and brings the hitch up a few inches (better for bad backs!).
3) You can most likely pry the rearmost part of the fender trim away with your fingers, it just pops out. Gentle pulling, rotating your fingertip under the back edge part of the flare should do it. Sometimes the rearmost clips break and MDM thoughtfully includes extras. Occasionally 1-2 white clips (further forward on the flare) come disengaged, just be careful and you can re-engage them in the flare then onto the body. You'll do fine. Don't pry with a metal object!
4) You'll need to ziptie the short wiring loom back onto the car - it's easy. I decided to ziptie it onto the hitch since the groove in the top of the fender may collect moisture and wiring doesn't usually like that. MDM includes zipties; I added a couple because I had 'em. Just route the wiring so it's not pinched or rubbing on sharp edges.
That's about it, not a hard install.
Oh - and there's no room behind the bumper for a rocket launcher, rear-firing anti-tailgating spray reservoir, oil slick or smoke generating device. Darn.
Coordinator :: Arkansas MINI Owners Klub (AMOK)
Joined: Apr 2006
Posts: 364
Likes: 0
From: Arkansas
I put on my MINI Do More trailer hitch for a S convertible this past weekend. MINI Do More, your instructions are great! Easy, step by step, very well explained. I did most of it. My husband held the bumper while I unplugged the lights and sensors, he helped put on the hitch. The heat shield did have to be pushed down a little for the hitch to line up correctly (make sure the heat shield does not sit on your exhaust, it makes a funny noise that is not desirable.) We also installed MINI Do More's wiring harness, more detailed than the hitch, but they did a great job with instructions. I pulled everything apart, most of the plastic on the inside of the trunk has to come out, he did the actual splicing. It was easy though because they provided wire splicing clips where the two wires are put in this clip and when you shut it it cuts into both of the wires. A chart was given to know which wire goes with which wire.
I did take pics which I'll post later, I'm at work now.
5 minutes after the hitch was on it started raining! That was close. Thanks to the Man upstairs it waited til I was done! It poured, one of those summer showers. It rains hard for a few than acts like it never did anything.
Easy, step by step, very well explained. I did most of it. My husband held the bumper while I unplugged the lights and sensors, he helped put on the hitch. The heat shield did have to be pushed down a little for the hitch to line up correctly (make sure the heat shield does not sit on your exhaust, it makes a funny noise that is not desirable.) We also installed MINI Do More's wiring harness, more detailed than the hitch, but they did a great job with instructions. I pulled everything apart, most of the plastic on the inside of the trunk has to come out, he did the actual splicing. It was easy though because they provided wire splicing clips where the two wires are put in this clip and when you shut it it cuts into both of the wires. A chart was given to know which wire goes with which wire. I did take pics which I'll post later, I'm at work now.
5 minutes after the hitch was on it started raining! That was close. Thanks to the Man upstairs it waited til I was done! It poured, one of those summer showers. It rains hard for a few than acts like it never did anything.

Thread
Thread Starter
Forum
Replies
Last Post
igzekyativ
MINIs & Minis for Sale
34
Jul 16, 2020 12:54 PM
ECSTuning
Vendor Classifieds
7
Jan 4, 2019 12:51 PM
theateist
General MINI Talk
5
Aug 22, 2015 06:58 AM
ECSTuning
Vendor Announcements
0
Aug 12, 2015 01:24 PM
ECSTuning
Drivetrain Products
0
Aug 11, 2015 11:58 AM

