F55/F56 2017 F56 MCS Glovebox light no worky (no it's not the bulb)
#1
2017 F56 MCS Glovebox light no worky (no it's not the bulb)
Finally starting to fiddle with the 2017 MCS I recently acquired and top of the list is the easy stuff: glovebox light doesn't work.
Oh wait, nothing is easy when it comes to lighting on a Mini. I learned that on my 2011 MCS
The fixture for a bulb is there. There is a bulb in it, a standard W5W (in other words, not an LED). It tests fine for continuity. Tried an LED. Won't light, regardless of polarity. Tried a spare W5W (I have a small collection from de-W5W-ing the 2011 MCS). Doesn't work.
So, uh, what's the secret?
Also finding it interesting that I can't locate the switch that turns this bulb on/off. Any idea where that is?
I'm also guessing this fixture doesn't have its own dedicated fuse.
I can't be the only one to have run into this, but you can probably imagine that with "glovebox" being a search term everything comes up either "replace the bulb" or "the fuse box is behind the glovebox," m'doh
Ideas/thoughts?
Oh wait, nothing is easy when it comes to lighting on a Mini. I learned that on my 2011 MCS

The fixture for a bulb is there. There is a bulb in it, a standard W5W (in other words, not an LED). It tests fine for continuity. Tried an LED. Won't light, regardless of polarity. Tried a spare W5W (I have a small collection from de-W5W-ing the 2011 MCS). Doesn't work.
So, uh, what's the secret?
Also finding it interesting that I can't locate the switch that turns this bulb on/off. Any idea where that is?
I'm also guessing this fixture doesn't have its own dedicated fuse.
I can't be the only one to have run into this, but you can probably imagine that with "glovebox" being a search term everything comes up either "replace the bulb" or "the fuse box is behind the glovebox," m'doh

Ideas/thoughts?
#3
#5
Ok - got the glovebox out (that was "fun") and found the switch -- not in the hinge, but in the piston assembly that makes the door lower slowly and smoothly if properly attached to the right-side door... arm/stopper/whatever one might call it (I know there's a term, it's just not coming to me at the moment).
Mine was... not attached to the door. Unlatch the door and it dropped open like a rock.
Extend the piston, switch in the piston assembly makes contact, turns the light on. Interesting engineering.
I'm guessing the prior owner or some passenger of theirs just opened the door and pushed it down too hard to get it to open faster. Didn't damage the piston/switch/assembly, just disconnected the door from it.
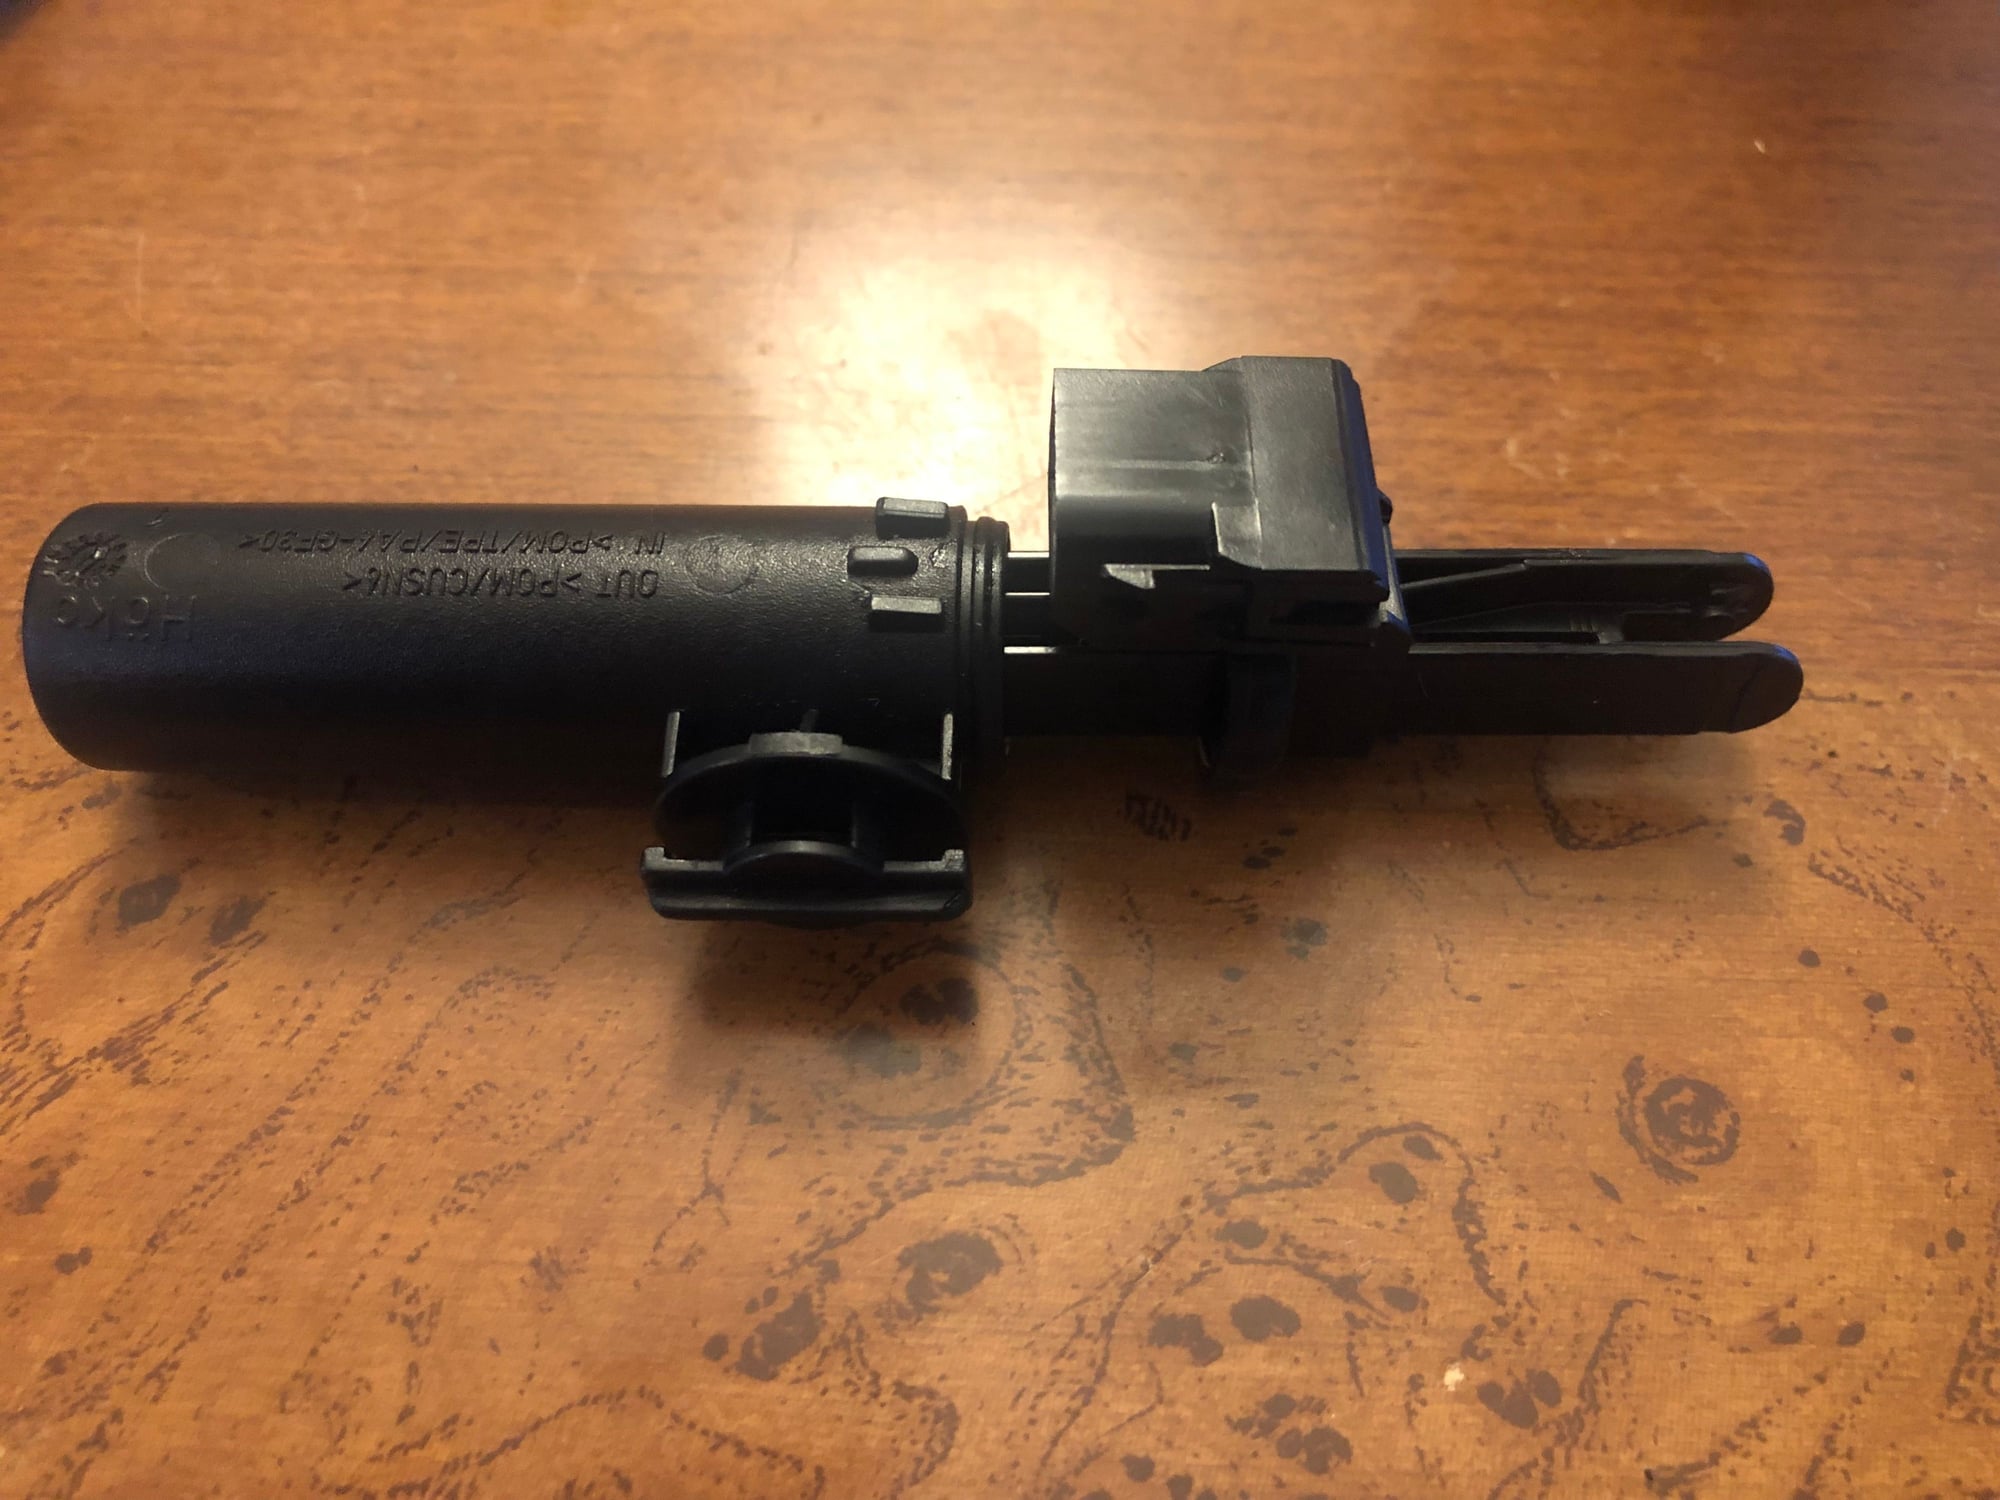
For any interested parties, the part number is 51169281574 and it is referred to as "Glove box damper".
I didn't have to replace mine, just had to reattach it to the door. Joy.
@TVPostSound -- thank you!
Last edited by cjv2; 08-02-2021 at 04:53 PM.
The following users liked this post:
F56-JCDub (08-03-2021)
#7
Of course, first time I operated the door after repair, I popped it loose from the piston. D'OH! But closing the door "deliberately but firmly" -- not a slam but more like a push -- unexpectedly snapped it right back in place. Yay!

Here's a couple of pics, showing the glove box damper and the attachment point, for future parties looking to sort this out.
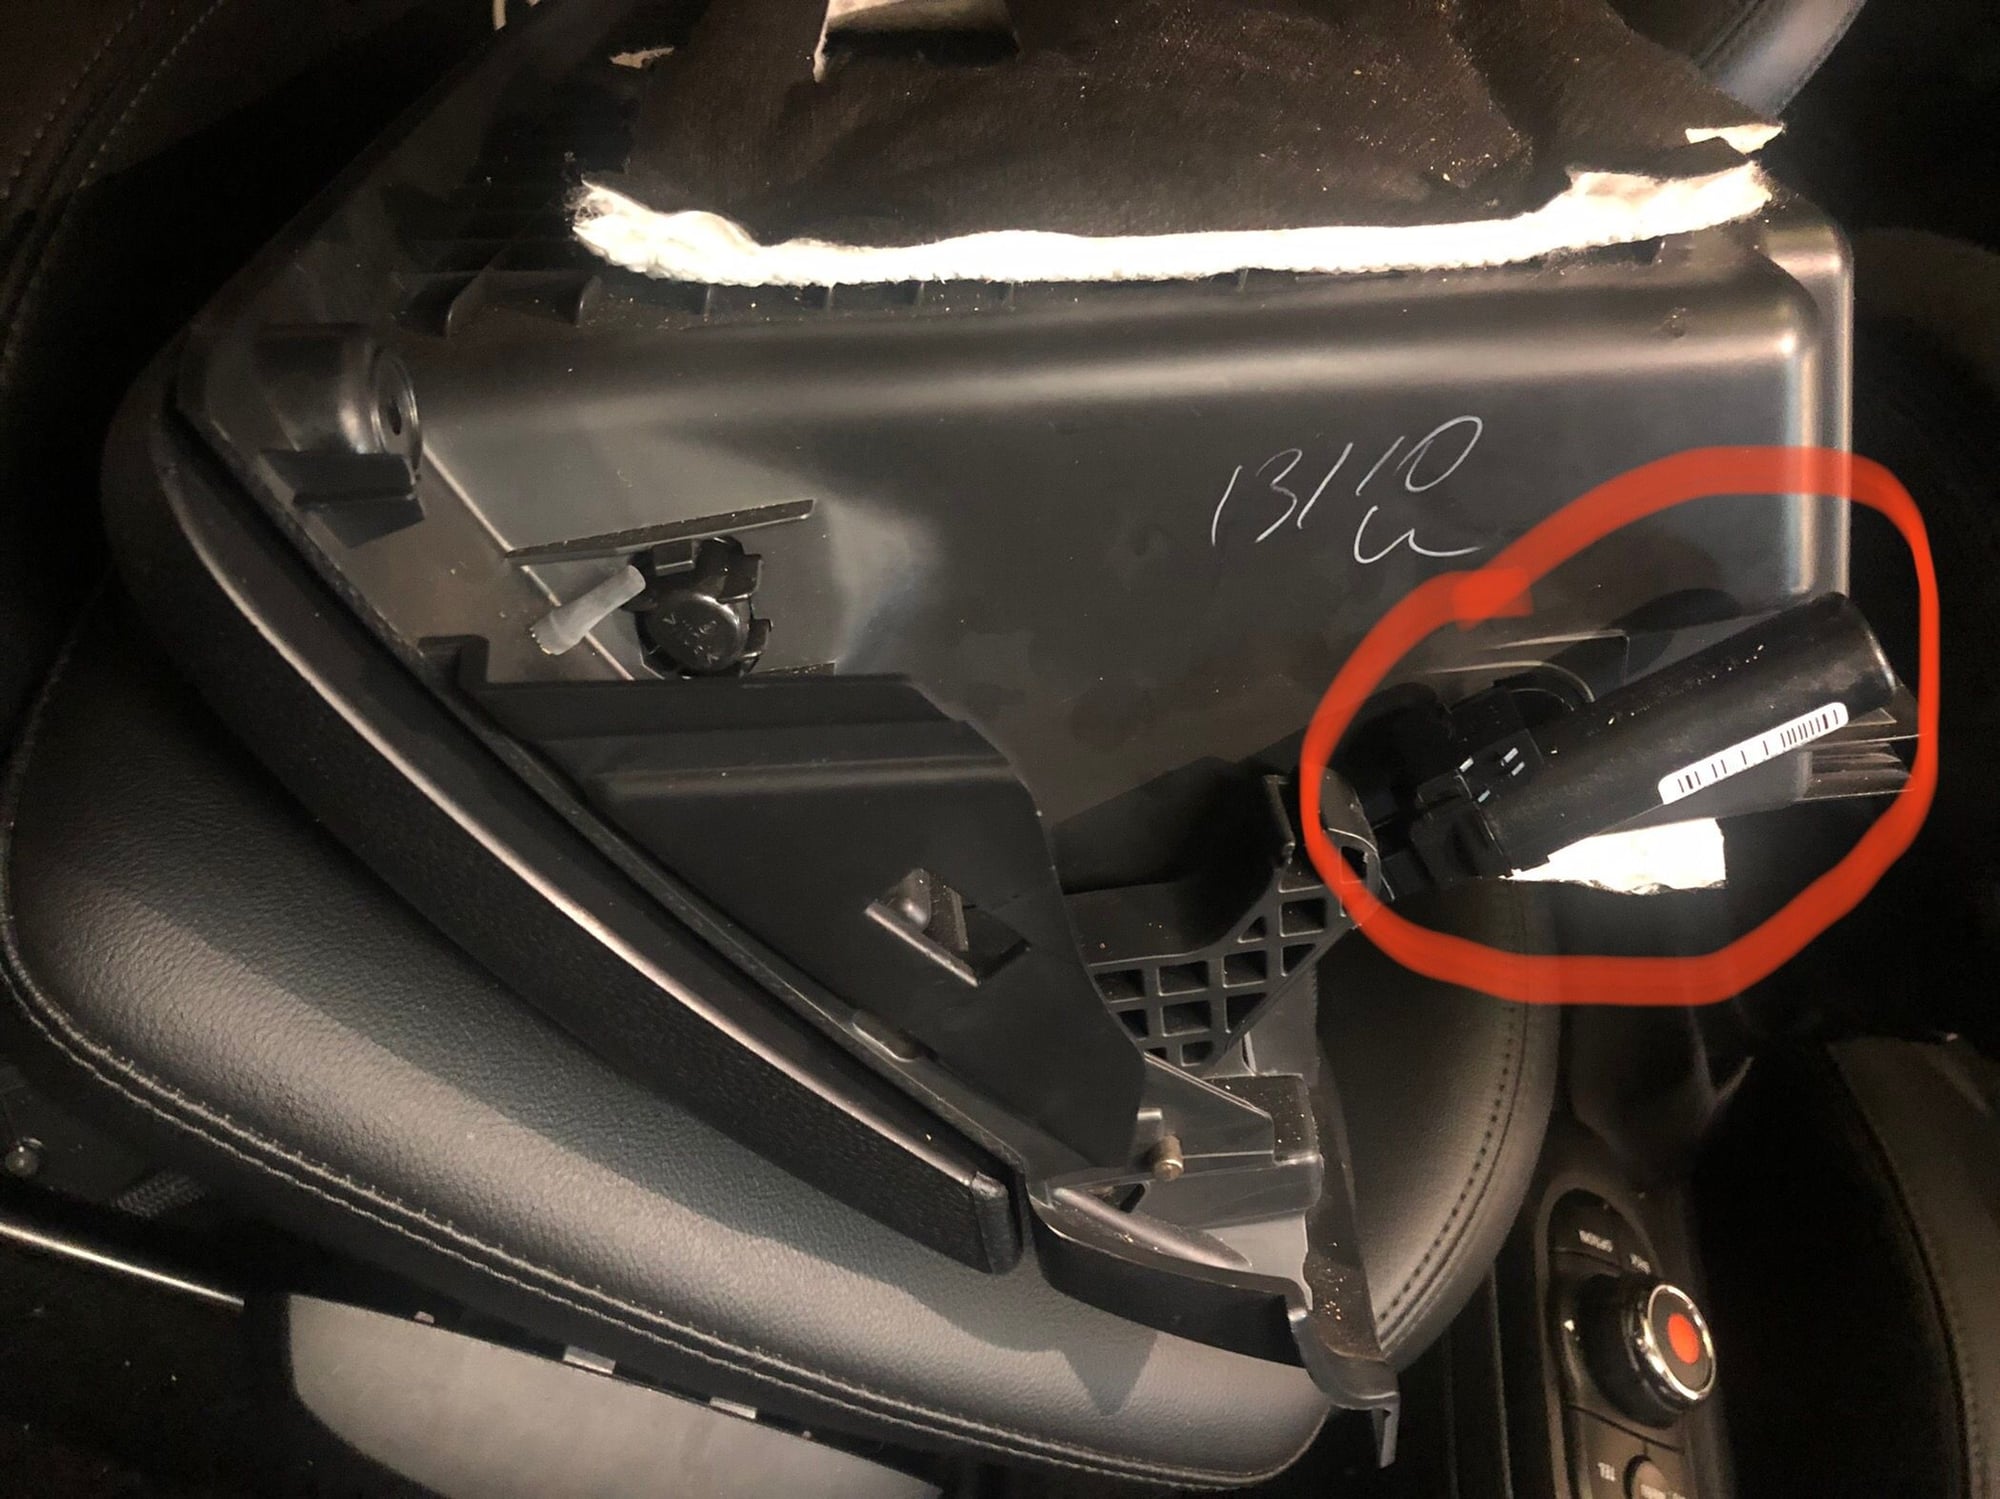
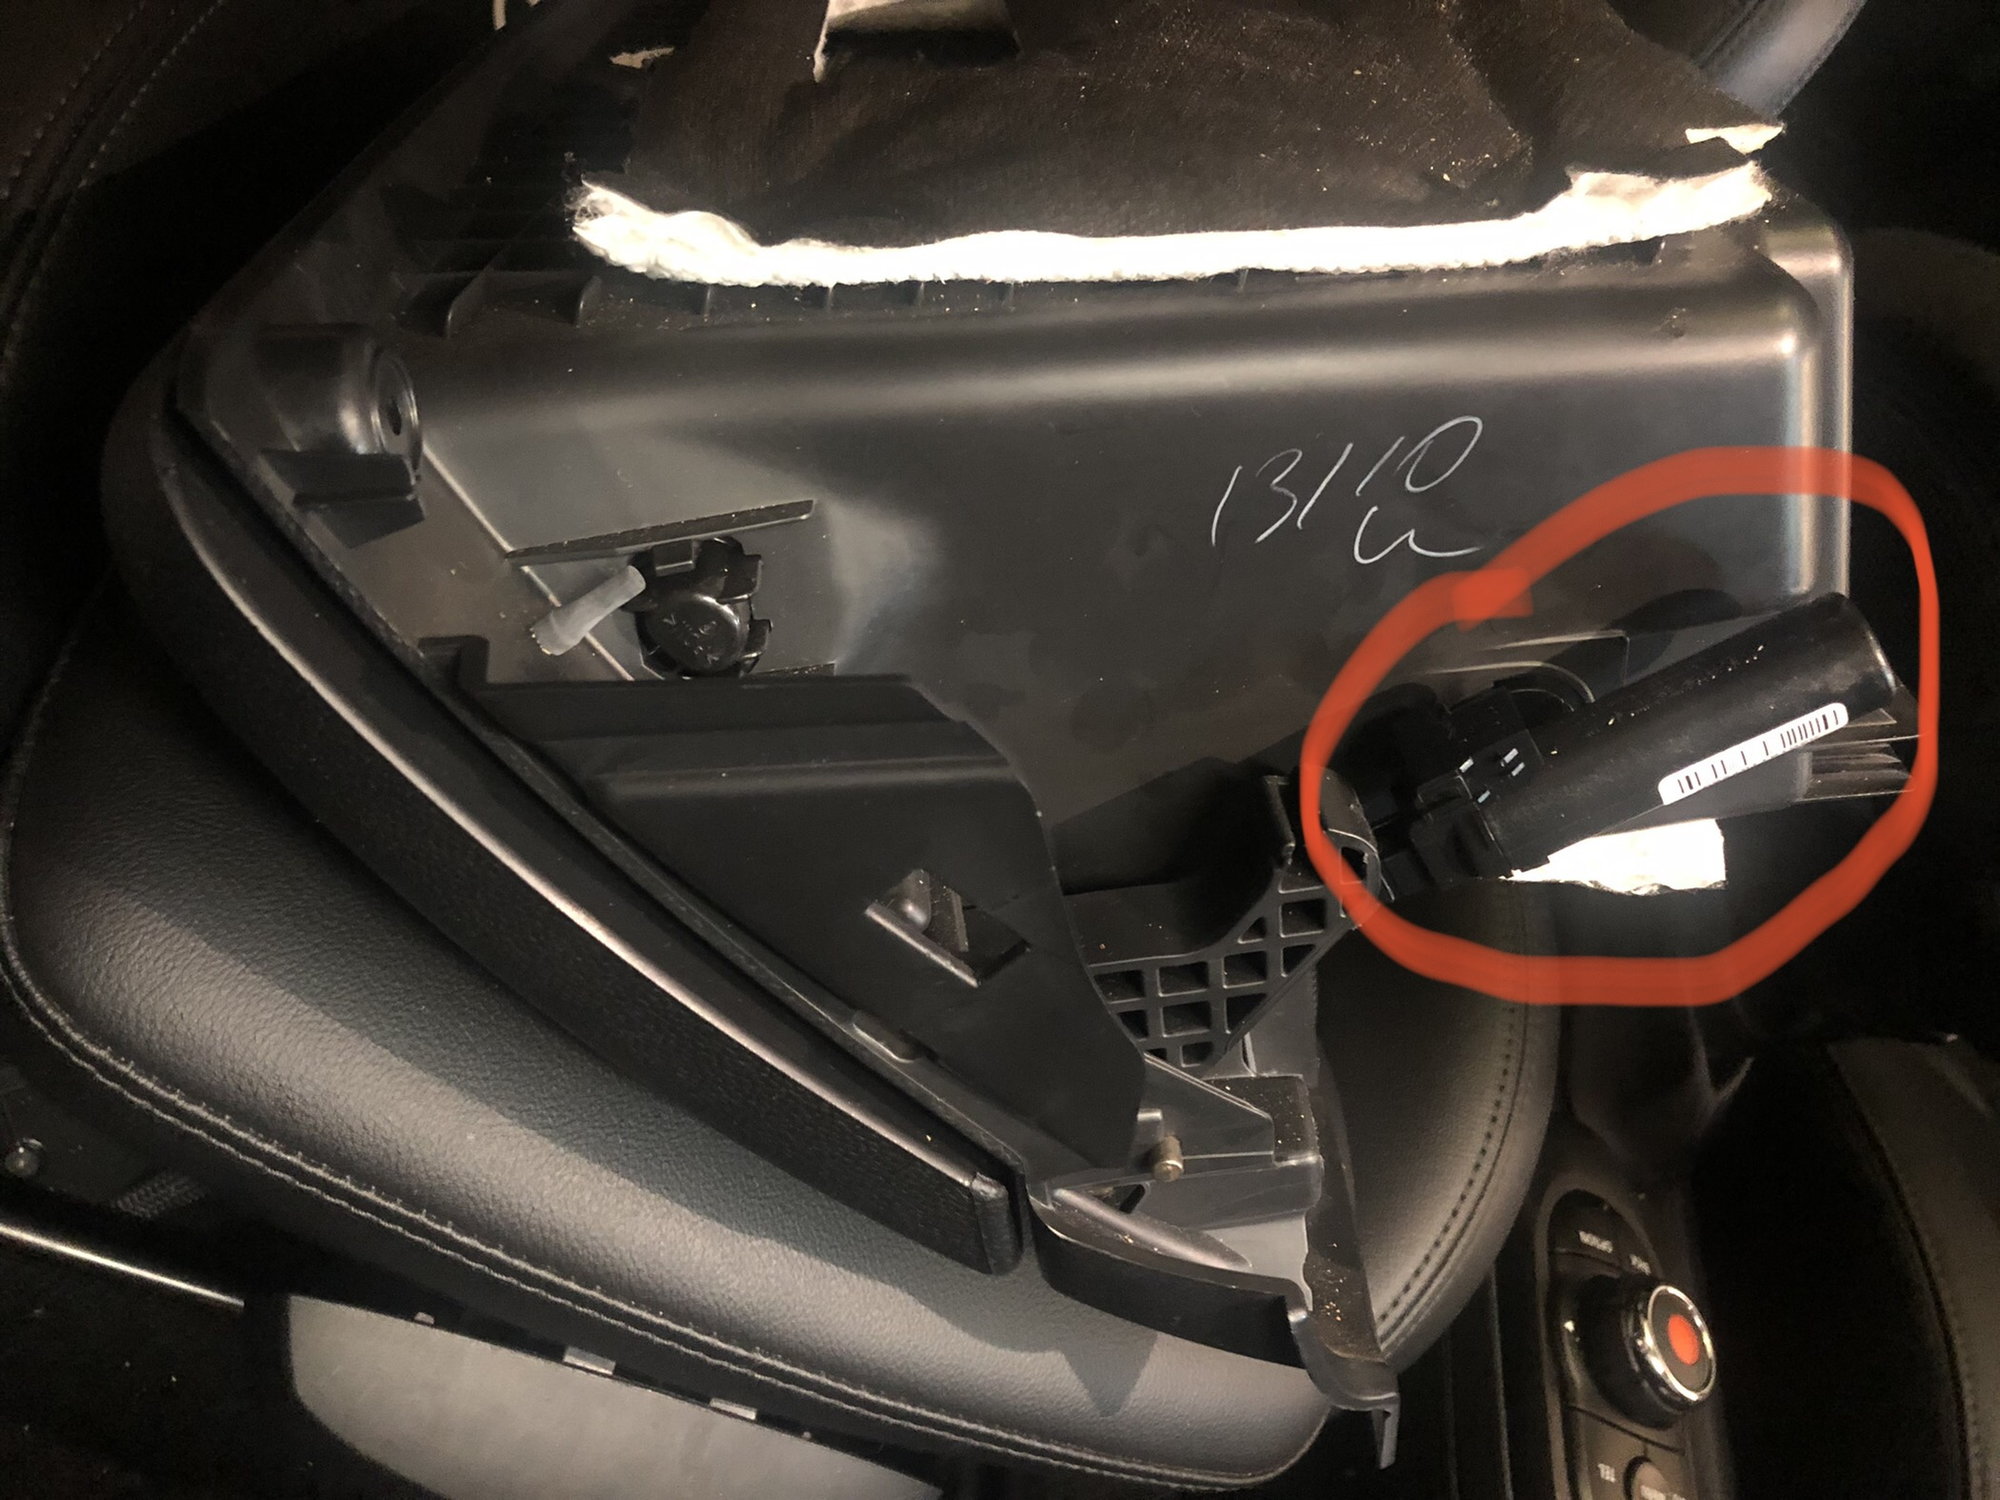
Glove box damper/light switch on RH side of glove box circled. Note: when the glovebox is installed, there is an electrical connector attached to this, in addition to the wired-up bulb installed in the glovebox roof.
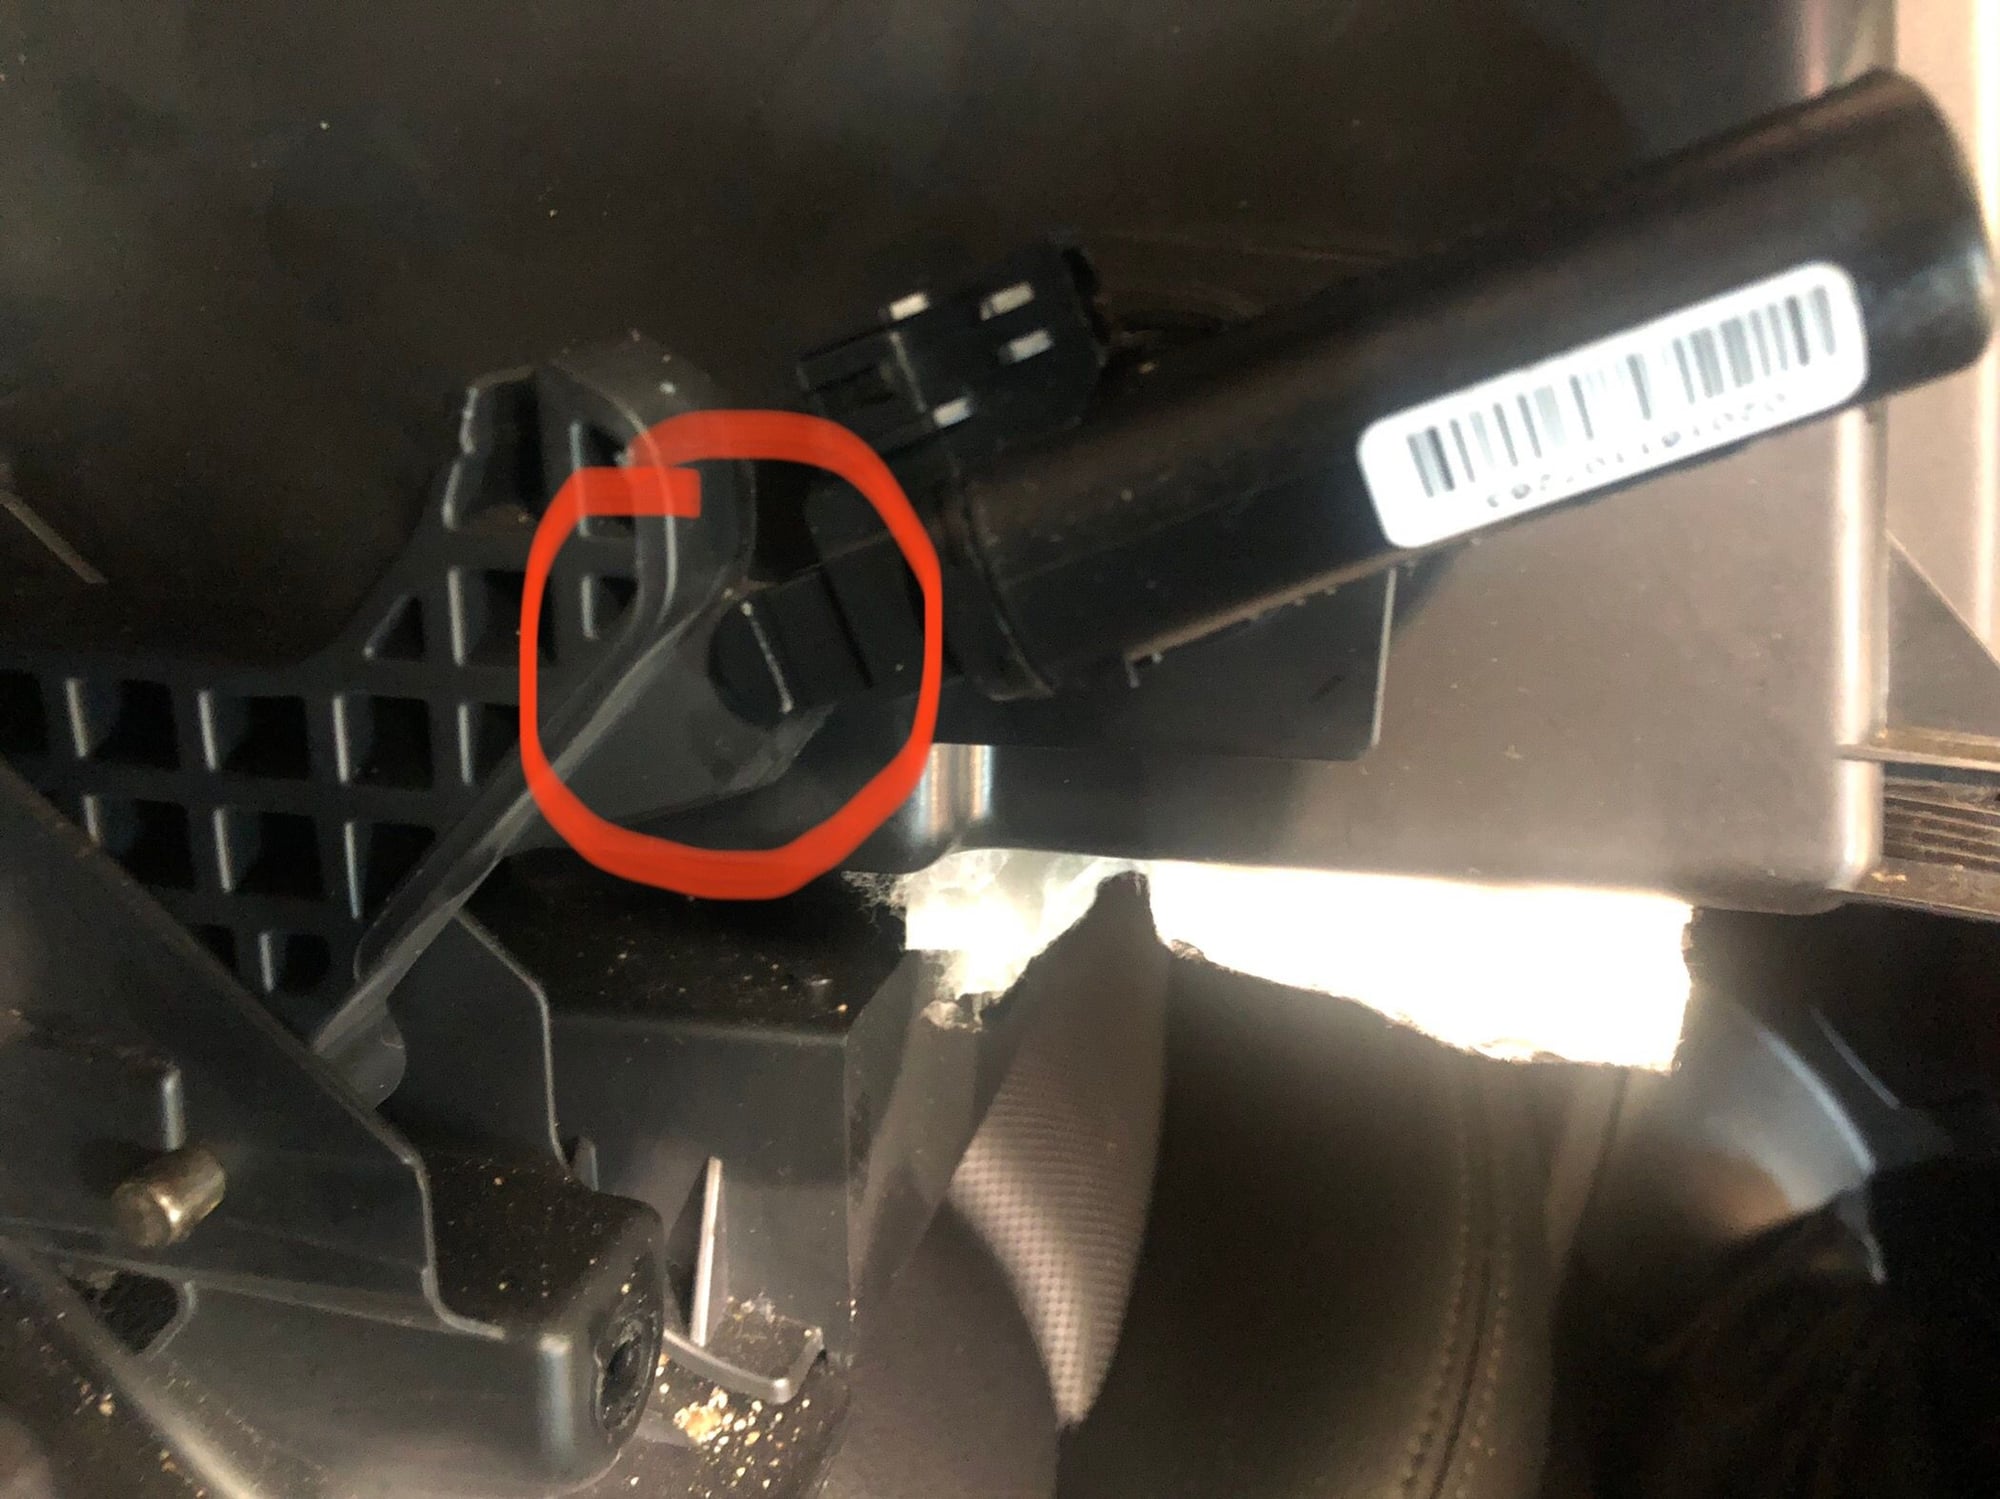
Attachment point for the piston. At the end of the piston is something similar to a c-clamp, so the door attachment point can be snapped in or out of the piston end. Put enough downward force on the door when it is opening, the attachment point will pop right out of the piston end -- it doesn't take much downward force *at all*.
Trending Topics
#8
Well, the saga isn't over just yet. That piston assembly is just way too "stuck" for normal glovebox operation, and the slightest downward pressure on the door pops it loose.
So going to take this on from a different POV. Found this thread of interest over in the land of things Audi. Short version: disassemble the piston assembly, drill a tiny hole in one end so the piston can get air in and move a little more freely, lubricate a rubber gasket/ring, and/or shave same ring (the ring is apparently what provides the friction). The Audi part looks to be of similar if not identical design to the BMW part, with similar issues.
I figure why not, I could certainly buy a new part but it will eventually have the same problem (or may have the problem right away).
I'm also going to see if I can get at that damper/piston assembly without pulling the whole glovebox out. It's reachable from below, and the body-attached trim on the right side should be removable... somehow.
Will let folks know how it goes...
#9
Detailed How-To
Ok - finally got it fixed in a functional way.
Full credit re the damper repair tactical to this thread that is not about Minis but is definitely about this very same "glove box damper" part, which looks to me like it is used by both BMW and Audi.
Big difference #1 is that on the Mini you're going to have to take the glove box out. Just do it. Don't try to do this some other way, you'll just annoy yourself and maybe scuff or scar or break something.
Big difference #2 is that I decided to employ some silicone grease to lubricate the piston and avoid future issues. I recommend the following product, but whatever you get, use silicone because you don't want something that will degrade plastic or rubber.
You're going to need the following to get the glove box out:
On to the actual repair part.

Full credit re the damper repair tactical to this thread that is not about Minis but is definitely about this very same "glove box damper" part, which looks to me like it is used by both BMW and Audi.
Big difference #1 is that on the Mini you're going to have to take the glove box out. Just do it. Don't try to do this some other way, you'll just annoy yourself and maybe scuff or scar or break something.
Big difference #2 is that I decided to employ some silicone grease to lubricate the piston and avoid future issues. I recommend the following product, but whatever you get, use silicone because you don't want something that will degrade plastic or rubber.
- Sil-Glyde Brake Lubricant (which I happened to have around). They have another similar product that doesn't reference brakes, but both products share the same MSDS sheet so for this exercise, I figure they are effectively the same.

You're going to need the following to get the glove box out:
- A Torx T-20 bit.
- TWO screwdrivers that will handle that Torx bit:
- A "regular length" screwdriver (whatever that happens to be, so long as it will handle the bit), and;
- A stubby screwdriver that will handle the bit. I used this one (which doesn't come with the Torx bit, btw).
- Pop the light fixture in the glove box and disconnect the socket from the fixture -- Paul's Travel Pictures has a good writeup of how to do that. You don't need to pull the bulb proper. The point is to not end up yanking the light bulb socket and its wires out of the car in the process of pulling out the glove box. You *really* don't want to be tugging on your glove box to get it out while the light bulb wire is keeping the whole thing stuck in your dash.

- Pop the two plastic trim pieces at the bottom corners of the glove box (note these are *below* the door, not on it).
- Tip 1: Tabs that hold these trim pieces in place are on the sides, with a hinge-like tab at the bottom. Pop these at/near the top.
- Use a trim removal tool or other plastic tool you can wield with precision. The dash surface and the trim surface scratch more easily than you're going to want to think.
- Remove the screws that were hiding behind these trim pieces.
- Remove the screws -- top, center, and right -- that you can only see when the glove box door is open.
- The center screw is recessed and rather than going straight in or straight up, it at an angle.
- This is also the screw you need the stubby screwdriver for.
- This is also the screw you need the stubby screwdriver for.
- The center screw is recessed and rather than going straight in or straight up, it at an angle.
- Play with your ability to move the glove box a bit. Note that there is "stuff going on" with a trim piece on the right side of the glove box. Guess what? There are two tabs holding that trim piece to the glove box side. One latches to the glove box, the other does not, but you *will* ultimately have to flex that trim piece gently to get things going.
- Use a trim removal tool or other plastic tool you can wield with precision, along with some, ah, creative movement (again, easy to scratch this stuff) to separate that trim piece on the right (which will stay attached to the car) from the glove box. As you pry the space between the two open you'll be able to see the two tabs in question. Go slowly, use a flashlight and your eyes.
- Also, as you're fiddling with this, note the bottom right corner of the glove box and how/where it sits relative to the door-side trim pieces -- if you aren't clear about this, it may give you headaches when you put the glove box back.
- Also, as you're fiddling with this, note the bottom right corner of the glove box and how/where it sits relative to the door-side trim pieces -- if you aren't clear about this, it may give you headaches when you put the glove box back.
- The glove box is going to be somewhat held in place by the electrical connector to the glove box damper (piston thing). Here's how you deal with that.
- As you loosen the glove box you will eventually get enough room to get your hand on the right side.
- The electrical connector is on the top side of the damper/piston.
- You want to pinch (squeeze) both sides of the connector at its edge furthest away from you (the edge is simultaneously closest to the front of the car). Pinch, and pull the connector towards the front of the car.
- It doesn't require a ton of power to pinch, but pulling while doing so may make you temporarily hate BMW for making you go through all this.

- As you loosen the glove box you will eventually get enough room to get your hand on the right side.
- Once you have the electrical connector detached from the damper/piston assembly, you should be able to remove the glove box from the dash. Keep an eye on that light bulb connector so you don't accidently yank it on the way out.
On to the actual repair part.
- The damper/piston assembly is attached via a keyed pin. If you rotate the assembly to the right place and pull (not *hard*, it comes out without effort), it will be sitting there in your hand so that you can work on it away from the glove box. Do the detach bit and away we go.

Damper attached to glovebox.

The keyed point on the glovebox where the damper goes. Note that chewed-up plastic just to its left -- that's the attachment point for the damper piston. Gentle recommend to clean up any plastic burring there, but don't remove much surface as the shape is needed for the piston to attach to. - Before you do anything else, grasp the piston end with two fingers pull it outward from its chamber.
- Difficult? That's why this thing is a problem.

- It's difficult because inside that chamber, at the piston end you can't see, is a rubber seal. There is no path for air to get into that cylinder except for past the seal. You need air to get into that cylinder so the piston will extend. Fun design huh? Yeah.
- It's difficult because inside that chamber, at the piston end you can't see, is a rubber seal. There is no path for air to get into that cylinder except for past the seal. You need air to get into that cylinder so the piston will extend. Fun design huh? Yeah.
- Do NOT grab your handy pliers to do this. You'll likely break or otherwise damage the piston end. Unless you don't break it. You get the idea, don't break it.
- As you extend the piston (you'll get there, don't worry), note the orientation of the following. This will matter later.
- the piston relative to the electrical connector
- the electrical connector relative to the chamber
- Difficult? That's why this thing is a problem.
- Remove the electrical connector / piston chamber cap from the damper body.
- Wait what, you say? Yes I'm serious. It pops off and will slide forward, down the piston, and off.
- A post in the Audi thread says you don't need a flathead screwdriver to do this, but I found otherwise.
- A photo in the Audi forum thread suggests that this thing twists off. That might work, and if it does, great. But it did not for me. The cap is a pop-off cap, not a threaded twist-on-off.
- IF YOU USE A SCREWDRIVER:
- Use one with as thin a tip as possible.
- I kind of shoved my fingernail into the gap between the connector first, to make a gap for the screwdriver blade.
- Don't force the issue here. Find a place where you can get a good pry action and it will work for you.
- Wait what, you say? Yes I'm serious. It pops off and will slide forward, down the piston, and off.
- Here's a photo showing the proper orientation of chamber, electrical connector, and piston -- but with the connector and chamber separated.

NOTE THE ORIENTATIONS OF EACH PIECE. Keyed point on chamber (pointing to photo bottom) goes into right side of glove box. Electrical connector has to sit at 90 degree angle to this as shown. Piston MUST go in as shown in order to make electrical contacts work -- when you reassemble, don't make the mistake of putting the piston back in at a 180-degree angle from what you see here. The underside of that piston does not have the same slats as you see in the photo here. - Here's a photo of the business end of the piston, so you can see how and why it's so easy to inadvertently detach this from the door. Remember how hard it was to get that piston to move? Yeah...
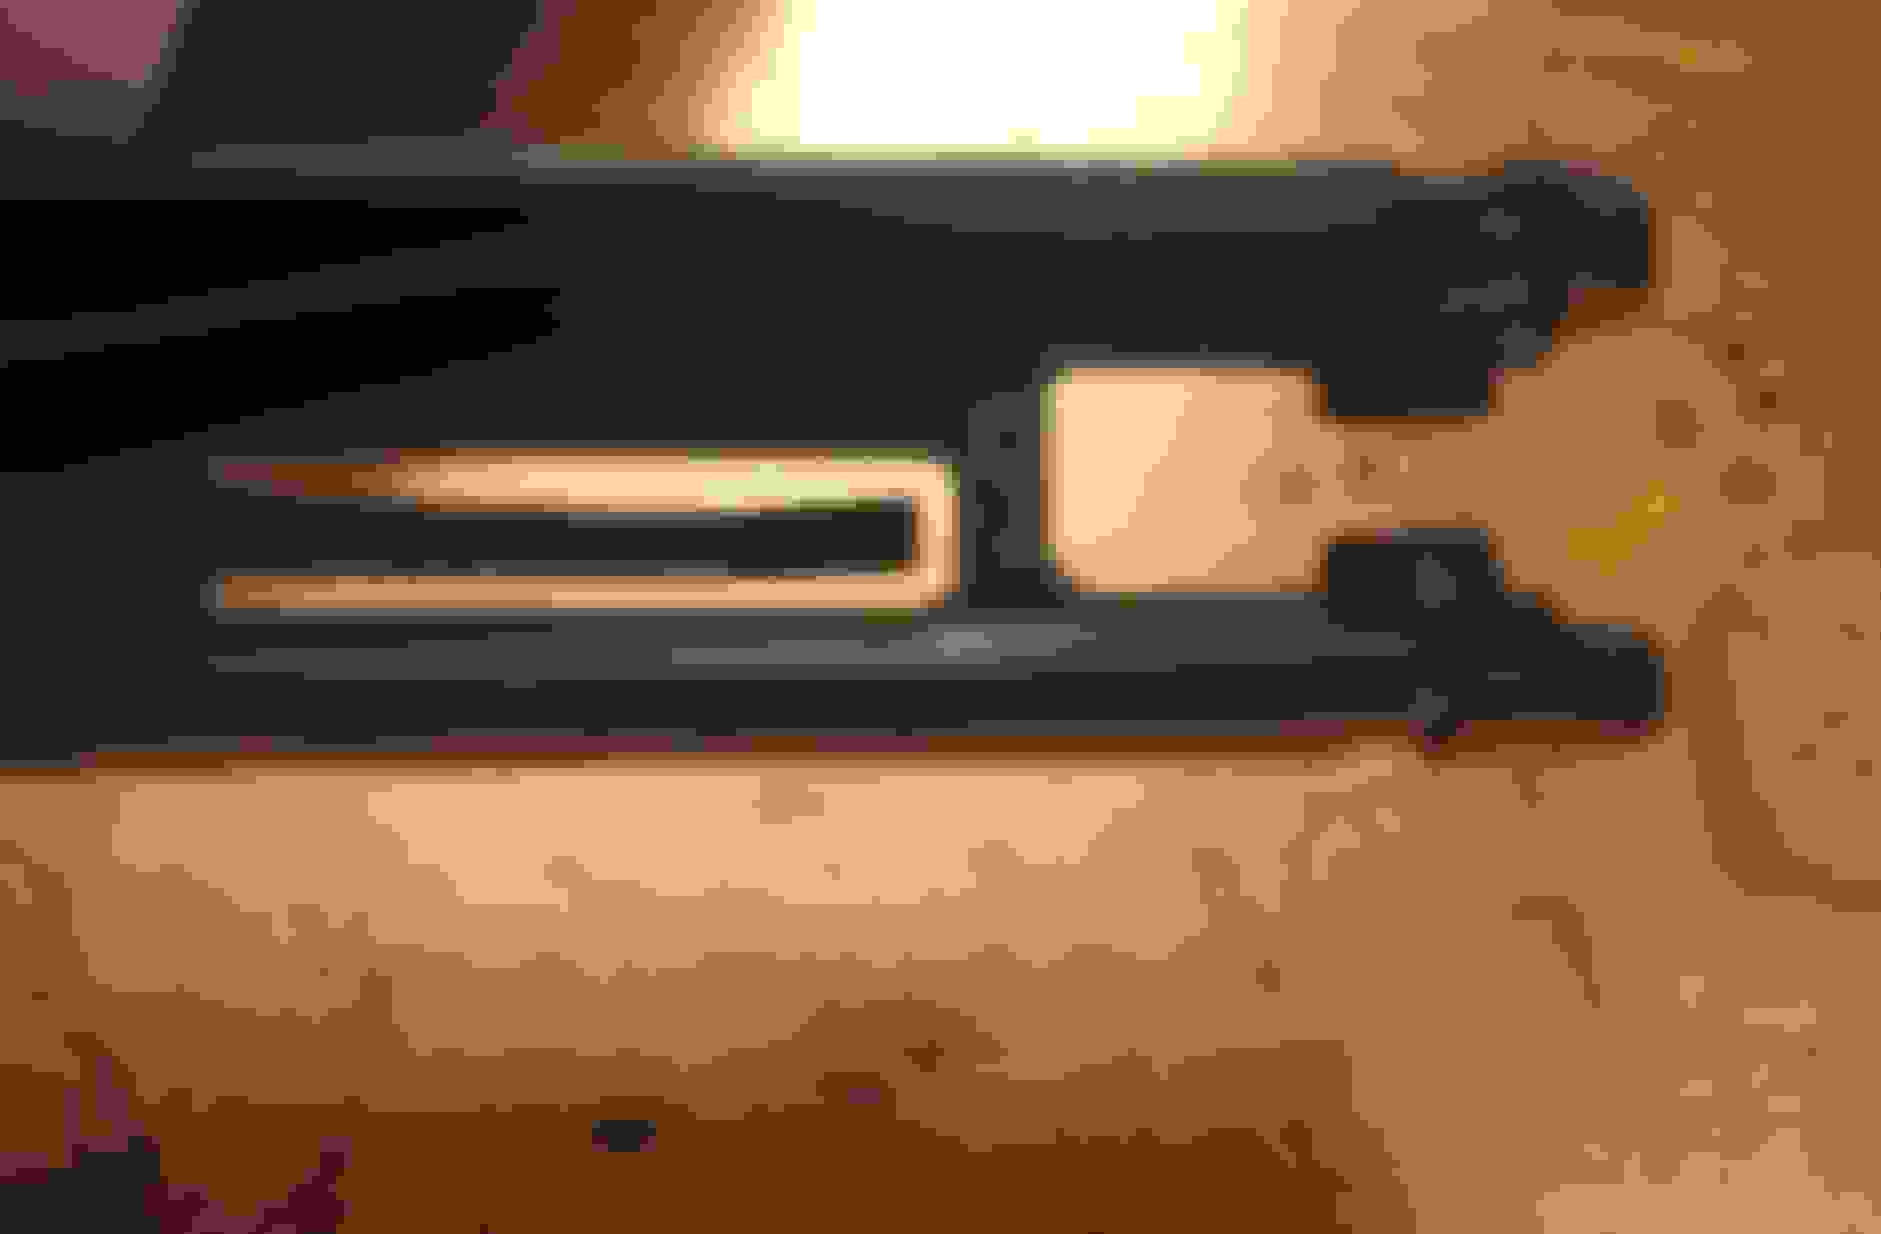
What you see here is undamaged. The gap is intentional. The problem is that with the piston being so hard to move, the door will either just hang in place or take so long to open that someone just pushes it down, which pops it out of this piston connection point. - Ok, now that you have popped the electrical connector, remove it and remove the piston from the chamber.
- To make the piston easier to move -- but not so easy that this damper doesn't work as a damper any more, do 2 things.
- Lubricate the chamber end of the piston with silicone grease.
- I tried silicone spray. The piston didn't move smoothly. Just use the grease instead.
- Do NOT try to lubricate the cylinder interior -- let the piston do that for you.
- Go easy on the grease. Use as much as you need and no more (see step 8).
- Drill a tiny hole - 1/16" - in the end of the chamber.
- This will allow air to get in and faster/smoother piston movement.
- I was not impressed with the movement after the 1/16" hole was drilled, and I decided to bump it to 1/8". That was not the smartest thing for me to do.
 It still works, but the door drops faster than I want. Stick with 1/16", or at least try that first, reattach it all to the glove box and test, and then if dissatisfied make the hole bigger -- by 1/64" to 1/32" at a time.
- Some pics:
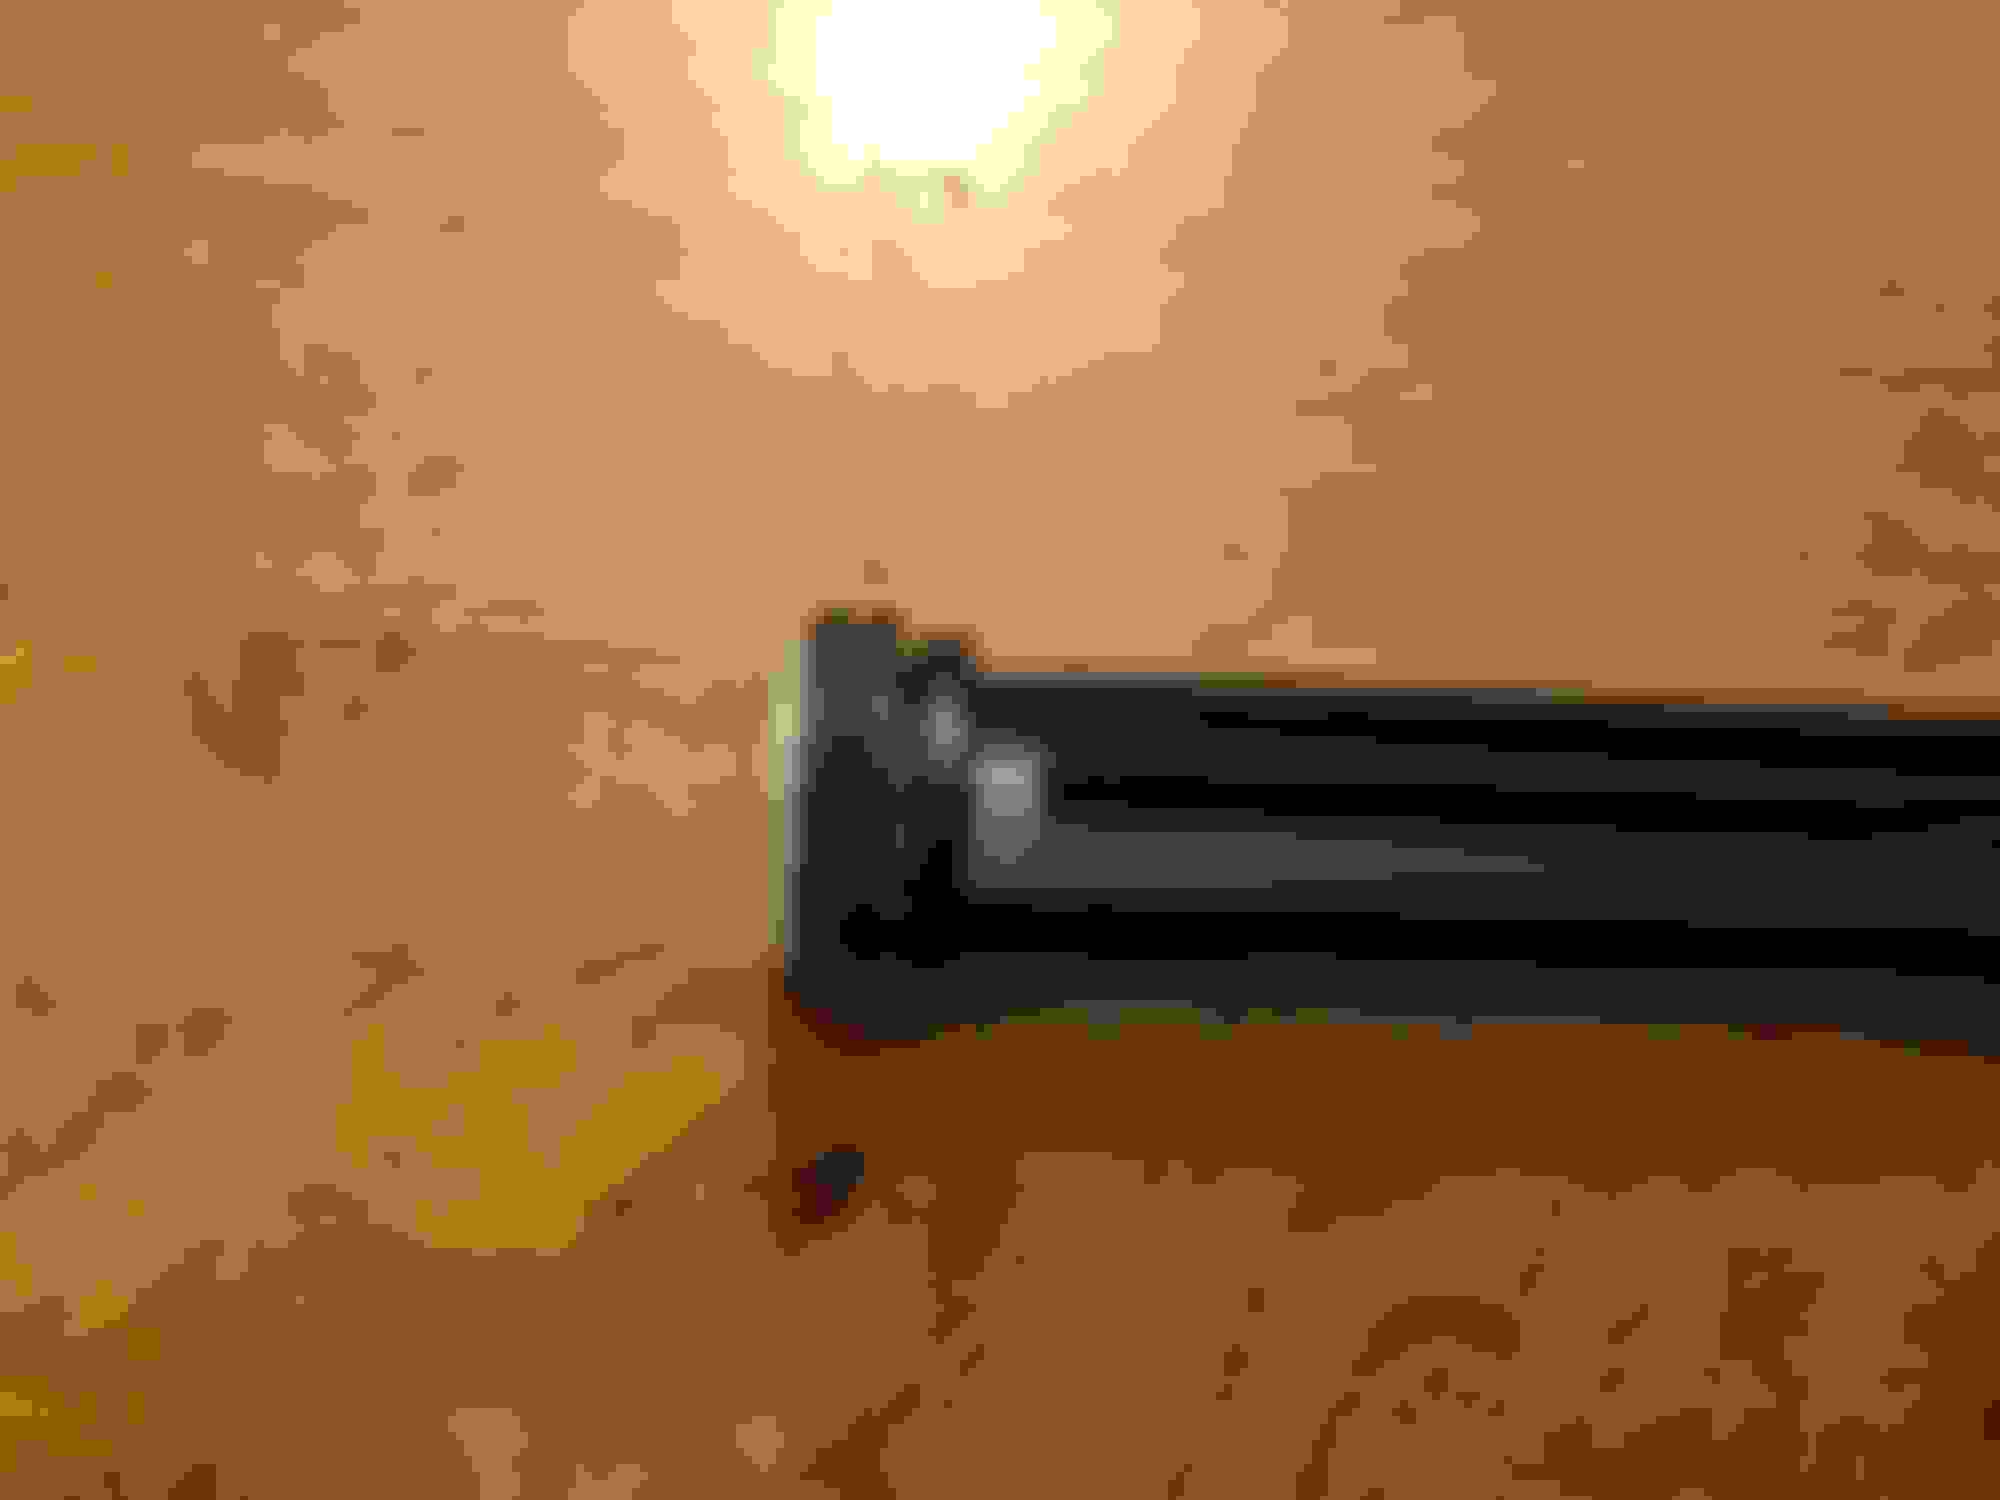
This is the chamber end of the piston. Rubber seal, that's it. That seal is what you're going to lubricate with silicone grease.

Small hole, drilled by me. This is to allow air to enter the chamber when the piston is pulled down by the weight of the door. You do NOT want to make this hole too big. I recommend 1/16". Go up in increments of 1/64" or 1/32" if you don't like things at 1/16".
- Lubricate the chamber end of the piston with silicone grease.
- Don't go crazy with the silicone grease. Apply a small amount, then put the piston back in the chamber and see how it glides. If it doesn't glide smoothly, add a little more. You aren't looking for perfection in terms of smooth glide, but you also don't want to turn the chamber into a grease tube.
- Reassemble the damper (see photo under step 4 above for proper orientation of the parts). Make sure that electrical connector doesn't spin around the chamber end -- it shouldn't.
- Attach the damper to the glove box.
- Attach the piston end to the door attachment point. You will want to extend the piston, and then grasp and hold the piston end to guide it to the lock point on the door attachment point.
- Tip: if there is loose plastic on the door attachment point from prior damage, clean it up. You don't want it in the way of the connection. But don't go shaving plastic off everywhere, as you may take off too much for this rather delicate little connection point. The idea is to tidy it, not remake it.
- Tip: if there is loose plastic on the door attachment point from prior damage, clean it up. You don't want it in the way of the connection. But don't go shaving plastic off everywhere, as you may take off too much for this rather delicate little connection point. The idea is to tidy it, not remake it.
- Test how the door "falls open."
- If the door fall is too slow, make the hole you drilled bigger, 1/64" to 1/32" at a time, re-testing after each. I'm serious about the small increments. Again, I jumped to 1/8" and frankly, that's too big, or at least it's unnecessary.
- Once satisfied with the door fall, test the electrical.
- Plug the damper's electrical connector in.
- It's ok to remove the damper from the glove box for this part if that is easier for you -- it probably will be. If you do so, just go easy -- REALLY easy on the end of the piston and its attachment point to the door. You don't want to make the problem you were trying to fix worse!
- It's ok to remove the damper from the glove box for this part if that is easier for you -- it probably will be. If you do so, just go easy -- REALLY easy on the end of the piston and its attachment point to the door. You don't want to make the problem you were trying to fix worse!
- Make sure the bulb is in the glove box light socket.
- Pushing the piston all the way in should turn the light off.
- Pulling the piston out should turn the light on.
- You don't have to extend the piston completely to get the light to come on. If you have to do that, something is wrong.
- If you are using an LED for the glovebox light, remember that polarity matters. Flip the bulb in the socket and try again if you've got no light, or even better, just try a standard W5W (meaning non-LED) that you know is a good bulb. Or use a multimeter. You get the idea.
- I haven't figured out the exact conditions yet, but there is definitely a point where the Mini, at rest and not running and some time after you have exited the vehicle, will cut power to the glovebox light. So if the light just doesn't come on, do this test with the ignition ON so that you at least know your Mini isn't being power-smarter than you or something by cutting power to the glovebox light.
- Plug the damper's electrical connector in.
- Once satisfied that the damper is electrically functional, attach the damper back to the glove box and glove box door.
- Put the glove box back. "Installation is the reverse of removal," blah blah.
- Tip: Remember those right-side trim pieces in the car? To the extent possible, get the right side of the glove box pushed in further than the left -- meaning lead with the right -- so that you can align those trim pieces and pins. It's worth the trouble, especially at the bottom right corner of the glove box.


Last edited by cjv2; 08-04-2021 at 06:16 PM.
Thread
Thread Starter
Forum
Replies
Last Post
kenros
Electrical
3
09-24-2007 07:54 AM
tonester
Electrical
2
05-10-2006 04:51 PM


