When you click on links to various merchants on this site and make a purchase, this can result in this site earning a commission. Affiliate programs and affiliations include, but are not limited to, the eBay Partner Network.
Not really sure what you solved with Bimmercode. No one had to code anything for the mirror to work (except for dim on reverse).
Hah, well, I didn't mean any offense - it was just to say that I was able to do it without trying to figure out E-Sys. This thread, thanks to yourself, was very helpful in all aspects but it only mentioned "do the coding" which wasn't something I was sure of.
I had already bought a wireless dongle and got the software for Bimmercode so I figured it was worth a shot. I suppose it was also an excuse at doing some coding to learn.
The net net was that I wanted to get the dim on reverse set up and I did. Not much value probably but it was a good excuse to do something new like I mentioned above.
No offense taken whatsoever, just wasn't sure what you got done in Bimmercode. When I checked it back whenever ago the line for activating the dim on reverse wasn't there, but then again I have pre lci.
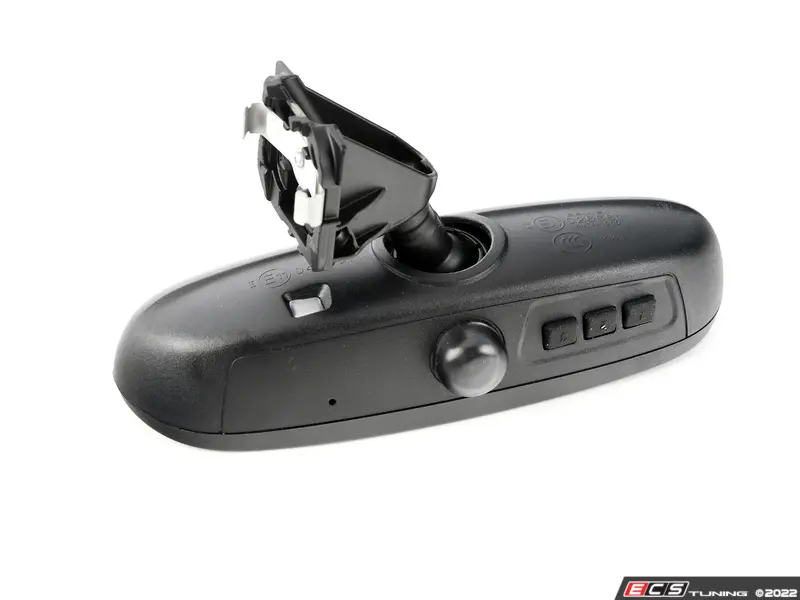
I am about to install the self dimmer mirror in my F56 GP3, does anyone know what the size of the pins are that need to be added to the connector on the car side?
I have a crimp tool if I know what connectors to add I can just make my own wires.
I added the homelink UGDO, compass, auto-dim, alarm mirror to my 2016 JCW (July 2015 build). Mine came only with auto-dim and alarm. It was plug and play, but I did go into Bimmercode and code a few items because it showed some mirror errors in Bimmerlink.
Firstly, thanks to all keeping this up to date....
I performed this interior retrofit a year or so ago, works fine - tapped rain sensor for power and got the homelink and compass working as I wanted to do.
Now, I've followed another thread about adding exterior auto-fold mirrors that also have auto-dim capability. Mirror folding works great. I need to go back into the interior mirror and connect LIN bus to enable exterior mirror auto dim. I read earlier in this thread that a black wire in position 6 of the mirror plug to the console plug is needed. I would have gone to NewTIS, but alas. Has anyone done this retrofit and linked the new mirror to LIN? Is it as simple as connecting #6 from mirror plug to ?? plug port on the console, then coding? Anyone know of a write up that describes installing interior mirror with LIN wiring?
Post #2 of this thread shows #6 on the mirror plug going to LIN. Where does that wire go in the console plug?
edit:
Found this:
The other 61130006663 should be inserted into location 6 on the 10 pin black plug. This wire is the LIN (local interconnect network) signal wire. It is long enough to be connected without needing to add any wire.
In the long thin black plug, E131*2B, that was removed from the left side of the roof console, you should find the correct violet/yellow wire in position 2
Solder the wire from pin 6 into this wire and insulate properly.
Hi All...
So the rainy day finally came. I broke down and pulled the glovebox, dropped the fusebox and added a circuit for the mirror garage door remote which now turns off about 30 seconds after power off, and added a second circuit for the V1 at the mirror. I hooked up the V1 hardwire power dongle at the fusebox second circuit, ran the remote wire up the A pillar along with the mirror power wire and a second through the back of the center console to the remote V1 control box mounted next to the steering column. All in all, it took about an hour and a half to execute, weeks off and on in planning. I purchased a scrap fusebox off ebay to figure out how to add in the circuit and can post pics of the process and a write-up of the procedure for the circuit and removing the glovebox if anyone would find it helpful. I wasn't able to find a good glove box removal step by step, or info about adding a circuit to an open slot in the fusebox. Just let me know if it would help.
Hi, My 2018 MINI Cooper F60 rear mirror is a manual with no connector. I am planning to retrofit a 2013-18 F30 RearView Mirror Part#9305633 to my MINI. I intend to swap the holder of the MINI mirror with the F30 mirror.
The F30 mirror has the following pins populated Pin#3, Pin#6, Pin#9 & Pin#10. Can U guide me & indicate what the wires from these pins should/can connect to?. My Car has a Rain Sensor too with its own 3 wire harness.
I am enclosing images of my new F30 mirror & also my small manual MINI mirror that i currently have.
Can U tell me which of the wires connect to the Rain sensor & where all the connections need to plug into, exactly?.
The F30 mirror i purchased happens to have Auto-Dim & Home Link feature. I also have Drivers side wing mirror with Feature AutoDim.
Originally Posted by Muxor
Here are my videos. Sorry there are 11 individual videos but all are relatively short. I never did edit them into one but it shouldn't take long to watch them all or just the ones you are interested in.
On the video I mention the blue/green wire for future alarm. Later I realized (with a big thanks to 6FT6) that this wire needed to be connected to the A21*1B connection. I have pictures of this connection but nothing in the video. I mention that I was leaving it coiled up in the video for future but I actually went in later that day and connected it to the A21*1B - just no video of this connection.
I was able to install a "10 inch Used rear view mirror of BMW F30" with Compass/GarageOpener/Auto Dim/LED on my 2018 MINI F60 which sadly came with a plain manual Rear View Mirror with also NO electrical connector. Everything seems to work but still need to dive deeper and fine tune some stuff.
I shuffled the cradle from the original MINI F60 mirror onto the F30 mirror and it was able to slide onto the railing on the Module glued to the F60 windshield which also seems to house the RainSensor module as its passenger. The screw on the cradle of one mirror will not suit the other and that cannot hence shuffle.
There seems to be a tiny wobble that i was able to fix with adding a small piece of paper in the space between on the cradle.
I had previously also did coding using BimmerCode app to activate the mirror.I still need to research and code some more i believe. Under BDC_PFInternalMirror BimmerCode: PfInternalMirror 3120 > ISP_EC = aktiv PfInternalMirror 3120 > ISP_KOMPASS = aktiv PfInternalMirror 3120 > LIN_ISP_VERBAUT = aktiv PfInternalMirror 3120 > PF_INMI_LIN_VAR = ISP_g_EC PfInternalMirror 3120 > UGDO_Country=Global or Rest of Europe PfInternalMirror 3120 > UGDO_Type=EURO_HL2_HL4 PfInternalMirror 3120 > UGDO_Code_Mode=default mode PfInternalMirror 3120 > UGDO=Aktiv PfInternalMirror 3120 > PF_UGDO_LIN_VAR=Nict_aktiv PfInternalMirror 3120 > COMPASS_ZONE=Zone_13 (UGDO means Universal Garage Door Opener; EC stands for ElectroChrome(AutoDim); KOMPASS is COMPASS; LIN is LIN BUS Signal; VAR is Variant; INMI is Internal Mirror; VERBAUT means Installed/Connected; ECE means European Freq; DWA option indicates your mirror with feature of ALARM+LED; Zone of Compass is chosen based on region your MINI dwells in & the "F30 downloadable online PDF Instruction Manual" has a map for this). The Used F30 mirror that cost me 46US$ on eBay has a 10Pin connector on which the Pin#3 is Power; Pin#6 is Signal(LIN) & Pin#10 is ground. I purchased a used & suitable connector stub on ebay costing another 10 US$ and wired the same. The BMW F30 mirror i used is part#51169345387 and it has built in Compass/Auto-Dip & Home Link Garage Opener.
The globe shaped housing behind the MINI F60 OEM mirror unfortunately will not suit my F30 mirror and i will now have to check and see if an F30 housing can adapt to my F60 windshield.
I connected the other end of wire to the> corresponding 3 wires on the Rain Sensor. You have to test the wires to check.The 3 wires on the rain sensor will be colour coded and the one in brown will be Ground as always & the other 2 will be power & signal.
When you use the tester, the one that is constant(?red/white) will be the power and the one that blinks(?violet/grey) on the tester will be the signal wire. The 3 wires can also run under the windshield upholstery and down the driver pillar(my F60 is a RHD) into the Lights control module which has the same 3 wires to connect to just as on the rain sensor.
In my case i noticed that the HeadLights & DRL were overwhelmed with the draw of power from the Rear Mirror while stationary and they were buggy and hence i changed my mind & connected to the wiring of the Rain sensor instead & its also very next to the mirror.
The F30 mirror also has a tiny hole underneath using which you can choose on/off of the compass & compass region & language options on the mirror. When you check the F30 instruction manual you can find more details concerning this mirror functions.
(These are my early days into this project and if anyone were to implement this project, they do it at their own risk and things can actually go wrong and hence caution is to exercise/study/learn).
I have more details & images of the project with images on a Facebook group called MINI COUNTRYMAN OWNERS. This website does not allow me to post a link for my write up on that page.
I had retrofit a BMW F30 10" Rear View Mirror on my F60 by adapting the cradle of the F60 MINI mirror into the F30 mirror.
I have connected PIN3 to Power & PIN6 to LIN BUS & PIN10 to ground. My F30 mirror also has a PIN7 which i do not know why and hence left it unconnected.
I did some coding using BimmerTech and the Garage Door Opener buttons seem to work, The Compass is working but the Auto Dim is not something i am sure is working, i still have to test.
Using a simple tester, the ground/brown wire is easy to identify at the Rain Sensor harness. The Power is the wire on which your tester lights constantly Red while the Signal would be the one on which your tester would blink red.
Yet another dusting off of a very old thread!
First off thanks to Muxor for documenting the whole process.
I purchased two auto dimming mirrors off ebay with a plan to retrofit my car.
I'd love to be able to test my mirror 'on the bench' to ensure that one works before installing it.
At first I bought just an auto-dimming mirror (no other features) because I'm cheap and it's really all that I want. I connected the mirror to power and ground using a handy 12V/1A power supply, however I couldn't get the auto-dim feature to actually work. Well, it was quite cheap, so I decided, why not buy another one to help troubleshoot.
This time I bought a mirror with compass/homelink/alarm light. I used the same harness to test this one, and sure enough the compass turns on and even functions correctly, the garage door openers even work, and if I tap the alarm line to +12V the red LED lights up. However the auto-dim still doesn't work. I've been testing the dimming by covering the sensor on the back of the mirror (what would face the windshield), and shining a light into the mirror's light sensor. No dimming.
I wonder if the auto-dimming simply doesn't function until the mirror is connected to the vehicle's K-LIN/communication bus? Would love some confirmation on that. My speculation is that the mirror doesn't care what it sees, it just has to see 'some traffic' on the bus before it starts working, since dimming seems to work on people's cars without any coding. Maybe? It seems like it would be quite odd for me to buy two mirrors that came from accident vehicles, both of which just happened to have a failure of the auto-dim feature, but who knows, maybe that IS the case and I need to try buying a third mirror (might as well have just bought one new, in that case ;-)).
It would appear that I am correct. The mirror LIN bus MUST be connected for the dimming feature to work, whereas everything else will work even with the LIN line left floating:
(see around 3 minutes, 30 seconds into the video).
One curiosity is, does dimming actually work without coding? Mostly wondering if the mirror sees what it wants to wake up without actually telling the car that there is a mirror installed. Guess I'll assume my mirrors work and do the retrofit.
For future bench testing I may write up a basic LIN bus module for raspberry pi arduino or something, capture whatever traffic we see to the camera and replay it like the video above shows. Could be helpful in my future dimming side mirror project =).
Hi all,
I purchased the Homelink mirror some weeks ago but unfortunately I cant use it. I live in Italy and this mirror is available only on US/Canada market, where garage openers work with specific frequencies (315Mhz vs 433Mhz).
If someone would retrofit on his car, I'm selling it.
art. 6821264
auto dip, homelink, alarm led, compass
I understand this a very old thread, however, wondering if this is still available?
Hi all,
I purchased the Homelink mirror some weeks ago but unfortunately I cant use it. I live in Italy and this mirror is available only on US/Canada market, where garage openers work with specific frequencies (315Mhz vs 433Mhz).
If someone would retrofit on his car, I'm selling it.
art. 6821264
auto dip, homelink, alarm led, compass
I realize this is an old post, however, is this by chance still available?
 09-03-2020, 09:41 AM