Drivetrain "Bolo: My Mini and it's Odyssey" or "How I Spent Way Too Much Money and Free Time"
#1
 07-01-2016, 08:50 PM

"Bolo: My Mini and it's Odyssey" or "How I Spent Way Too Much Money and Free Time"
** those who haven't read my other build threads, this first post will be a long one but will cover most of what I've done from purchase to motor rebuild, for those who have, you've seen all of this before.**
(Figured since most of my mods are power related I'd put my build thread here instead of the convertible section)
Nov. '04 : Picked up my Mini, an '05 MCSC-JCW, Pure Silver, 6 speed w/ all Leather, Sport and Cold Weather packages.
April. '07: My first MOTD, met Chad from Detroit Tuned and it snowballed from there....
Summer '07: First Mods at DT, H Sport Springs, Koni Yellows and BVH.
Then I took over....
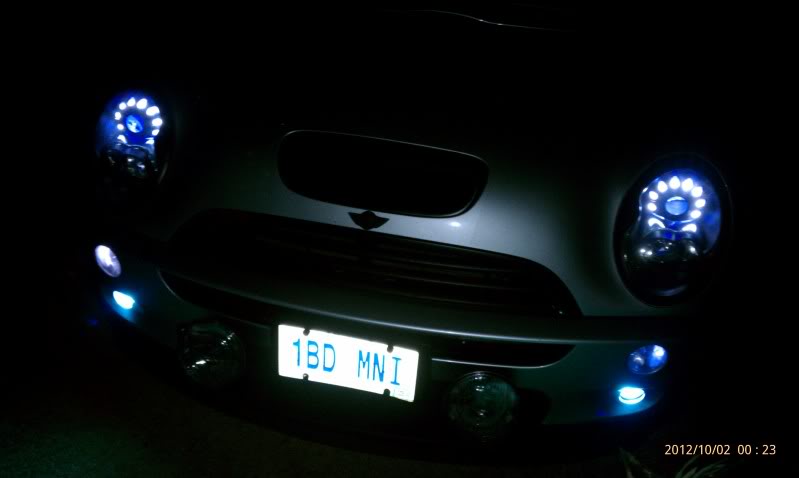
Exterior mods:
A Joey Mod and LED's in my surrounds.
From this thread:
https://www.northamericanmotoring.co...eadlights.html
Blackout Kit,Wheels, Tinted windows & Tail Lights.
I didn't want to do much to the outside of the car to give it a little bit if a sleeper vibe.
Interior Mods:
Gauges....
First came the dash gauges:
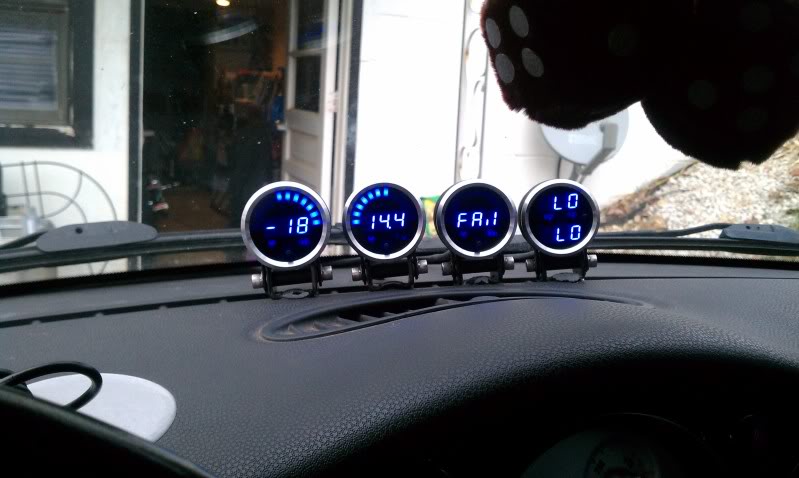
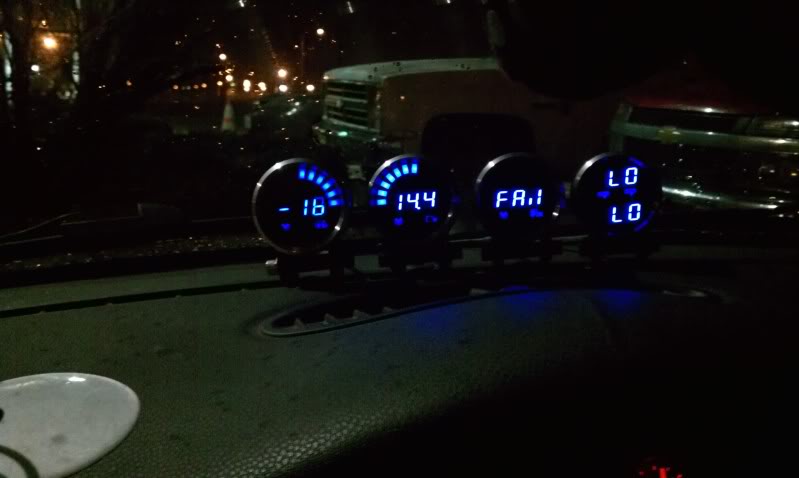
They originally were:
Boost / Volts / Fuel psi / Pre & Post I/C temps.
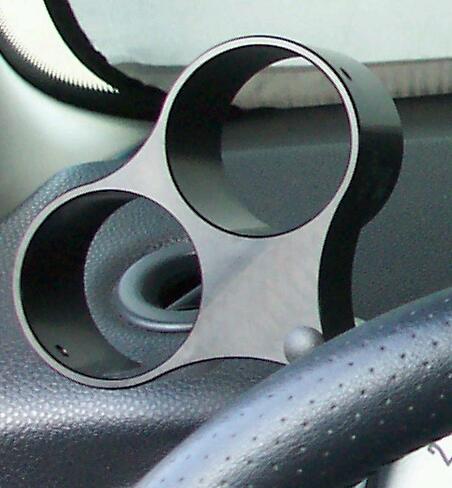
Steering Column Gauges:
Started with these...
Inserted some LED's for indicator lights...
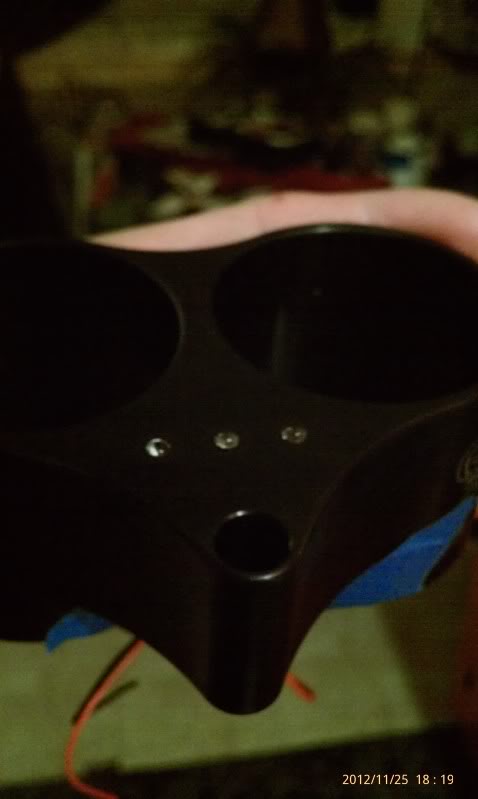
Added a new Steering Wheel....
(Left Button - Nitrous / Right Button - Horn)
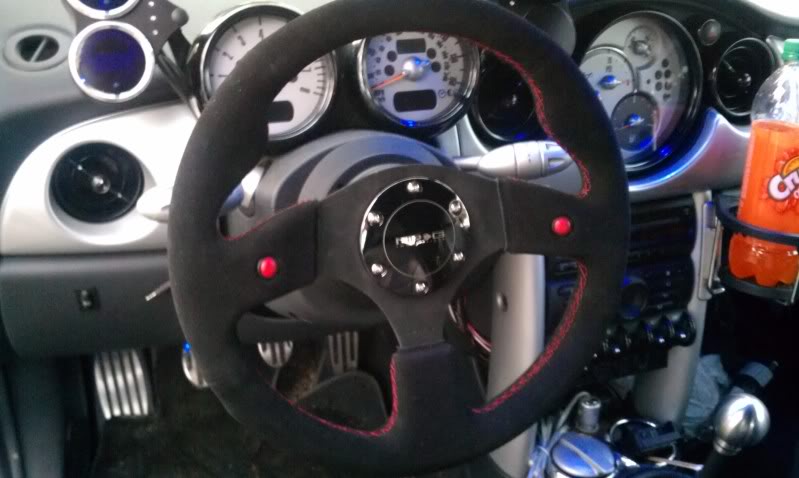
And ended up with this...
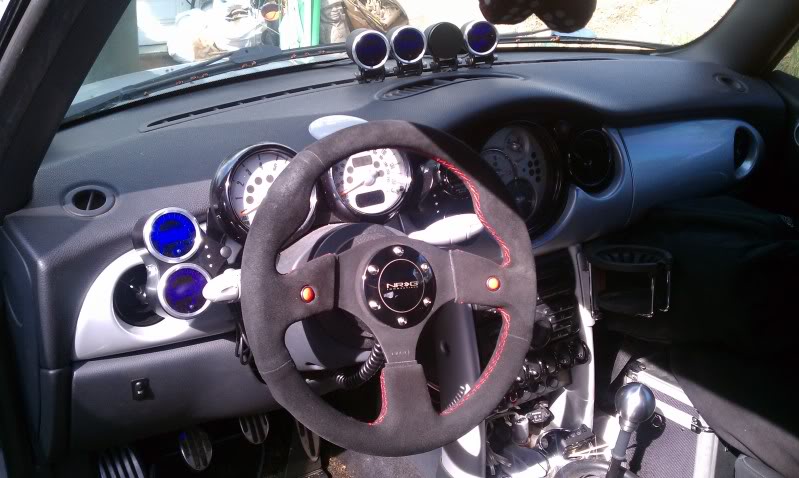
Left side:
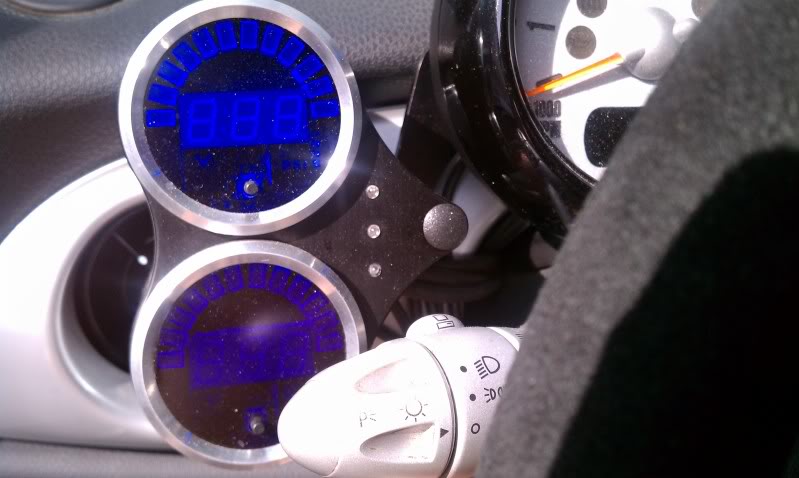
Gauges are Fuel & NOS psi
Lights are all red
NOS Armed
Stage 1 controller On
Stage 2 controller On
Right Side:
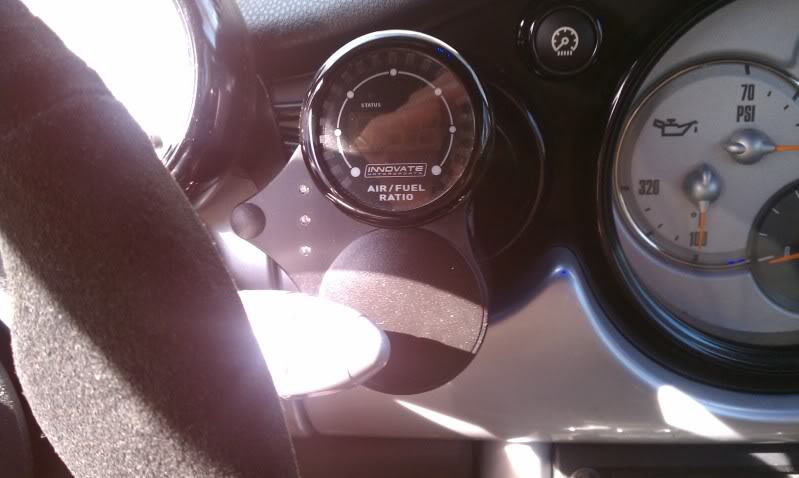
Gauges are AFR & W/M will go in the bottom
Lights are all Blue
W/M On
Driving Lights On
W/P Power Supplied
Then in addition to those I made a switch panel to mount under the toggle panel to turn things on.
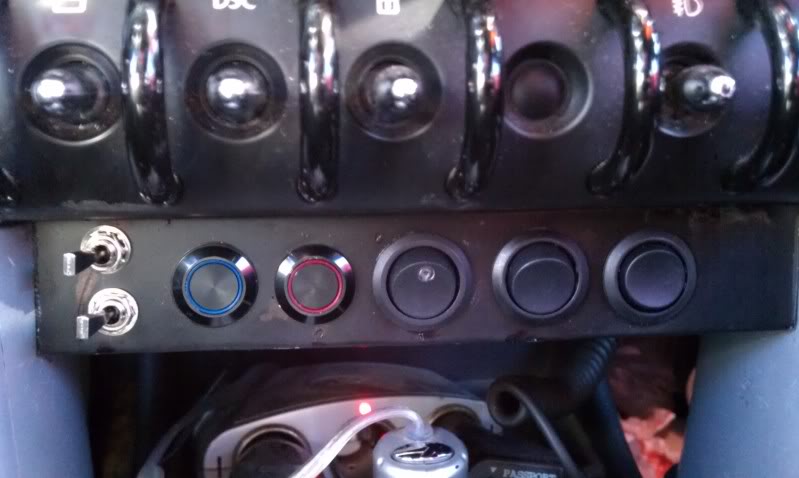
Toggles on the left are to arm stage 1 & 2 NOS controllers, buttons are...
W/M On/Off
NOS On/Off
NOS Bottle Heater On/Off
NOS Purge
(Open)
Plus there's a few other minor interior changes, shift ****, shifter plate to replace the leather boot and an old school foot trigger for my driving lights...
Now for the engine, started with the factory JCW 210 package, installed an RMW BVH around 70k miles, had some issues with compression around 80k, at the time we didn't know what it was and ended up not only sending the head to Jan for a freshening, but pulled a piston to check the rings, problem ended up being the head, but since we already pulled one piston, decided to re-ring the whole thing. (new rod bearings as well, of course)
At about 100k we added a RMW Shorty header and re-tuned.
About 135k the flex basket on the header started giving me issues due to the fact I was still using the stock upper motor mount, at this time we changed to the Mynes V-2 Header and added a Cam....
Well the car didn't like the Cam at all, tried a completely different one... still no joy, after much time tuning and experimenting, we simply came to the conclusion that I just got lucky and got one of those facelift ECU's that just doesn't play well with Cams, so back to stock.
About 178k the original S/C finally gave out and on went the Sprintex...Pulley and tuning changes were as such:
178-193k - 69mm pulley
193-198k - 64mm pulley
198-212k - 60mm pulley
Then I rolled over the magic number:
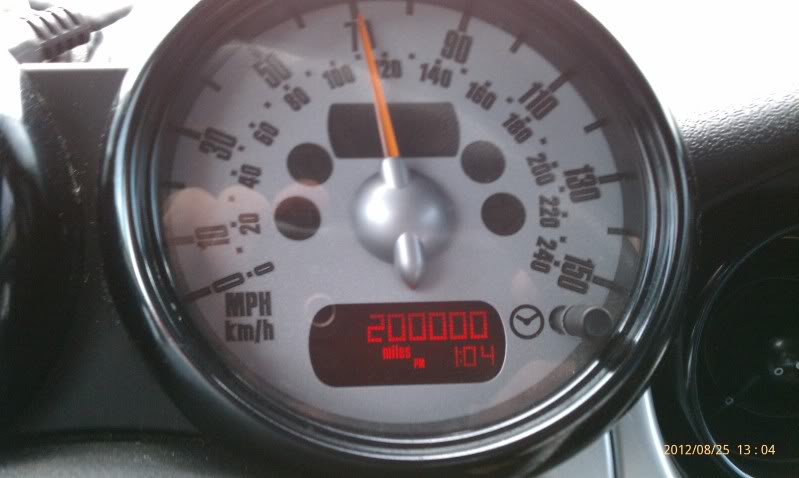
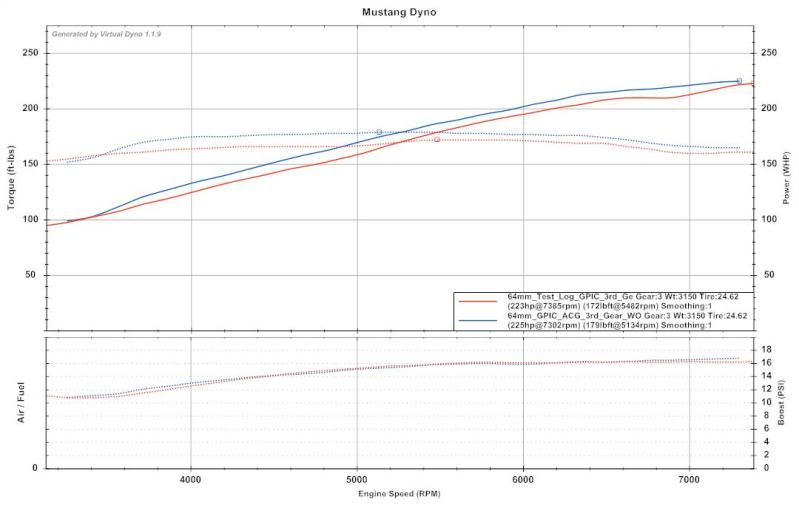
First mod after 200k was Thumpers Adjusted Cam Gear, the ECU was fine with it, and these were the results:
OEM Gear
ACG
(bottom graph is boost only, wanted to show, that's not where the power came from)
After that came the Nitrous install, went something like this...
I want to start by saying, this system is Complete Overkill and will never be used to it's full potential on the Mini, but there is actually a method to my madness. One of the reasons for all the extra stuff is, I just decided to do it all now & never have to add later, no matter what vehicle I use it on. (not to mention, just a couple of things & this 1 system becomes 2) The main reason though, is control, I wanted maximum control over when & how much.
So, I started with this; the Zex Universal 4-6 cyl. Wet kit, Black Out edition. http://www.zex.com/zx/nitrous-system...wet-black.html
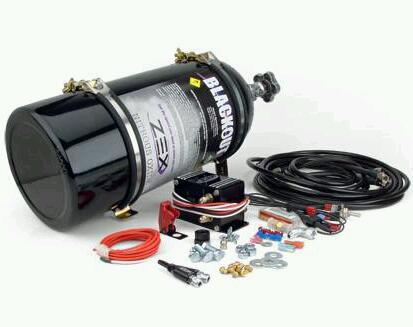
Sorry, I didn't do the obligatory "spread out everything on the floor" picture. :D
I choose "Wet" for the safety & ease of tuning, I'll be running a small enough "shot" that I won't need much timing adjustment and with "Wet" the AFR can simply be tuned with the fuel jet.
As I said, I started with that system, off of it I've built a One Off, Custom, 2 Stage system, including a 2nd "Wet Management" unit & RPM controller, I've also added a Purge kit & Bottle Heater.
Here's the intent behind all the "extra's" :
2 stages, mainly for traction & delivery control, each stage acts on both a WOT throttle position sensor & a push button. (2 seperate push buttons, one for Stage 1 only, one for both Stages combined)
Stage 1 will be stricktly determined by traction, what ever level I can use, up to approx. a 65 "shot" that the car will hold traction @ 3500 RPM in 2nd gear, is where it will be set at.
Stage 2 will give me an additional "shot" to give me a combined total of about 100, (for this incarnation of my motor) it will also be controlled by an RPM "window" switch and will only activate from the bottom of my next gear RPM point up to 7000. (in other words, if I run out the gear to "shift point" the RPM that I am then at, after my gear change, is where I'll set the bottom of the RPM controller, approx 5400 or so)
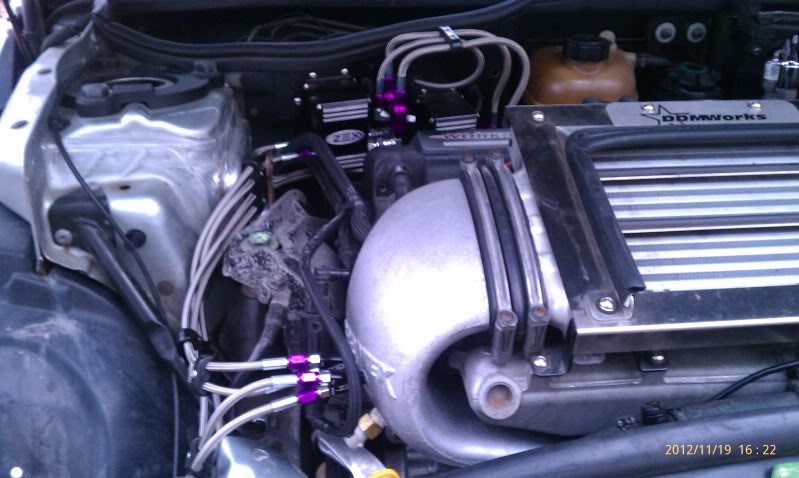
Here's a few pic's of the install so far, I'm 1/2 finished with all of the engine compartment install & have some of the wiring started:
Cut out for mounting panel:
Fabbed new panel:

Mocked up:
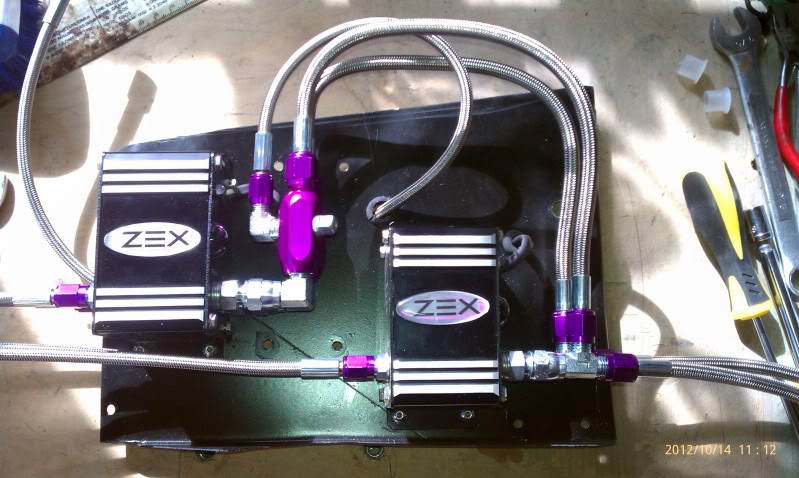
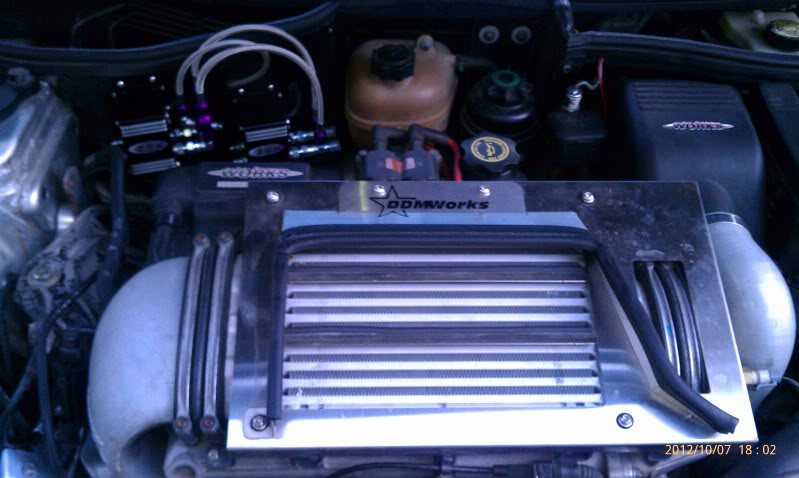
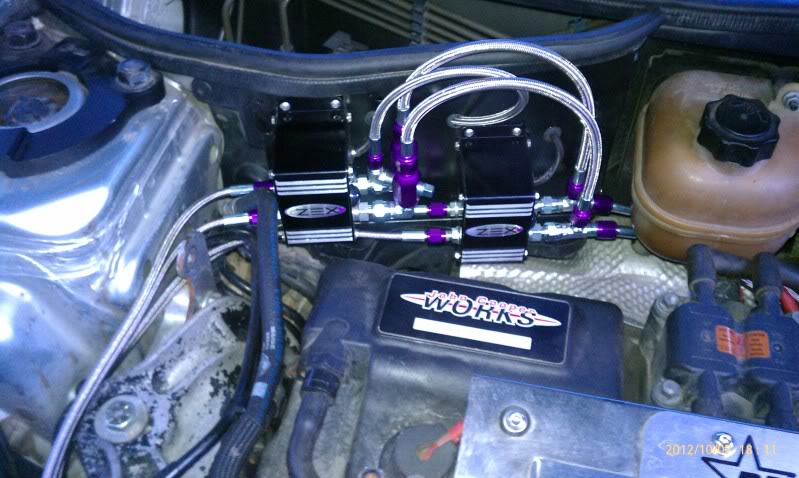
Installed:
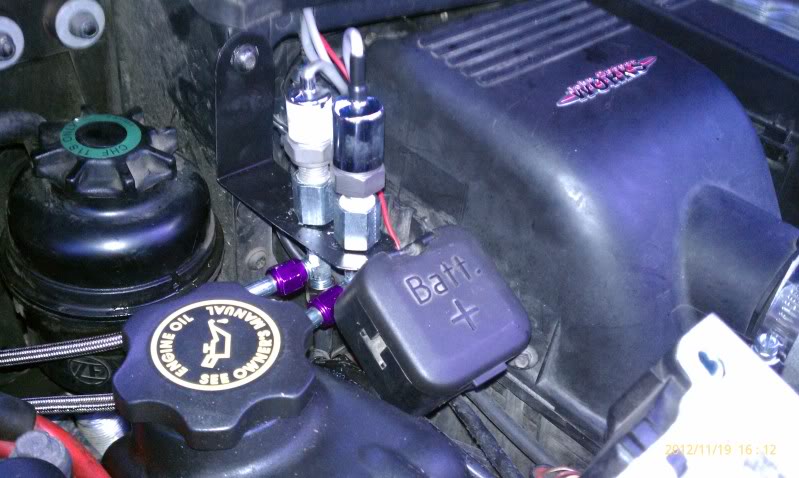
Both Nitrous and Fuel psi solenoids in battery junction box re-mounted.
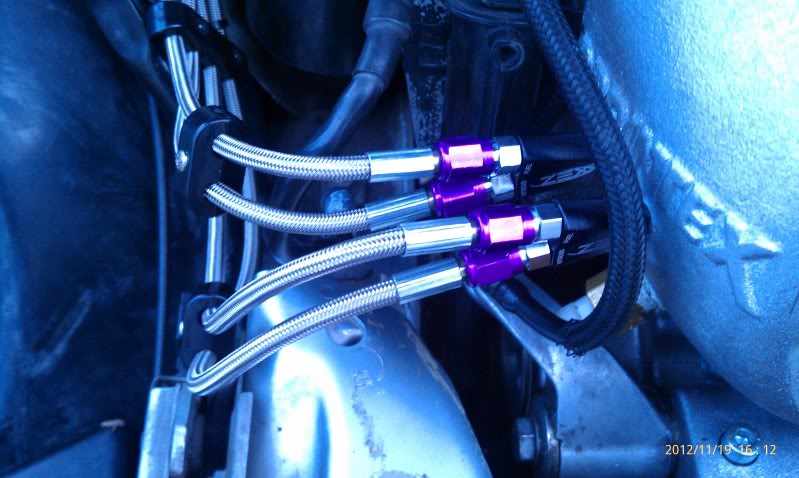
Nozzles & Lines attached.
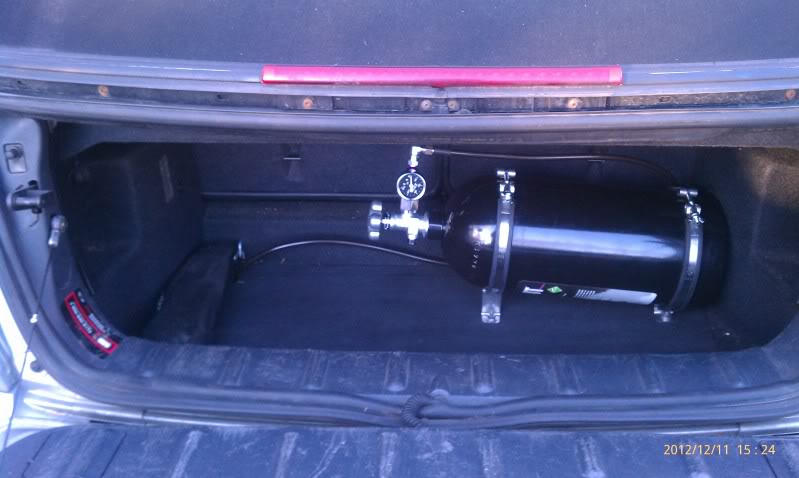
Also have a psi gauge on the bottle itself, besides the in car one. (go ahead & say it....yes, another gauge....:laff: ) and ordered the bottle heater today.
(And for those of you who noticed it, [Thmpr caught it right away :D] yes the
bottle is upside down in this pic. it was just
a quick snap I took right after fitting
everything on a very cold day. All is correct now)
Then, March 2013, even before I had a chance to use the bottle once.... I started getting a misfire, checked the compression and the motor was only carrying 110 lb across the deck, so I decided with 212k miles, it was time to simply do a full rebuild instead of trying to fix what was wrong, esp since I had planned to do it all along, was just waiting for the motor to go to the great beyond....
All of 2013 & 2014 was taken up with the purchase of a new house, no car stuff at all.
March 2015, an embarrassing pre-mature announcement that the car would be worked on and finished by Aug. Ooops!
May 2016, I'm back and here's what has gone on.....
Motor is done, transmission is cleaned up and ready for mating, all associated parts, gaskets and misc. items are bought and ready for install....(including, new idler pulley, clutch slave cylinder, updated Sprintex tensioner and vented filler bolt, New timing chain, Thumper extended chain tensioner bolt, Amsoil JCW Air Filter, seals and gaskets and other cosmetic goodies) Here's some of the details for those interested.
Motor came out a couple of months ago, besides all the piston squirters being snapped off, the bottom end was in phenomena condition, I'll be honest, had I not wanted to rebuild the motor anyway and looked closer at the head (I didn't even bother because I wanted to rebuild and just assumed the age of the motor was to blame for the loss in compression), I probably could have repaired the head, replaced the squirters and put it back together as is. I honestly feel like I probably could have gotten to at least 300k+ on that bottom end, it was that good.... And maybe even on the same clutch since this is what it liked like when it came out.
Original OEM w/ 212k miles.
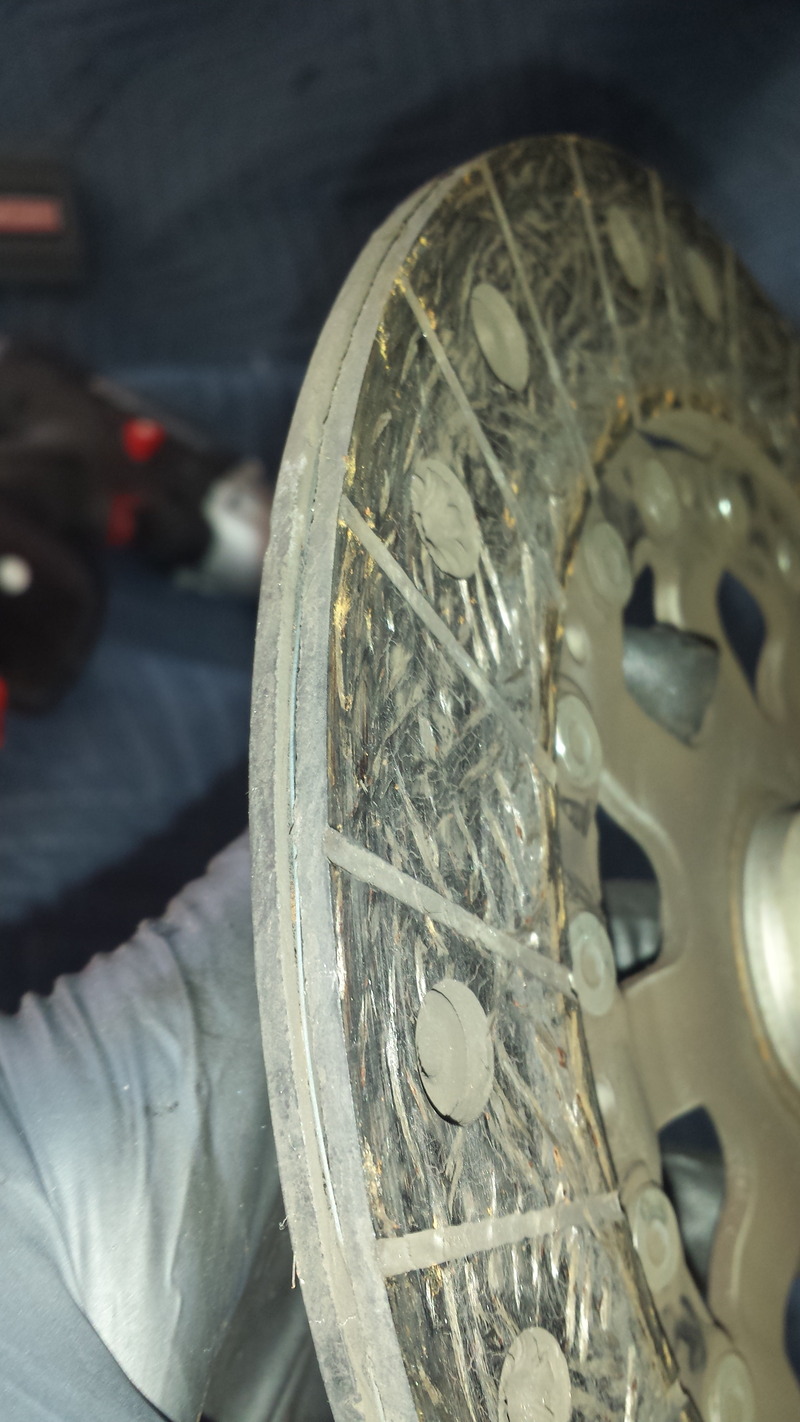
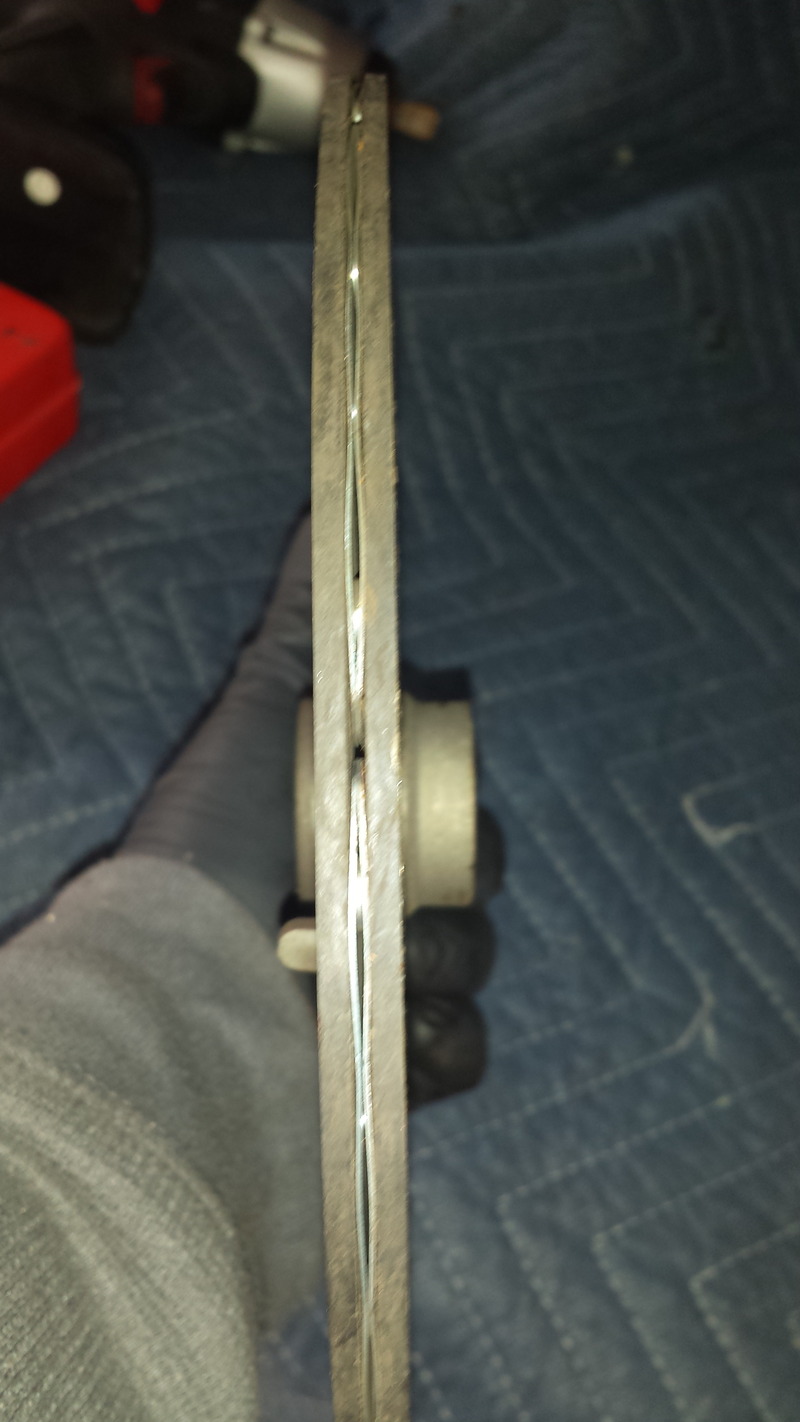
But no sense in crying about it now...lol, I'm really happy with what I've got.
Motor Specs:
Block Bored for a 77.5mm Piston
CP Pistons (77.5mm - 8.3:1)
Crower I-Beam Rods w/ ARP Bolts
King Rod & Main bearings
Balanced
Crank Polished
Mellings H/P Oil Pump
Block Decked .004
TPR Adjusted Cam Gear
TPR2rT Cylinder Head
Sprintex S/C w/ 60mm pulley
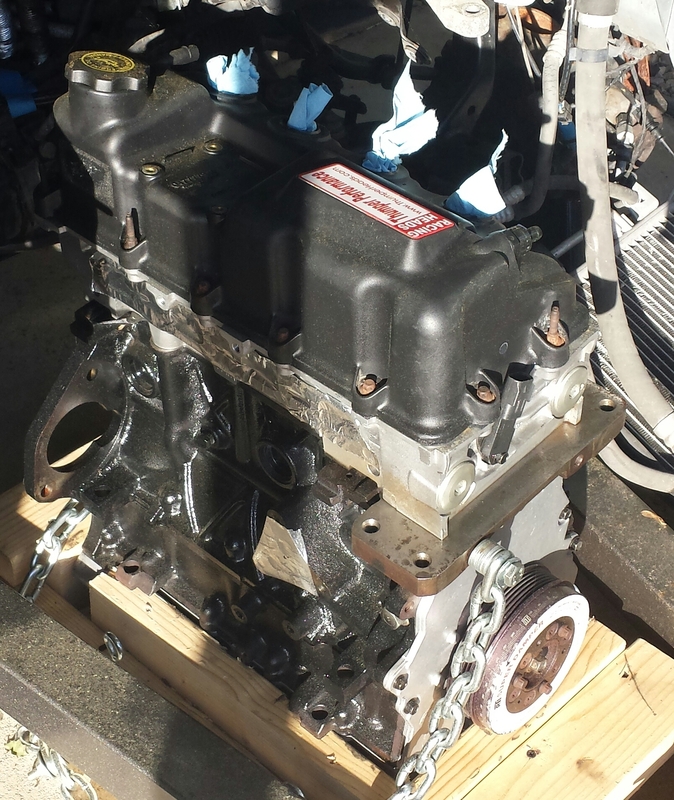
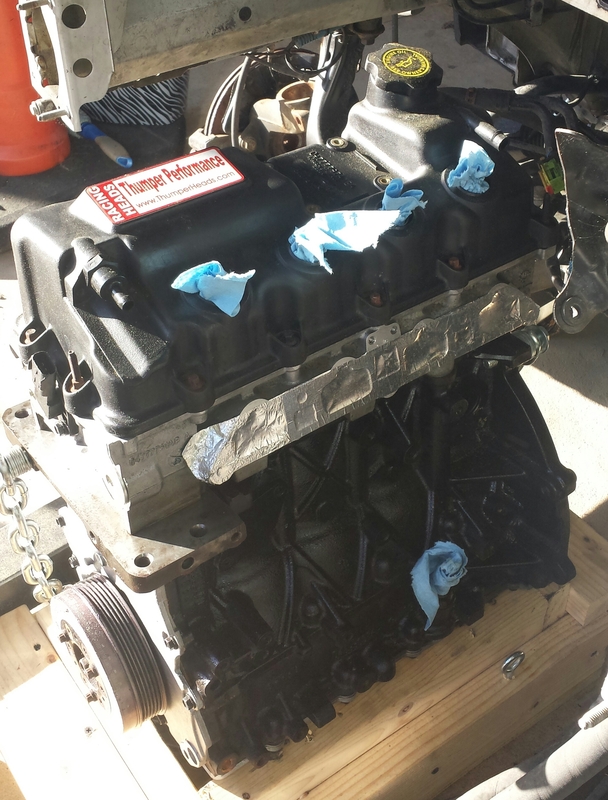
Here's the motor as it is now sitting in a cradle I made, I've since put it inside to fight the humidity while I wait for my clutch.
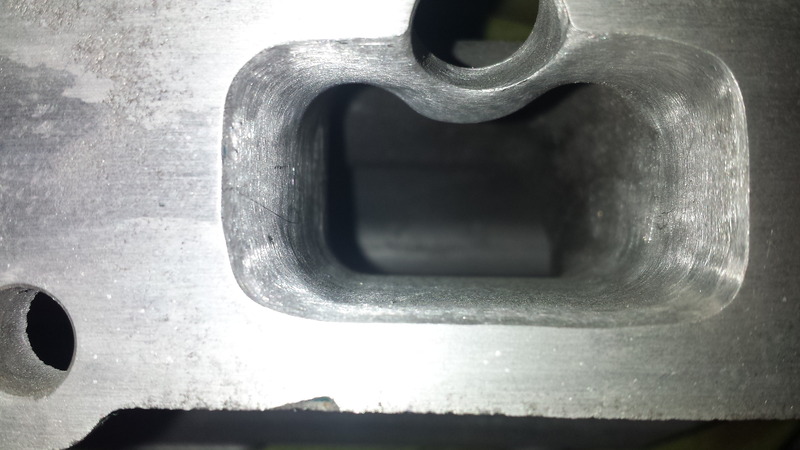
A little Head **** for you:
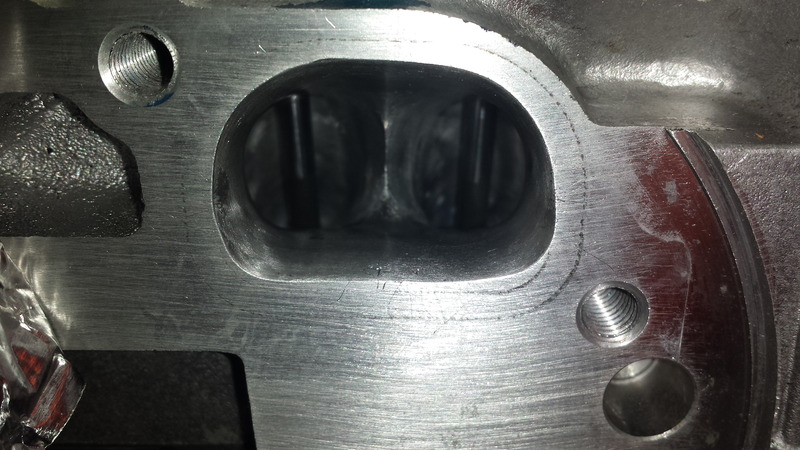
Exhaust ports are matched to my header.
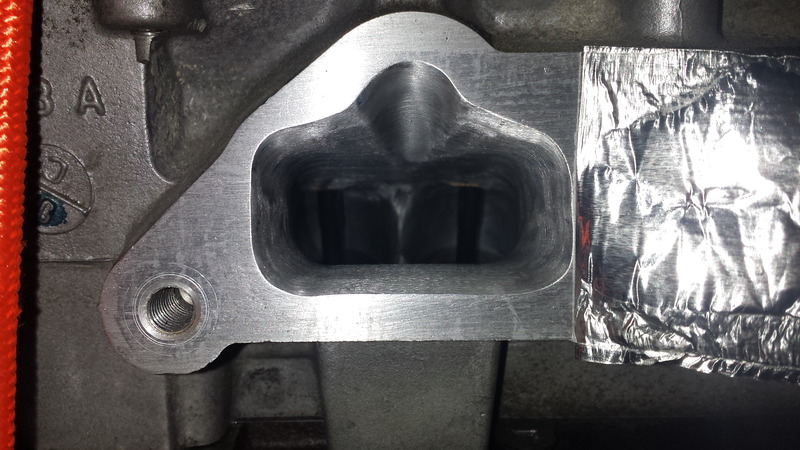
Intake ports are opened up and intake is matched.
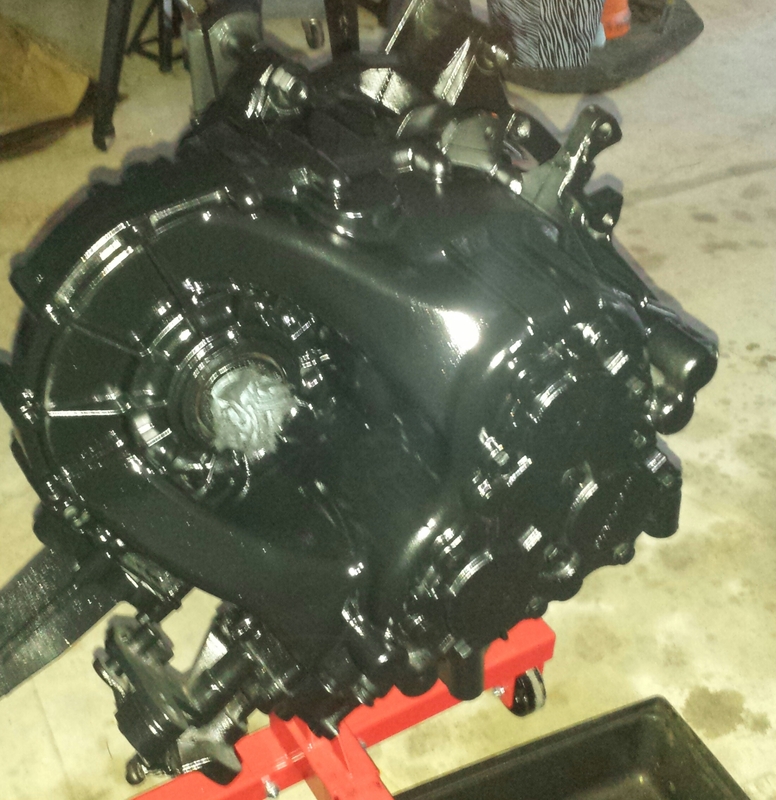
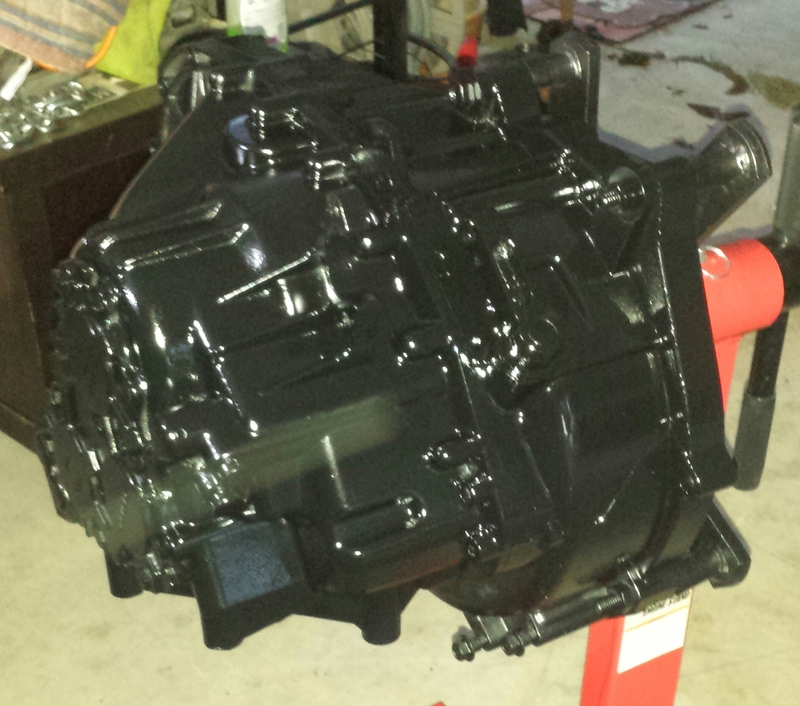
Transmission was cleaned up and painted, with new seals all the way around.
Clutch will be the OS Giken Blue and W/M will be the Aquamist HFS-3.
Once I get the clutch, everything will go back together and we'll do the appropriate tuning, then I'll add the W/M and start playing with the bottle
But in the meantime there will be some other things I want to try and get done like a rear seat delete and moving my bottle into the cabin of the car, so should be some more new postings soon.
So that's where I am to date, funds for the clutch will be available in a couple of weeks and install will commence, followed by break in, tuning, the addition of the W/M and more tuning, then bottle tuning.... so we'll see how everything goes.
If you took the time to read all of this, THANKS....
Motor has been sitting in the house for climate control and I hope to start working on the rear seat pans this weekend, Nitrous bottle and W/M Tank will be moved inside the car and mounted to them.
Later.
(Figured since most of my mods are power related I'd put my build thread here instead of the convertible section)
Nov. '04 : Picked up my Mini, an '05 MCSC-JCW, Pure Silver, 6 speed w/ all Leather, Sport and Cold Weather packages.
April. '07: My first MOTD, met Chad from Detroit Tuned and it snowballed from there....
Summer '07: First Mods at DT, H Sport Springs, Koni Yellows and BVH.
Then I took over....
Exterior mods:
A Joey Mod and LED's in my surrounds.
From this thread:
https://www.northamericanmotoring.co...eadlights.html
Blackout Kit,Wheels, Tinted windows & Tail Lights.
I didn't want to do much to the outside of the car to give it a little bit if a sleeper vibe.
Interior Mods:
Gauges....
First came the dash gauges:
They originally were:
Boost / Volts / Fuel psi / Pre & Post I/C temps.
Steering Column Gauges:
Started with these...
Inserted some LED's for indicator lights...
Added a new Steering Wheel....
(Left Button - Nitrous / Right Button - Horn)
And ended up with this...
Left side:
Gauges are Fuel & NOS psi
Lights are all red
NOS Armed
Stage 1 controller On
Stage 2 controller On
Right Side:
Gauges are AFR & W/M will go in the bottom
Lights are all Blue
W/M On
Driving Lights On
W/P Power Supplied
Then in addition to those I made a switch panel to mount under the toggle panel to turn things on.
Toggles on the left are to arm stage 1 & 2 NOS controllers, buttons are...
W/M On/Off
NOS On/Off
NOS Bottle Heater On/Off
NOS Purge
(Open)
Plus there's a few other minor interior changes, shift ****, shifter plate to replace the leather boot and an old school foot trigger for my driving lights...
Now for the engine, started with the factory JCW 210 package, installed an RMW BVH around 70k miles, had some issues with compression around 80k, at the time we didn't know what it was and ended up not only sending the head to Jan for a freshening, but pulled a piston to check the rings, problem ended up being the head, but since we already pulled one piston, decided to re-ring the whole thing. (new rod bearings as well, of course)
At about 100k we added a RMW Shorty header and re-tuned.
About 135k the flex basket on the header started giving me issues due to the fact I was still using the stock upper motor mount, at this time we changed to the Mynes V-2 Header and added a Cam....
Well the car didn't like the Cam at all, tried a completely different one... still no joy, after much time tuning and experimenting, we simply came to the conclusion that I just got lucky and got one of those facelift ECU's that just doesn't play well with Cams, so back to stock.
About 178k the original S/C finally gave out and on went the Sprintex...Pulley and tuning changes were as such:
178-193k - 69mm pulley
193-198k - 64mm pulley
198-212k - 60mm pulley
Then I rolled over the magic number:
First mod after 200k was Thumpers Adjusted Cam Gear, the ECU was fine with it, and these were the results:
OEM Gear
ACG
(bottom graph is boost only, wanted to show, that's not where the power came from)
After that came the Nitrous install, went something like this...
I want to start by saying, this system is Complete Overkill and will never be used to it's full potential on the Mini, but there is actually a method to my madness. One of the reasons for all the extra stuff is, I just decided to do it all now & never have to add later, no matter what vehicle I use it on. (not to mention, just a couple of things & this 1 system becomes 2) The main reason though, is control, I wanted maximum control over when & how much.
So, I started with this; the Zex Universal 4-6 cyl. Wet kit, Black Out edition. http://www.zex.com/zx/nitrous-system...wet-black.html
Sorry, I didn't do the obligatory "spread out everything on the floor" picture. :D
I choose "Wet" for the safety & ease of tuning, I'll be running a small enough "shot" that I won't need much timing adjustment and with "Wet" the AFR can simply be tuned with the fuel jet.
As I said, I started with that system, off of it I've built a One Off, Custom, 2 Stage system, including a 2nd "Wet Management" unit & RPM controller, I've also added a Purge kit & Bottle Heater.
Here's the intent behind all the "extra's" :
2 stages, mainly for traction & delivery control, each stage acts on both a WOT throttle position sensor & a push button. (2 seperate push buttons, one for Stage 1 only, one for both Stages combined)
Stage 1 will be stricktly determined by traction, what ever level I can use, up to approx. a 65 "shot" that the car will hold traction @ 3500 RPM in 2nd gear, is where it will be set at.
Stage 2 will give me an additional "shot" to give me a combined total of about 100, (for this incarnation of my motor) it will also be controlled by an RPM "window" switch and will only activate from the bottom of my next gear RPM point up to 7000. (in other words, if I run out the gear to "shift point" the RPM that I am then at, after my gear change, is where I'll set the bottom of the RPM controller, approx 5400 or so)
Here's a few pic's of the install so far, I'm 1/2 finished with all of the engine compartment install & have some of the wiring started:
Cut out for mounting panel:
Fabbed new panel:
Mocked up:
Installed:
Both Nitrous and Fuel psi solenoids in battery junction box re-mounted.
Nozzles & Lines attached.
Also have a psi gauge on the bottle itself, besides the in car one. (go ahead & say it....yes, another gauge....:laff: ) and ordered the bottle heater today.
(And for those of you who noticed it, [Thmpr caught it right away :D] yes the
bottle is upside down in this pic. it was just
a quick snap I took right after fitting
everything on a very cold day. All is correct now)
Then, March 2013, even before I had a chance to use the bottle once.... I started getting a misfire, checked the compression and the motor was only carrying 110 lb across the deck, so I decided with 212k miles, it was time to simply do a full rebuild instead of trying to fix what was wrong, esp since I had planned to do it all along, was just waiting for the motor to go to the great beyond....
All of 2013 & 2014 was taken up with the purchase of a new house, no car stuff at all.
March 2015, an embarrassing pre-mature announcement that the car would be worked on and finished by Aug. Ooops!
May 2016, I'm back and here's what has gone on.....
Motor is done, transmission is cleaned up and ready for mating, all associated parts, gaskets and misc. items are bought and ready for install....(including, new idler pulley, clutch slave cylinder, updated Sprintex tensioner and vented filler bolt, New timing chain, Thumper extended chain tensioner bolt, Amsoil JCW Air Filter, seals and gaskets and other cosmetic goodies) Here's some of the details for those interested.
Motor came out a couple of months ago, besides all the piston squirters being snapped off, the bottom end was in phenomena condition, I'll be honest, had I not wanted to rebuild the motor anyway and looked closer at the head (I didn't even bother because I wanted to rebuild and just assumed the age of the motor was to blame for the loss in compression), I probably could have repaired the head, replaced the squirters and put it back together as is. I honestly feel like I probably could have gotten to at least 300k+ on that bottom end, it was that good.... And maybe even on the same clutch since this is what it liked like when it came out.
Original OEM w/ 212k miles.
But no sense in crying about it now...lol, I'm really happy with what I've got.
Motor Specs:
Block Bored for a 77.5mm Piston
CP Pistons (77.5mm - 8.3:1)
Crower I-Beam Rods w/ ARP Bolts
King Rod & Main bearings
Balanced
Crank Polished
Mellings H/P Oil Pump
Block Decked .004
TPR Adjusted Cam Gear
TPR2rT Cylinder Head
Sprintex S/C w/ 60mm pulley
Here's the motor as it is now sitting in a cradle I made, I've since put it inside to fight the humidity while I wait for my clutch.
A little Head **** for you:
Exhaust ports are matched to my header.
Intake ports are opened up and intake is matched.
Transmission was cleaned up and painted, with new seals all the way around.
Clutch will be the OS Giken Blue and W/M will be the Aquamist HFS-3.
Once I get the clutch, everything will go back together and we'll do the appropriate tuning, then I'll add the W/M and start playing with the bottle
But in the meantime there will be some other things I want to try and get done like a rear seat delete and moving my bottle into the cabin of the car, so should be some more new postings soon.
So that's where I am to date, funds for the clutch will be available in a couple of weeks and install will commence, followed by break in, tuning, the addition of the W/M and more tuning, then bottle tuning.... so we'll see how everything goes.
If you took the time to read all of this, THANKS....
Motor has been sitting in the house for climate control and I hope to start working on the rear seat pans this weekend, Nitrous bottle and W/M Tank will be moved inside the car and mounted to them.
Later.
Last edited by BlwnAway; 10-10-2016 at 04:28 PM.
#2
07-10-2016, 05:46 PM

Nice to know someone else is going in deep. Maybe you can give me a hand on something i have been asking but no one seems to know the answer too.
I have about 2" of wires and hoses i need to bring in from the engine bay. since you don't have a motor in the car do you know of a good place in the fire wall to drill thru or and already exciting hole. since you have lots of gauges.
What is you end goal Drag racing? I'm putting in a WMI, but mostly for cooling not to make power. Plan on getting LSD when the clutch goes, but damn looking at your clutch with 212k it seems like this car have un-destructible clutches.
Refer to post #92
This is my build thread
https://www.northamericanmotoring.co...ng-turtel.html

#4
07-11-2016, 07:10 PM
Nice to know someone else is going in deep. Maybe you can give me a hand on something i have been asking but no one seems to know the answer too.
I have about 2" of wires and hoses i need to bring in from the engine bay. since you don't have a motor in the car do you know of a good place in the fire wall to drill thru or and already exciting hole. since you have lots of gauges.
What is you end goal Drag racing? I'm putting in a WMI, but mostly for cooling not to make power. Plan on getting LSD when the clutch goes, but damn looking at your clutch with 212k it seems like this car have un-destructible clutches.
Refer to post #92
This is my build thread
https://www.northamericanmotoring.co...ng-turtel.html
I have about 2" of wires and hoses i need to bring in from the engine bay. since you don't have a motor in the car do you know of a good place in the fire wall to drill thru or and already exciting hole. since you have lots of gauges.
What is you end goal Drag racing? I'm putting in a WMI, but mostly for cooling not to make power. Plan on getting LSD when the clutch goes, but damn looking at your clutch with 212k it seems like this car have un-destructible clutches.
Refer to post #92
This is my build thread
https://www.northamericanmotoring.co...ng-turtel.html

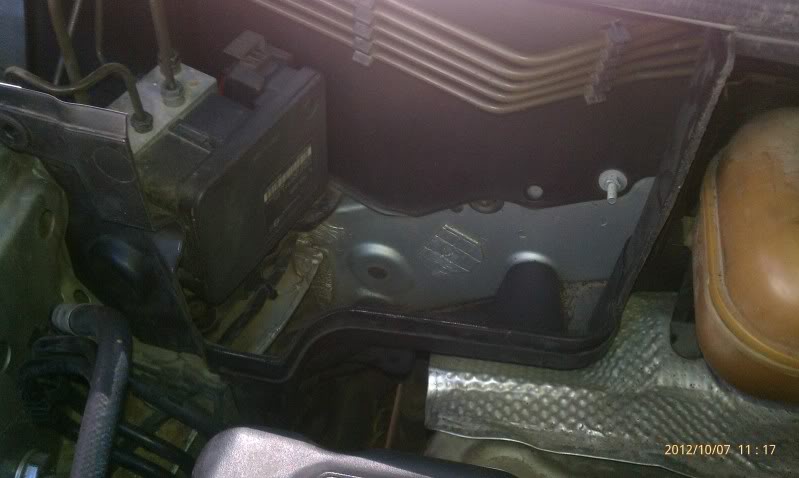
And there is a clear spot in the other side that you should be able to safely drill through if you need more room (double check the inside floor board/fire wall for clearance):
My roots are in drag racing, but honestly my goal is to just to have a fun little street and back roads toy, I still love to be set back into the seat and have always loved doing it with cars that are out of the "norm", to me that surprised look on other people faces is still priceless....lol

#6
07-14-2016, 06:23 AM
I just realized you have a convertible. I would never expect nos if i was to see you in the street.
I'm aiming for a track car and dont want to go all crazy on a tune. I think i would be happy with the JCW tune for right now lol.
I juat got my steering wheel yesterday. I looked at all your pictures and you have zero air bag lights how did you managed that? I was looking here and on other forums but there is lots of info but no clear this is what you need and most of the threads are almost 7-10 years old.
With your nos setup you not scared you have a leak right above the exhaust manny?
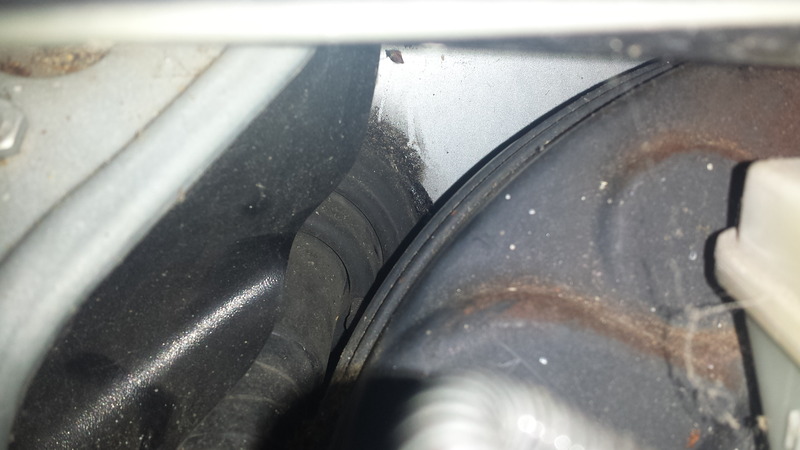
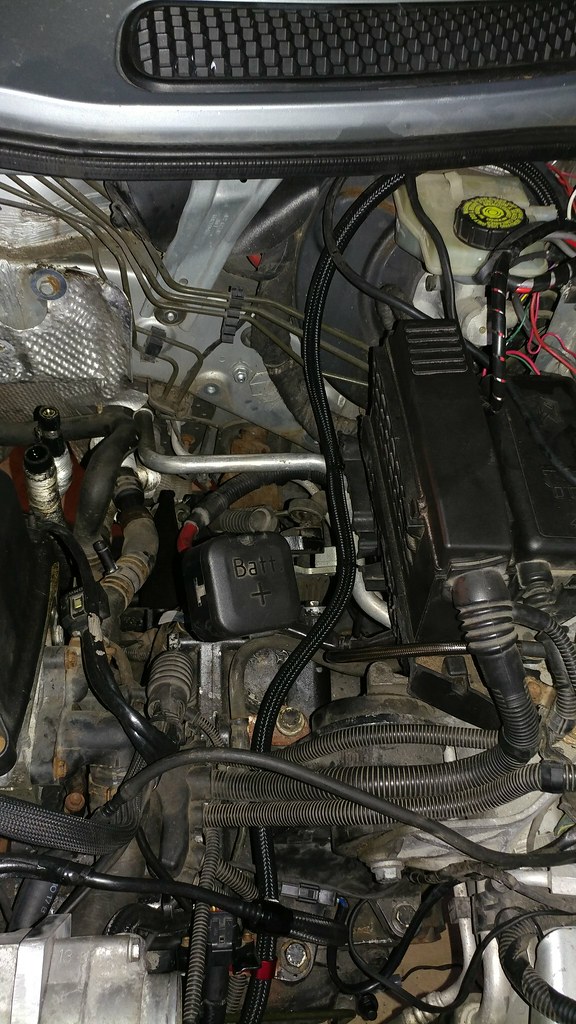
Best place I've found is in either side of the brake servo, on the drivers side of the unit there's a grommet and wiring loom already passing through, most of my wiring was fed through there:
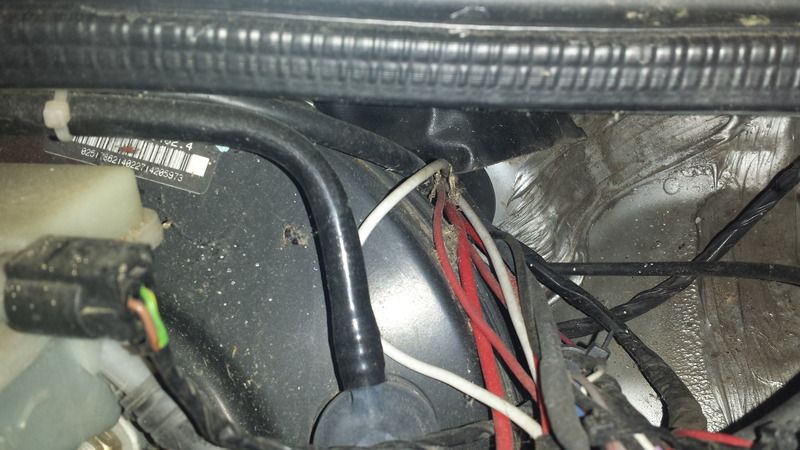
And there is a clear spot in the other side that you should be able to safely drill through if you need more room (double check the inside floor board/fire wall for clearance):
My roots are in drag racing, but honestly my goal is to just to have a fun little street and back roads toy, I still love to be set back into the seat and have always loved doing it with cars that are out of the "norm", to me that surprised look on other people faces is still priceless....lol
#7
07-14-2016, 12:01 PM
Can't really say, I was still using the original unit when I decided to do the rebuild, it had the same issues as all the other original units, oil seal leak, I just never had an issue with it because I changed the S/C oil every time I changed the motor oil (5k), mine had 34k on it when I decided to pull the motor. The unit I currently have is the updated one that Sprintex sent me to replace the older one (free of charge I might add, even though I was well beyond warranty because of pulley changes) and has never been used yet.
Trending Topics
#8
07-14-2016, 12:10 PM
I just got my steering wheel yesterday. I looked at all your pictures and you have zero air bag lights how did you managed that? I was looking here and on other forums but there is lots of info but no clear this is what you need and most of the threads are almost 7-10 years old.
Actually no, not with the AN fittings, plus I'm adding a small heat blanket above the OEM heat shield with the new motor
#9
07-31-2016, 10:40 PM
Clutch is due next weekend, so reassembly can finally start.
But in the meantime got one more project done:
Rear Seat Delete and new rear Floor Pans.
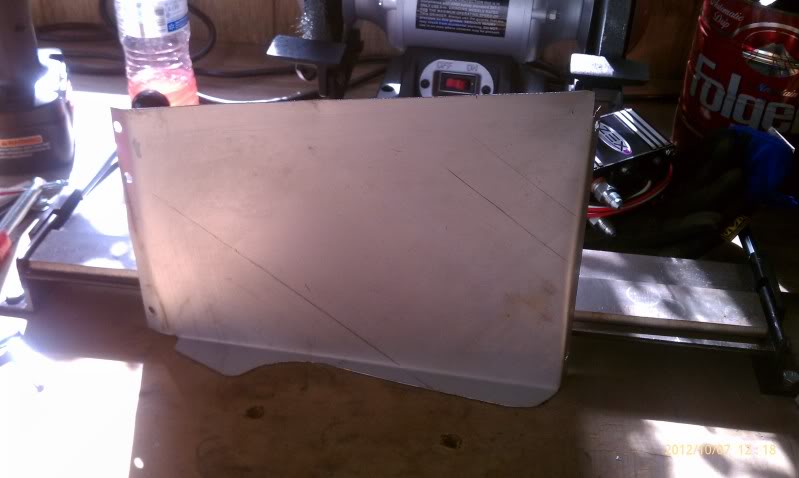
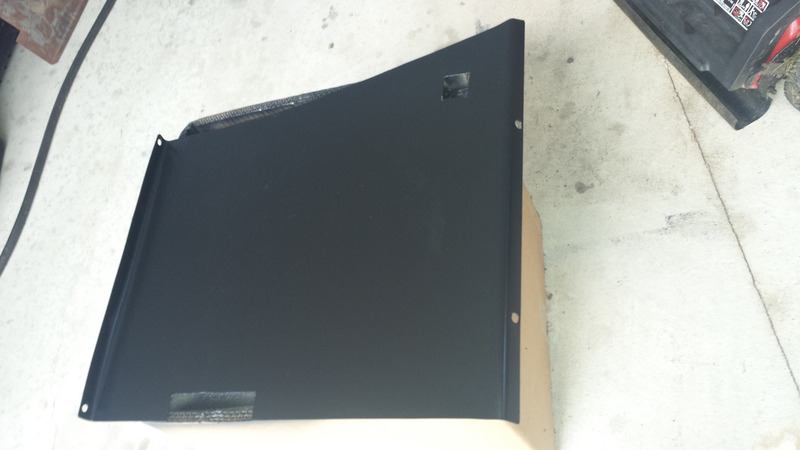
Started with a 24"x48" piece of cold rolled 18ga steel, normally I'd use aluminum or something thinner to cut weight, but I had decided to move the Bottle and W/M tank inside the cabin so the pans had to have some strength to them. Made some cardboard templates and got out the air shears, a few cuts, some grinding, a bunch of measuring and a little paint later and this is what I ended up with:
Drivers Side.
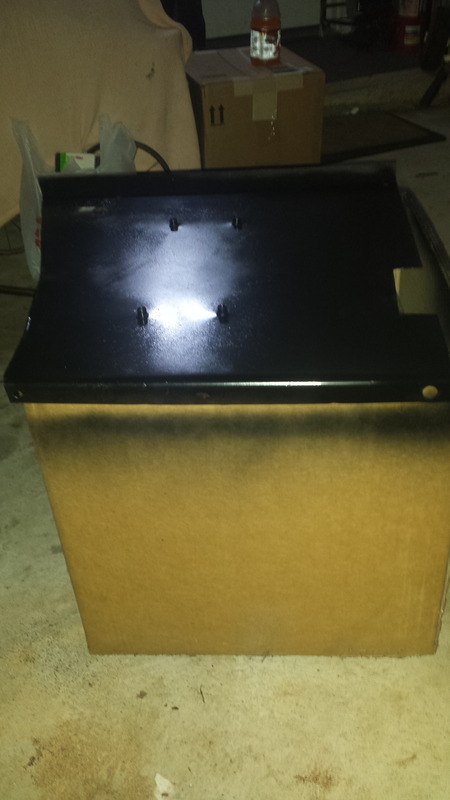
Pass Side, w/ rivet nuts for Bottle brackets.
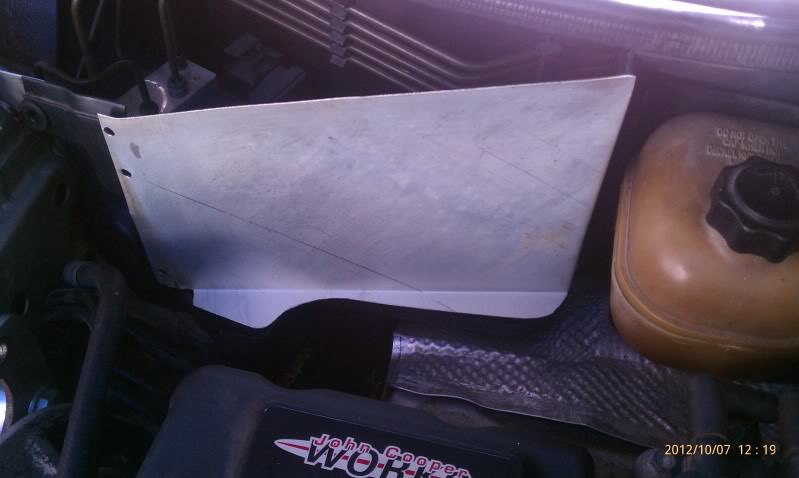
Then just a little unbacked automotive carpet and some edge trim.
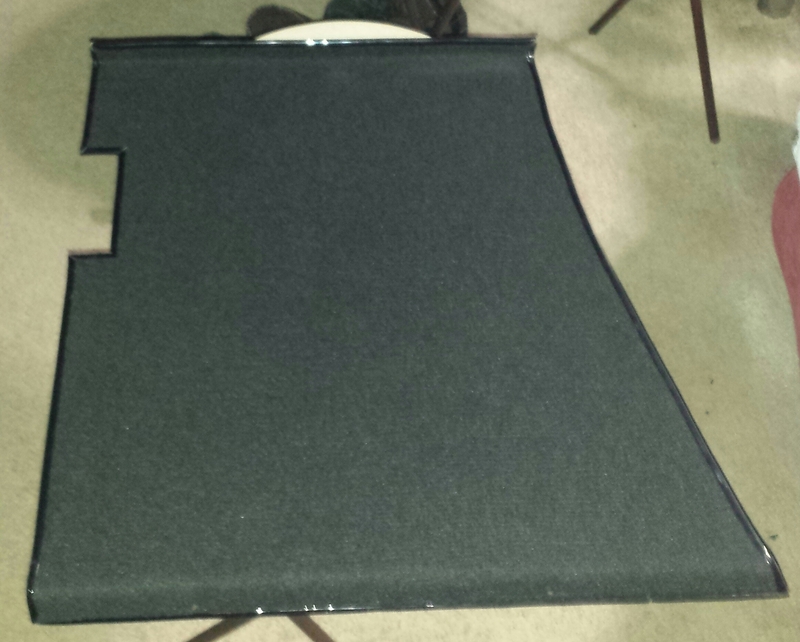
Added a little plastic fiber foam for support.

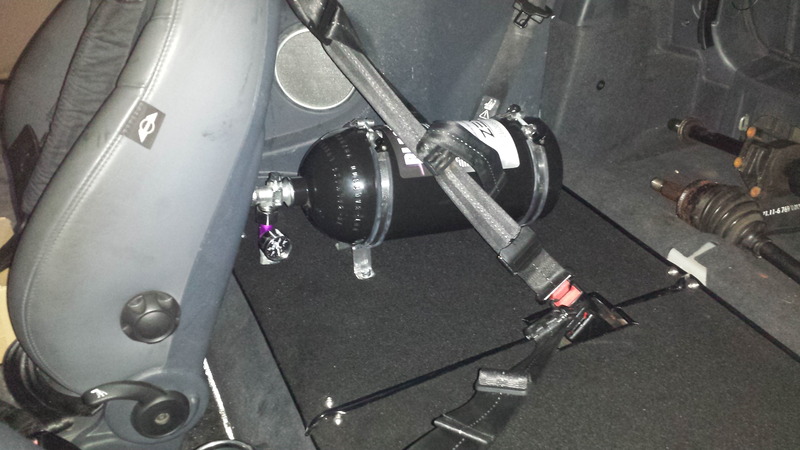
And installed.
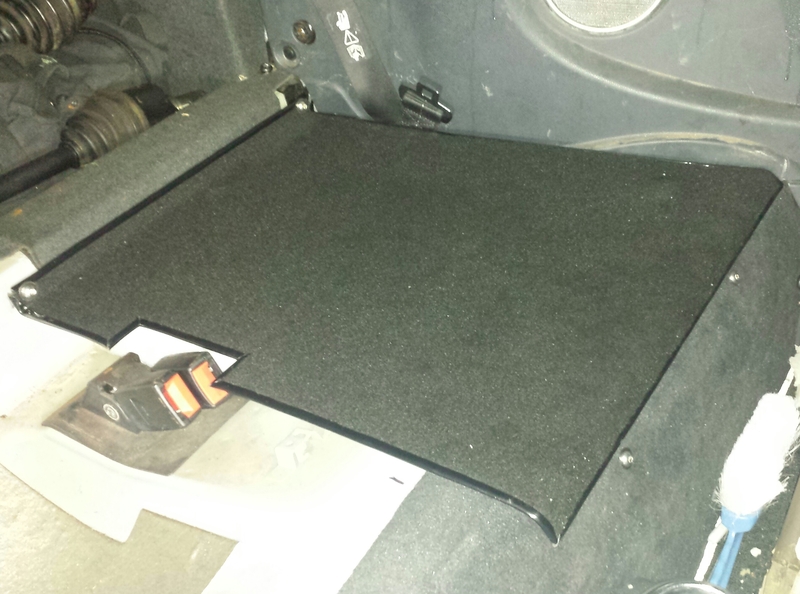
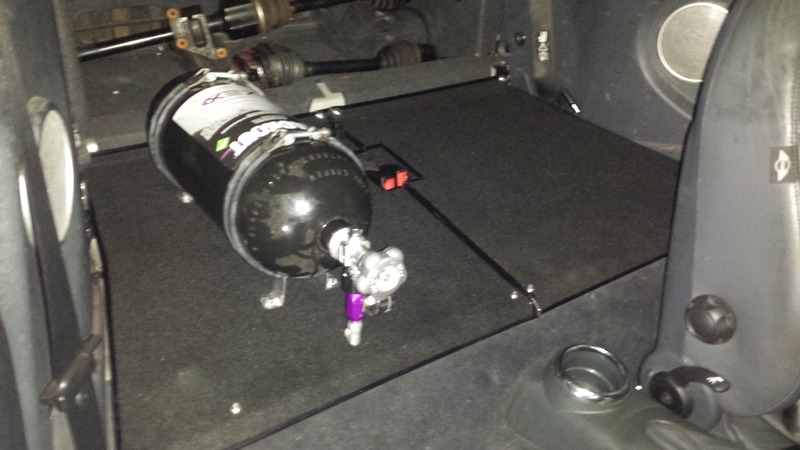
Harnesses fit around the bottle perfectly.
But in the meantime got one more project done:
Rear Seat Delete and new rear Floor Pans.
Started with a 24"x48" piece of cold rolled 18ga steel, normally I'd use aluminum or something thinner to cut weight, but I had decided to move the Bottle and W/M tank inside the cabin so the pans had to have some strength to them. Made some cardboard templates and got out the air shears, a few cuts, some grinding, a bunch of measuring and a little paint later and this is what I ended up with:
Drivers Side.
Pass Side, w/ rivet nuts for Bottle brackets.
Then just a little unbacked automotive carpet and some edge trim.
Added a little plastic fiber foam for support.
And installed.
Harnesses fit around the bottle perfectly.
#10
09-11-2016, 11:05 PM

i haven't read through everything but... dang.. nice car man! so, you were hitting 225hp before NOS? i think at 225, you were already eating v8's for lunch. lol
then again, i've never seen a dyno sheet for my car, but, if i'm to believe what Alta says about their products, with a 15% pulley, their cold air intake, and the old dual exhaust they don't make anymore, i should be hitting at least 200, plus the custom tune, maybe 215? i don't know though. it sure doesn't feel like 200hp when toyota camrys fly by me. power to weight at 200hp, this car should FLY... however, torque is pretty much non-existent in my car. almost to a point of worry. (I have to rev it to about 3.5 or 4 grand from a light to make sure i don't start too laggy from a light. otherwise, it feels like i'm taking off in 3rd gear... and heaven forbid i actually DO try to take off from 3rd gear... but.. i'm also used to driving LS1's, despite having this car a year now, and, you can start off really low in the rpm's and there's more than enough TQ to take off)
but.... with all of that said, i don't believe alta's horsepower claims and take it with a grain of salt. i'd be very surprised if i was higher than 180... especially considering, i've had more than one JCW minis smoke me for breakfast. mostly Gen 2's though. which, makes perfect sense.
Last edited by Mb460; 09-12-2016 at 01:12 AM.
#11
10-04-2016, 03:23 PM
Well, the last 2 months have just been tedious and slow, between the heat and humidity, and little issues just taking a while to sort, last weekend was finally a good one...
Motor fired right off, oil pressure came right up, wouldn't idle or throttle due to a stuck throttle body, a quick poke with a finger to unstick it and all is well. Fires up, idles and throttles prefect, only thing left to do is the rear brakes, front of the car is complete, reassembled and on the ground, just simply ran out of time, front brakes and wheels were a PITA from sitting for so long, had to clean out the lug threads to get the bolts to even seat against the wheel properly. The wheels have been on the rears this whole time so they shouldn't be as much of an issue.
Going to be the weekend before I can get first drive simply because of my work week.
Last edited by BlwnAway; 10-04-2016 at 05:28 PM.
#12
10-10-2016, 09:27 PM
Finally back on the road, rear brakes were a pain, but it looks like the new pads will work OK for now with the old rotors. The only reason I haven't changed everything is because of the planned BBK and complete brake overhaul in early spring.
Motor runs well, of course I'll still be a little easy on it for a while before we start tuning, but it fires right up and doesn't miss a lick under normal throttle, extremely smooth and very free feeling, just seems to want to accelerate with little or no effort.
Only hold back to not driving it everywhere to get the break-in miles done is tires and P/S pump.
Rear tires had been on ramps for over a year now and have some dry rot cracks in them, 4 new ones on the way, should be here by Wed.
And, while I was checking the cooling system for leaks before it was all back together, P/S pump ran on and wouldn't shut off without pulling the battery cable, it's toast, won't come on at all, luckily it's the original and is covered under the recall, appointment to have it changed next Mon. Just have to remember to bring my big neon pink marker with me so I can write "Do Not Update The ECU" in big letters on the work order....
No biggie, I can always re-download the tune if they screw up....
Should only take a couple of weeks after that for the break-in to be done and tuning to begin, HFS-3 should be here by then also.
#13
10-11-2016, 08:00 AM

5th Gear


#15
10-11-2016, 09:37 AM
Here are some "break-in" specs. Most don't follow them but here they are anyway..
http://www.mototuneusa.com/break_in_secrets.htm
http://www.mototuneusa.com/break_in_secrets.htm
Those are pretty close to my philosophies also, my initial fire up had the 15 min 3000 rpm run and I've always had a "break it in like your going to drive it" philosophy, except for of course a couple of early oil changes (250 & 1500) that and the tried and true "no prolonged constant rpm", but otherwise that's it, always had good luck that way. Letting the engine warn up (I like to go by oil temp) is pretty much a gimme, esp with forged Pistons, the only thing holding me back is tires, really don't trust these old ones so I'm not even traveling far from the house, or traveling at "highway speeds" until the new ones get installed.
Only other thing is to stay away from High rpm, WOT pulls, until that first oil change (just like to have the original break-in oil out first) when we can start with the re-tuning process, while the new parts will only slightly effect normal driving and not risk any damage, the WOT tuning will be a different story, should be able to start that after the new P/S install.
Last edited by BlwnAway; 10-11-2016 at 02:44 PM.
#16
10-11-2016, 06:55 PM
I absolutely don't expect anyone to follow in, or even understand some of my... shall we call them...eccentricities....

#17
10-18-2016, 06:07 PM
New update, most things are going to plan, new tires are on, P/S pump was changed at Mini yesterday, and initial break-in oil has been changed. Oil and filter look excellent, so no red flags there.
Only thing so far is that boost is a little low at WOT so more back and forth miles this week to work and troubleshooting next weekend, car seems to run really smooth so I'm thinking must be something with a leak on the pressure side or maybe even belt slip (I doubt it's belt slip simply because it levels out and stays pretty smooth, but we are looking at the logs, just to be sure) A leak wouldn't really surprised me that much though, considering I've got 4 separate intake horn taps and a new intake plug and tap for one of my in car intake temp gauges. Soapy water here we come....
Plus I'm having an ozone treatment done this week (A convertible just sitting outside for 3 years requires a heavy duty freshening up, just slapping a little deodorant on, isn't quite enough) and possibly some cosmetic changes if I have time, thinking about match painting the wheel arches and body surrounds, and just so happens, there's a silver peel coat that is a pretty good match to Pure Silver, so at least I can experiment first.
Once the boost situation is sorted, the first stage of tuning can begin, I'm looking at 3 separate tuning phases:
Fuel only first, then with the W/M, then with the bottle. I'm hoping for end of Nov. to have it all done, but we'll see.
#18
11-09-2016, 07:32 PM
Latest update unfortunately isn't much of one.
Some of my boost issues have been sorted, and actually helped with something else too.
Ends up that I was getting some belt slip, (I was pretty certain that it was one of the issues) so I swapped back to my old tensioner system and all is good, even boost in all gears. And as an added benefit, the swap also got rid of some higher RPM clatter that I was hearing, so two thumbs up there.
But it's still a little lower than I anticipated with all the changes from before. Currently I'm seeing a hair under 18 psi and my previous setup had me right at 20, so considering changes to the motor and intake system, and that I was actually seeing more than most people were before. I was hoping to see 19 or so.
So last week I ordered some new O-Rings and gaskets to completely redo all the junction points from the S/C to the Head. (I did re-use some of these parts after doing a good visual inspection) Unfortunately Sprintex sent me the wrong O-Ring for the S/C to I/C horn connection,(which, when I disassembled the two, showed some signs of a possible leak, and even thought the O-Ring appears perfectly fine, I'm thinking there might have been some shrinkage while sitting) so I'm at a stand still until the new one arrives tomorrow.
Everything should go back together this weekend and barring any stupid mistakes on my part or glaring new issues, tuning should commence, break-in is done.
#19
11-15-2016, 01:15 PM
Everything is back together, and going through everything didn't gain me anything but peace of mind, I'm glad it wasn't anything difficult to do, and if nothing else confirms that everything is together and working correctly.
I'm seeing 17.8 psi at the gauge (haven't checked a data log yet to see what the map sensor is seeing) and it's steady and consistent.
Already sent an e-mail and the first stage of tuning should commence soon, but even as it is, the motor is really strong and smooth, and I'm sure the tune isn't even close considering all the changes.

#21
11-22-2016, 07:51 PM
Doing the pump gas tuning now, it's just a slow process doing it remotely, and on the street. But it is my preferred method, this way we get real world temp's and air flow.
#22
12-13-2016, 09:07 PM
New update....
Well so much for confidence....
We got 2 tunes in and all signs pointed to another leak (vacuum) or bad MAP sensor.
Because of work and weather it took me almost 3 weeks to Finally get it sorted, but I found it and I couldn't be happier.
Ended up being the intercooler itself, it's got some leaks right where the rows meet the tank/ends, probably happened while it was packed away, and the last time I re-assembled everything it pinched those holes closed enough that it was barely noticeable. But after taking it back apart and a few WOT tuning pulls, it became very obvious.
Now the couldn't be happier part...
It's all back together and the boost is right at where I had originally hoped and thought, it should be, I'm peaking right at 19+ psi on my logs, and the car feels really strong.
Tuning has re-commenced, and with any luck, we'll get through it before it gets slippery around here, bought a propane heater and some tarps for the carport, it'll make the next few months work, mainly the W/M install, much easier.
Oh, and props to George my tuner with ByteTronik, he's been really patient and understanding with all these setbacks.
Last edited by BlwnAway; 12-13-2016 at 11:52 PM.
#23
12-22-2016, 08:23 PM
Pre-Holiday update to how things are progressing...
Car is running beautifully, pulls exceptionally hard under full boost (5700+ is giving me 19.5 psi at the MAP sensor according to my data logs.)
After a couple of tuning runs, I made a comment about how the power felt as if it was flattening out from 7000-7500 (7500 is the suggested max RPM for the 60mm pulley), but that I was totally expecting that with the stock Cam, so no big deal.(I wasn't complaining at all, just relaying information since this is a remote tune).
For those of you who don't remember or didn't know, I've been blessed with one of those ECU's that just doesn't like Cam changes of any kind. Previously we've spent months trying to get both an NS-2 and MegaMini Cam to work in my car without throwing misfire codes. Since at the time, the car was my DD, and the bottom of the motor was still stock, I finally just decided to stop trying, and stick with the stock Cam, and with the addition of the ACG, was actually really happy with the performance.
Well... that was then... This is now...
With everything else that I've done to this motor, not at least trying another Cam, just makes me feel like I've not given it my all.
Sooo, thanks to the ByteTronik team, they've agreed to put in the extra effort to let me try one more Cam.
After the holidays, on the way will be a 1320 spec'd CAT Cam, a new, properly degree'd ACG from Thmpr, and a set of 650cc injectors.
I've decided to just go with a second ACG so that I can have this current one stay with the stock Cam, and with my current configuration the 550 injectors that I have now, were going to be right at the top of their duty cycle anyway. (Right now they are running at 90% and the motor still wants more fuel)
So no more tuning for now, the car is running just fine and I'm driving it every chance I get. Weather permitting, I'll have everything installed and tuning will resume in about 3 weeks. At least if it doesn't work out, I'll feel better knowing I did everything I could, I just hated the feeling that I possibly hadn't.
Happy Holidays.
#24
05-10-2018, 02:18 AM
Well, it's been about a year since my last update, so this will be a long one.
I was planning on having the new setup ready for MOTD this year but couldn't get done in time. So with that over and finally setting up a new photo sharing account, I figured it's time to do an update.
First some back story as to what and why:
So I had the car at MOTD last year and it was running pretty well considering it was right after the Cam change and we were just starting the tuning (unfortunately the weather was horrible and only a few people got to ride in it). The only real problem was an idle issue that had popped up, it was acting like a boost/vacuum leak, but I couldn't find anything wrong. And then a week later I also developed a bearing squeal and drop in boost. After a couple of weeks of trouble shooting ends up that all of the problems were internal with the Sprintex. After speaking with them I found out that this unit was one of the last original 1st gen units that was given to me free as a favor from the rep at that time, knowing that my original unit while leaking internally at the oil seal, was well out of warranty for millage and modifications.
So between that and the fact that the unit sat on a shelf in my basement for three years while I went through my motor rebuild, they were understandably reluctant to just "give" me a replacement gen II kit. (I was offered a discount though)
So I was left with 2 choices, spend X$ on the gen II replacement kit or (2x)X$ on a turbo conversion, which if anyone remembers, was the overall plan for the car anyway.
The Sprintex only ever was to be an interim, all be it upgrade, for my failed M45, until I was ready for the motor rebuild with the proper parts for a turbo conversion.
Well, then I find out that Chase is selling some of his parts from Buddy, to go with a more track orientated build, which changed my cost from (2x)X$ to (1.5x)X$ so no brainer, turbo it is.
So last Oct I picked up these parts from Chase:
And Feb got this:
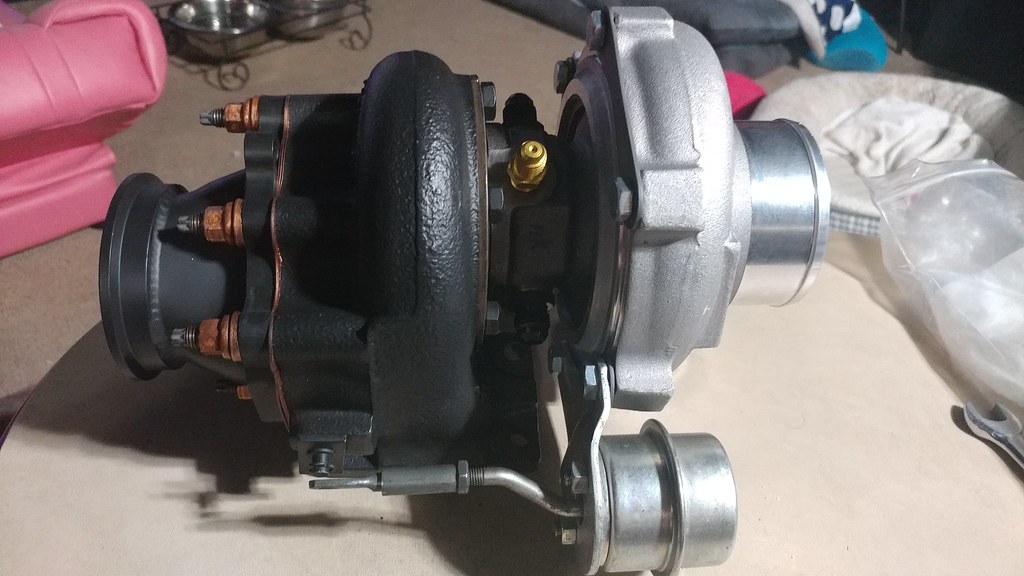
Garret GTX2867r gen II.
And then the real fun began, many 35-45� weekends on the carport assembling and fabricating parts. (No laughing and be kind, all I have is a bench top band saw, drill press and grinder, along with the bottom dollar harbor freight flux core welder)
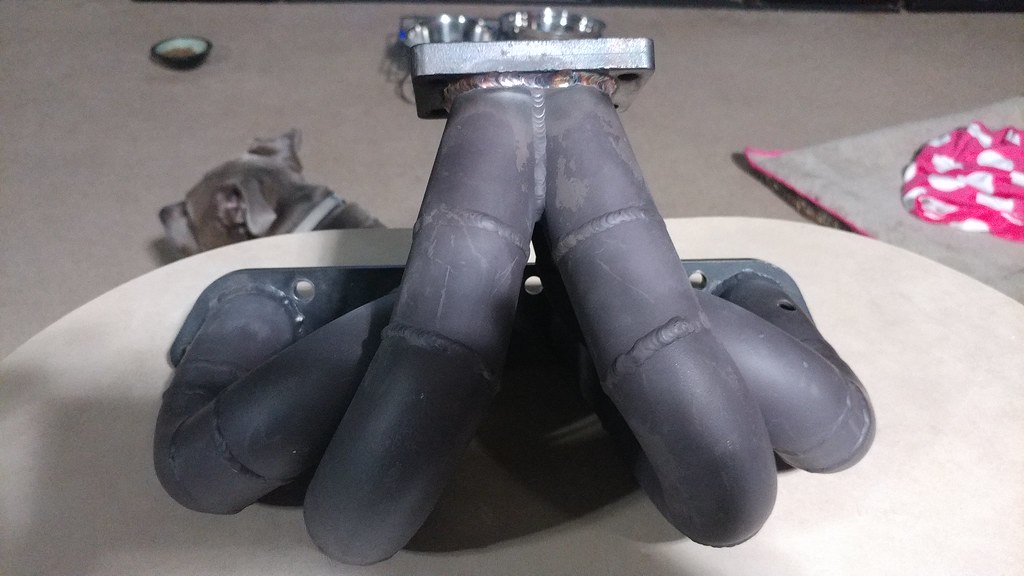
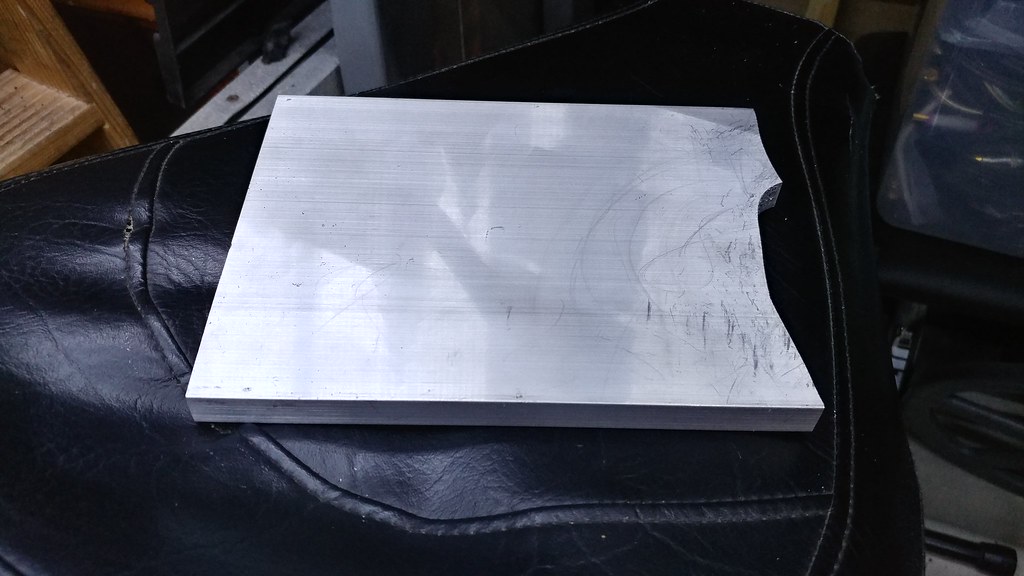
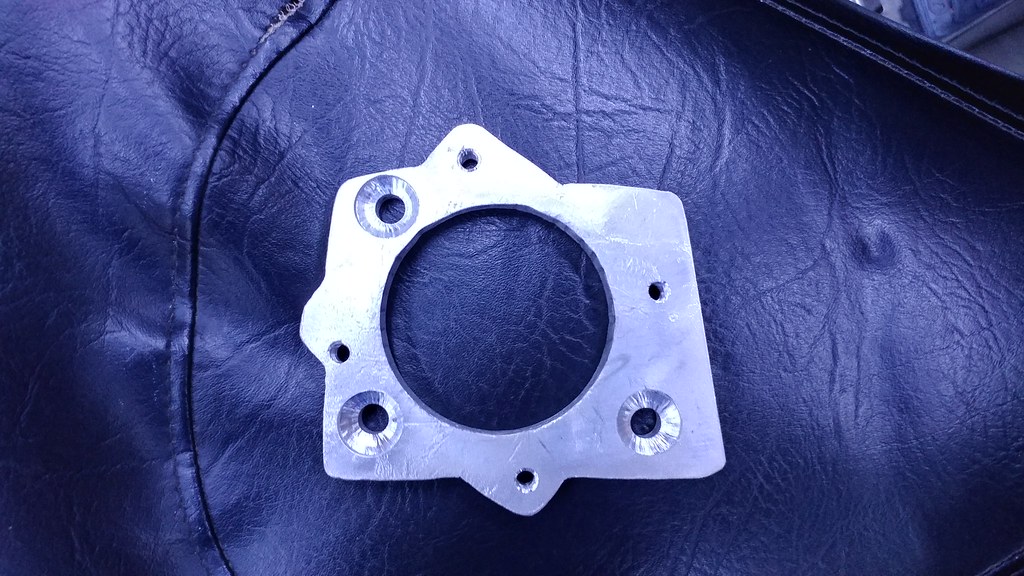
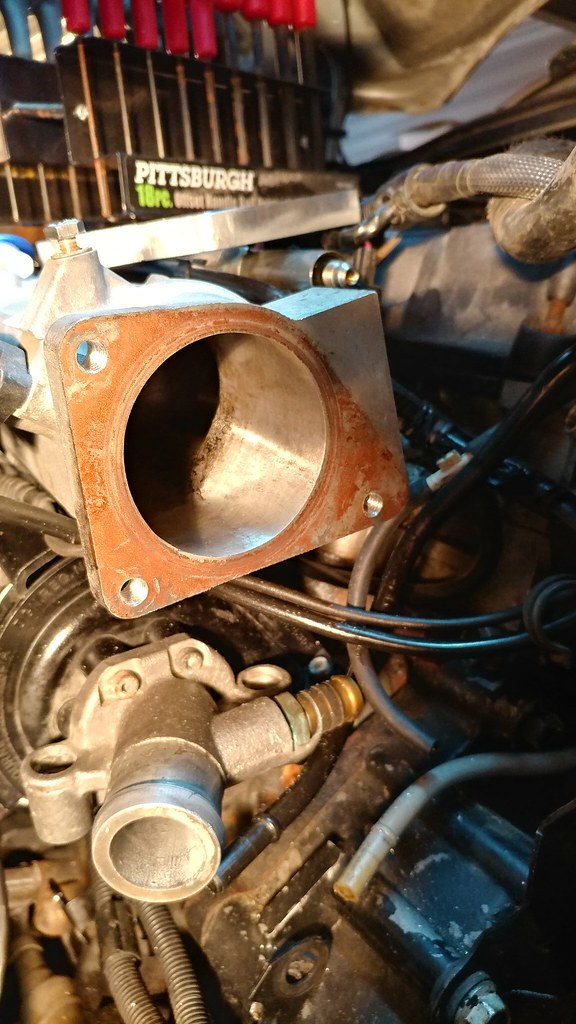
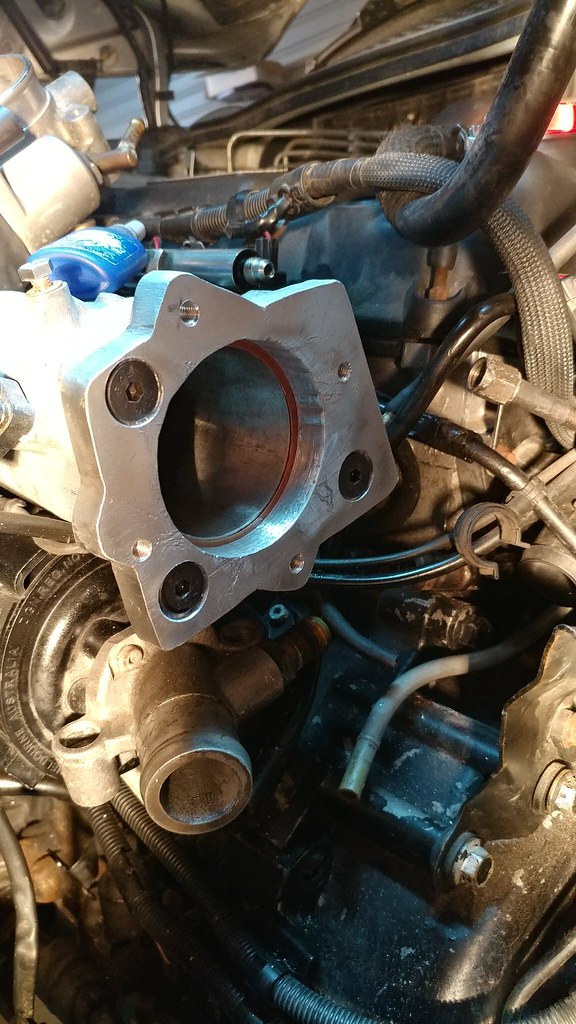
While I was waiting on the turbo I was able to start on the downpipe and T/B adaptor:
Here's the downpipe and hot side of the turbo after ceramic coating:
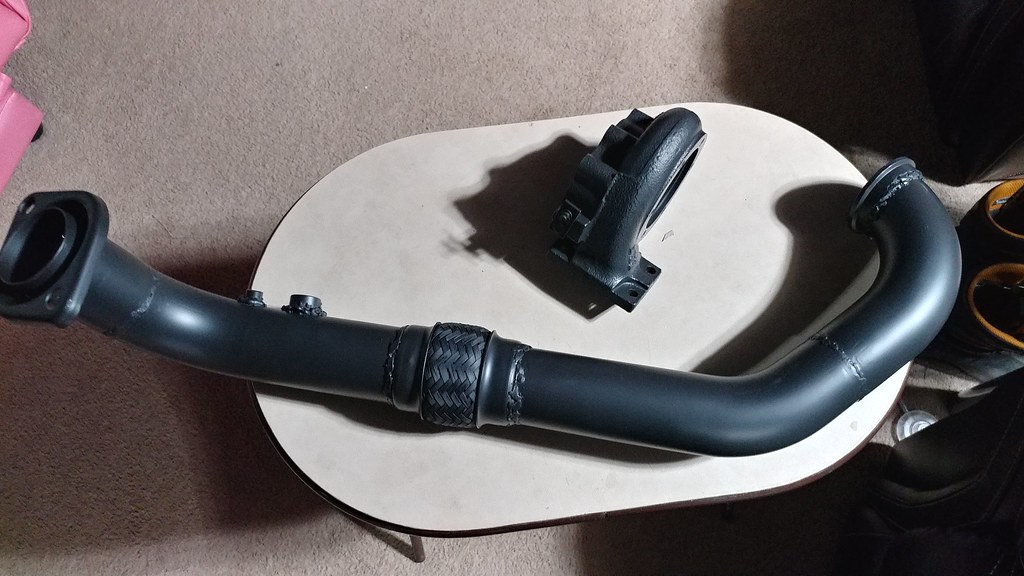
I'll be the first to tell you the welds on the downpipe are dreadful and I'll be lucky if they last 2 months, but... I've picked up 2 new welders (a mig and AC/DC tig) and that will give me two months to practice on my welding with my scrap stainless steel pipe.
I was going to just mock it up and send it off, but I actually enjoyed doing it and decided to give it a shot, first time welding or not.
Next I removed all the plastic cowling/firewall, sold my JCW CAI and cut the ECU portion from a regular CAI. Then worked up new heat shielding (DEI form-a-shield) for the firewall, brake lines and module.
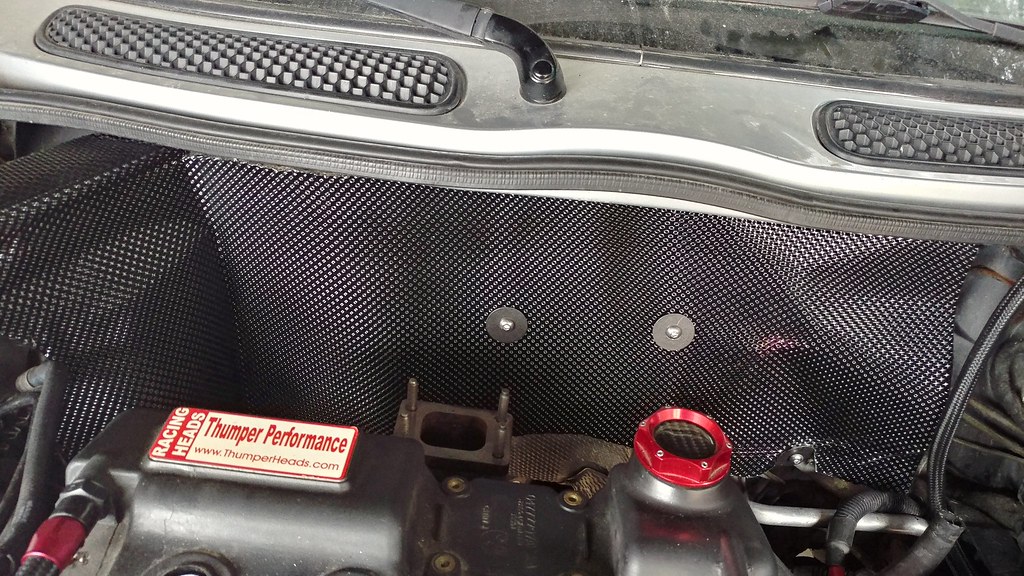
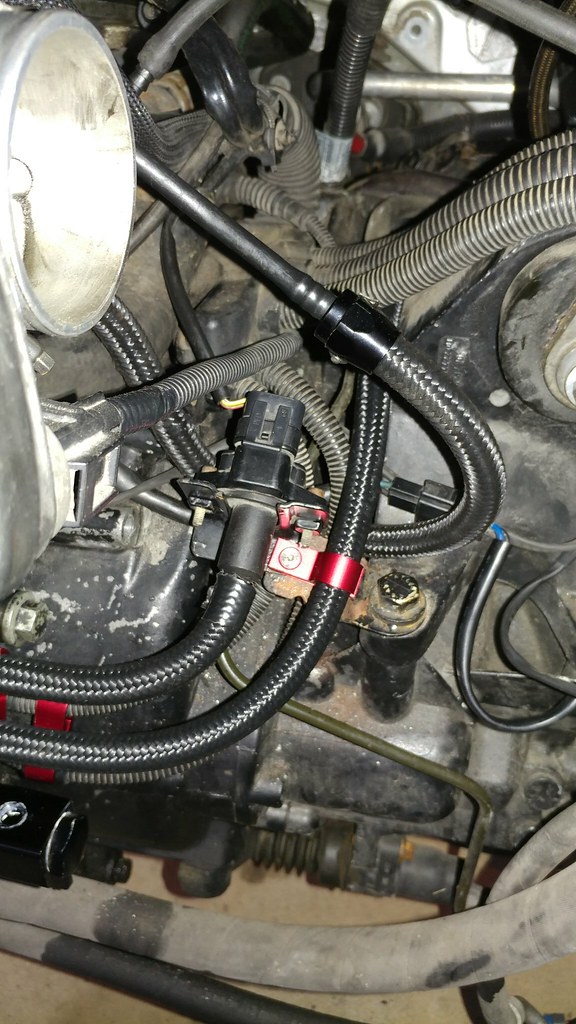
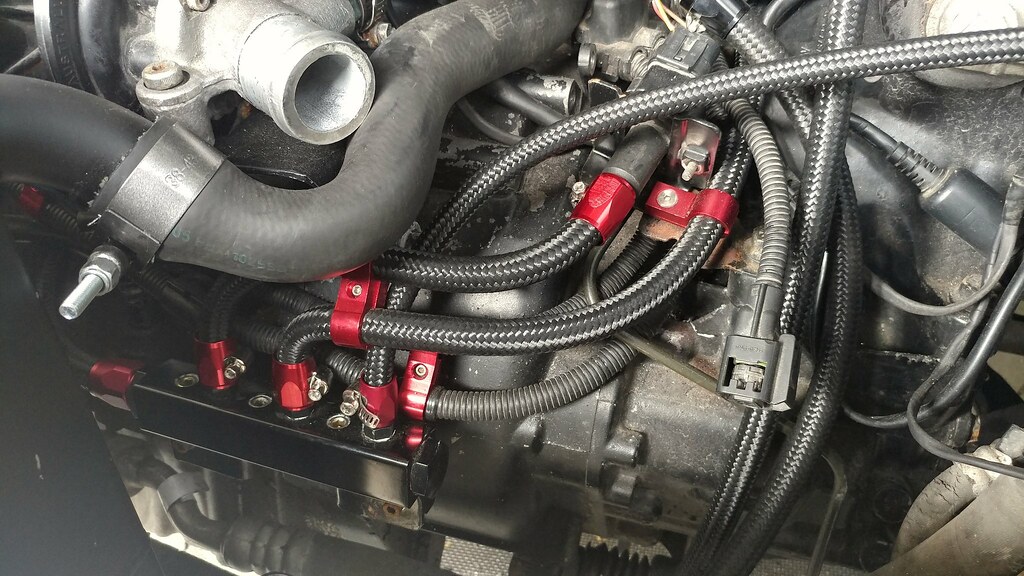
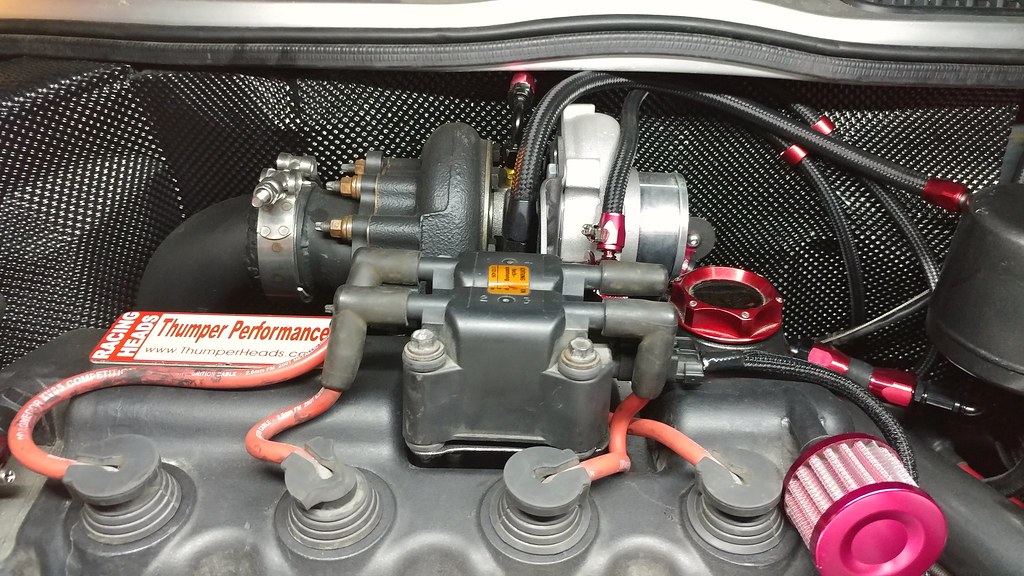
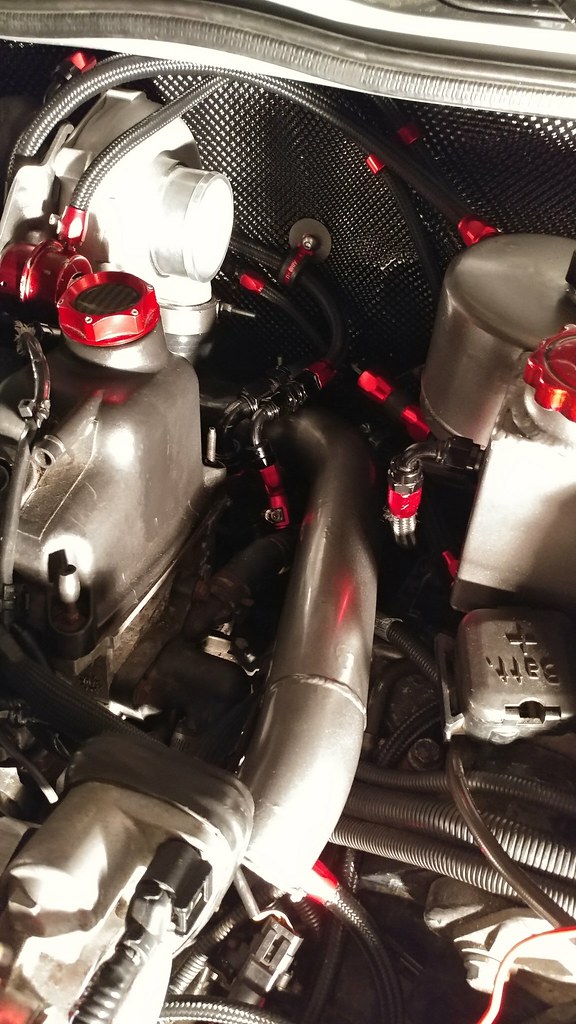
Moved the MAP sensor, replaced the hard plastic brake booster line and installed a vacuum manifold to take the place of the factory intake tube. (Yes I went overboard on the vacuum lines, but I wanted something that would clamp seal and also match the theme of the other lines I'm adding to for the turbo)
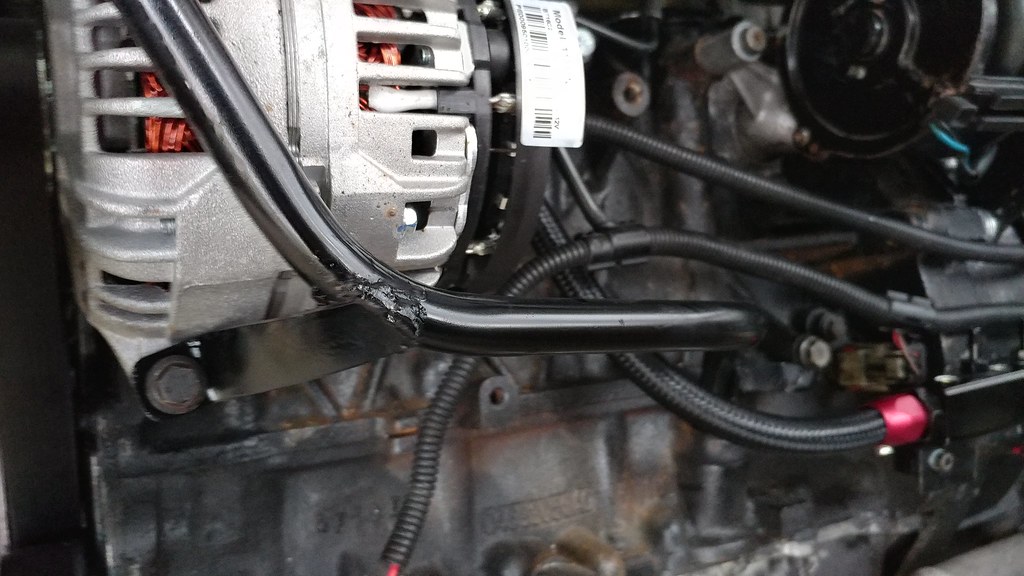
Cooper alternator and new dipstick tab mount:
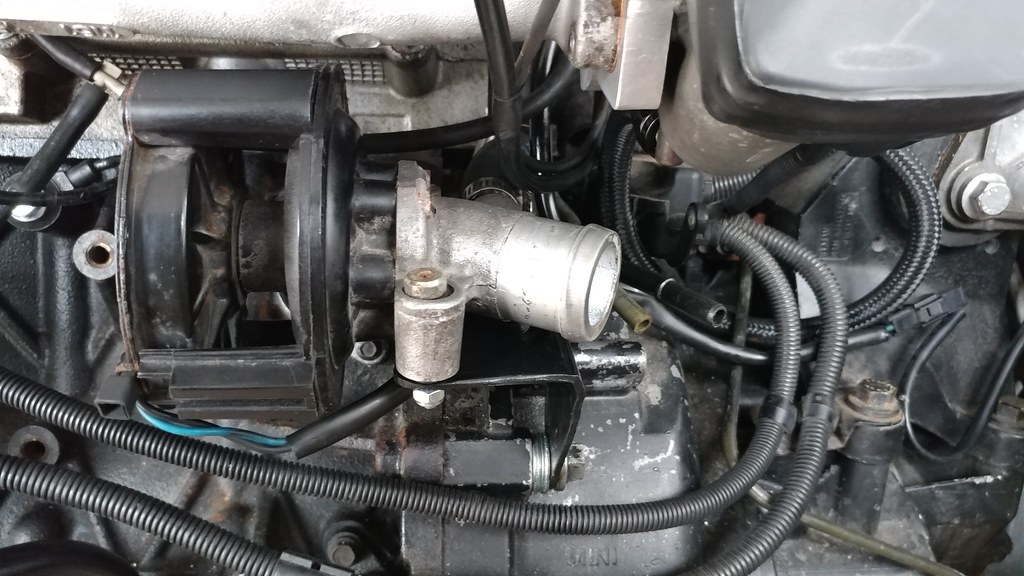
Fabbed new W/P mount to be able to use the electric W/P from the old Sprintex kit:
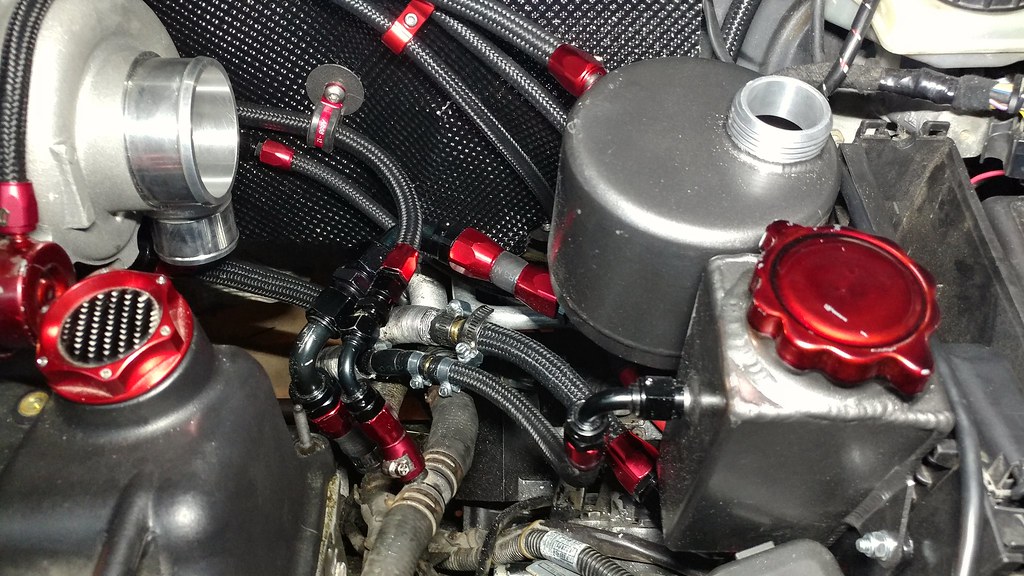
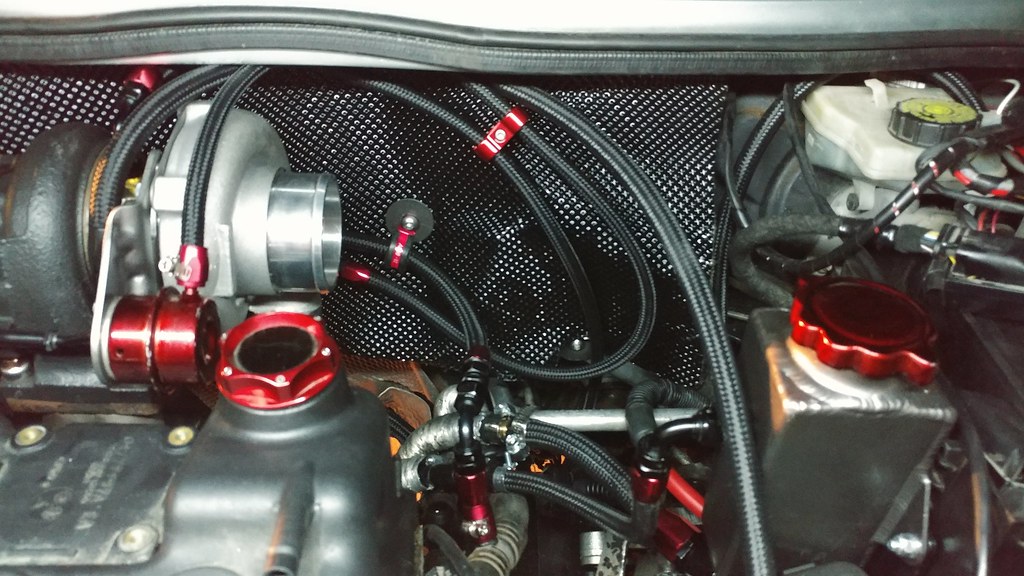
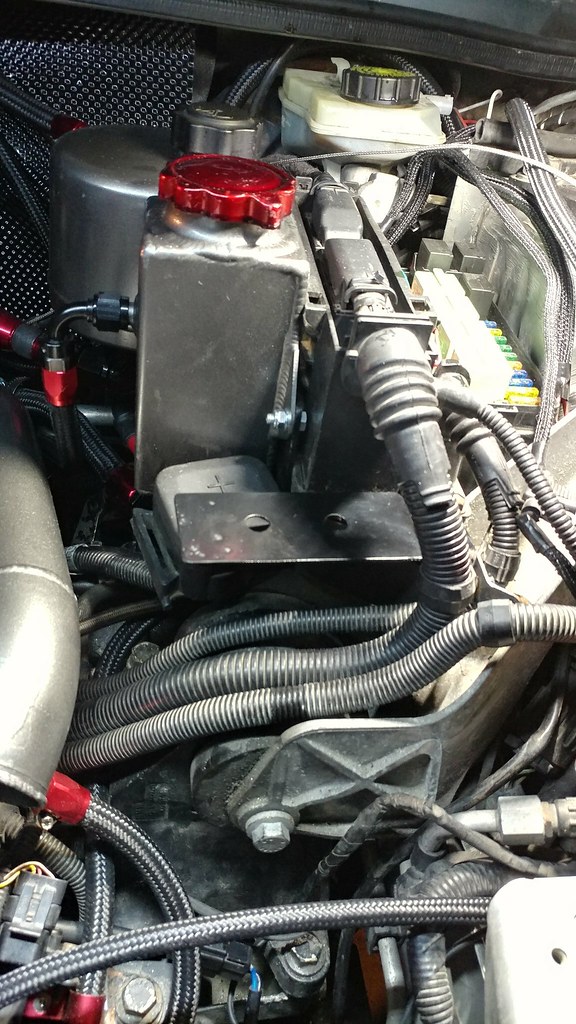
Mocked up, then made a mount to relocate time P/S and Coolant reservoir. Plumbed and installed them along with the coolant and oil lines for the turbo:

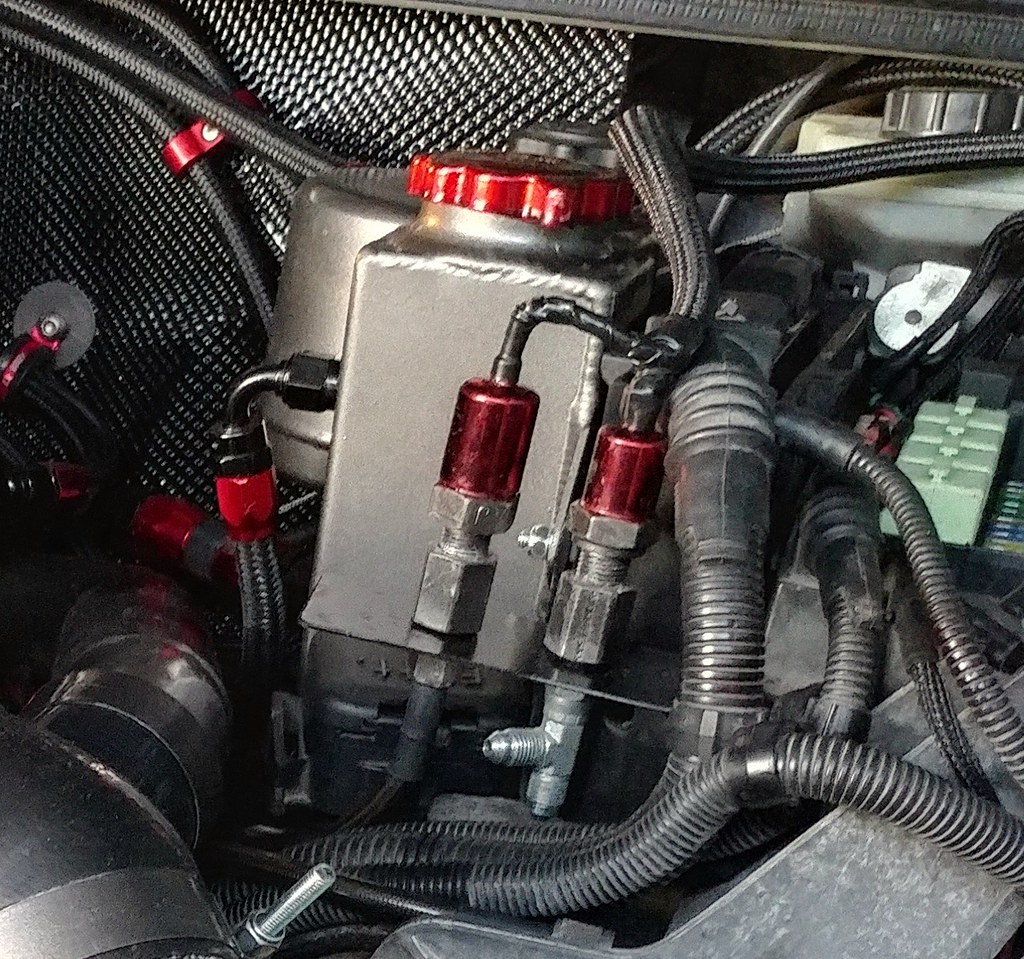
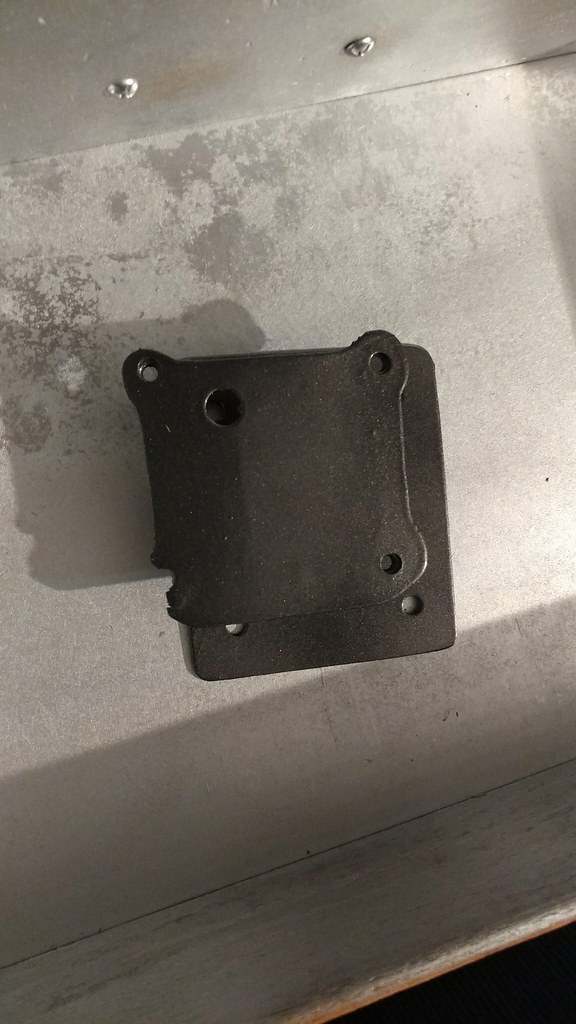
Made a mount for the Nitrous and Fuel Pressure solenoid:
Fabbed up a new coil mount to relocate it for the wastegate actuator.
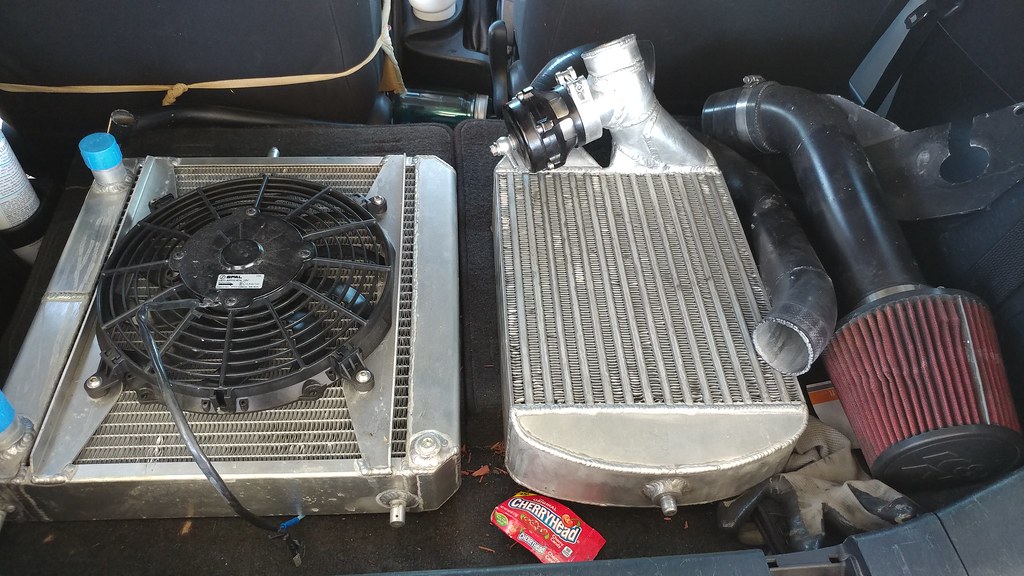
Installed the radiator and I/C, and finished the piping and hoses:
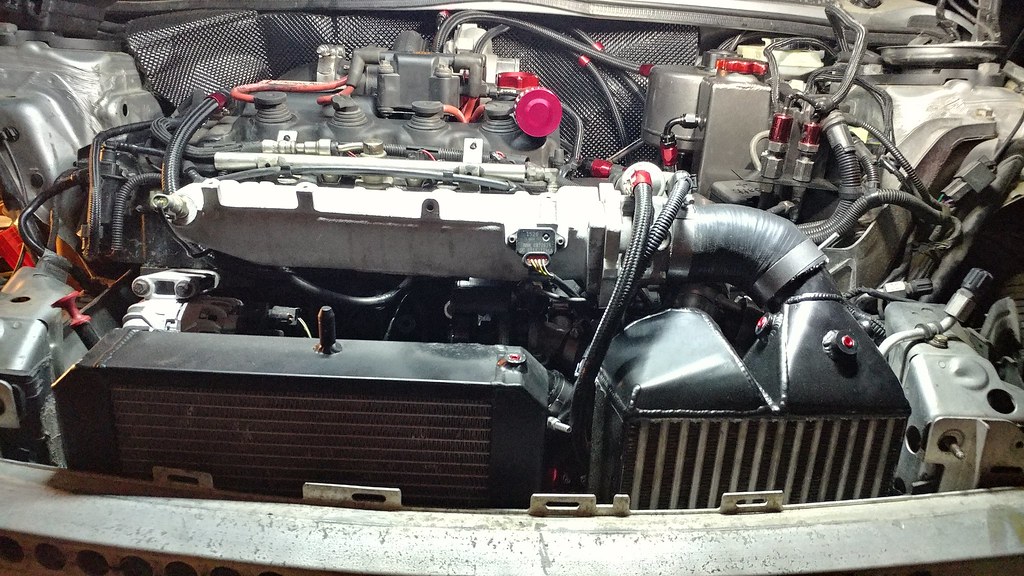
But... I screwed up, when I mocked up the radiator to have the necks welded on, I did it without the upper support bar in place, and now the top neck hits the W/P housing along with the fan touching the dipstick tube, when I tried to install the upper mount bar.
Found this out Tues before leaving for the Dragon, so that's where I am now.
I did however start the car, it fired up immediately and idled much better, with codes of course, but that's too be expected without any tuning changes at all.
So that's where I'm at, radiator is coming back out, neck will be cut off and mocked up properly and dipstick tube will be modified, so it'll just be a matter of waiting on my fab guy to weld on the new neck before I can get it reinstalled and finally done for first round of tuning.
Oh, and yes, I still plan on using the Nitrous, along with the new HFS-3 Aquamist system that I have sitting on a shelf right now. I'll go through all that as it progresses.
Sorry for the super long all-in-one post and thanks for reading
I was planning on having the new setup ready for MOTD this year but couldn't get done in time. So with that over and finally setting up a new photo sharing account, I figured it's time to do an update.
First some back story as to what and why:
So I had the car at MOTD last year and it was running pretty well considering it was right after the Cam change and we were just starting the tuning (unfortunately the weather was horrible and only a few people got to ride in it). The only real problem was an idle issue that had popped up, it was acting like a boost/vacuum leak, but I couldn't find anything wrong. And then a week later I also developed a bearing squeal and drop in boost. After a couple of weeks of trouble shooting ends up that all of the problems were internal with the Sprintex. After speaking with them I found out that this unit was one of the last original 1st gen units that was given to me free as a favor from the rep at that time, knowing that my original unit while leaking internally at the oil seal, was well out of warranty for millage and modifications.
So between that and the fact that the unit sat on a shelf in my basement for three years while I went through my motor rebuild, they were understandably reluctant to just "give" me a replacement gen II kit. (I was offered a discount though)
So I was left with 2 choices, spend X$ on the gen II replacement kit or (2x)X$ on a turbo conversion, which if anyone remembers, was the overall plan for the car anyway.
The Sprintex only ever was to be an interim, all be it upgrade, for my failed M45, until I was ready for the motor rebuild with the proper parts for a turbo conversion.
Well, then I find out that Chase is selling some of his parts from Buddy, to go with a more track orientated build, which changed my cost from (2x)X$ to (1.5x)X$ so no brainer, turbo it is.
So last Oct I picked up these parts from Chase:
And Feb got this:
Garret GTX2867r gen II.
And then the real fun began, many 35-45� weekends on the carport assembling and fabricating parts. (No laughing and be kind, all I have is a bench top band saw, drill press and grinder, along with the bottom dollar harbor freight flux core welder)
While I was waiting on the turbo I was able to start on the downpipe and T/B adaptor:
Here's the downpipe and hot side of the turbo after ceramic coating:
I'll be the first to tell you the welds on the downpipe are dreadful and I'll be lucky if they last 2 months, but... I've picked up 2 new welders (a mig and AC/DC tig) and that will give me two months to practice on my welding with my scrap stainless steel pipe.
I was going to just mock it up and send it off, but I actually enjoyed doing it and decided to give it a shot, first time welding or not.
Next I removed all the plastic cowling/firewall, sold my JCW CAI and cut the ECU portion from a regular CAI. Then worked up new heat shielding (DEI form-a-shield) for the firewall, brake lines and module.
Moved the MAP sensor, replaced the hard plastic brake booster line and installed a vacuum manifold to take the place of the factory intake tube. (Yes I went overboard on the vacuum lines, but I wanted something that would clamp seal and also match the theme of the other lines I'm adding to for the turbo)
Cooper alternator and new dipstick tab mount:
Fabbed new W/P mount to be able to use the electric W/P from the old Sprintex kit:
Mocked up, then made a mount to relocate time P/S and Coolant reservoir. Plumbed and installed them along with the coolant and oil lines for the turbo:
Made a mount for the Nitrous and Fuel Pressure solenoid:
Fabbed up a new coil mount to relocate it for the wastegate actuator.
Installed the radiator and I/C, and finished the piping and hoses:
But... I screwed up, when I mocked up the radiator to have the necks welded on, I did it without the upper support bar in place, and now the top neck hits the W/P housing along with the fan touching the dipstick tube, when I tried to install the upper mount bar.
Found this out Tues before leaving for the Dragon, so that's where I am now.
I did however start the car, it fired up immediately and idled much better, with codes of course, but that's too be expected without any tuning changes at all.
So that's where I'm at, radiator is coming back out, neck will be cut off and mocked up properly and dipstick tube will be modified, so it'll just be a matter of waiting on my fab guy to weld on the new neck before I can get it reinstalled and finally done for first round of tuning.
Oh, and yes, I still plan on using the Nitrous, along with the new HFS-3 Aquamist system that I have sitting on a shelf right now. I'll go through all that as it progresses.
Sorry for the super long all-in-one post and thanks for reading
#25
05-10-2018, 08:39 AM
